标签:on() com tkinter put value 初学 use next oat

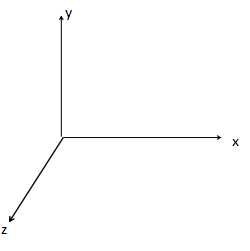
VTK窗口默认坐标方向:

#ifndef INITIAL_OPENGL
#define INITIAL_OPENGL
#include <vtkAutoInit.h>
VTK_MODULE_INIT(vtkRenderingOpenGL)
VTK_MODULE_INIT(vtkInteractionStyle)
#endif
#include <iostream>
using namespace std;
#include "vtkPolyDataMapper.h"
#include "vtkWin32OpenGLRenderWindow.h"
#include "vtkRenderWindow.h"
#include "vtkRenderWindowInteractor.h"
#include "vtkRenderer.h"
#include "vtkPoints.h"
#include "vtkWin32RenderWindowInteractor.h"
#include "vtkProperty.h"
#include "vtkFloatArray.h"
#include "vtkPolyData.h"
#include "vtkDataSetMapper.h"
#include "vtkActor2D.h"
#include "vtkContourFilter.h"
#include "vtkContourValues.h"
#include "vtkUnstructuredGrid.h"
#include "vtkPointData.h"
#include "vtkLine.h"
#include <vtkInteractorStyleTrackballCamera.h>
#include <vtkCellArray.h>
void myShow(vtkPolyData* polydata)
{
//设置映射器
vtkSmartPointer<vtkPolyDataMapper> amapper=vtkSmartPointer<vtkPolyDataMapper>::New();
amapper->SetInputData(polydata);
// amapper->SetScalarVisibility(0);
amapper->ScalarVisibilityOn();
//声明一个演员
vtkSmartPointer<vtkActor> anActor=vtkSmartPointer<vtkActor>::New();
anActor->SetMapper(amapper);
anActor->GetProperty()->SetRepresentationToWireframe();
anActor->GetProperty()->SetDiffuseColor(0,0,1);
anActor->GetProperty()->SetLineWidth(5);
anActor->GetProperty()->SetPointSize(10);
//创建显示窗口
vtkSmartPointer<vtkRenderer> ren1=vtkSmartPointer<vtkRenderer>::New();
ren1->AddActor(anActor);
vtkSmartPointer<vtkRenderWindow> renWin=vtkSmartPointer<vtkRenderWindow>::New();
renWin->AddRenderer(ren1);
vtkSmartPointer<vtkRenderWindowInteractor> iren=vtkSmartPointer<vtkRenderWindowInteractor>::New();
iren->SetRenderWindow(renWin);
vtkSmartPointer<vtkInteractorStyleTrackballCamera>style=vtkSmartPointer<vtkInteractorStyleTrackballCamera>::New();
iren->SetInteractorStyle(style);
renWin->SetSize(512,512);
ren1->ResetCamera();
iren->Start();
}
int main()
{
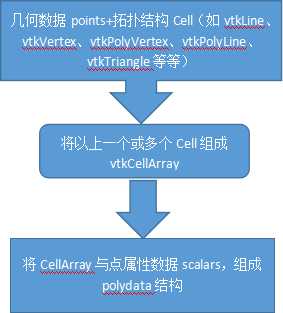
//几何数据
float pts[][3]={{0,0,0},{1,1,0}};
vtkSmartPointer<vtkPoints> Pointes=vtkSmartPointer<vtkPoints>::New();
Pointes->SetNumberOfPoints(2);
Pointes->InsertPoint(0,pts[0]);
Pointes->InsertPoint(1,pts[1]);
//属性数据
vtkSmartPointer<vtkFloatArray> lineScalars=vtkSmartPointer<vtkFloatArray>::New();
lineScalars->SetNumberOfTuples(2);
lineScalars->InsertValue(0,0);
lineScalars->InsertValue(1,1);
//拓扑结构
vtkSmartPointer<vtkLine> aLine=vtkSmartPointer<vtkLine>::New();
aLine->GetPointIds()->SetNumberOfIds(2);
aLine->GetPointIds()->SetId(0,0);
aLine->GetPointIds()->SetId(1,1);
//创建单元数组
vtkSmartPointer<vtkCellArray> lineCells=vtkSmartPointer<vtkCellArray>::New();
lineCells->InsertNextCell(aLine);
//将以上数据组合成一个vtkPolyData
vtkSmartPointer<vtkPolyData> polydata=vtkSmartPointer<vtkPolyData>::New();
polydata->SetPoints(Pointes);
polydata->SetLines(lineCells);
polydata->GetPointData()->SetScalars(lineScalars);
/**********在窗口中显示该结构元****************************************/
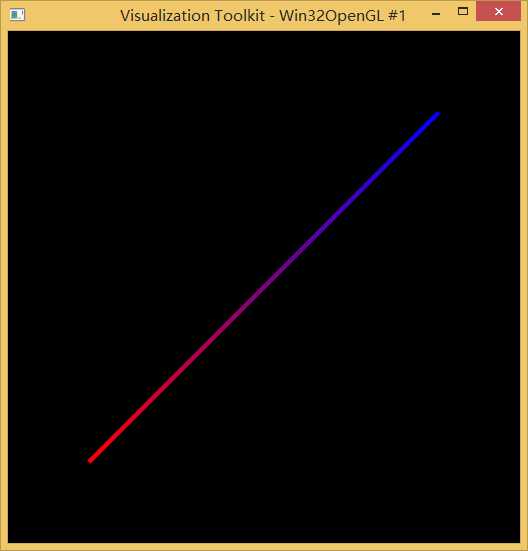
myShow(polydata);
return 0;
}

VTK初学一,线段的CellArray绘制c_Line_CellArray
标签:on() com tkinter put value 初学 use next oat
原文地址:http://www.cnblogs.com/phoenixdsg/p/6117290.html