标签:resin 安装&配置
Resin 和tomcat 一样,可以解析 JSP.
http://caucho.com/ Resin 的官网。免费的GPLv3 是开源的。
收费的当然功能更加高级,支持 OPENSSL.
做实验,免费开源的就够了。
[root@LNMP src]# wget http://www.caucho.com/download/resin-4.0.49.tar.gz #下载
[root@LNMP src]# tar axvf resin-4.0.49.tar.gz #解压
[root@LNMP src]# cd resin-4.0.49
[root@LNMP resin-4.0.49]# ./configure --prefix=/usr/local/resin --with-java=/usr/local/jdk1.8.0_112/
#--prefix=/usr/local/resin 指定安装路径,--with-java=/usr/local/jdk1.8.0_112/ 指定java路径
[root@LNMP resin-4.0.49]#echo $?
[root@LNMP resin-4.0.49]#make & make install
以下是编译后的摘要信息:
[root@LNMP resin-4.0.49]# ls /usr/local/resin/
app-inf bin conf doc endorsed lib libexec64 log project-jars resin-inf webapp-jars webapps
[root@LNMP resin-4.0.49]# ls /etc/init.d/resin #自动生成启动脚本
/etc/init.d/resin
启动resin之前先关掉 tomcat ,防止冲突。
[root@LNMP resin-4.0.49]# /etc/init.d/tomcat stop
[root@LNMP resin-4.0.49]# /etc/init.d/resin start
[root@LNMP resin-4.0.49]# ps aux |grep resin
[root@LNMP resin-4.0.49]# netstat -lnp |grep java
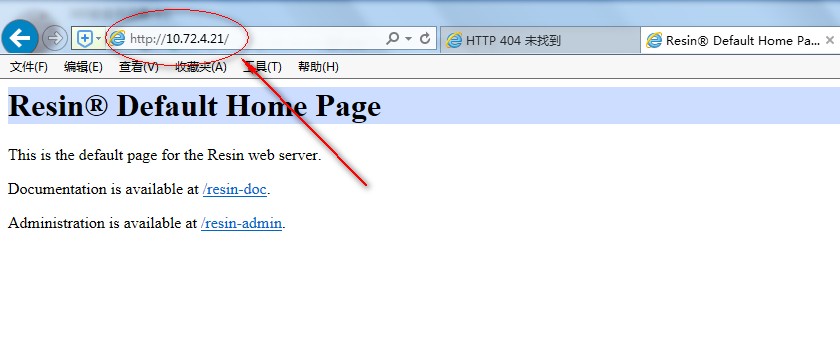
在Windows7 客户端进行访问测试
---------------------------------------------------------
[root@LNMP resin-4.0.49]# cd /usr/local/resin/
[root@LNMP resin]# cd conf/
[root@LNMP conf]# vim resin.properties #更改黙认访问端口 “8080” 到 “80”
app.http : 8080 #更改 app.http :8080 到 app.http : 80
# app.https : 8443
web.http : 8080
# web.https : 8443
# memcached.http : 8080
# memcached.https : 8443
# proxycache.http : 8080
# proxycache.https : 8443
---------------------------------
在Windows7 客户端进行测试。
http://10.72.4.21/,此时已经可以不需要带端口号 ,在测试的时候注意,80 端口是否被其他的应用占用,如有有占用,就出会出 HTTP 404。解决办法停用占用80端口的应用。
 -------------------------------------
配置虚拟机
[root@LNMP conf]# vim resin.xml #配置虚拟机,加入以下配置文件
<cluster id="app">
<host id="www.8_linux.com" root-directory=".">
<web-app id="/" root-directory="/tmp/resin"/>
</host>
[root@LNMP conf]# mkdir /tmp/resin/ #创建这个目录
[root@LNMP conf]# /etc/init.d/resin stop
Stopping resin: .
[root@LNMP conf]# /etc/init.d/resin start #重启 resin 服务
Starting resin: .
[root@LNMP conf]# !net
netstat -lnp |grep java
tcp 0 0 127.0.0.1:6800 0.0.0.0:* LISTEN 8451/java
tcp 0 0 127.0.0.1:6600 0.0.0.0:* LISTEN 8403/java
tcp 0 0 :::80 :::* LISTEN 8451/java
unix 2 [ ACC ] STREAM LISTENING 20235 8403/java /tmp/.java_pid8403.tmp
[root@LNMP conf]# cp /data/tomcatweb/1.jsp /tmp/resin/
[root@LNMP conf]# ls /tmp/resin/
1.jsp WEB-INF
在Linux 端测试:
[root@LNMP conf]# curl -x127.0.0.1:80 www.8_linux.com/1.jsp
<html><body><center>
Now time is: Mon Dec 12 14:44:21 CST 2016
</center></body></html>
在Windows 端测试:在hosts 文件绑定以下网址C:\Windows\System32\drivers\etc(楼主的不是固定IP )
10.72.4.21 www.8_linux.com
本文出自 “CBO#Boy_Linux之路” 博客,请务必保留此出处http://20151213start.blog.51cto.com/9472657/1881931
标签:resin 安装&配置
原文地址:http://20151213start.blog.51cto.com/9472657/1881931