标签:first ast git init 输入 image ges png 打开终端 bytes
如何创建github远程仓库
首先, 你有先到github网站注册账号https://github.com
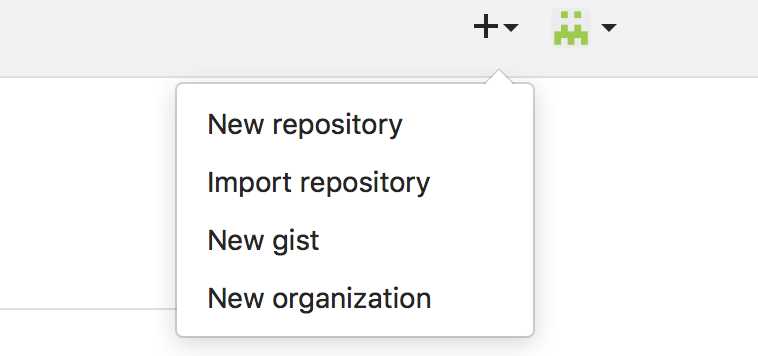
然后创建一个项目, Create a new repository
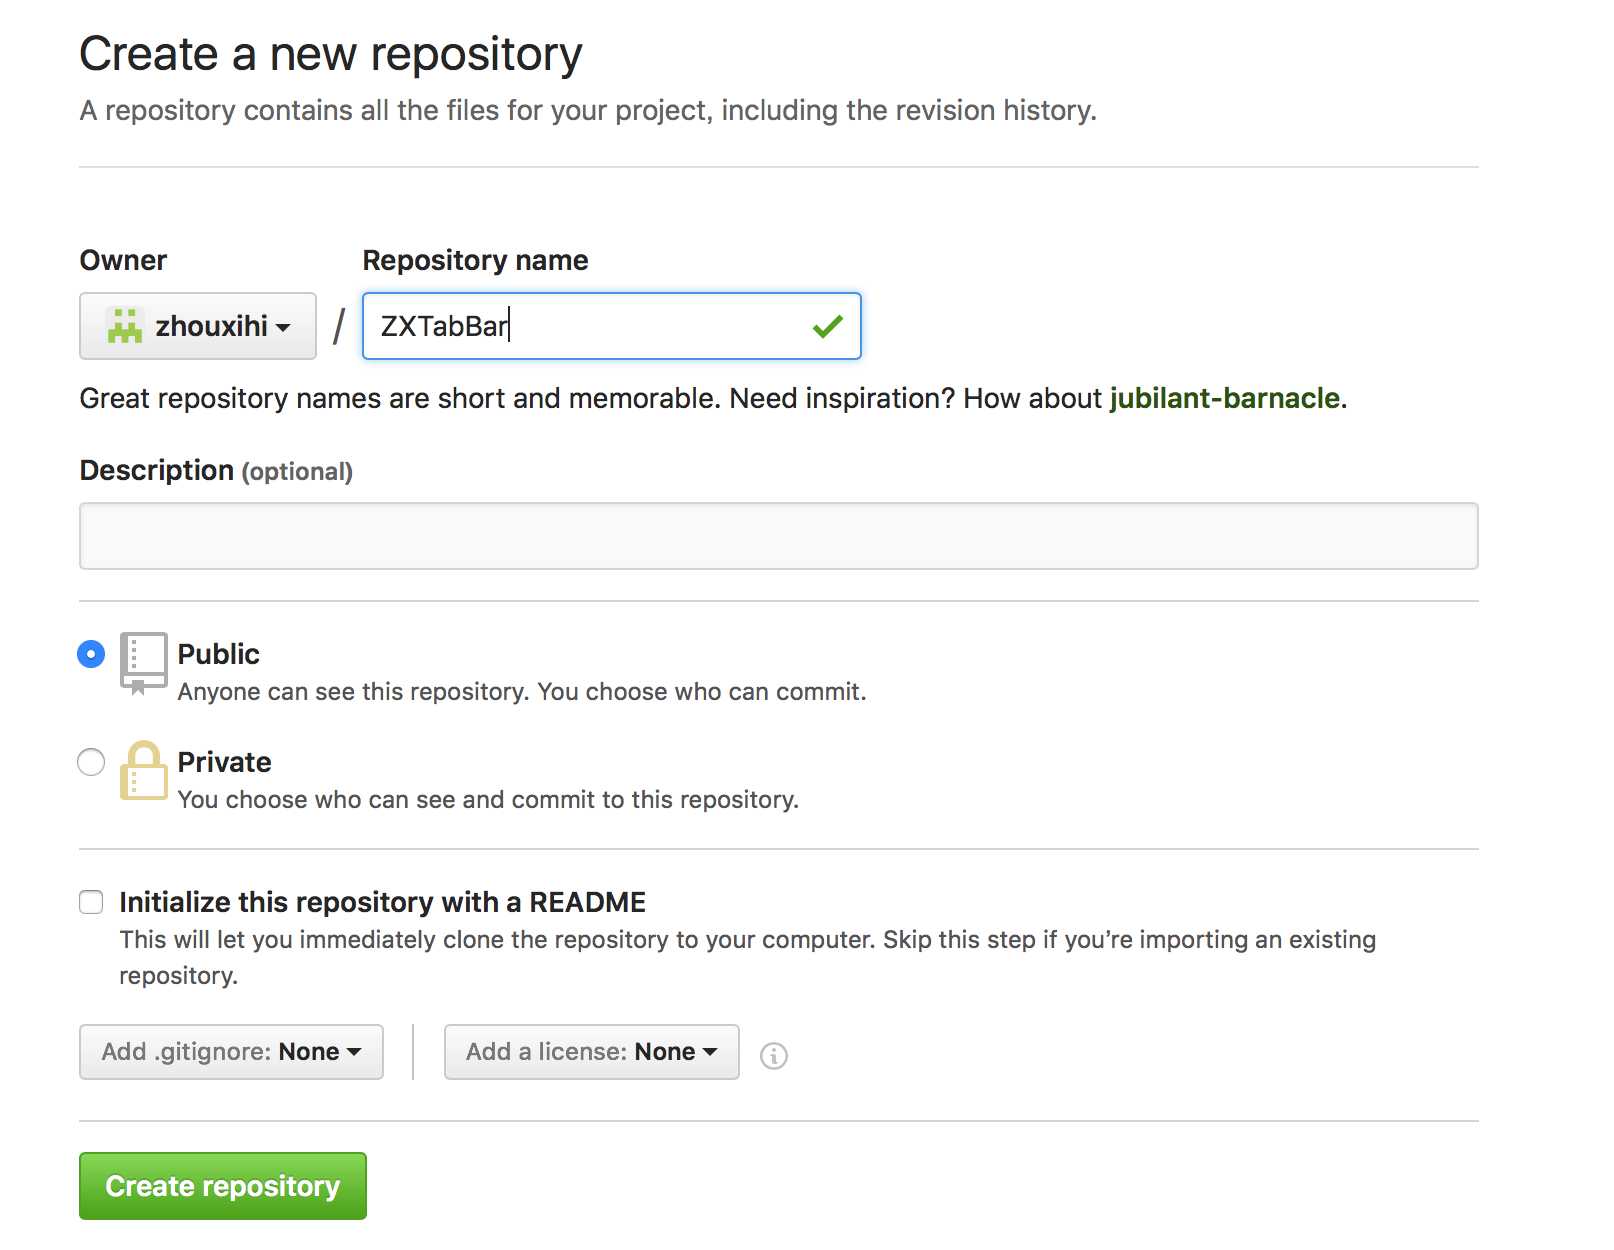
之后在在Repository name 填入 ZXTabBarController(你的远程仓库名) ,其他保持默认设置,
点击"Create repository"按钮,就成功地创建了一个新的Git仓库:
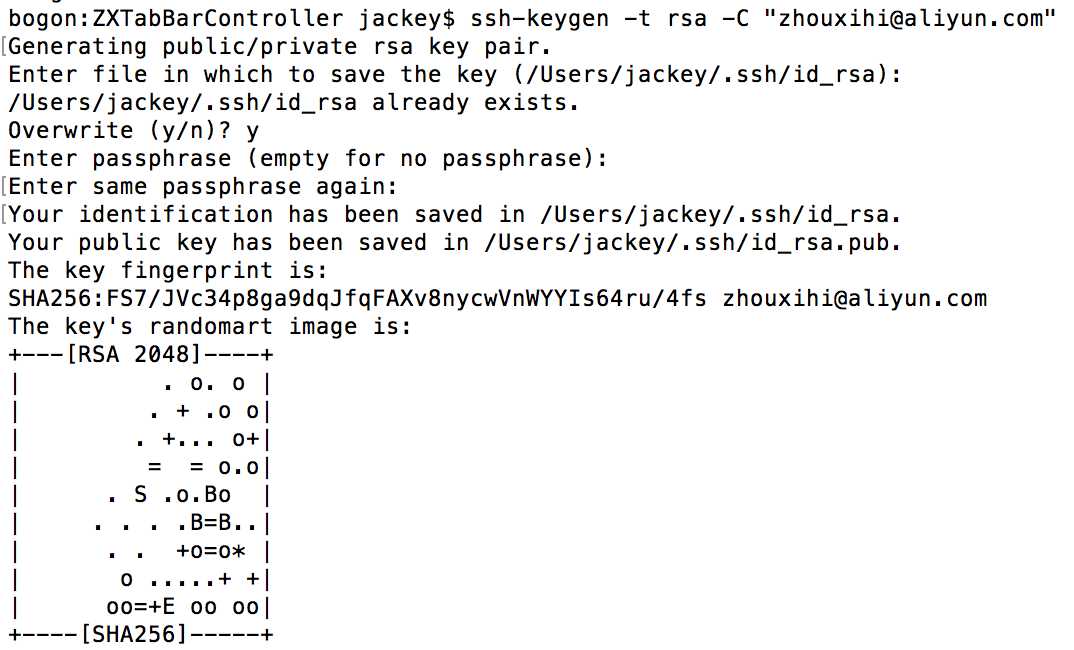
打开终端进入你的文件目录
ssh-keygen -t rsa -C "zhouxihi@aliyun.com"
改为你在 github 上注册的邮箱,之后会要求确认路径和输入密码,我们这使用默认的一路回车就行。
成功的话会在~/下生成.ssh文件夹,
进去,打开 id_rsa.pub,复制里面的 key
vi /Users/jackey/.ssh/id_rsa.pub
复制里面的所有内容, 然后回到github网页选择setting
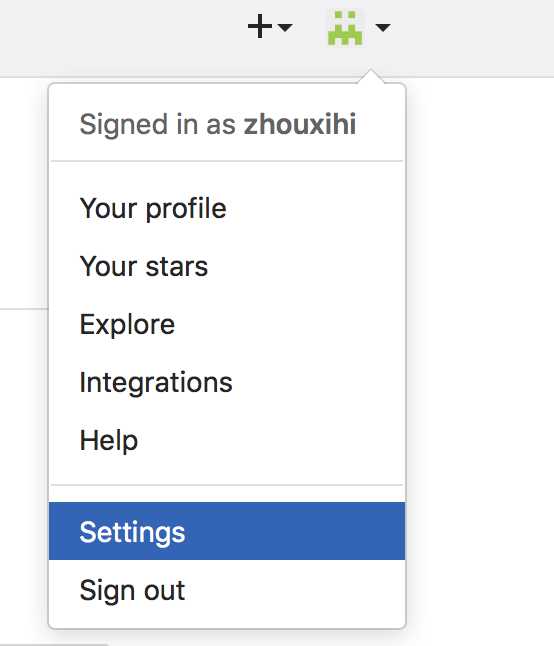
进入settings后选择SSH and GPG keys
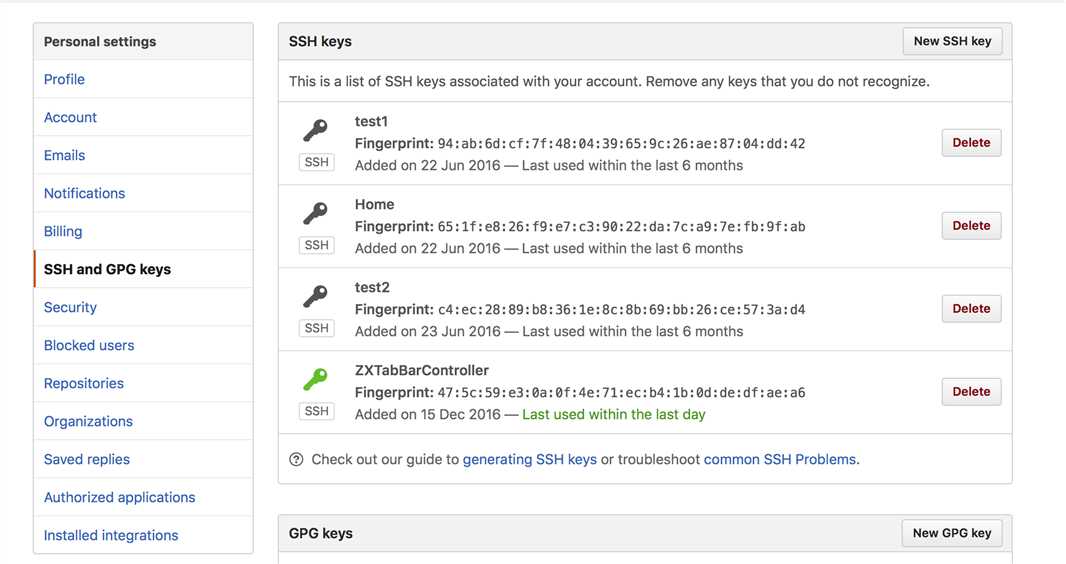
选择New SSH Key
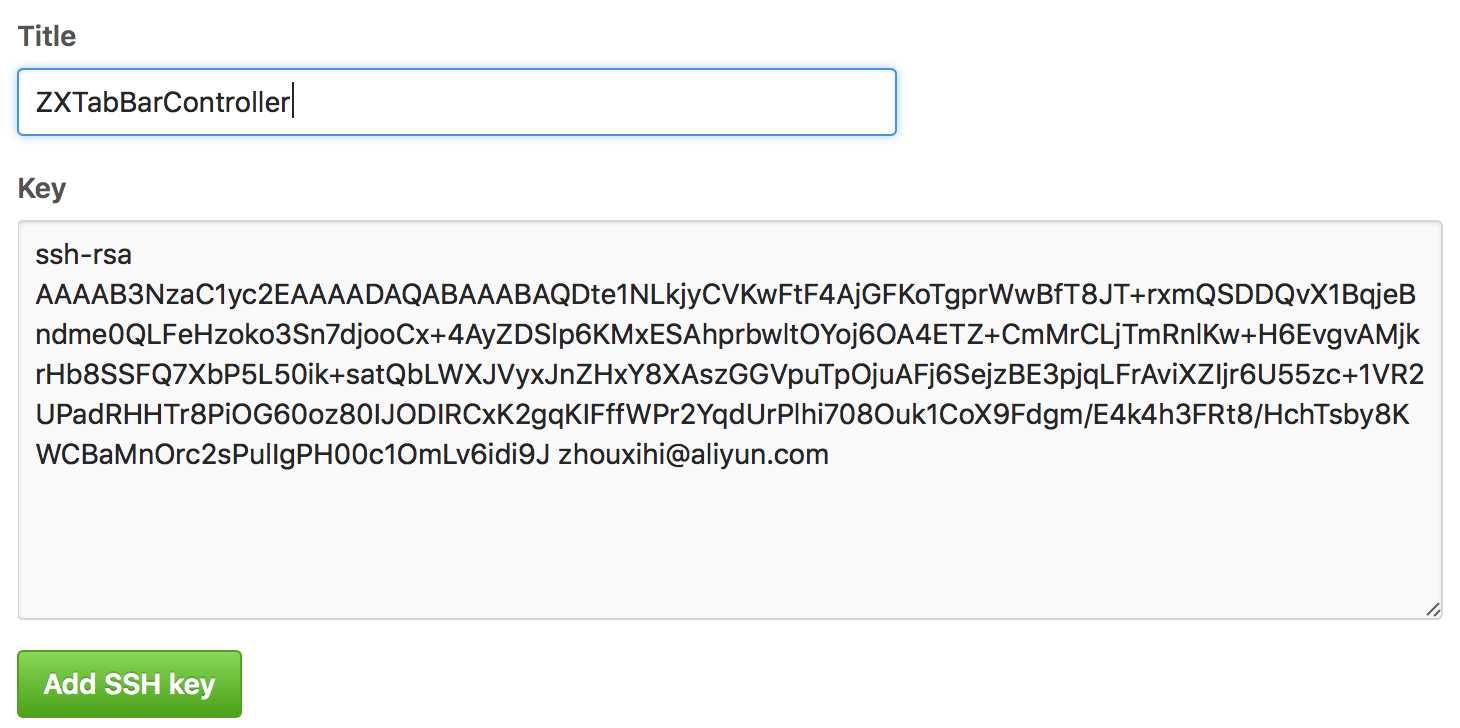
输入完title和key后选择Add SSH key按钮完成添加
现在回到终端, 测试下是否能连接到github服务器
ssh -T git@github.com
看到这样的提示就说明设置好了
bogon:ZXTabBarController jackey$ ssh -T git@github.com
Hi zhouxihi! You‘ve successfully authenticated, but GitHub does not provide shell access.
然后就可以将本地文件push到远程仓库了
首先初始化本地仓库
git init
添加文件
git add .
写入缓存
git commit -m ‘first upload‘
添加远程仓库
git remote add origin git@github.com:zhouxihi/ZXTabBarController.git
推送文件到远程仓库
git push -u origin master
显示100%. done就可以了
bogon:ZXTabBarController jackey$ git push -u origin master
Counting objects: 57, done.
Delta compression using up to 4 threads.
Compressing objects: 100% (51/51), done.
Writing objects: 100% (57/57), 86.20 KiB | 0 bytes/s, done.
Total 57 (delta 14), reused 0 (delta 0)
remote: Resolving deltas: 100% (14/14), done.
To git@github.com:zhouxihi/ZXTabBarController.git
 * [new branch]      master -> master
Branch master set up to track remote branch master from origin.
以后每次有修改本地文件就只要下面三个步骤就可以推送到服务器了
->git add.
->git commit -m ‘second upload‘
->git push -u origin master
如果想从服务器拉下来, 可以用指令
git clone https://github.com/zhouxihi/ZXTabBarController.git
标签:first ast git init 输入 image ges png 打开终端 bytes
原文地址:http://www.cnblogs.com/zhouxihi/p/6181737.html