标签:net combine change conf 整合 comm logging logger int
Topshelf可以很方便的构建windows service,而且在本地开发时也可以构建Console宿主,因此很方便WCF的开发。
ServiceModelEx则提供了很多便利的方法来配置wcf的behavior。
Nlog是.NET中记录日志类库和log4net提供的功能一样。
好了,现在开始从头构建解决方案:

以上的Host和Client为Console,Contract和Service为class librariy。
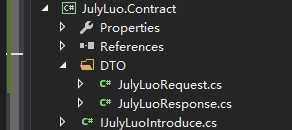
Contract里面定义的是wcf对外提供之服务,这里将其分为一下三个部分:
其中的Request和Response可以看作为Data Transfer Object也就是我们说的DTO,这里就将其放置与DTO的文件夹下面。
现在构建Request:
[DataContract]
public class JulyLuoRequest
{
    [DataMember]
    public string Greeting { get; set; }

    [DataMember]
    public string Name { get; set; }
}
构建Response:
[DataContract]
public class JulyLuoResponse
{
    [DataMember]
    public string Greeting { get; set; }

    [DataMember]
    public string ClientName { get; set; }

    [DataMember]
    public string ServiceName { get; set; }
}
最后构建我们的接口:
[ServiceContract]
public interface IJulyLuoIntroduce
{
    [OperationContract]
    JulyLuoResponse Introduce(JulyLuoRequest request);
}
整个的Contract工程如下:
Service是最终实现接口的地方,因此其需要引用Contract project,这里就简单的实现:
public class JulyLuoIntroduce : IJulyLuoIntroduce
{
    public JulyLuoResponse Introduce(JulyLuoRequest request)
    {
        return new JulyLuoResponse()
        {
            Greeting = request.Greeting,
            ClientName = request.Name,
            ServiceName = "JulyLuo"
        };
    }
}
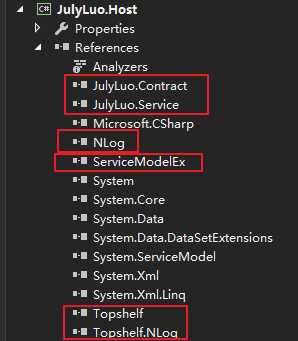
Host需要引用以上的Contract和Service工程。
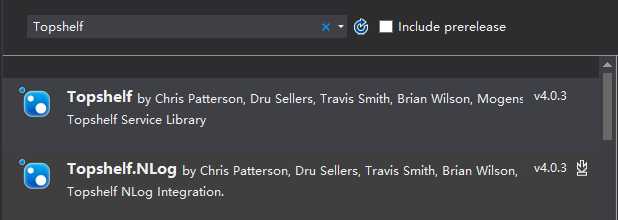
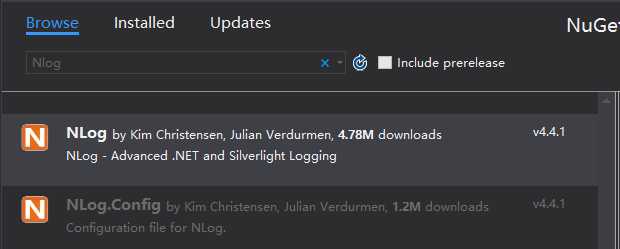
Host这里我们就需要TopShelf和Nlog的第三方类库,可以在NuGet上获取:
最后的引用如下:
Topshelf的最新版本网上提到不支持.NET 4.0, .NET4.5,因此用Nuget的时候可能不成功,解决办法就是使用低版本的Topshelf,或者从Topshelf官网下载对应的dll直接引用。
ServiceModeEx的类库在Nuget上获取不到,大家可以在网上下载自己再添加引用。
现在构建一个WcfHost类封装wcf提供的服务:
public class WcfHost
{
    private ServiceHost<JulyLuoIntroduce> _service;

    internal WcfHost()
    {
        _service = new ServiceHost<JulyLuoIntroduce>(new Uri[] { });
    }

    public void Start()
    {
        _service.Open();
    }

    public void Stop()
    {
        try
        {
            if (_service != null)
            {
                if (_service.State == CommunicationState.Opened)
                {
                    _service.Close();
                }
            }

        }
        catch (Exception ex)
        {
            Console.WriteLine(ex.Message);
        }
    }
}
最后通过TopShelf 配置Nlog,并宿主刚刚定义的WcfHost:
class Program
{
    private static Logger logger = LogManager.GetLogger("JulyLuo.Host");

    public static readonly LogFactory Instance = new LogFactory(new XmlLoggingConfiguration(GetNLogConfigFilePath()));

    private static string GetNLogConfigFilePath()
    {
        return Path.Combine(AppDomain.CurrentDomain.BaseDirectory, "NLog.config");
    }

    static void Main(string[] args)
    {
        try
        {
            const string name = "JulyLuo-Service";
            const string description = "JulyLuo-Introduce";
            var host = HostFactory.New(configuration =>
            {
                configuration.UseNLog(Instance);

                configuration.Service<WcfHost>(callback =>
                {
                    callback.ConstructUsing(s => new WcfHost());
                    callback.WhenStarted(service => service.Start());
                    callback.WhenStopped(service => service.Stop());
                });
                configuration.SetDisplayName(name);
                configuration.SetServiceName(name);
                configuration.SetDescription(description);
                configuration.RunAsLocalService();
            });
            host.Run();
        }
        catch (Exception ex)
        {
            logger.Error("Pdf Generator Service fatal exception. " + ex.Message);
        }

    }
}
现在要配置Nlog的配置文件,以及Host控制台的wcf配置。
Nlog这里需要配置两个target,一个是作为Console时Nlog写入Console,一个是作为windows service是Nlog写入本地的文件
<target xsi:type="Console" layout="${longdate}[${level}]${message}" name="Console"/>

<target name="TopShelfCSV" xsi:type="File" fileName="${basedir}/Logs/TopShelf-${shortdate}.csv"
        archiveFileName="${basedir}/Archive/TopShelf-{#}.csv"
        archiveNumbering="Date"
        archiveEvery="Day"
        maxArchiveFiles="7"
        archiveDateFormat="yyyy-MM-dd" >
  <layout xsi:type="CsvLayout">
    <column name="time" layout="${longdate}" />
    <column name="message" layout="${message} ${exception:format=tostring}" />
    <column name="logger" layout="${logger}"/>
    <column name="level" layout="${level}"/>
  </layout>
</target>
Nlog的rule配置在Console时配置如下:
<logger name="*" minlevel="Debug" writeTo="Console" />
在widows service的配置如下:
<logger name="*" minlevel="Debug" writeTo="TopShelfCSV" />
现在在Host控制台下添加app.config文件,并配置wcf service节点:
<system.serviceModel>
  <services>
    <service name="JulyLuo.Service.JulyLuoIntroduce" behaviorConfiguration="mexServiceBehavior">
      <host>
        <baseAddresses>
          <add baseAddress="net.tcp://localhost:50129/PdfGenerator" />
        </baseAddresses>
      </host>
      <endpoint address="" binding="netTcpBinding" contract="JulyLuo.Contract.IJulyLuoIntroduce" />
      <endpoint address="mex" binding="mexTcpBinding" contract="IMetadataExchange" />
    </service>
  </services>
  <behaviors>
    <serviceBehaviors>
      <behavior name="mexServiceBehavior">
        <serviceMetadata />
      </behavior>
    </serviceBehaviors>
  </behaviors>
</system.serviceModel>
这里的wcf用的是Tcp的绑定,要主要就是service中name和 endpoint中的contract,其对应的就是以上创建的service和contract的名称。
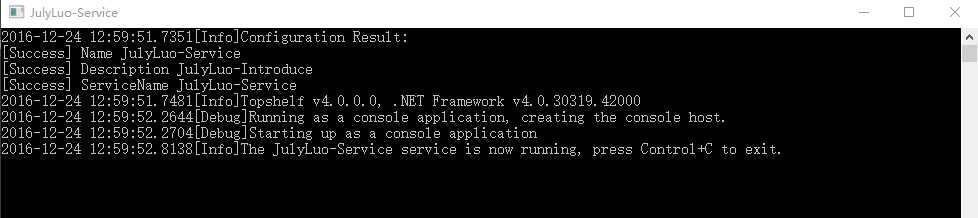
一切设置完毕之后,设置Host为启动项目,现在可以直接运行,因为传入的参数为空,topshelf将设置为Console,界面如下:
这里的Client端只需要应用Contract工程即可,引用添加之后新创建一个类封装调用wcf:
public class WcfProxy<TContract> : IDisposable
    where TContract : class
{
    public TContract Service { get; private set; }

    public WcfProxy()
    {
        try
        {
            var factory = new ChannelFactory<TContract>(typeof(TContract).Name + "_Endpoint");
            factory.Open();
            Service = factory.CreateChannel();
        }
        catch (Exception ex)
        {
            Console.WriteLine("Could not create proxy: {0}", ex.Message);
            Service = null;
        }
    }

    public void Dispose()
    {
        if (Service != null)
        {
            var internalProxy = Service as ICommunicationObject;

            try
            {
                if (internalProxy != null)
                {
                    if (internalProxy.State != CommunicationState.Closed && internalProxy.State != CommunicationState.Faulted)
                        internalProxy.Close();
                }
            }
            catch (Exception ex)
            {
                Console.WriteLine("Could not close proxy: {0}", ex.Message);
                try
                {
                    if (internalProxy != null)
                        internalProxy.Abort();
                }
                catch (Exception exInternal)
                {
                    Console.WriteLine("Could not abort proxy: {0}", exInternal.Message);
                }
            }

            if (internalProxy is IDisposable)
            {
                try
                {
                    if (internalProxy.State != CommunicationState.Faulted)
                        (internalProxy as IDisposable).Dispose();
                }
                catch (Exception ex)
                {
                    Console.WriteLine("Could not dispose proxy: ", ex.Message);
                }
            }
        }
    }
}
因为是调用wcf,这里的Client端也需要添加app.config并设置如下:
<system.serviceModel>
  <client>
    <endpoint address="net.tcp://localhost:50129/Introduce"
        binding="netTcpBinding"
        contract="JulyLuo.Contract.IJulyLuoIntroduce"
        name="IJulyLuoIntroduce_Endpoint">
    </endpoint>
  </client>
</system.serviceModel>
所有的准备完毕之后,我们就可以在Client端开始编写代码调用wcf:
Console.WriteLine("Press enter to send the introduction request");
Console.ReadLine();
using (var proxy = new WcfProxy<IJulyLuoIntroduce>())
{
    Console.ForegroundColor = ConsoleColor.Blue;
    var request = new JulyLuo.Contract.DTO.JulyLuoRequest
    {
        Greeting = "Hello",
        Name = "world"
    };
    Console.WriteLine("Sending: {0}", request);

    Console.ForegroundColor = ConsoleColor.Green;
    var response = proxy.Service.Introduce(request);
    Console.WriteLine("Received: {0} {1} {2}", response.Greeting, response.ClientName, response.ServiceName);
}
Console.ForegroundColor = ConsoleColor.White;
Console.WriteLine("Press enter to exit");
Console.ReadLine();
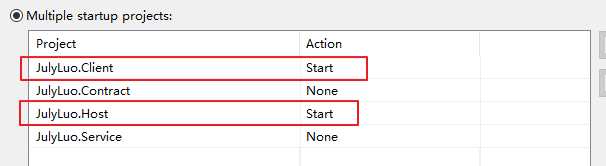
然后设置整个solution将client和host 工程都设置为启动项目:
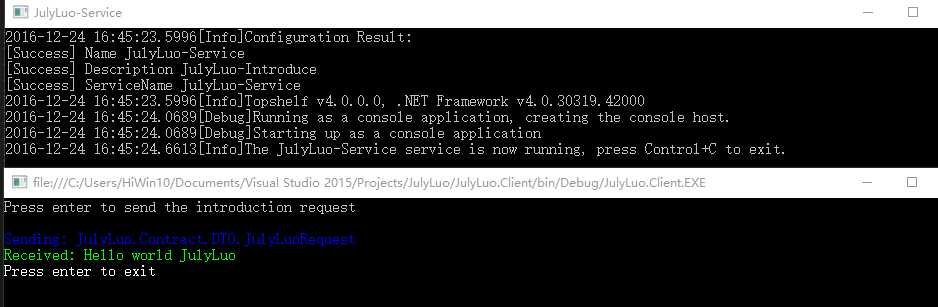
最后的运行结果如下:
通过以上的步骤,我们成功的整合了几个类库来开发wcf,topshelf还可以宿主为windows service,这样的文章园子里面有很多,这里就不说明了。
Topshelf + ServiceModelEx + Nlog 从头构建WCF
标签:net combine change conf 整合 comm logging logger int
原文地址:http://www.cnblogs.com/julyluo/p/6217150.html