下载grafana以及安装
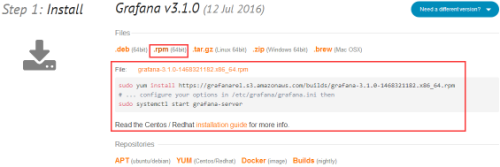
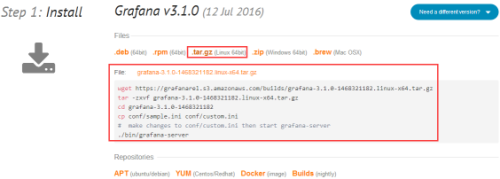
Zabbix plugin for Grafana官网给出了rpm和源码包的安装方法

sudo yum install https://grafanarel.s3.amazonaws.com/builds/grafana-3.1.0-1468321182.x86_64.rpm
# ... configure your options in /etc/grafana/grafana.ini then
sudo systemctl start grafana-server

wget https://grafanarel.s3.amazonaws.com/builds/grafana-3.1.0-1468321182.linux-x64.tar.gztar -zxvf grafana-3.1.0-1468321182.linux-x64.tar.gz
cd grafana-3.1.0-1468321182
cp conf/sample.ini conf/custom.ini
# make changes to conf/custom.ini then start grafana-server
./bin/grafana-server
两种安装方法我都试了,但是在国内访问官网很卡慢,下载也是非常的慢。后面我是在网上找的rpm包,成功安装grafana。

1、安装garfana-zabbix插件
官方网站:https://github.com/alexanderzobnin/grafana-zabbix
官网:http://docs.grafana-zabbix.org/installation/
[使用grafana-cli工具安装]
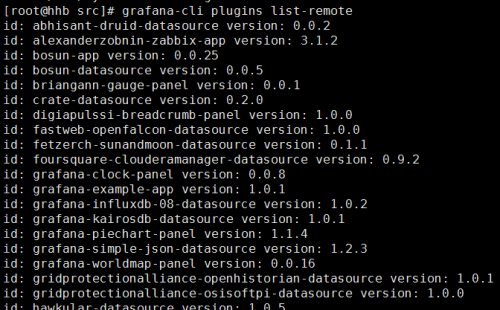
获取可用插件列表
grafana-cli plugins list-remote

安装zabbix插件
grafana-cli plugins install alexanderzobnin-zabbix-app
安装插件完成之后重启garfana服务
service grafana-server restart
使用grafana-zabbix-app源,其中包含最新版本的插件
cd /var/lib/grafana/plugins/
克隆grafana-zabbix-app插件项目到当前目录
git clone https://github.com/alexanderzobnin/grafana-zabbix-app

注:如果没有git,请先安装git
yum install –y git
插件安装完成重启garfana服务
service grafana-server restart
####################################################
注:通过这种方式,可以很容易升级插件
cd /var/lib/grafana/plugins/grafana-zabbix-app
git pull
service grafana-server restart
##################################################
[使用源码包安装]
源码安装需要NodeJS,npm和Grunt支持
git clone https://github.com/alexanderzobnin/grafana-zabbix.git
cd grafana-zabbix
npm install
npm install -g grunt-cli
#########################################################
系统没有安装npm命令Centos上面直接yum 安装就可以了,前提是要启用了 EPEL 软件库
yum install -y npm
#########################################################
grunt
插件将建成dist/目录。然后你可以将它复制到你的grafana插件目录或在grafana配置文件中指定编译插件的路径
[plugin.zabbix]
path = /home/your/clone/dir/grafana-zabbix/dist
如果需要更新,执行下面命令
git pull
Grunt
重启grafana服务
service grafana-server restart
systemctl restart grafana-server
#######################################################################
Package details
Installs binary to /usr/sbin/grafana-server
Copies init.d script to /etc/init.d/grafana-server
Installs default file (environment vars) to /etc/sysconfig/grafana-server
Copies configuration file to /etc/grafana/grafana.ini
Installs systemd service (if systemd is available) name grafana-server.service
The default configuration uses a log file at /var/log/grafana/grafana.log
The default configuration specifies an sqlite3 database at /var/lib/grafana/grafana.db
Start the server (via systemd)
$ systemctl daemon-reload
$ systemctl start grafana-server
$ systemctl status grafana-server
To configure the Grafana server to start at boot time:
$ sudo /sbin/chkconfig --add grafana-server
Enable the systemd service to start at boot
sudo systemctl enable grafana-server.service
###################################################################
2、测试zabbix-API
[root@Server ~]# curl -i -X POST -H ‘Content-Type: application/json‘ -d ‘{"jsonrpc":"2.0","method":"user.login","params":{"user":"Admin","password":"zabbix"},"auth":null,"id":0}‘ http://192.168.21.250/zabbix/api_jsonrpc.php
HTTP/1.1 200 OK
Date: Thu, 28 Apr 2016 07:43:21 GMT
Server: Apache/2.2.15 (CentOS)
X-Powered-By: PHP/5.5.34
Access-Control-Allow-Origin: *
Access-Control-Allow-Headers: Content-Type
Access-Control-Allow-Methods: POST
Access-Control-Max-Age: 1000
Content-Length: 68
Connection: close
Content-Type: application/json
{"jsonrpc":"2.0","result":"21b85be9259926290f10d70bd7428409","id":0}

测试成功,可以登录配置grafana了。
下一篇文章我将详细的介绍grafana的使用。
本文出自 “Grafana3-0-5安装步骤” 博客,转载请与作者联系!
原文地址:http://tonybo.blog.51cto.com/8671400/1889361