标签:names _id point active git add 函数 读取 ice
在 /home/your_name/TensorFlow/DCGAN/ 下新建文件 train.py,同时新建文件夹 logs 和文件夹 samples,前者用来保存训练过程中的日志和模型,后者用来保存训练过程中采样器的采样图片,在 train.py 中输入如下代码:
# -*- coding: utf-8 -*-
import tensorflow as tf
import os

from read_data import *
from utils import *
from ops import *
from model import *
from model import BATCH_SIZE


def train():

    # 设置 global_step ,用来记录训练过程中的 step
    global_step = tf.Variable(0, name = ‘global_step‘, trainable = False)
    # 训练过程中的日志保存文件
    train_dir = ‘/home/your_name/TensorFlow/DCGAN/logs‘

    # 放置三个 placeholder,y 表示约束条件,images 表示送入判别器的图片,
    # z 表示随机噪声
    y= tf.placeholder(tf.float32, [BATCH_SIZE, 10], name=‘y‘)
    images = tf.placeholder(tf.float32, [64, 28, 28, 1], name=‘real_images‘)
    z = tf.placeholder(tf.float32, [None, 100], name=‘z‘)

    # 由生成器生成图像 G
    G = generator(z, y)
    # 真实图像送入判别器
    D, D_logits  = discriminator(images, y)
    # 采样器采样图像
    samples = sampler(z, y)
    # 生成图像送入判别器
    D_, D_logits_ = discriminator(G, y, reuse = True)

    # 损失计算
    d_loss_real = tf.reduce_mean(
        tf.nn.sigmoid_cross_entropy_with_logits(D_logits, tf.ones_like(D)))
    d_loss_fake = tf.reduce_mean(
        tf.nn.sigmoid_cross_entropy_with_logits(D_logits_, tf.zeros_like(D_)))
    d_loss = d_loss_real + d_loss_fake
    g_loss = tf.reduce_mean(
        tf.nn.sigmoid_cross_entropy_with_logits(D_logits_, tf.ones_like(D_)))

    # 总结操作
    z_sum = tf.histogram_summary("z", z)
    d_sum = tf.histogram_summary("d", D)
    d__sum = tf.histogram_summary("d_", D_)
    G_sum = tf.image_summary("G", G)

    d_loss_real_sum = tf.scalar_summary("d_loss_real", d_loss_real)
    d_loss_fake_sum = tf.scalar_summary("d_loss_fake", d_loss_fake)
    d_loss_sum = tf.scalar_summary("d_loss", d_loss)
    g_loss_sum = tf.scalar_summary("g_loss", g_loss)

    # 合并各自的总结
    g_sum = tf.merge_summary([z_sum, d__sum, G_sum, d_loss_fake_sum, g_loss_sum])
    d_sum = tf.merge_summary([z_sum, d_sum, d_loss_real_sum, d_loss_sum])

    # 生成器和判别器要更新的变量,用于 tf.train.Optimizer 的 var_list
    t_vars = tf.trainable_variables()
    d_vars = [var for var in t_vars if ‘d_‘ in var.name]
    g_vars = [var for var in t_vars if ‘g_‘ in var.name]

    saver = tf.train.Saver()

    # 优化算法采用 Adam
    d_optim = tf.train.AdamOptimizer(0.0002, beta1 = 0.5)                 .minimize(d_loss, var_list = d_vars, global_step = global_step)
    g_optim = tf.train.AdamOptimizer(0.0002, beta1 = 0.5)                 .minimize(g_loss, var_list = g_vars, global_step = global_step)


    os.environ[‘CUDA_VISIBLE_DEVICES‘] = str(0)
    config = tf.ConfigProto()
    config.gpu_options.per_process_gpu_memory_fraction = 0.2
    sess = tf.InteractiveSession(config=config)

    init = tf.initialize_all_variables()
    writer = tf.train.SummaryWriter(train_dir, sess.graph)

    # 这个自己理解吧
    data_x, data_y = read_data()
    sample_z = np.random.uniform(-1, 1, size=(BATCH_SIZE, 100))
#    sample_images = data_x[0: 64]
    sample_labels = data_y[0: 64]
    sess.run(init)

    # 循环 25 个 epoch 训练网络
    for epoch in range(25):
        batch_idxs = 1093
        for idx in range(batch_idxs):
            batch_images = data_x[idx*64: (idx+1)*64]
            batch_labels = data_y[idx*64: (idx+1)*64]
            batch_z = np.random.uniform(-1, 1, size=(BATCH_SIZE, 100))

            # 更新 D 的参数
            _, summary_str = sess.run([d_optim, d_sum],
                                      feed_dict = {images: batch_images,
                                                   z: batch_z,
                                                   y: batch_labels})
            writer.add_summary(summary_str, idx+1)

            # 更新 G 的参数
            _, summary_str = sess.run([g_optim, g_sum],
                                      feed_dict = {z: batch_z,
                                                   y: batch_labels})
            writer.add_summary(summary_str, idx+1)

            # 更新两次 G 的参数确保网络的稳定
            _, summary_str = sess.run([g_optim, g_sum],
                                      feed_dict = {z: batch_z,
                                                   y: batch_labels})
            writer.add_summary(summary_str, idx+1)

            # 计算训练过程中的损失,打印出来
            errD_fake = d_loss_fake.eval({z: batch_z, y: batch_labels})
            errD_real = d_loss_real.eval({images: batch_images, y: batch_labels})
            errG = g_loss.eval({z: batch_z, y: batch_labels})

            if idx % 20 == 0:
                print("Epoch: [%2d] [%4d/%4d] d_loss: %.8f, g_loss: %.8f"                         % (epoch, idx, batch_idxs, errD_fake+errD_real, errG))

            # 训练过程中,用采样器采样,并且保存采样的图片到
            # /home/your_name/TensorFlow/DCGAN/samples/
            if idx % 100 == 1:
                sample = sess.run(samples, feed_dict = {z: sample_z, y: sample_labels})
                samples_path = ‘/home/your_name/TensorFlow/DCGAN/samples/‘
                save_images(sample, [8, 8],
                            samples_path + ‘test_%d_epoch_%d.png‘ % (epoch, idx))
                print ‘save down‘

            # 每过 500 次迭代,保存一次模型
            if idx % 500 == 2:
                checkpoint_path = os.path.join(train_dir, ‘DCGAN_model.ckpt‘)
                saver.save(sess, checkpoint_path, global_step = idx+1)

    sess.close()


if __name__ == ‘__main__‘:
    train()
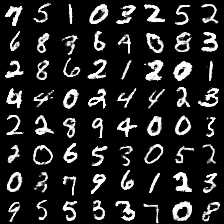
输入完成后点击运行,运行过程中,可以看到,生成的每个图片对应行对应列都是一样的数字,这是因为我们加了条件约束;采样器 sampler 采样的图片被保存在 samples 文件夹下,由模糊到清晰,由刚开始的噪声,慢慢变成手写字符,最后完全区分不出来是生成图片还是真实图片,反正我是区分不出来,you can you up。

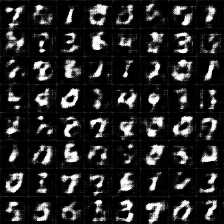
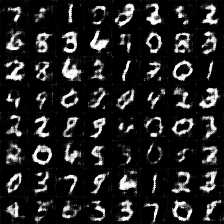
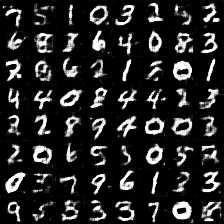
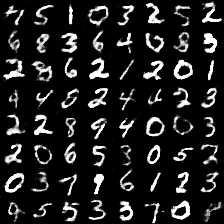
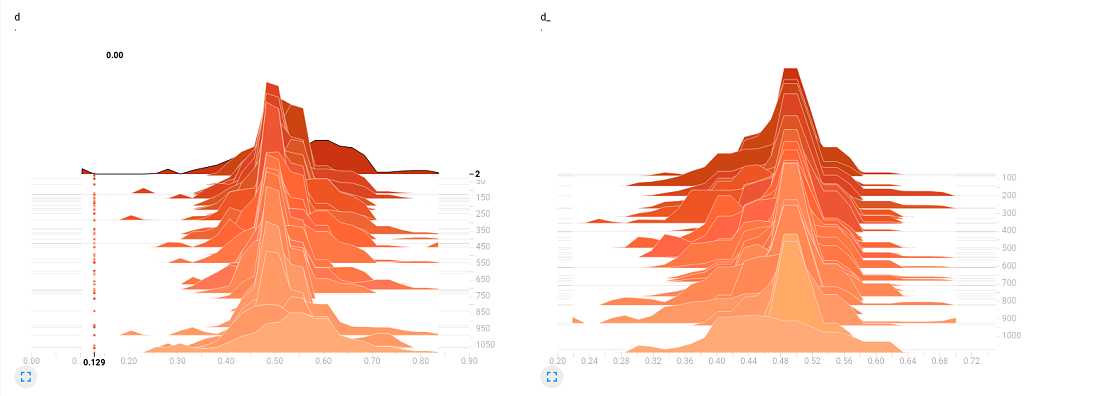
与此同时,要是在训练的时候打开 TensorBoard,可以看到 D 的分布,大致在趋于 0.5 左右的附件徘徊,说明判别器 D 已经趋于判别不出来了,只能随机猜测,正确率大致 0.5。
讲道理,我们的 GAN 到这一步,已经算是完成了,测试的过程,我们已经在训练的时候通过采样完成了,如果嫌不够,非要单独写个测试的文件,也不是不可以:
在 /home/your_name/TensorFlow/DCGAN/ 下新建文件 eval.py 和文件夹 eval,eval 文件夹用来保存测试结果图片,在 eval.py 中输入如下代码:
# -*- coding: utf-8 -*-
import tensorflow as tf
import os

from read_data import *
from utils import *
from ops import *
from model import *
from model import BATCH_SIZE


def eval():
    # 用于存放测试图片
    test_dir = ‘/home/your_name/TensorFlow/DCGAN/eval/‘
    # 从此处加载模型
    checkpoint_dir = ‘/home/your_name/TensorFlow/DCGAN/logs/‘

    y= tf.placeholder(tf.float32, [BATCH_SIZE, 10], name=‘y‘)
    z = tf.placeholder(tf.float32, [None, 100], name=‘z‘)

    G = generator(z, y)
    data_x, data_y = read_data()
    sample_z = np.random.uniform(-1, 1, size=(BATCH_SIZE, 100))
    sample_labels = data_y[120: 184]

    # 读取 ckpt 需要 sess,saver
    print("Reading checkpoints...")
    ckpt = tf.train.get_checkpoint_state(checkpoint_dir)

    # saver
    saver = tf.train.Saver(tf.all_variables())

    # sess
    os.environ[‘CUDA_VISIBLE_DEVICES‘] = str(0)
    config = tf.ConfigProto()
    config.gpu_options.per_process_gpu_memory_fraction = 0.2
    sess = tf.InteractiveSession(config=config)

    # 从保存的模型中恢复变量
    if ckpt and ckpt.model_checkpoint_path:
        ckpt_name = os.path.basename(ckpt.model_checkpoint_path)
        saver.restore(sess, os.path.join(checkpoint_dir, ckpt_name))

    # 用恢复的变量进行生成器的测试
    test_sess = sess.run(G, feed_dict = {z: sample_z, y: sample_labels})

    # 保存测试的生成器图片到特定文件夹
    save_images(test_sess, [8, 8], test_dir + ‘test_%d.png‘ % 500)

    sess.close()


if  __name__ == ‘__main__‘:

    eval()
点击运行,在 eval 文件夹下生成test_500.png 文件,可以看到,生成器 G 已经可以生成不错的结果。
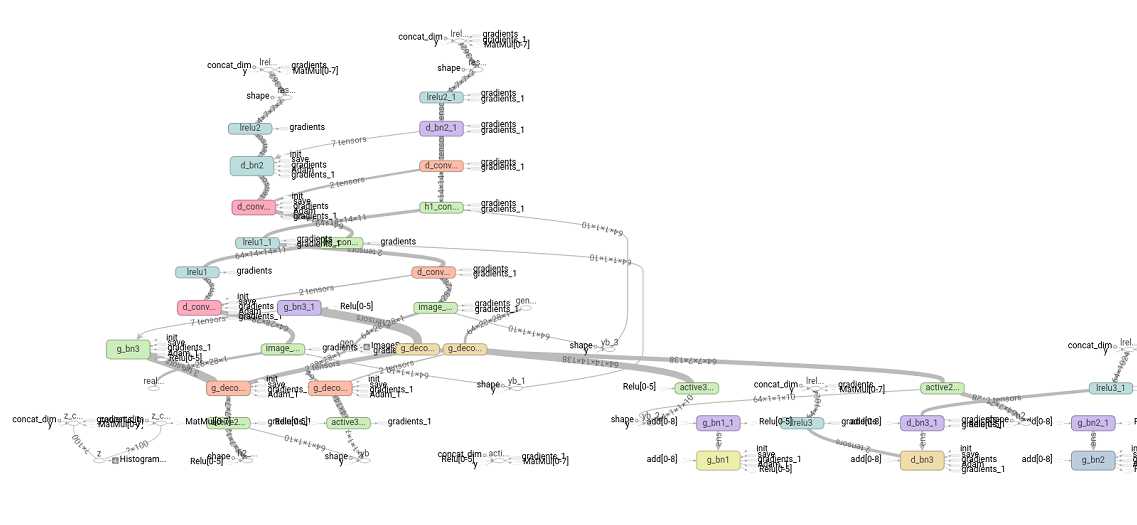
训练测试完,可以打开 TensorBoard 查看网络的 Graph,可以看到,由于没有细致采用 namespace 和 variable_scope ,画出来的 Graph 比较凌乱,只能依稀的看出来网络的一些结构。
至此,我们的 TensorFlow GAN 工作基本完成,细心的朋友会发现,我们的程序存在以下几个问题:
1)在写 eval() 函数的时候,对于生成函数 generator(),没有指定 train = False,也就是在 BN 层,没有体现出训练和测试的区别;
2)在我的这篇 http://www.cnblogs.com/Charles-Wan/p/6197019.html 博客中,提到了我采用了 tfrecords 进行 GAN 数据的输入处理,但是此程序并没有体现出来;
3)没有细致的采用 namespace 和 variable_scope ,画出来的 Graph 比较凌乱;
4)程序中太多不明含义的数字,路径名字全都采用绝对路径;
5)训练过程中不能断点续训练等。
针对以上问题,我们在下一节的不加约束 GAN 上将进行改进。
参考文献:
1. https://github.com/carpedm20/DCGAN-tensorflow
不要怂,就是GAN (生成式对抗网络) (四):训练和测试 GAN
标签:names _id point active git add 函数 读取 ice
原文地址:http://www.cnblogs.com/Charles-Wan/p/6338074.html