标签:files fas rpm 保存 mcrypt 技术 stop ipv6 ping
我们平时都是用源码包进行编译安装,这种方式比较灵活可控,但是比较麻烦耗费的时间很长。我们也可以通过二进制包进行安装或者直接使用rpm方式进行安装
Mysql软件下载地址:http://dev.mysql.com/downloads/
源码安装请参考
rpm安装方式
安装包:https://yunpan.cn/cMqfzAiJHpGdy 访问密码 ba7f
rpm -ivh MySQL-server-5.5.51-1.el6.x86_64.rpm --forcerpm -ivh MySQL-client-5.5.51-1.el6.x86_64.rpm
/etc/init.d/mysql start/etc/init.d/mysql status
netstat -nat | grep 3306/usr/bin/mysqladmin -u root passwordmysql -uroot -p
php官方下载地址: http://www.php.net/downloads.php
useradd -s /sbin/nologin php-fpm
yum install gcc -yyum install libxslt-develyum install libjpeg-develyum install libpng-develps -ef | grep mysqlyum install curl-develyum install libXpm-develyum install libfreetype6-devyum install freetype-deve安装mcrypttar -xzvf libmcrypt-2.5.7.tar.gz./configure --prefix=/usr/local/libmcryptmake && make install
tar -xzvf php-5.5.38.tar.gzcd php-5.5.38
./configure \--prefix=/usr/local/php \--with-config-file-path=/usr/local/php/etc \--enable-fpm \--with-fpm-user=php-fpm \--with-fpm-group=php-fpm \--with-mysql \--with-mysql-sock \--with-libxml-dir \--with-gd \--with-jpeg-dir \--with-png-dir \--with-freetype-dir \--with-iconv-dir \--with-zlib-dir \--with-mcrypt=/usr/local/libmcrypt \--enable-soap \--enable-gd-native-ttf \--enable-ftp \--enable-mbstring \--enable-exif \--enable-zend-multibyte \--disable-ipv6 \--with-pear \--with-curl \--with-openssl \--enable-bcmath \--enable-sockets \--with-gettext
make && make installmake test
cp php.ini-production /usr/local/php/etc/php.inivi /usr/local/php/etc/php-fpm.conf把下面内容加入[global]pid = /usr/local/php/var/run/php-fpm.piderror_log = /usr/local/php/var/log/php-fpm.log[www]#listen = /tmp/php-fcgi.socklisten = 127.0.0.1:9000user = php-fpmgroup = php-fpmpm = dynamicpm.max_children = 50pm.start_servers = 20pm.min_spare_servers = 5pm.max_spare_servers = 35pm.max_requests = 500rlimit_files = 1024request_terminate_timeout = 300保存修改后,通过下面命令检查配置是否正确/usr/local/php/sbin/php-fpm -t
cp sapi/fpm/init.d.php-fpm /etc/init.d/php-fpmchmod 755 /etc/init.d/php-fpmservice php-fpm start开机启动chkconfig php-fpm onps aux |grep php-fpm
参考文章:
- 第18章 LNMP环境搭建 –Linux 学习的好网站
4.编译时报错:configure: error: mcrypt.h not found. Please reinstall libmcrypt.
解决:
–with-mcrypt参数加上路径–with-mcrypt=/usr/local/libmcrypt

可以到网盘目录进行下载:
https://yunpan.cn/cMqmvitt4Ezqj 访问密码 58ff
Nginx官方网站(http://nginx.org)
tar zxvf nginx-1.4.4.tar.gz
cd nginx-1.4.4./configure \--prefix=/usr/local/nginx \--with-http_realip_module \--with-http_sub_module \--with-http_gzip_static_module \--with-http_stub_status_module \--with-pcre
make
make install
因为nginx比较小,所以很快就会安装完,而且也不会出什么错误,如果出错了,自行百度Google
vim /etc/init.d/nginx
写入如下内容:
#!/bin/bash# chkconfig: - 30 21# description: http service.# Source Function Library. /etc/init.d/functions# Nginx SettingsNGINX_SBIN="/usr/local/nginx/sbin/nginx"NGINX_CONF="/usr/local/nginx/conf/nginx.conf"NGINX_PID="/usr/local/nginx/logs/nginx.pid"RETVAL=0prog="Nginx"start() {echo -n $"Starting $prog: "mkdir -p /dev/shm/nginx_tempdaemon $NGINX_SBIN -c $NGINX_CONFRETVAL=$?echoreturn $RETVAL}stop() {echo -n $"Stopping $prog: "killproc -p $NGINX_PID $NGINX_SBIN -TERMrm -rf /dev/shm/nginx_tempRETVAL=$?echoreturn $RETVAL}reload(){echo -n $"Reloading $prog: "killproc -p $NGINX_PID $NGINX_SBIN -HUPRETVAL=$?echoreturn $RETVAL}restart(){stopstart}configtest(){$NGINX_SBIN -c $NGINX_CONF -treturn 0}case "$1" instart)start;;stop)stop;;reload)reload;;restart)restart;;configtest)configtest;;*)echo $"Usage: $0 {start|stop|reload|restart|configtest}"RETVAL=1esacexit $RETVAL
保存后,更改权限:
chmod 755 /etc/init.d/nginxchkconfig --add nginx
如果想开机启动,请执行:
chkconfig nginx on
首先把原来的配置文件清空:
> /usr/local/nginx/conf/nginx.conf
“>” 这个符号为重定向的意思,单独用它,可以把一个文本文档快速清空。
vi /usr/local/nginx/conf/nginx.conf
写入如下内容:
user nobody nobody;worker_processes 2;error_log /usr/local/nginx/logs/nginx_error.log crit;pid /usr/local/nginx/logs/nginx.pid;worker_rlimit_nofile 51200;events{use epoll;worker_connections 6000;}http{include mime.types;default_type application/octet-stream;server_names_hash_bucket_size 3526;server_names_hash_max_size 4096;log_format combined_realip ‘$remote_addr $http_x_forwarded_for [$time_local]‘‘$host "$request_uri" $status‘‘"$http_referer" "$http_user_agent"‘;sendfile on;tcp_nopush on;keepalive_timeout 30;client_header_timeout 3m;client_body_timeout 3m;send_timeout 3m;connection_pool_size 256;client_header_buffer_size 1k;large_client_header_buffers 8 4k;request_pool_size 4k;output_buffers 4 32k;postpone_output 1460;client_max_body_size 10m;client_body_buffer_size 256k;client_body_temp_path /usr/local/nginx/client_body_temp;proxy_temp_path /usr/local/nginx/proxy_temp;fastcgi_temp_path /usr/local/nginx/fastcgi_temp;fastcgi_intercept_errors on;tcp_nodelay on;gzip on;gzip_min_length 1k;gzip_buffers 4 8k;gzip_comp_level 5;gzip_http_version 1.1;gzip_types text/plain application/x-javascript text/css text/htm application/xml;server{listen 80;server_name localhost;index index.html index.htm index.php;root /usr/local/nginx/html;location ~ \.php$ {include fastcgi_params;fastcgi_pass unix:/tmp/php-fcgi.sock;-----fastcgi_pass 127.0.0.1:9000;-----#listen = /tmp/php-fcgi.sockfastcgi_index index.php;fastcgi_param SCRIPT_FILENAME /usr/local/nginx/html$fastcgi_script_name;}}}
如果启动报/tmp/php-fcgi.sock不存在,把参数文件中的fastcgi_pass unix: /tmp/php-fcgi.sock; 修改成fastcgi_pass unix: 127.0.0.1:9000; 这个参数和php-fpm.com中的listen = /tmp/php-fcgi.sock是对应的
保存配置后,先检验一下配置文件是否有错误存在:
/usr/local/nginx/sbin/nginx -t
如果显示内容如下,则配置正确,否则需要根据错误提示修改配置文件:
nginx: the configuration file /usr/local/nginx/conf/nginx.conf syntax is oknginx: configuration file /usr/local/nginx/conf/nginx.conf test is successful
启动nginx:
service nginx start
如果不能启动,请查看“/usr/local/nginx/logs/error.log”文件,检查nginx是否启动:
ps aux |grep nginx
看是否有进程。
php文件放在 /usr/local/nginx/conf/nginx.conf 配置文件root /usr/local/nginx/html;所指的目录下
如:
vi /usr/local/nginx/html/2.php<?phpecho "hellp php"?>
或者
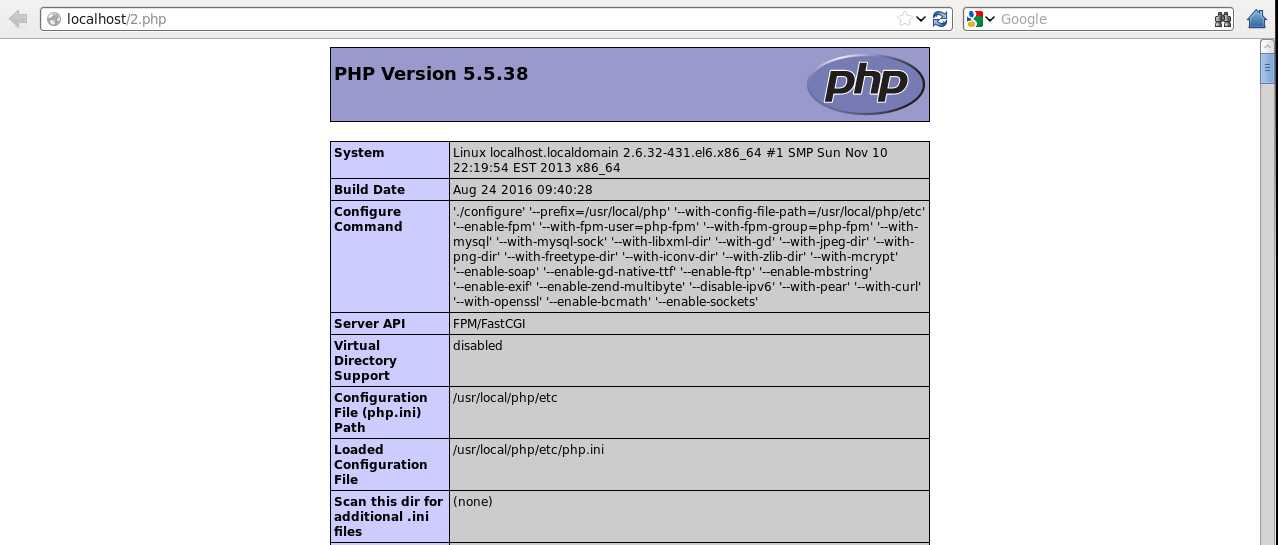
vi /usr/local/nginx/html/2.php<?phpphpinfo();?>
[root@localhost html]# curl localhost/2.php -IHTTP/1.1 200 OKServer: nginx/1.4.7Date: Thu, 25 Aug 2016 01:10:51 GMTContent-Type: text/htmlConnection: keep-alive
输出200 OK即正常解析!
在浏览器中测试
参考:
标签:files fas rpm 保存 mcrypt 技术 stop ipv6 ping
原文地址:http://www.cnblogs.com/haoxiaoyu/p/2f6a078059e61508f1077518beda479f.html