标签:push simple imp rda static vector wchar_t get 数据信息
阅读文章前需要了解的知识:文本渲染 https://learnopengl-cn.github.io/06%20In%20Practice/02%20Text%20Rendering/
简要步骤:
获取要绘制的字符的 Unicode 码,使用 FreeType 库获取对应的位图数据,添加到字符表中(后面同样的字符可以再表中直接索引),将字符表上的字符填充到一张纹理上。计算每个字符的纹理坐标,使用渲染器绘制
注意的问题:
对于中英文混合的字符串,使用 char 存储时,英文字符占 1 个字节,而中文字符占 2 个字符。必须转换为宽字符,即中英文字符都占 2 个字节。
    void TextRender::toWchar(wchar_t* dest, const char* src, int size)
    {
        const char* old_local = setlocale(LC_CTYPE, "chs");
        mbstowcs(dest, src, size);
        setlocale(LC_CTYPE, old_local);
    }
通过上面的函数,可以将 char 转为 wchar_t。
添加 FreeType 库到工程
注意添加新的包含路径就好了,我把 External 目录也设置为包含路径,否则使用 FreeType 库会发生错误
渲染文本
首先,对 FreeType 库初始化
        size = 48;

        /* 初始化 FreeType 库 */
        assert(FT_Init_FreeType(&ftLibrary) == 0);

        /* 加载字体 */
        assert(FT_New_Face(ftLibrary, PathHelper::fullPath("Font/msyh.ttc").c_str(), 0, &ftFace) == 0);

        /* 设定为 UNICODE,默认也是 */
        FT_Select_Charmap(ftFace, FT_ENCODING_UNICODE);

        /* 定义字体大小 */
        FT_Set_Pixel_Sizes(ftFace, size, size);
字体在 Font 文件夹中,为 微软雅黑
定义一个字符结构
        struct Character
        {
            Vec2 texcoord[4];    /* 纹理坐标 */
            Vec2 size;           /* 字型大小 */
            Vec2 bearing;        /* 从基准线到字形左部/顶部的偏移值 */
            int  advance;        /* 原点距下一个字形原点的距离 */
            bool space;

            std::vector<unsigned char> data;
        };
包含渲染字符所需要的数据,对于空白字符(没有位图数据,只有到下一个字符的偏移量)需要特别处理。 data 存储位图数据。
上面只是绘制一个字符的数据,对于一串字符,还需要定义一个文本结构
        struct Text
        {
            Vec2 pos;
            float scale;
            Color color;
            std::vector<Character*> vCharacters;
        };
包含绘制文本的坐标,缩放比,颜色以及字符的索引。
创建一个新类 TextRender 使用渲染文本
调用函数 DrawText 直接绘制文本
    void TextRender::drawText(int x, int y, float scale, const std::string& text, Color& color)
    {
        static wchar_t buffer[2048];
        this->toWchar(buffer, text.c_str(), text.size());

        int count = 0;
        for ( int i = 0; i < 2048; i++ ) {
            if ( buffer[i] == 0 ) break;
            count++;
        }

        Text t = { Vec2(x, y), scale, color };
        Character* character = nullptr;

        for ( int i = 0; i < count; i++ ) {
            int index = buffer[i];

            auto it = characterMap.find(index);
            if ( it == characterMap.end() ) {
                character = new Character();
                character->space = (index == ‘ ‘ );
                this->loadCharacter(character, index);
                characterMap.insert(CharacterMap::value_type(index, character));
            }
            else {
                character = it->second;
            }
            t.vCharacters.push_back(character);
        }
        vTexts.push_back(t);
    }
遍历所有要绘制的字符,查找字符表,如果字符表存则返回字符。最后把所有字符存储到 Text 中,而 Text 存储在一个数组中(数组存储一帧需要绘制的字符串)。
如果字符表中没有该字符,则加载该字符
    void TextRender::loadCharacter(Character* character, unsigned long id)
    {
        if ( bUpdateTexture == false ) bUpdateTexture = true;

        FT_Load_Char(ftFace, id, FT_LOAD_RENDER);

        /* 填充结构数据 */
        character->size.set(ftFace->glyph->bitmap.width, ftFace->glyph->bitmap.rows);
        character->bearing.set(ftFace->glyph->bitmap_left, ftFace->glyph->bitmap_top);
        character->advance = ftFace->glyph->advance.x;

        if ( character->space ) return;

        /* 储存位图数据 */
        character->data.resize(character->size.x * character->size.y);
        memcpy(&character->data[0], ftFace->glyph->bitmap.buffer, character->data.size());
    }
函数中使用 FreeType 库加载字符位图数据,填充绘制字符的数据信息。一旦这个函数被调用,证明字符表需要添加新的字符了,在渲染文本前需要更新纹理以及纹理坐标。这里使用 bool 值的 bUpdateTexture 标志,待会要更新纹理。
更新纹理的函数
    void TextRender::updateTextTexture()
    {
        glPixelStorei(GL_UNPACK_ALIGNMENT, 1);

        if ( texture.texture != -1 ) {
            glDeleteTextures(1, &texture.texture);
        }
        glGenTextures(1, &texture.texture);
        glBindTexture(GL_TEXTURE_2D, texture.texture);

        int count = characterMap.size();
        int col, row;

        if ( count < nRowCharCount ) {
            col = count;
            row = 1;
        }
        else {
            col = nRowCharCount;
            row = ceilf(float(count) / col);
        }
        textureData.resize(row * col * size * size);
        for ( auto &ele : textureData ) ele = 0;

        int tex_size_w = col * size;
        int tex_size_h = row * size;

        /* 合并所有字符的位图数据 */
        int characterCount = 0;
        for ( auto it = characterMap.begin(); it != characterMap.end(); ++it ) {
            this->copyCharacterData(characterCount / col, characterCount % col, size * col, it->second, tex_size_w, tex_size_h);
            characterCount++;
        }

        /* 设置纹理数据 */
        glTexImage2D(GL_TEXTURE_2D, 0, GL_RED, col * size, row * size, 0, GL_RED, GL_UNSIGNED_BYTE, &textureData[0]);

        /* 设置纹理选项 */
        glTexParameteri(GL_TEXTURE_2D, GL_TEXTURE_WRAP_S, GL_CLAMP_TO_EDGE);
        glTexParameteri(GL_TEXTURE_2D, GL_TEXTURE_WRAP_T, GL_CLAMP_TO_EDGE);
        glTexParameteri(GL_TEXTURE_2D, GL_TEXTURE_MIN_FILTER, GL_LINEAR);
        glTexParameteri(GL_TEXTURE_2D, GL_TEXTURE_MAG_FILTER, GL_LINEAR);

        /* 解绑纹理 */
        glBindTexture(GL_TEXTURE_2D, 0);
    }
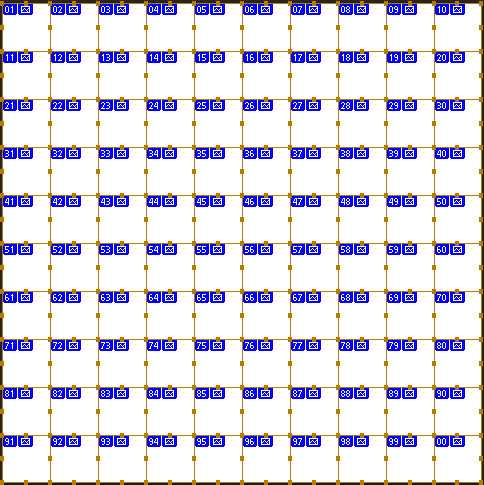
函数中的重点是如何把字符表中字符的位图数据合并的一张纹理上。方法是创建一张足够大的纹理,再将纹理切分为 M x N 的块

然后将字符表中字符的位图数据拷贝到对应的格子上,计算字符的纹理坐标
    void TextRender::copyCharacterData(int row, int col, int stride, Character* character, float sizew, float sizeh)
    {
        int w = character->size.x;
        int h = character->size.y;
        int index = 0;

        if ( character->space ) return;

        for ( int i = 0; i < h; i++ ) {
            for ( int j = 0; j < w; j++ ) {
                index = (row * size + i) * stride + (col * size + j);
                textureData[index] = character->data[i * w + j];
            }
        }
        character->texcoord[0].set(float(col * size + 0) / sizew, float(row * size + h) / sizeh);
        character->texcoord[1].set(float(col * size + 0) / sizew, float(row * size + 0) / sizeh);
        character->texcoord[2].set(float(col * size + w) / sizew, float(row * size + 0) / sizeh);
        character->texcoord[3].set(float(col * size + w) / sizew, float(row * size + h) / sizeh);
    }
最后就是渲染了
    void TextRender::render()
    {
        /* 更新纹理 */
        if ( bUpdateTexture ) {
            bUpdateTexture = false;
            this->updateTextTexture();
        }

        /* 获取顶点数据 */
        for ( auto& ele : vTexts ) {
            GLfloat x = ele.pos.x;
            GLfloat y = ele.pos.y;

            int positionCount = ele.vCharacters.size() * 4;
            int indexCount = ele.vCharacters.size() * 6;
            if ( vPositions.size() < positionCount ) {
                vPositions.resize(positionCount);
                vTexCoords.resize(positionCount);
                vIndices.resize(indexCount);
            }
            nPositionIndex = nIndexIndex = 0;

            int beginIndex = 0;
            for ( auto& character : ele.vCharacters ) {
                GLfloat xpos = x + character->bearing.x * ele.scale;
                GLfloat ypos = y - (character->size.y - character->bearing.y) * ele.scale;

                x += (character->advance >> 6) * ele.scale;

                if ( character->space ) continue;

                GLfloat w = character->size.x * ele.scale;
                GLfloat h = character->size.y * ele.scale;

                vPositions[nPositionIndex + 0].set(xpos + 0, ypos + 0, 0);
                vPositions[nPositionIndex + 1].set(xpos + 0, ypos + h, 0);
                vPositions[nPositionIndex + 2].set(xpos + w, ypos + h, 0);
                vPositions[nPositionIndex + 3].set(xpos + w, ypos + 0, 0);

                vTexCoords[nPositionIndex + 0] = (character->texcoord[0]);
                vTexCoords[nPositionIndex + 1] = (character->texcoord[1]);
                vTexCoords[nPositionIndex + 2] = (character->texcoord[2]);
                vTexCoords[nPositionIndex + 3] = (character->texcoord[3]);

                vIndices[nIndexIndex + 0] = (4 * beginIndex + 0);
                vIndices[nIndexIndex + 1] = (4 * beginIndex + 2);
                vIndices[nIndexIndex + 2] = (4 * beginIndex + 1);
                vIndices[nIndexIndex + 3] = (4 * beginIndex + 0);
                vIndices[nIndexIndex + 4] = (4 * beginIndex + 3);
                vIndices[nIndexIndex + 5] = (4 * beginIndex + 2);

                beginIndex++;
                nPositionIndex += 4;
                nIndexIndex += 6;
            }

            static RenderUnit unit;
            unit.pPositions = &vPositions[0];
            unit.nPositionCount = nPositionIndex;
            unit.pTexcoords = &vTexCoords[0];
            unit.pIndices = &vIndices[0];
            unit.nIndexCount = nIndexIndex;
            unit.color = ele.color;
            unit.texture = &texture;
            unit.renderType = RENDER_TYPE_TEXTURE;

            pRenderer->pushRenderUnit(unit);
            nPositionIndex = nIndexIndex = 0;
        }
        vTexts.clear();
    }
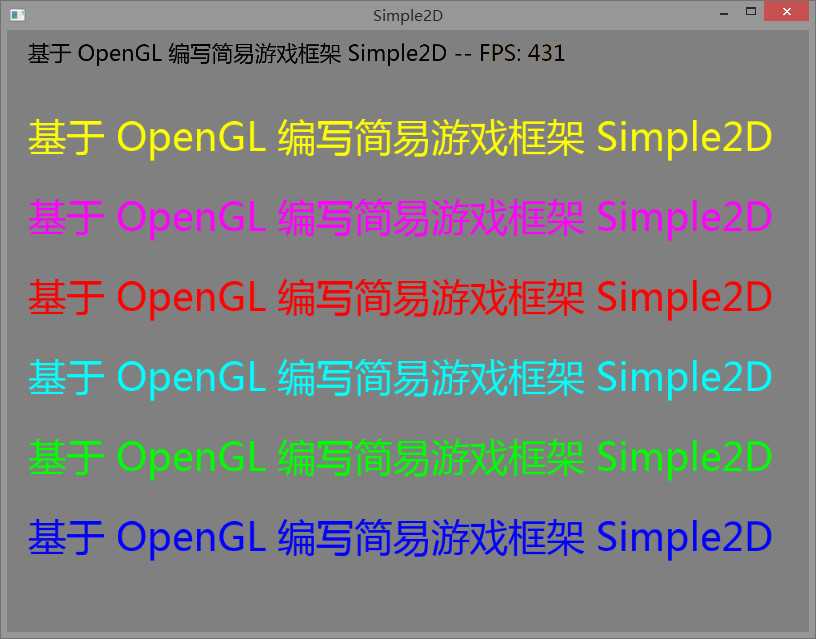
在主函数绘制文本
            textRender.drawText(20,  80, 0.8, "基于 OpenGL 编写简易游戏框架 Simple2D", Color(0, 0, 1, 1));
            textRender.drawText(20, 160, 0.8, "基于 OpenGL 编写简易游戏框架 Simple2D", Color(0, 1, 0, 1));
            textRender.drawText(20, 240, 0.8, "基于 OpenGL 编写简易游戏框架 Simple2D", Color(0, 1, 1, 1));
            textRender.drawText(20, 320, 0.8, "基于 OpenGL 编写简易游戏框架 Simple2D", Color(1, 0, 0, 1));
            textRender.drawText(20, 400, 0.8, "基于 OpenGL 编写简易游戏框架 Simple2D", Color(1, 0, 1, 1));
            textRender.drawText(20, 480, 0.8, "基于 OpenGL 编写简易游戏框架 Simple2D", Color(1, 1, 0, 1));
            textRender.drawText(20, 570, 0.45, buffer, Color(0, 0, 0, 1));
            textRender.render();
运行程序后的结果

源码下载:http://pan.baidu.com/s/1skOmP21
标签:push simple imp rda static vector wchar_t get 数据信息
原文地址:http://www.cnblogs.com/ForEmail5/p/6816195.html