标签:style blog http color os 使用 io 文件 for
首先要学习的是表格标签<form>
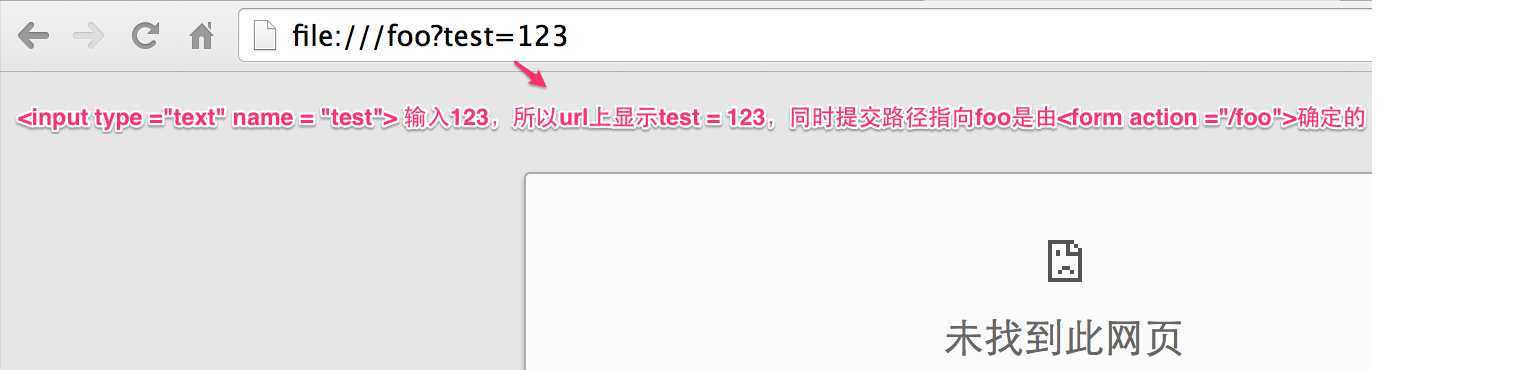
<form action ="/foo">
    <input type = "text"  name = "test">
    <input type ="submit" value ="ClickOnMe">
</form>
- <form> 表格标签
- <form action ="url"> 表格所要提交的目的(where a form submit to)
- <input type ="text"> input为输入控件,text定义了该控件类型是文本框
- <input type ="submit"> intput为输入控件,submit定义了该空间类型是提交按钮,点击该按钮相当于按回车键

当输入123,然后点击ClickOnMe后,显示如下结果。
掌握了这些基本知识,就能够做一个简单的搜索框,让结果指向百度或者Google
<form action="http://www.baidu.com/s">
    <input name="wd">
    <input type="submit">
</form>
先下载并安装GoogleAppEngine(自行百度),新建一个新的应用
import webapp2

class MainHandler(webapp2.RequestHandler):
    def get(self):
        self.response.write(‘Suck world!‘)

app = webapp2.WSGIApplication([
    (‘/‘, MainHandler)
], debug=True)
- 当webapp2接受到一个对‘/‘(根路径)的请求时,会实例化MainHandler类,并调用get方法
- 关于请求的信息,包含在self.request中
- 如果遇到异常,debug=ture 会通知打印栈跟踪
接下来对程序进行修改,让它和知识点一最后给出的例子一样
import webapp2

# new string object from
form="""
<form action="http://www.baidu.com/s">
    <input name="wd">
    <input type="submit">
</form>
"""

#print form
class MainHandler(webapp2.RequestHandler):
    def get(self):
        #slef.resopne.headers[‘Content-Type‘] = ‘text/plain‘
        self.response.write(form)

app = webapp2.WSGIApplication([
    (‘/‘, MainHandler)
], debug=True)
GoogleApp自动将打印的信息当成html处理,如果你想打印纯文本,需要多添加一条:slef.resopne.headers[‘Content-Type‘] = ‘text/plain‘
接下来,我们让form的信息提交到自己创建的路径中,而不是提交到百度中
import webapp2

# new string object from
form="""
<form action="/testform">
    <input name="wd">
    <input type="submit">
</form>
"""

#print form
class MainHandler(webapp2.RequestHandler):
    def get(self):
        #slef.resopne.headers[‘Content-Type‘] = ""
        self.response.write(form)

class TestHandler(webapp2.RequestHandler):
    def get(self):
        wd = self.request.get("wd")
        self.response.write(wd)

app = webapp2.WSGIApplication([
    (‘/‘, MainHandler),
    (‘/testform‘,TestHandler)
], debug=True)
- form的信息提交给了“/formtest",由于app只识别‘/‘,所以新建了一个(‘/testform‘,TestHandler)
- TestHandler类中包含了以下信息:新建一个wd对象,用于储存请求信息中wd变量的信息,然后做出回应,打印wd变量
也可以让浏览器打印所有请求信息
#!/usr/bin/env python
#
# Copyright 2007 Google Inc.
#
# Licensed under the Apache License, Version 2.0 (the "License");
# you may not use this file except in compliance with the License.
# You may obtain a copy of the License at
#
#     http://www.apache.org/licenses/LICENSE-2.0
#
# Unless required by applicable law or agreed to in writing, software
# distributed under the License is distributed on an "AS IS" BASIS,
# WITHOUT WARRANTIES OR CONDITIONS OF ANY KIND, either express or implied.
# See the License for the specific language governing permissions and
# limitations under the License.
#
import webapp2

# new string object from
form="""
<form action="/testform">
    <input name="wd">
    <input type="submit">
</form>
"""

#print form
class MainHandler(webapp2.RequestHandler):
    def get(self):
        #self.response.headers[‘Content-Type‘] = ‘text/plain‘
        self.response.write(form)

class TestHandler(webapp2.RequestHandler):
    def get(self):
        #wd = self.request.get("wd")
        #self.response.write(wd)
        self.response.headers[‘Content-Type‘] = ‘text/plain‘
        self.response.write(self.request)

app = webapp2.WSGIApplication([
    (‘/‘, MainHandler),
    (‘/testform‘,TestHandler)
], debug=True)
接下来介绍form标签的post属性,也就是post方法
POST:向指定的资源提交要被处理的数据
# new string object from
form="""
<form method="post"  action="/testform">
    <input name="wd">
    <input type="submit">
</form>
"""

#print form
class MainHandler(webapp2.RequestHandler):
    def get(self):
        #self.response.headers[‘Content-Type‘] = ‘text/plain‘
        self.response.write(form)

class TestHandler(webapp2.RequestHandler):
    def post(self):
        wd = self.request.get("wd")
        self.response.write(wd)
        #self.response.headers[‘Content-Type‘] = ‘text/plain‘
        #self.response.write(self.request)

app = webapp2.WSGIApplication([
    (‘/‘, MainHandler),
    (‘/testform‘,TestHandler)
], debug=True)
注意代码的两处改动,一个是在<form>标签中声明 method = post,也就是说,如果不声明,那么默认为get方法。另一处改动是TestHandler类的get方法要改名为post方法

Get vs Post
- get方法常用于获取某个文件;post方法用于更新数据
- get方法的参数保存在url中;post方法的参数保存在主体中
- get方法的参数有长度限制;post方法的参数没有长度限制
- get方法支持缓存,不必每次都请求;post方法不支持缓存
- get方法无法改变服务端;post方法可以改变服务端
password属性:能让输入的文本以星号显示,但是结果能会在url中显示

<form>
    <input type="password" name="wd">
    <input type="submit">
</form>
checkbox属性:多选按钮,如果点击按钮,参数会以name=on的形式显示在浏览器中,否则则不会显示参数
<form>
    <input type="checkbox" name="wd">
    <input type="checkbox" name="r">
    <input type="checkbox" name="s">
    <br>
    <input type="submit">
</form>
radio属性:单选按钮控件,只需要为不同按钮赋予相同名字即可
<form>
    <input type="radio" name="wd">
    <input type="radio" name="wd">
    <input type="ra" name="wd">
    <br>
    <input type="submit">
</form>
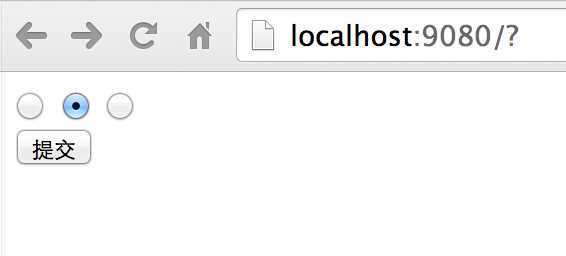
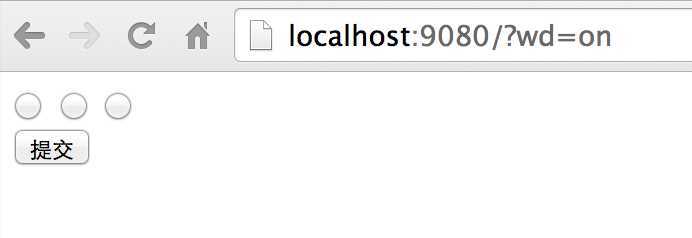
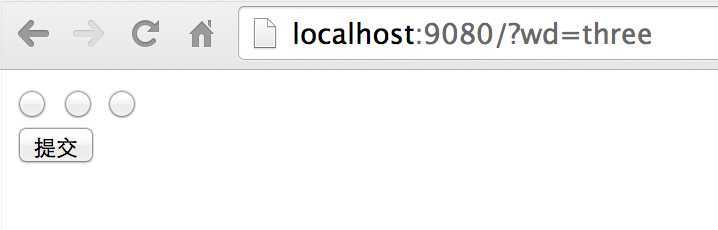
但是,单单使用radio属性的话,不管点击哪一个,结果的url中都不会有提示点击哪一个的信息,只会显示wd=on。这时候,就需要借助value属性
<form>
    <input type="radio" name="wd" value="one">
    <input type="radio" name="wd" value="two">
    <input type="radio" name="wd" value="three">
    <br>
    <input type="submit">
</form>
选择第三个按钮,最终会在url上显示相关信息
label标签: input 元素定义标注(标记)
为上述按钮添加文本标注
<form>
    <label>
        One
        <input type="radio" name="wd" value="one">
    </label>

    <label>
        Two
        <input type="radio" name="wd" value="two">
    </label>

    <label>
        Three
          <input type="radio" name="wd" value="three">
    </label>
    <br>
    <input type="submit">
</form>
selcet:创建单选或者多选元素
<form>
    <select name="q">
        <option>one</option>
        <option>two</option>
        <option>three</option>
    </select>

    <br>
    <input type="submit">
</form>
url的信息会以q=one(two或者three)的形式来显示
如果要改变url显示的信息,可以借助value
<form>
    <select name="q">
        <option value="1">one</option>
        <option value="2">two</option>
        <option value="3">three</option>
    </select>

    <br>
    <input type="submit">
</form>
结果会以q=1(2或者3)的形式显示在url中
验证服务端接受的内容是否是什么所期待的(what we receive is what we expect)
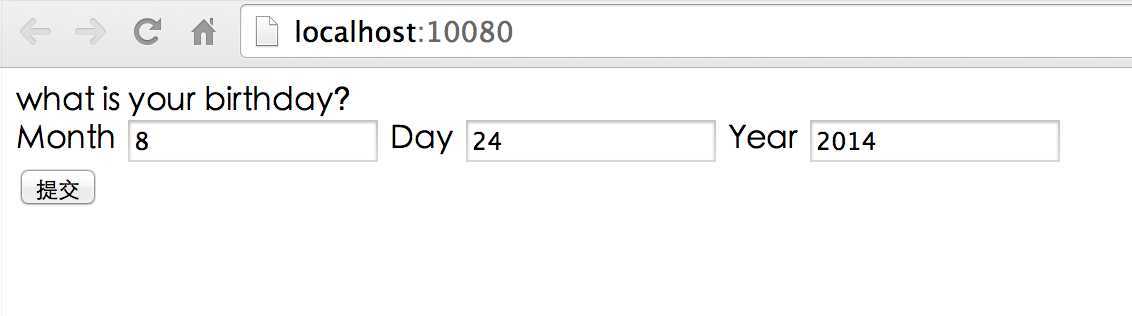
新建一个应用,让用户输入年/月/日
form="""
<form method="post">
what is your birthday?
<br>
<label> Month
<input type="text" name="month">
</label>
<label> Day
<input type="text" name="day">
</label>
<label> Year
<input type="text" name="year">
</label>
<br>
<input type="submit">
</form>
"""
class MainHandler(webapp2.RequestHandler):
def get(self):
self.response.write(form)
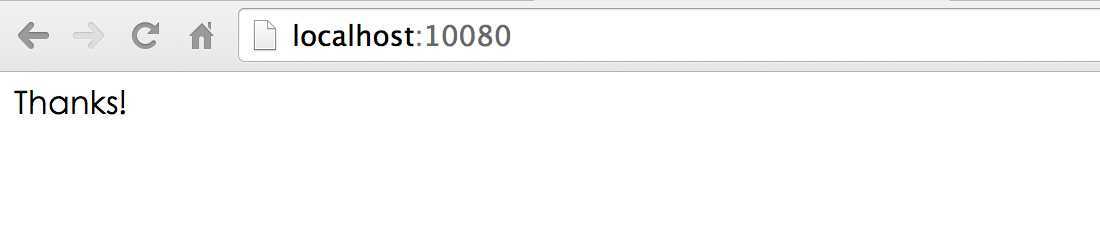
def post(self):
self.response.write("Thanks!")
app = webapp2.WSGIApplication([
(‘/‘, MainHandler)
], debug=True)
运行效果如下:
我们知道,年月日的输入是有限定的,可以采取两种方式对用户输入的数字进行限定:
- 用下拉列表的方式呈现所有合法的选项,供用户选择
- 对用户输入的信息进行验证
先编写对月份的验证
# judge the input of month is what we expect
#新建一个字典,来保存12个月的信息
months = [‘janurary‘,
         ‘February‘,
         ‘March‘,
         ‘April‘,
         ‘May‘,
         ‘june‘,
         ‘july‘,
         ‘August‘,
         ‘September‘,
         ‘October‘,
         ‘November‘,
         ‘December‘

]

def valid_month(month):
    if month:
                #将用户输入的月份的首字母大写化
        cap_month = month.capitalize()
               #遍历字典,看首字母大写化之后的月份是否在里面
    if cap_month in months:
        return cap_month
    else:
        print("not legal")
        return None
可以稍微修改,只校验前三个字母即可
# judge the input of month is what we expect
months = [‘janurary‘,
         ‘February‘,
         ‘March‘,
         ‘April‘,
         ‘May‘,
         ‘june‘,
         ‘july‘,
         ‘August‘,
         ‘September‘,
         ‘October‘,
         ‘November‘,
         ‘December‘

]

month_abbvs = dict((m[:3].lower(), m) for m in months)

def valid_month(month):
    if month:
        short_month = month[:3].lower()
        return month_abbvs.get(short_month)
对日期的验证较为简单,现在只是简单的验证,没有具体到某个月最大天数
def valid_day(day):
    if day and day.isdigit():
        day = int(day)
        if day > 0 and day <= 31:
            return day
对年份的验证和日期验证类似
def valid_year(year):
    if year and year.isdigit():
        year1 = int(year)
        if year > 1900 and year <2020:
            return year
接下来就可以将其整合到应用中了,先了解下整个验证的过程
- =》用户获取表格信息(get form)
- 《= 服务器返回表格页面(form date)
- =》用户提交表格信息(post date)
- 服务端对其进行验证:验证成功,返回感谢页面;验证失败,返回表格页面
也就是说,我们的验证机制应该包括三个方面的内容:
- 验证用户的输入是否合法
- 如果不合法的话,再次返回表格输入页面
- 提示错误信息
import webapp2

def valid_day(day):
    if day and day.isdigit():
        day = int(day)
        if day > 0 and day <= 31:
            return day

def valid_year(year):
    if year and year.isdigit():
        year = int(year)
        if year > 1900 and year <2020:
            return year

# judge the input of month is what we expect
months = [‘janurary‘,
         ‘February‘,
         ‘March‘,
         ‘April‘,
         ‘May‘,
         ‘june‘,
         ‘july‘,
         ‘August‘,
         ‘September‘,
         ‘October‘,
         ‘November‘,
         ‘December‘

]

month_abbvs = dict((m[:3].lower(), m) for m in months)

def valid_month(month):
    if month:
        short_month = month[:3].lower()
        return month_abbvs.get(short_month)


form="""
<form method="post">
    what is your birthday?
    <br>

    <label> Month
        <input type="text" name="month">
    </label>

    <label> Day
        <input type="text" name="day">
    </label>

    <label> Year
        <input type="text" name="year">
    </label>

    <br>
    <input type="submit">
</form>
"""

class MainHandler(webapp2.RequestHandler):
    def get(self):
        self.response.write(form)

    def post(self):
        user_month = valid_month(self.request.get(‘month‘))
        user_day = valid_day(self.request.get(‘day‘))
        user_year = valid_year(self.request.get(‘year‘))

        # not x means if x is any kind of zero or empty container, or False...
        if not (user_month and user_day and user_year):
            self.response.write(form)
        else:
            self.response.write("Thanks! That‘s a totally valid date !")


app = webapp2.WSGIApplication([
    (‘/‘, MainHandler)
], debug=True)
程序不过是按照刚才的分析来做,在post方法下添加了对用户数据输入的验证,然后判断是否合法,并根据不同判断返回不同信息。不过该程序还差一样提示错误信息。
先补充一个字符串替代的知识,共有三种方式可以在字符串中嵌入变量:
t1 = "I think %s is perfectly normal things to do in public"
def sub1(s):
    return t1 %s

t2 = "I think %s and %s are perfectly normal things to do in public"
def sub2(s1,s2):
    return t2 %(s1,s2)

t3 = "I‘m %(nickname)s. My real name is %(name)s, but my friend all call me %(nickname)s"
def sub_3(name, nickname):
    return t3 %{‘name‘:name, ‘nickname‘:nickname}
除了提示错误信息之外,还增加了一个功能:当用户输入错误信息的时候,错误信息仍然显示在文本框里面,以避免用户需要全部重新输入一遍
import webapp2

def valid_day(day):
    if day and day.isdigit():
        day = int(day)
        if day > 0 and day <= 31:
            return day

def valid_year(year):
    if year and year.isdigit():
        year = int(year)
        if year > 1900 and year <2020:
            return year

# judge the input of month is what we expect
months = [‘janurary‘,
         ‘February‘,
         ‘March‘,
         ‘April‘,
         ‘May‘,
         ‘june‘,
         ‘july‘,
         ‘August‘,
         ‘September‘,
         ‘October‘,
         ‘November‘,
         ‘December‘

]

month_abbvs = dict((m[:3].lower(), m) for m in months)

def valid_month(month):
    if month:
        short_month = month[:3].lower()
        return month_abbvs.get(short_month)

#嵌入了四个变量 month,day,year,error
form="""
<form method="post">
    what is your birthday?
    <br>

    <label> Month
        <input type="text" name="month" value="%(month)s">
    </label>

    <label> Day
        <input type="text" name="day" value="%(day)s">
    </label>

    <label> Year
        <input type="text" name="year" value="%(year)s">
    </label>

    <div style="color:red">%(error)s</div>
    <br>
    <input type="submit">
</form>
"""

class MainHandler(webapp2.RequestHandler):
    #因为根据数据合法性所返回的结果是不同的,所以统一用一个函数编写
    def  write_form(self,error="",month="",day="",year=""):
        self.response.write(form %{"error": error,
                                   "month": month,
                                   "day": day,
                                   "year": year})

   #step1:获取表格信息,四个变量不需要任何参数
    def get(self):
        self.write_form()

    #setp2:用户提交表格信息
    def post(self):
        #获取用户输入信息
        user_month = self.request.get(‘month‘)
        user_day = self.request.get(‘day‘)
        user_year = self.request.get(‘year‘)

        #判断输入信息合法与否
        month = valid_month(user_month)
        day = valid_day(user_day)
        year = valid_year(user_year)

        # not x means if x is any kind of zero or empty container, or False...
        if not (month and day and year):
           #如果数据输入没有通过验证,除了返回错误信息外,还返回原来用户的输入信息
            self.write_form("That donesn‘t look valid to me ,friend.",
                             user_month, user_day, user_year)
        else:
            self.response.write("Thanks! That‘s a totally valid date !")


app = webapp2.WSGIApplication([
    (‘/‘, MainHandler)
], debug=True)
上述的程序仍然有bug,就是文本框无法对输入字符进行处理,例如,在月份那栏输入foo">drep!,结果显示如下
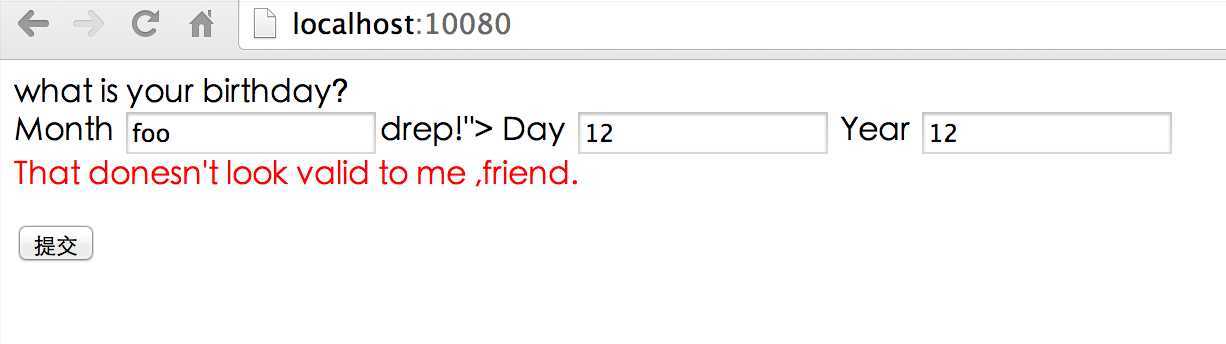
因为用户输入的">被当做特殊字符处理,所以才导致出错。我们需要用到转移字符。例如,要在浏览器打印<html>应该如何打印?正确方式是用 < 与 > 的转义字符来替代
What if i want to talk about <html> in html?
What if i want to talk about <html>in html?
&:&;
<: <
>: >
" : "
那么,如何解决上述问题呢?
编写函数,用于将用户在文本框输入的内容转化成转义字符,python本身也有内置模块(cgi)直接支持
#import cgi
def escape_html(s):
#return cgi.escape(s,quote = True)
for(i,o) in (("&","&"),
(">",">"),
("<","<"),
(‘"‘,""")):
s = s.replace(i,o)
return s
然后重写write_form函数即可
 def  write_form(self,error="",month="",day="",year=""):
        self.response.write(form %{"error": error,
                                   "month": escape_html(month),
                                   "day": escape_html(day),
                                   "year": escape_html(year)})
五、重定向
当我们输入正确的日期时,会返回一个感谢界面

如果解决上述的两个问题?答案就是给对返回的页面进行重定向,包括以下三个步骤:
- 做一个“thank"的hander
- 添加 /thank的url
- 进行定向
 # not x means if x is any kind of zero or empty container, or False...
        if not (month and day and year):
            self.write_form("That donesn‘t look valid to me ,friend.",
                             user_month, user_day, user_year)
        else:
           #进行定向
            self.redirect("/thanks")

#添加Thank的Handler
class ThanksHandler(webapp2.RequestHandler):
    def get(self):
        self.response.write("Thanks! That‘s a totally valid date !")

#添加thank的url
app = webapp2.WSGIApplication([
    (‘/‘, MainHandler),(‘/thanks‘,ThanksHandler)
], debug=True)
How to build a blog 02:Suck World
标签:style blog http color os 使用 io 文件 for
原文地址:http://www.cnblogs.com/ihuangmx/p/3930149.html
