标签:UI book 登录 after less remove node system epo
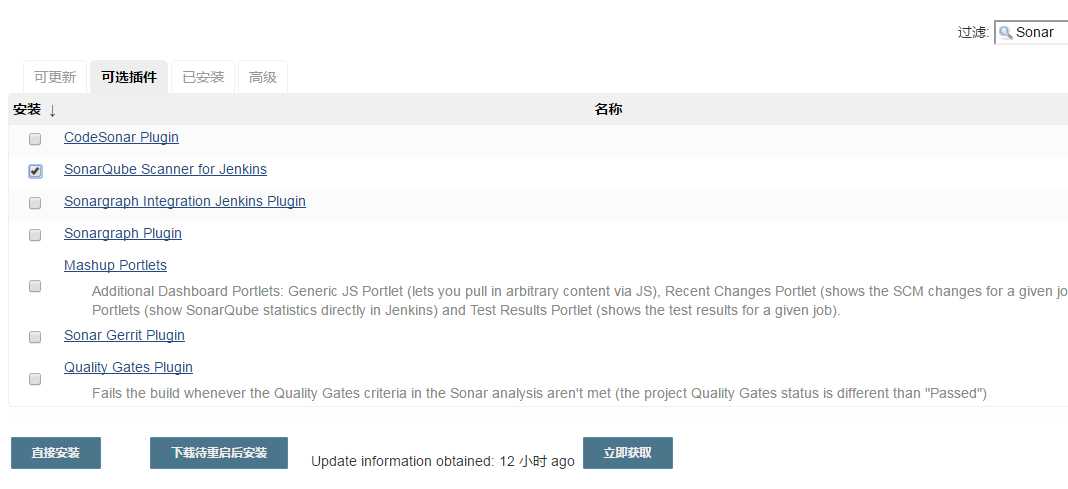
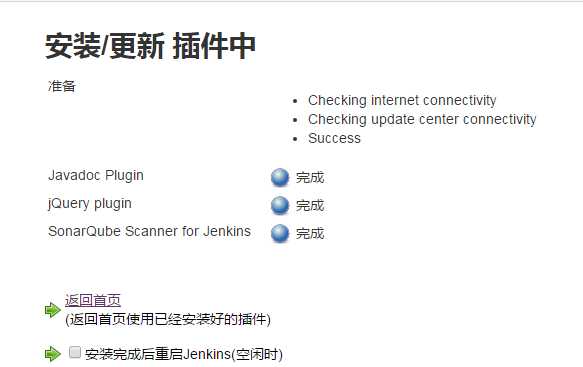
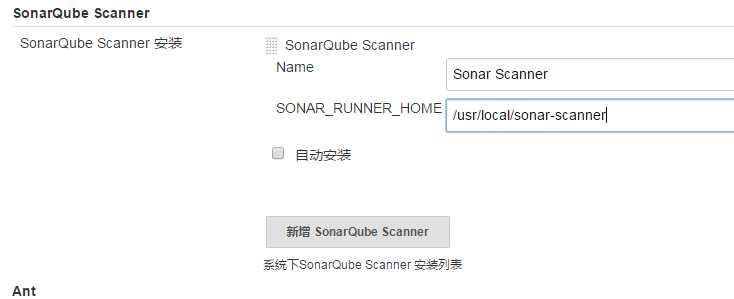
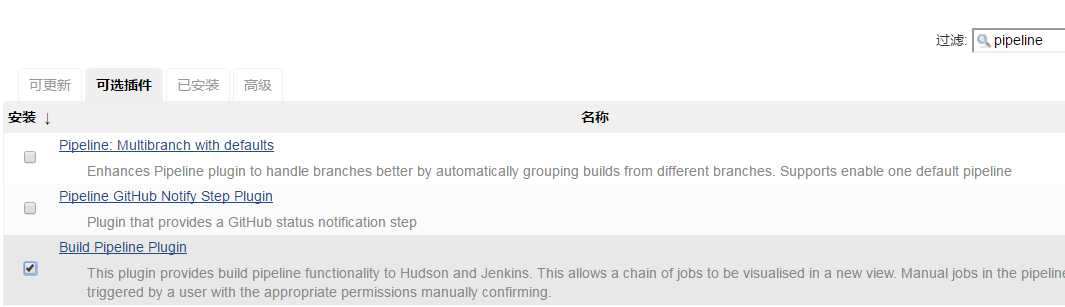
安装sonar Scanner

[root@linux-node1 plugins]# cd /usr/local/src/
[root@linux-node1 src]# ls
mysql-5.6.30-linux-glibc2.5-x86_64.tar.gz  sonarqube-5.6.zip
[root@linux-node1 src]# rz -E
rz waiting to receive.
[root@linux-node1 src]# ls
mysql-5.6.30-linux-glibc2.5-x86_64.tar.gz  sonar-scanner-2.6.1.zip
sonarqube-5.6.zip
[root@linux-node1 src]#
[root@linux-node1 plugins]# pwd
/usr/local/sonarqube/extensions/plugins
[root@linux-node1 plugins]# ll
total 29180
-rw-r--r-- 1 root root     128 Apr 11  2016 README.txt
-rw-r--r-- 1 root root 7797781 Apr  7  2016 sonar-csharp-plugin-5.0.jar
-rw-r--r-- 1 root root 3191477 Apr 28  2016 sonar-java-plugin-3.13.1.jar
-rw-r--r-- 1 root root 1678073 Apr  7  2016 sonar-javascript-plugin-2.11.jar
-rw-r--r-- 1 root root 3733262 Apr 29 17:26 sonar-php-plugin-2.10.0.2087.jar
-rw-r--r-- 1 root root 3663678 Apr 29 17:11 sonar-python-plugin-1.7.0.1195.jar
-rw-r--r-- 1 root root 3233128 Apr  7  2016 sonar-scm-git-plugin-1.2.jar
-rw-r--r-- 1 root root 6564535 Apr  7  2016 sonar-scm-svn-plugin-1.3.jar
[root@linux-node1 plugins]# rz -E
rz waiting to receive.
[root@linux-node1 plugins]# ll
total 29216
-rw-r--r-- 1 root root     128 Apr 11  2016 README.txt
-rw-r--r-- 1 root root 7797781 Apr  7  2016 sonar-csharp-plugin-5.0.jar
-rw-r--r-- 1 root root 3191477 Apr 28  2016 sonar-java-plugin-3.13.1.jar
-rw-r--r-- 1 root root 1678073 Apr  7  2016 sonar-javascript-plugin-2.11.jar
-rw-r--r-- 1 root root   36538 Apr 29 17:34 sonar-l10n-zh-plugin-1.11.jar
-rw-r--r-- 1 root root 3733262 Apr 29 17:26 sonar-php-plugin-2.10.0.2087.jar
-rw-r--r-- 1 root root 3663678 Apr 29 17:11 sonar-python-plugin-1.7.0.1195.jar
-rw-r--r-- 1 root root 3233128 Apr  7  2016 sonar-scm-git-plugin-1.2.jar
-rw-r--r-- 1 root root 6564535 Apr  7  2016 sonar-scm-svn-plugin-1.3.jar
[root@linux-node1 plugins]#
[root@linux-node1 plugins]# /usr/local/sonarqube/bin/linux-x86-64/sonar.sh stop
Stopping SonarQube...
Waiting for SonarQube to exit...
Stopped SonarQube.
[root@linux-node1 plugins]# lsof -i:9000
[root@linux-node1 plugins]# /usr/local/sonarqube/bin/linux-x86-64/sonar.sh start
Starting SonarQube...
Started SonarQube.
[root@linux-node1 plugins]# lsof -i:9000
[root@linux-node1 plugins]# lsof -i:9000
[root@linux-node1 plugins]# lsof -i:9000
[root@linux-node1 plugins]# lsof -i:9000
COMMAND   PID USER   FD   TYPE DEVICE SIZE/OFF NODE NAME
java    43957 root   77u  IPv4 195191      0t0  TCP *:cslistener (LISTEN)
[root@linux-node1 plugins]#
[root@linux-node1 plugins]# cd /usr/local/src/
[root@linux-node1 src]# ls
mysql-5.6.30-linux-glibc2.5-x86_64.tar.gz  sonar-scanner-2.6.1.zip
sonarqube-5.6.zip
[root@linux-node1 src]#
[root@linux-node1 src]# unzip sonar-scanner-2.6.1.zip
Archive:  sonar-scanner-2.6.1.zip
   creating: sonar-scanner-2.6.1/bin/
  inflating: sonar-scanner-2.6.1/bin/sonar-scanner
  inflating: sonar-scanner-2.6.1/bin/sonar-runner
   creating: sonar-scanner-2.6.1/conf/
  inflating: sonar-scanner-2.6.1/conf/sonar-scanner.properties
   creating: sonar-scanner-2.6.1/lib/
  inflating: sonar-scanner-2.6.1/lib/sonar-scanner-cli-2.6.1.jar
  inflating: sonar-scanner-2.6.1/bin/sonar-runner.bat
  inflating: sonar-scanner-2.6.1/bin/sonar-scanner.bat
[root@linux-node1 src]# ll
total 422960
-rw-r--r-- 1 root root 314592758 Apr  9 13:38 mysql-5.6.30-linux-glibc2.5-x86_64.tar.gz
-rw-r--r-- 1 root root 118012667 Apr 29 15:57 sonarqube-5.6.zip
drwxr-xr-x 5 root root        37 Apr 29 17:52 sonar-scanner-2.6.1
-rw-r--r-- 1 root root    501750 Apr 29 17:16 sonar-scanner-2.6.1.zip
[root@linux-node1 src]# mv sonar-scanner-2.6.1 /usr/local/
[root@linux-node1 src]# ln -s /usr/local/sonar-scanner-2.6.1/ /usr/local/sonar-scanner
[root@linux-node1 src]#
[root@linux-node1 local]# cd /usr/local/
[root@linux-node1 local]# ll
total 4
drwxr-xr-x.  2 root  root     6 Jun 10  2014 bin
drwxr-xr-x.  2 root  root     6 Jun 10  2014 etc
drwxr-xr-x.  2 root  root     6 Jun 10  2014 games
drwxr-xr-x.  2 root  root     6 Jun 10  2014 include
drwxr-xr-x.  2 root  root     6 Jun 10  2014 lib
drwxr-xr-x.  2 root  root     6 Jun 10  2014 lib64
drwxr-xr-x.  2 root  root     6 Jun 10  2014 libexec
lrwxrwxrwx   1 mysql mysql   46 Apr  4 14:15 mysql -> /usr/local/mysql-5.6.30-linux-glibc2.5-x86_64/
drwxr-xr-x  13 mysql mysql 4096 Apr 29 16:01 mysql-5.6.30-linux-glibc2.5-x86_64
drwxr-xr-x.  2 root  root     6 Jun 10  2014 sbin
drwxr-xr-x.  5 root  root    46 Feb  6 01:26 share
lrwxrwxrwx   1 root  root    25 Apr 29 16:00 sonarqube -> /usr/local/sonarqube-5.6/
drwxr-xr-x  10 root  root   111 Jun  1  2016 sonarqube-5.6
lrwxrwxrwx   1 root  root    31 Apr 29 17:53 sonar-scanner -> /usr/local/sonar-scanner-2.6.1/
drwxr-xr-x   5 root  root    37 Apr 29 17:52 sonar-scanner-2.6.1
drwxr-xr-x.  2 root  root   108 Apr 29 17:52 src
[root@linux-node1 local]#
[root@linux-node1 local]# cd sonar-scanner
[root@linux-node1 sonar-scanner]# ll
total 0
drwxr-xr-x 2 root root 92 May 12  2016 bin
drwxr-xr-x 2 root root 37 May 12  2016 conf
drwxr-xr-x 2 root root 40 May 12  2016 lib
[root@linux-node1 sonar-scanner]# cd conf/
[root@linux-node1 conf]# ll
total 4
-rw-r--r-- 1 root root 775 May 12  2016 sonar-scanner.properties
[root@linux-node1 conf]# pwd
/usr/local/sonar-scanner/conf
[root@linux-node1 conf]#
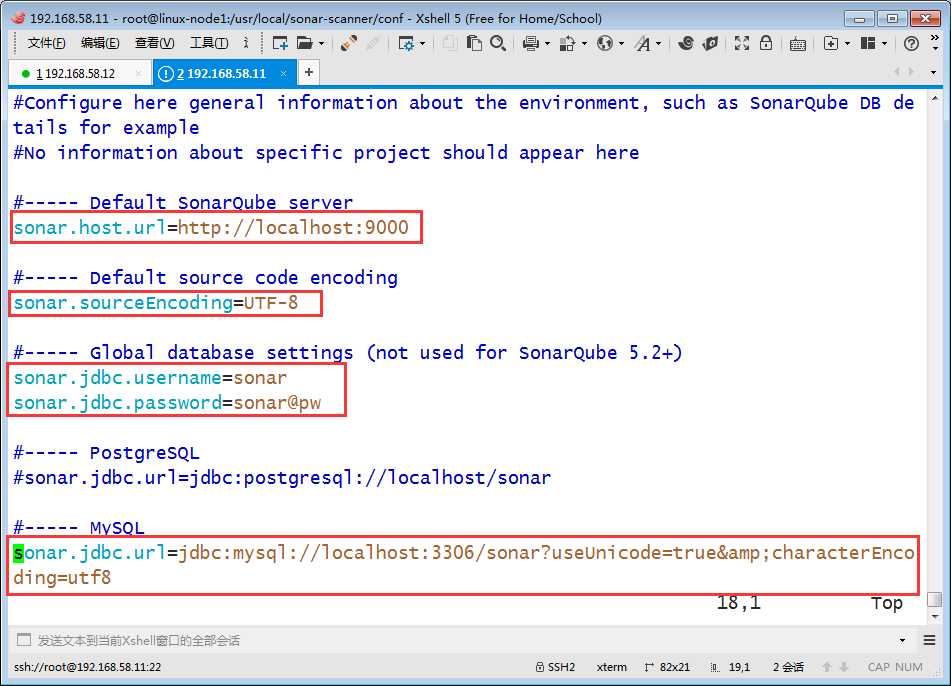
保存,退出
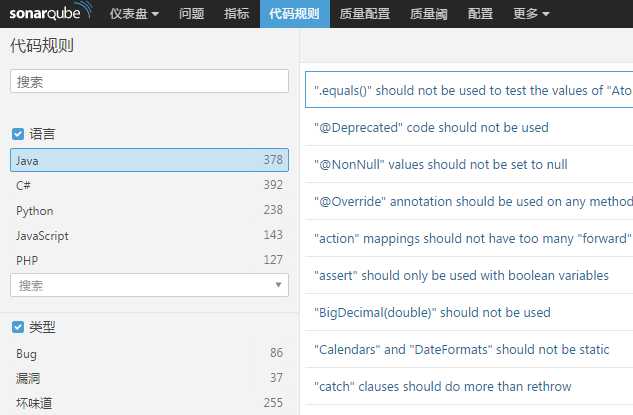
找一些代码 对它进行分析
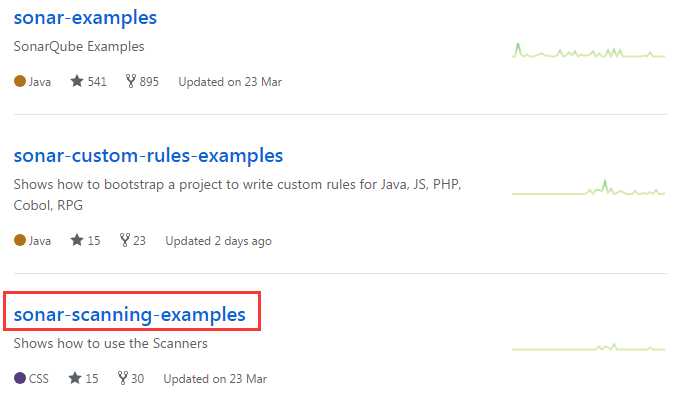
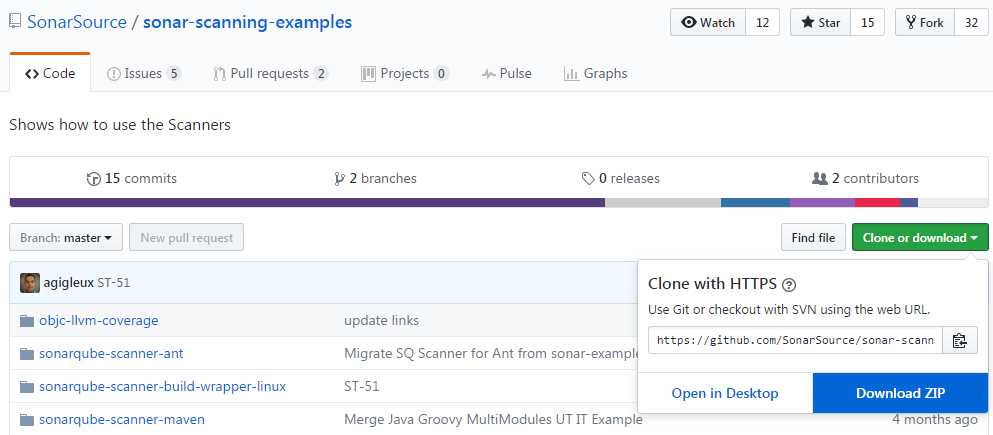
sonar官方提供了个样板包,有各种源的代码
打开下面地址
https://github.com/SonarSource
找到下面东西
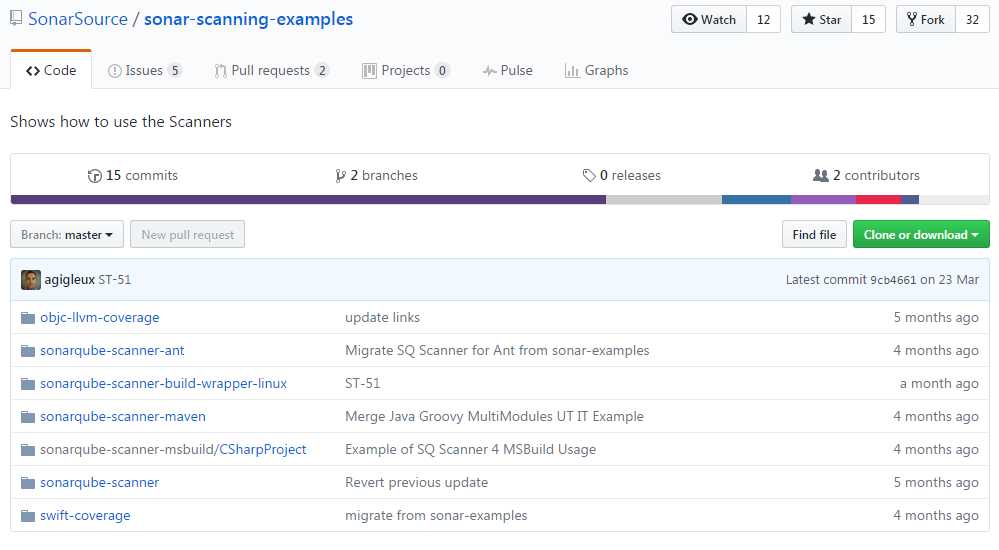
[root@linux-node1 ~]# ls
anaconda-ks.cfg  sonar-scanning-examples-master
ks.cfg           sonar-scanning-examples-master.zip
[root@linux-node1 ~]# cd sonar-scanning-examples-master
[root@linux-node1 sonar-scanning-examples-master]# ls
objc-llvm-coverage     sonarqube-scanner-build-wrapper-linux  swift-coverage
sonarqube-scanner      sonarqube-scanner-maven
sonarqube-scanner-ant  sonarqube-scanner-msbuild
[root@linux-node1 sonar-scanning-examples-master]# cd sonarqube-scanner
[root@linux-node1 sonarqube-scanner]# ls
copybooks  coverage-report  sonar-project.properties  src
[root@linux-node1 src]# pwd
/root/sonar-scanning-examples-master/sonarqube-scanner/src
[root@linux-node1 src]# ll
total 0
drwxr-xr-x 2 root root 46 Mar 23 18:26 abap
drwxr-xr-x 2 root root 25 Mar 23 18:26 cobol
drwxr-xr-x 2 root root 39 Mar 23 18:26 css
drwxr-xr-x 2 root root 33 Mar 23 18:26 directory
drwxr-xr-x 2 root root 22 Mar 23 18:26 erlang
drwxr-xr-x 2 root root 47 Mar 23 18:26 flex
drwxr-xr-x 2 root root 53 Mar 23 18:26 java
drwxr-xr-x 2 root root 22 Mar 23 18:26 javascript
drwxr-xr-x 2 root root 49 Mar 23 18:26 package
drwxr-xr-x 2 root root 21 Mar 23 18:26 php
drwxr-xr-x 2 root root 73 Mar 23 18:26 pli
drwxr-xr-x 2 root root 44 Mar 23 18:26 python
drwxr-xr-x 2 root root 26 Mar 23 18:26 rpg
drwxr-xr-x 2 root root 75 Mar 23 18:26 samples
drwxr-xr-x 2 root root 40 Mar 23 18:26 sql
drwxr-xr-x 2 root root 26 Mar 23 18:26 swift
drwxr-xr-x 2 root root 59 Mar 23 18:26 vb6
drwxr-xr-x 2 root root 25 Mar 23 18:26 web
drwxr-xr-x 2 root root 29 Mar 23 18:26 xml
[root@linux-node1 src]#
[root@linux-node1 sonarqube-scanner]# ll
total 8
drwxr-xr-x  2 root root   75 Mar 23 18:26 copybooks
drwxr-xr-x  2 root root   39 Mar 23 18:26 coverage-report
-rw-r--r--  1 root root  647 Mar 23 18:26 sonar-project.properties
drwxr-xr-x 21 root root 4096 Mar 23 18:26 src
下面配置文件
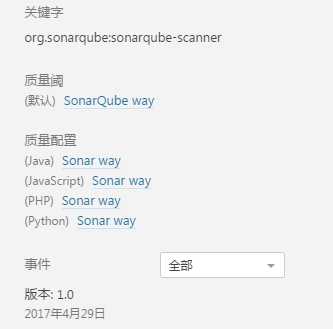
[root@linux-node1 sonarqube-scanner]# cat sonar-project.properties
sonar.projectKey=org.sonarqube:sonarqube-scanner
sonar.projectName=Example of SonarQube Scanner Usage
sonar.projectVersion=1.0

sonar.sources=src,copybooks

sonar.sourceEncoding=UTF-8

## Cobol Specific Properties

# comma-separated paths to directories with copybooks
sonar.cobol.copy.directories=copybooks
# comma-separated list of suffixes
sonar.cobol.file.suffixes=cbl,cpy
sonar.cobol.copy.suffixes=cpy


## Flex Specific Properties

# retrieve code coverage data from the Cobertura report
sonar.flex.cobertura.reportPath=coverage-report/coverage-cobertua-flex.xml


# PL/I Specific Properties
sonar.pli.marginLeft=2
sonar.pli.marginRight=0
[root@linux-node1 sonarqube-scanner]#
进行扫描
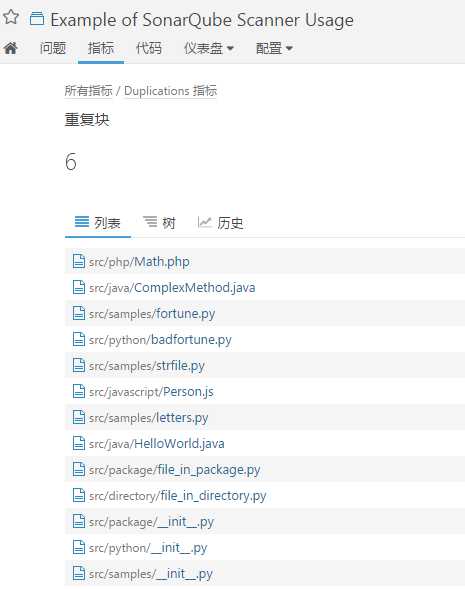
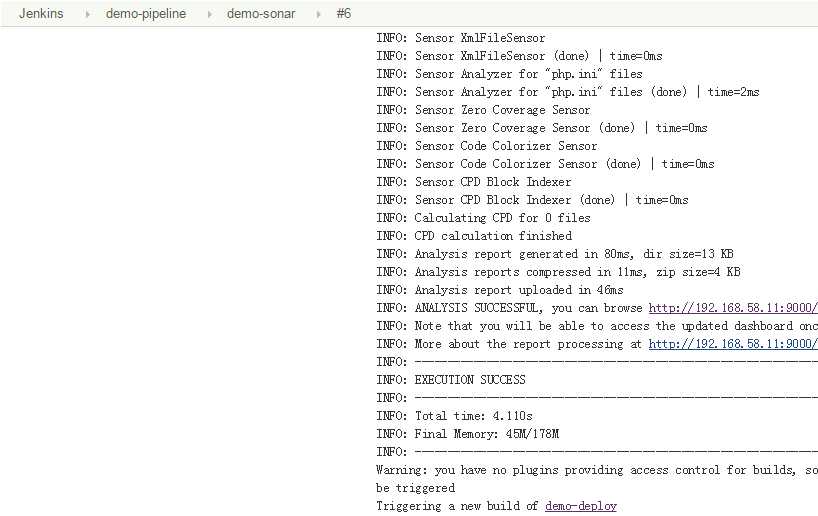
[root@linux-node1 sonarqube-scanner]# /usr/local/sonar-scanner/bin/sonar-scanner
INFO: Scanner configuration file: /usr/local/sonar-scanner/conf/sonar-scanner.properties
INFO: Project root configuration file: /root/sonar-scanning-examples-master/sonarqube-scanner/sonar-project.properties
INFO: SonarQube Scanner 2.6.1
INFO: Java 1.8.0_131 Oracle Corporation (64-bit)
INFO: Linux 3.10.0-229.el7.x86_64 amd64
INFO: User cache: /root/.sonar/cache
INFO: Load global repositories
INFO: Load global repositories (done) | time=153ms
WARN: Property ‘sonar.jdbc.url‘ is not supported any more. It will be ignored. There is no longer any DB connection to the SQ database.
WARN: Property ‘sonar.jdbc.username‘ is not supported any more. It will be ignored. There is no longer any DB connection to the SQ database.
WARN: Property ‘sonar.jdbc.password‘ is not supported any more. It will be ignored. There is no longer any DB connection to the SQ database.
INFO: User cache: /root/.sonar/cache
INFO: Load plugins index
INFO: Load plugins index (done) | time=32ms
INFO: Plugin [l10nzh] defines ‘l10nen‘ as base plugin. This metadata can be removed from manifest of l10n plugins since version 5.2.
INFO: SonarQube server 5.6
INFO: Default locale: "en_US", source code encoding: "UTF-8"
INFO: Process project properties
INFO: Load project repositories
INFO: Load project repositories (done) | time=33ms
INFO: Load quality profiles
INFO: Load quality profiles (done) | time=49ms
INFO: Load active rules
INFO: Load active rules (done) | time=582ms
WARN: SCM provider autodetection failed. No SCM provider claims to support this project. Please use sonar.scm.provider to define SCM of your project.
INFO: Publish mode
INFO: -------------  Scan Example of SonarQube Scanner Usage
INFO: Load server rules
INFO: Load server rules (done) | time=124ms
INFO: Base dir: /root/sonar-scanning-examples-master/sonarqube-scanner
INFO: Working dir: /root/sonar-scanning-examples-master/sonarqube-scanner/.sonar
INFO: Source paths: src, copybooks
INFO: Source encoding: UTF-8, default locale: en_US
INFO: Index files
INFO: 13 files indexed
INFO: Quality profile for java: Sonar way
INFO: Quality profile for js: Sonar way
INFO: Quality profile for php: Sonar way
INFO: Quality profile for py: Sonar way
INFO: JaCoCoSensor: JaCoCo report not found : /root/sonar-scanning-examples-master/sonarqube-scanner/target/jacoco.exec
INFO: JaCoCoItSensor: JaCoCo IT report not found: /root/sonar-scanning-examples-master/sonarqube-scanner/target/jacoco-it.exec
INFO: Sensor JavaSquidSensor
INFO: Configured Java source version (sonar.java.source): none
INFO: JavaClasspath initialization...
WARN: Bytecode of dependencies was not provided for analysis of source files, you might end up with less precise results. Bytecode can be provided using sonar.java.libraries property
INFO: JavaClasspath initialization done: 1 ms
INFO: JavaTestClasspath initialization...
WARN: Bytecode of dependencies was not provided for analysis of test files, you might end up with less precise results. Bytecode can be provided using sonar.java.test.libraries property
INFO: JavaTestClasspath initialization done: 1 ms
INFO: Java Main Files AST scan...
INFO: 2 source files to be analyzed
INFO: Java Main Files AST scan done: 639 ms
WARN: Java bytecode has not been made available to the analyzer. The org.sonar.java.bytecode.visitor.DependenciesVisitor@26e0d39c, org.sonar.java.checks.unused.UnusedPrivateMethodCheck@56382bc9 are disabled.
INFO: Java Test Files AST scan...
INFO: 2/2 source files have been analyzed
INFO: 0 source files to be analyzed
INFO: Java Test Files AST scan done: 5 ms
INFO: Sensor JavaSquidSensor (done) | time=1306ms
INFO: Sensor Lines Sensor
INFO: 0/0 source files have been analyzed
INFO: Sensor Lines Sensor (done) | time=6ms
INFO: Sensor PythonXUnitSensor
INFO: Sensor PythonXUnitSensor (done) | time=24ms
INFO: Sensor SurefireSensor
INFO: parsing /root/sonar-scanning-examples-master/sonarqube-scanner/target/surefire-reports
INFO: Sensor SurefireSensor (done) | time=7ms
INFO: Sensor JavaScriptSquidSensor
INFO: 1 source files to be analyzed
INFO: Sensor JavaScriptSquidSensor (done) | time=486ms
INFO: Sensor SCM Sensor
INFO: No SCM system was detected. You can use the ‘sonar.scm.provider‘ property to explicitly specify it.
INFO: Sensor SCM Sensor (done) | time=0ms
INFO: Sensor Python Squid Sensor
INFO: 1/1 source files have been analyzed
INFO: Python unit test coverage
INFO: Python integration test coverage
INFO: Python overall test coverage
INFO: Sensor Python Squid Sensor (done) | time=384ms
INFO: Sensor PHP sensor
INFO: 1 source files to be analyzed
INFO: 1/1 source files have been analyzed
INFO: No PHPUnit test report provided (see ‘sonar.php.tests.reportPath‘ property)
INFO: No PHPUnit unit test coverage report provided (see ‘sonar.php.coverage.reportPath‘ property)
INFO: No PHPUnit integration test coverage report provided (see ‘sonar.php.coverage.itReportPath‘ property)
INFO: No PHPUnit overall coverage report provided (see ‘sonar.php.coverage.overallReportPath‘ property)
INFO: Sensor PHP sensor (done) | time=717ms
INFO: Sensor Analyzer for "php.ini" files
INFO: Sensor Analyzer for "php.ini" files (done) | time=3ms
INFO: Sensor org.sonar.plugins.javascript.lcov.UTCoverageSensor
INFO: Sensor org.sonar.plugins.javascript.lcov.UTCoverageSensor (done) | time=0ms
INFO: Sensor org.sonar.plugins.javascript.lcov.ITCoverageSensor
INFO: Sensor org.sonar.plugins.javascript.lcov.ITCoverageSensor (done) | time=0ms
INFO: Sensor Zero Coverage Sensor
INFO: Sensor Zero Coverage Sensor (done) | time=36ms
INFO: Sensor Code Colorizer Sensor
INFO: Sensor Code Colorizer Sensor (done) | time=1ms
INFO: Sensor CPD Block Indexer
INFO: JavaCpdBlockIndexer is used for java
INFO: DefaultCpdBlockIndexer is used for js
INFO: DefaultCpdBlockIndexer is used for php
INFO: DefaultCpdBlockIndexer is used for py
INFO: Sensor CPD Block Indexer (done) | time=81ms
INFO: Calculating CPD for 7 files
INFO: CPD calculation finished
INFO: Analysis report generated in 108ms, dir size=64 KB
INFO: Analysis reports compressed in 40ms, zip size=38 KB
INFO: Analysis report uploaded in 298ms
INFO: ANALYSIS SUCCESSFUL, you can browse http://localhost:9000/dashboard/index/org.sonarqube:sonarqube-scanner
INFO: Note that you will be able to access the updated dashboard once the server has processed the submitted analysis report
INFO: More about the report processing at http://localhost:9000/api/ce/task?id=AVu6Wsaeyj9VSYmN4Z_C
INFO: ------------------------------------------------------------------------
INFO: EXECUTION SUCCESS
INFO: ------------------------------------------------------------------------
INFO: Total time: 9.136s
INFO: Final Memory: 51M/252M
INFO: ------------------------------------------------------------------------
[root@linux-node1 sonarqube-scanner]# cat sonar-project.properties
sonar.projectKey=org.sonarqube:sonarqube-scanner
sonar.projectName=Example of SonarQube Scanner Usage
sonar.projectVersion=1.0

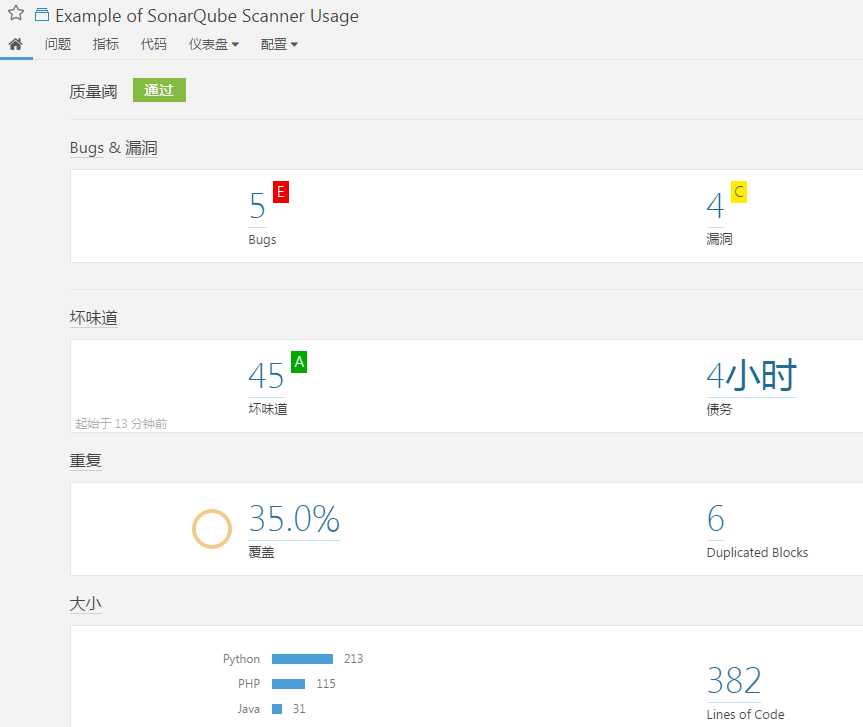

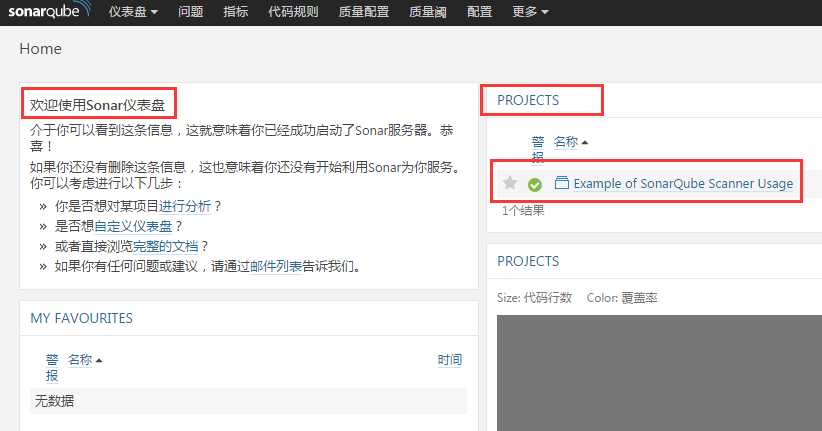
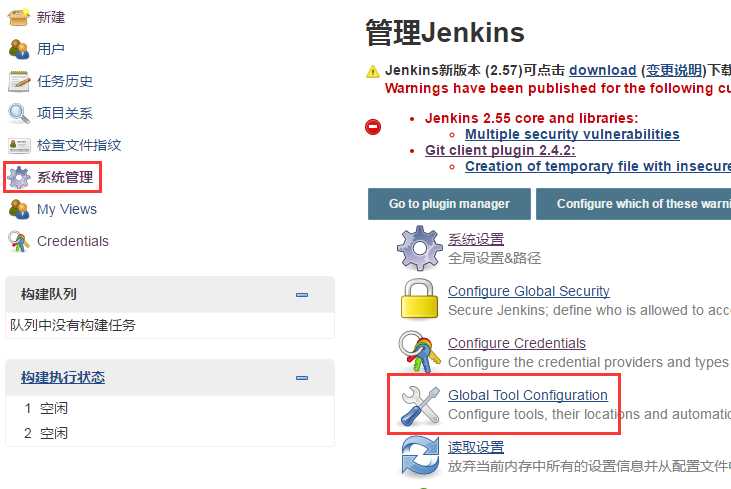
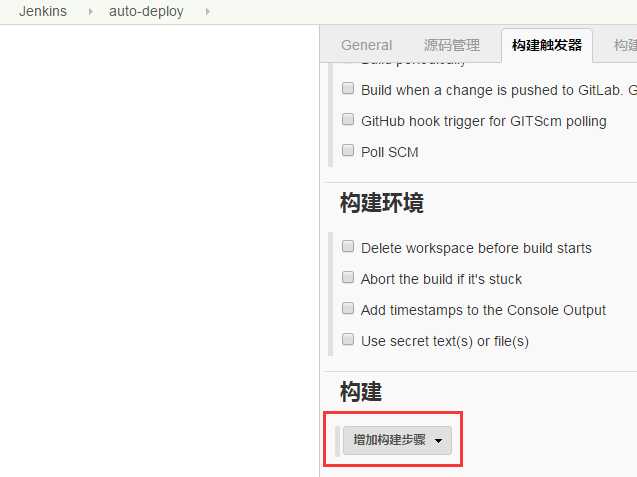
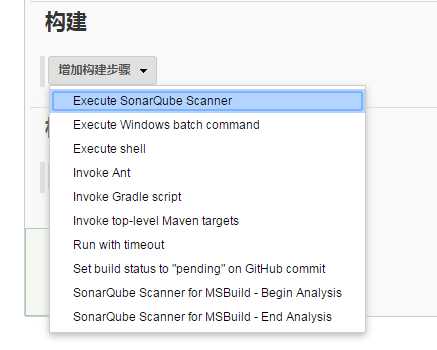
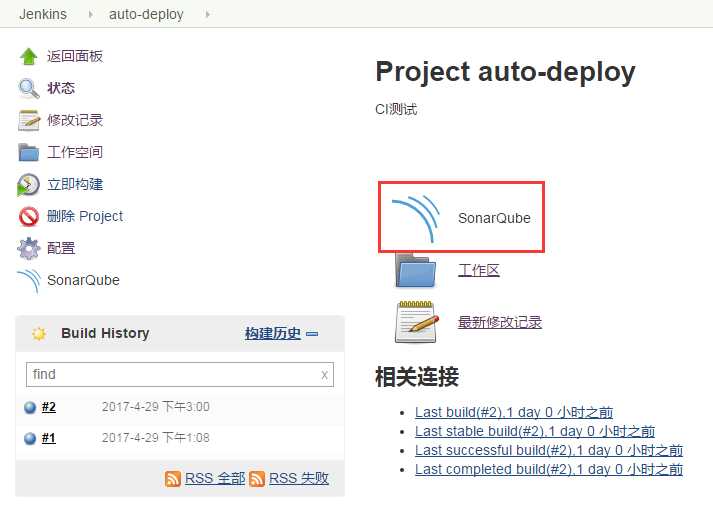
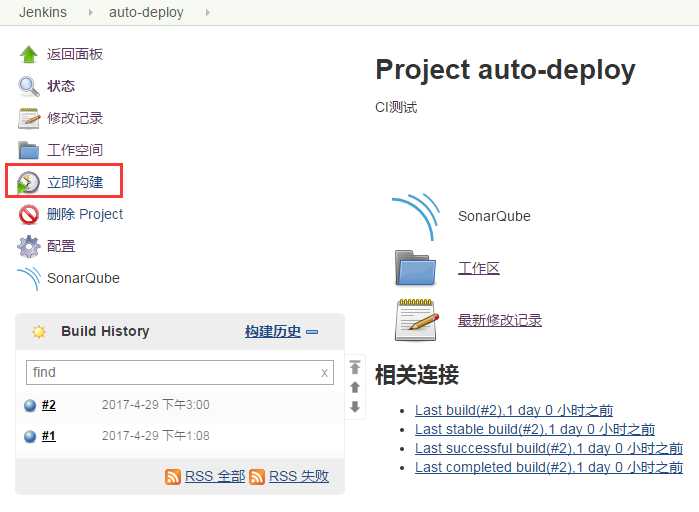
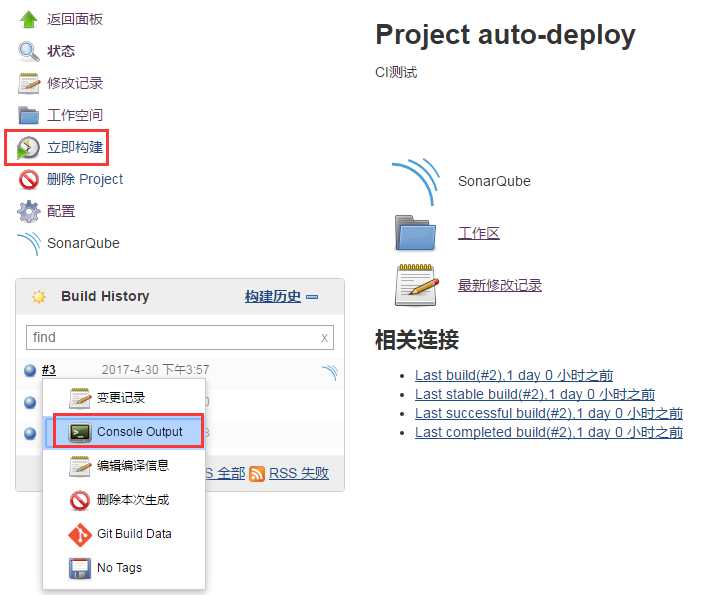
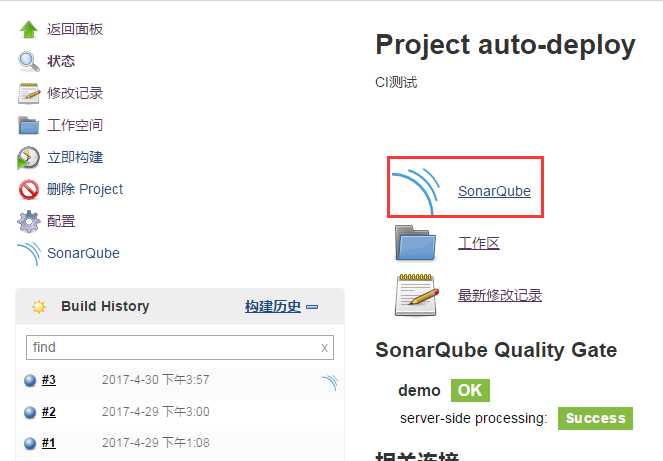
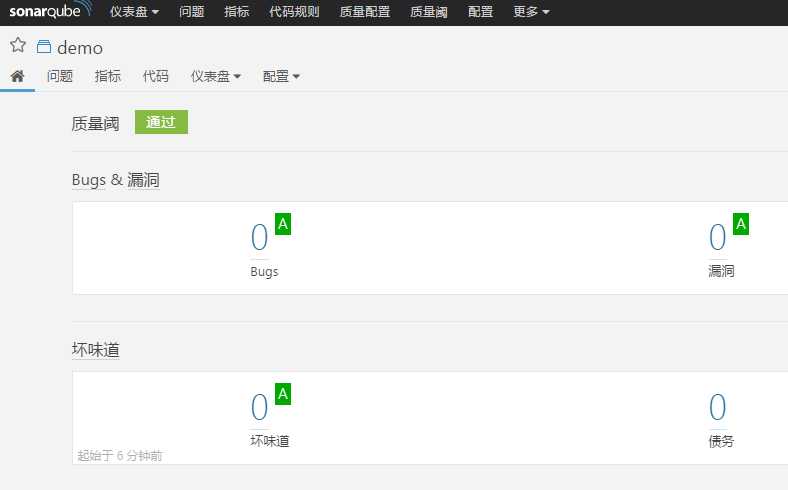
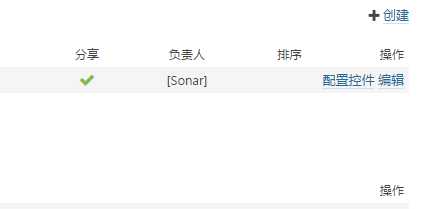
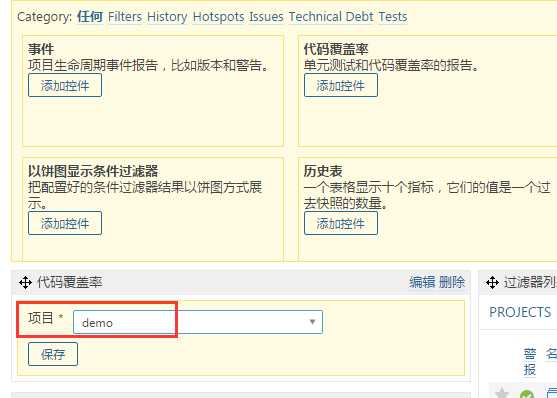
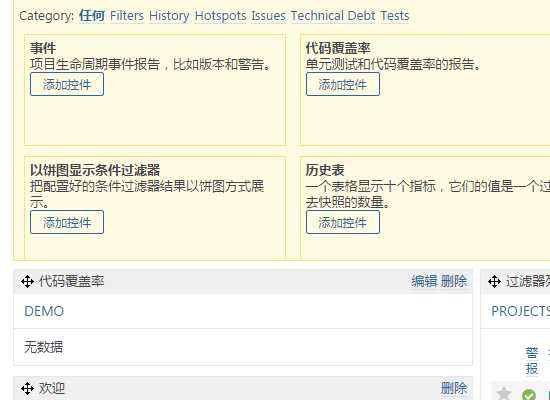
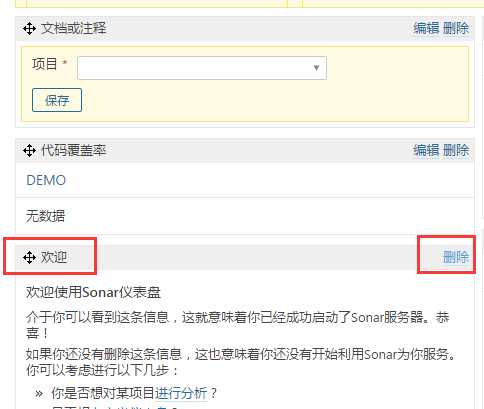
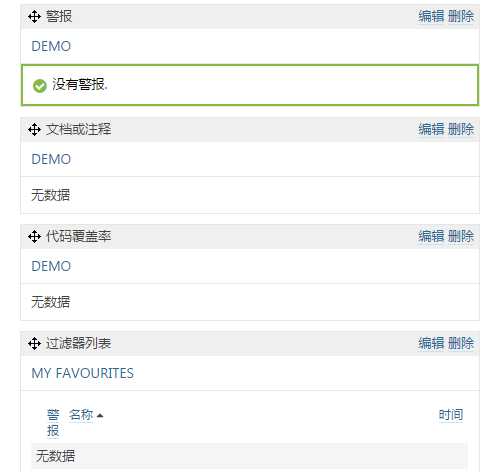
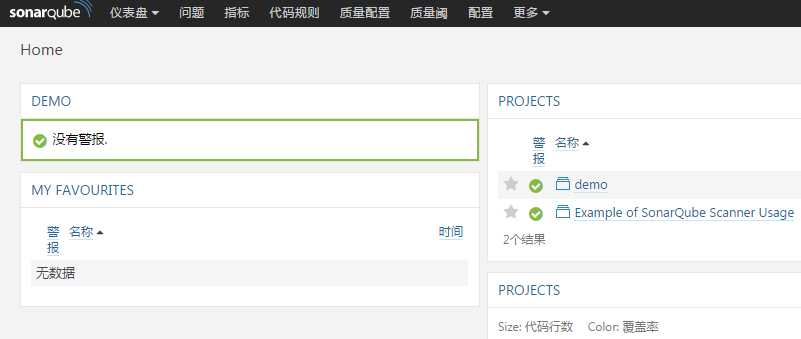
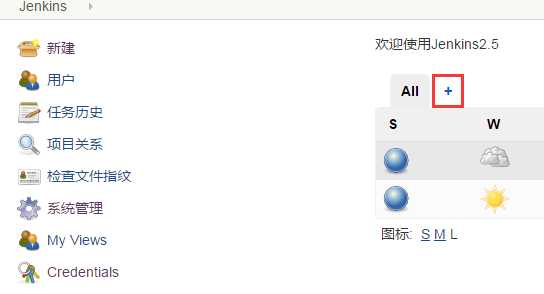
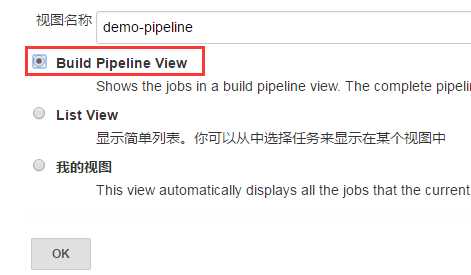
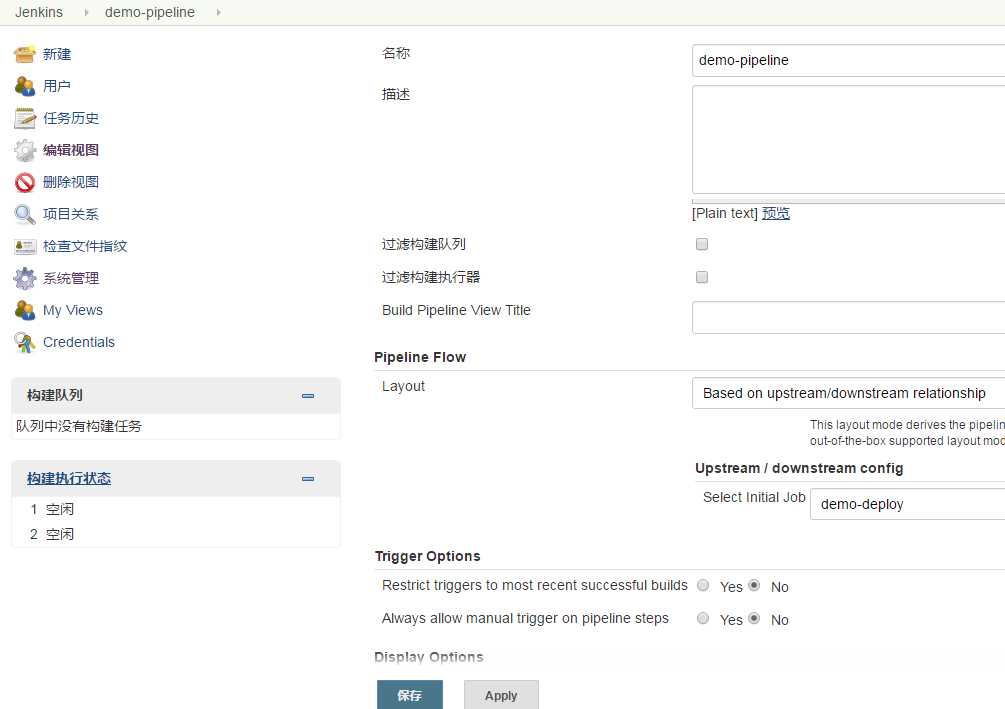
点击下面


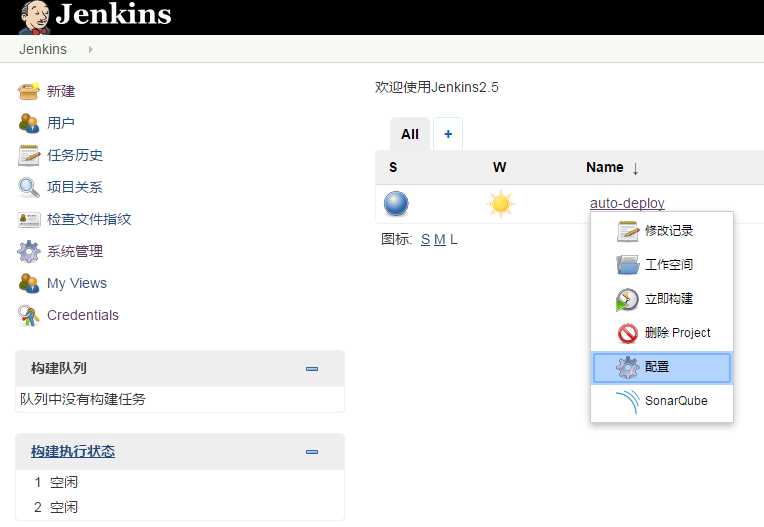
之前安装在了node1上,需要把它迁移到node2上,和jenkins在一个机器上
[root@linux-node1 local]# cd /usr/local/
[root@linux-node1 local]# ll
total 4
drwxr-xr-x.  2 root  root     6 Jun 10  2014 bin
drwxr-xr-x.  2 root  root     6 Jun 10  2014 etc
drwxr-xr-x.  2 root  root     6 Jun 10  2014 games
drwxr-xr-x.  2 root  root     6 Jun 10  2014 include
drwxr-xr-x.  2 root  root     6 Jun 10  2014 lib
drwxr-xr-x.  2 root  root     6 Jun 10  2014 lib64
drwxr-xr-x.  2 root  root     6 Jun 10  2014 libexec
lrwxrwxrwx   1 mysql mysql   46 Apr  4 14:15 mysql -> /usr/local/mysql-5.6.30-linux-glibc2.5-x86_64/
drwxr-xr-x  13 mysql mysql 4096 Apr 30 14:55 mysql-5.6.30-linux-glibc2.5-x86_64
drwxr-xr-x.  2 root  root     6 Jun 10  2014 sbin
drwxr-xr-x.  5 root  root    46 Feb  6 01:26 share
lrwxrwxrwx   1 root  root    25 Apr 29 16:00 sonarqube -> /usr/local/sonarqube-5.6/
drwxr-xr-x  10 root  root   111 Jun  1  2016 sonarqube-5.6
lrwxrwxrwx   1 root  root    31 Apr 29 17:53 sonar-scanner -> /usr/local/sonar-scanner-2.6.1/
drwxr-xr-x   5 root  root    37 Apr 29 17:52 sonar-scanner-2.6.1
drwxr-xr-x.  2 root  root   108 Apr 29 17:52 src
[root@linux-node1 local]#
[root@linux-node1 local]# rsync -az sonar-scanner-2.6.1 192.168.58.12:/usr/local/
root@192.168.58.12‘s password:
[root@linux-node1 local]#
[root@linux-node2 ~]# cd /usr/local/
[root@linux-node2 local]# ll
total 4
drwxr-xr-x.  2 root  root     6 Jun 10  2014 bin
drwxr-xr-x.  2 root  root     6 Jun 10  2014 etc
drwxr-xr-x.  2 root  root     6 Jun 10  2014 games
drwxr-xr-x.  2 root  root     6 Jun 10  2014 include
drwxr-xr-x.  2 root  root     6 Jun 10  2014 lib
drwxr-xr-x.  2 root  root     6 Jun 10  2014 lib64
drwxr-xr-x.  2 root  root     6 Jun 10  2014 libexec
lrwxrwxrwx   1 mysql mysql   35 Apr  9 16:50 mysql -> mysql-5.6.30-linux-glibc2.5-x86_64/
drwxr-xr-x  13 mysql mysql 4096 Apr  9 20:56 mysql-5.6.30-linux-glibc2.5-x86_64
drwxr-xr-x.  2 root  root     6 Jun 10  2014 sbin
drwxr-xr-x.  5 root  root    46 Feb  6 01:26 share
drwxr-xr-x   5 root  root    37 Apr 29 17:52 sonar-scanner-2.6.1
drwxr-xr-x.  2 root  root    54 Apr  9 16:50 src
[root@linux-node2 local]# ln -s sonar-scanner-2.6.1 sonar-scanner
[root@linux-node2 local]# ll
total 4
drwxr-xr-x.  2 root  root     6 Jun 10  2014 bin
drwxr-xr-x.  2 root  root     6 Jun 10  2014 etc
drwxr-xr-x.  2 root  root     6 Jun 10  2014 games
drwxr-xr-x.  2 root  root     6 Jun 10  2014 include
drwxr-xr-x.  2 root  root     6 Jun 10  2014 lib
drwxr-xr-x.  2 root  root     6 Jun 10  2014 lib64
drwxr-xr-x.  2 root  root     6 Jun 10  2014 libexec
lrwxrwxrwx   1 mysql mysql   35 Apr  9 16:50 mysql -> mysql-5.6.30-linux-glibc2.5-x86_64/
drwxr-xr-x  13 mysql mysql 4096 Apr  9 20:56 mysql-5.6.30-linux-glibc2.5-x86_64
drwxr-xr-x.  2 root  root     6 Jun 10  2014 sbin
drwxr-xr-x.  5 root  root    46 Feb  6 01:26 share
lrwxrwxrwx   1 root  root    19 Apr 30 15:16 sonar-scanner -> sonar-scanner-2.6.1
drwxr-xr-x   5 root  root    37 Apr 29 17:52 sonar-scanner-2.6.1
drwxr-xr-x.  2 root  root    54 Apr  9 16:50 src
[root@linux-node2 local]#
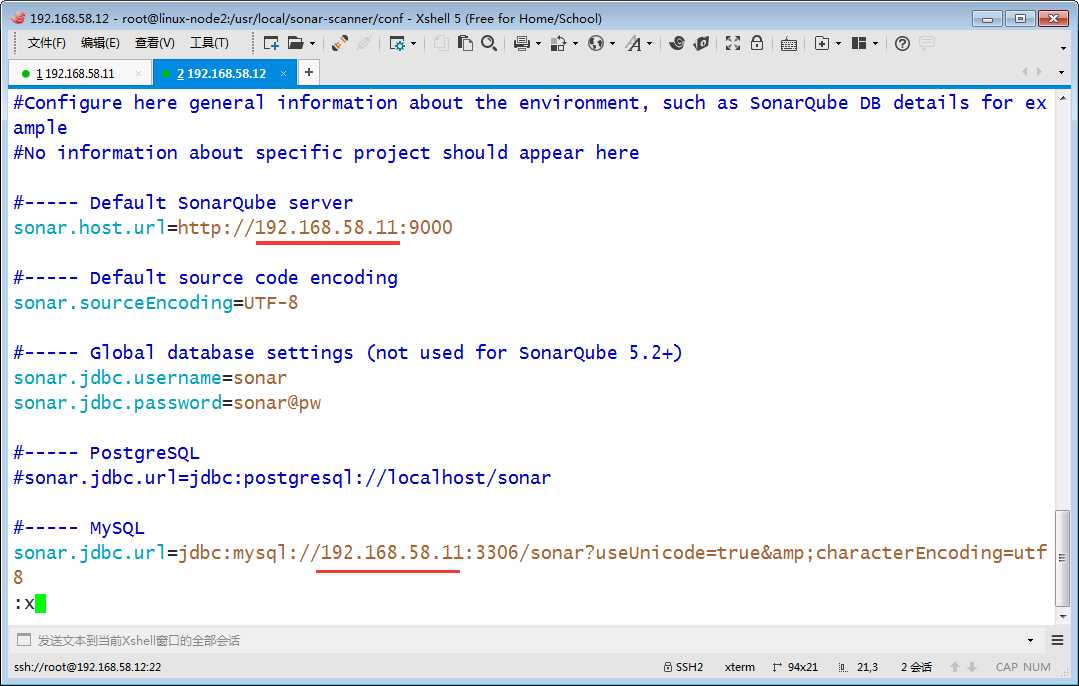
[root@linux-node2 conf]# pwd
/usr/local/sonar-scanner/conf
[root@linux-node2 conf]# ll
total 4
-rw-r--r-- 1 root root 781 Apr 30 15:24 sonar-scanner.properties
[root@linux-node2 conf]# vim sonar-scanner.properties
[root@linux-node1 ~]# cd sonar-scanning-examples-master
[root@linux-node1 sonar-scanning-examples-master]# cd sonarqube-scanner
[root@linux-node1 sonarqube-scanner]# ll
total 8
drwxr-xr-x  2 root root   75 Mar 23 18:26 copybooks
drwxr-xr-x  2 root root   39 Mar 23 18:26 coverage-report
-rw-r--r--  1 root root  647 Mar 23 18:26 sonar-project.properties
drwxr-xr-x 21 root root 4096 Mar 23 18:26 src
[root@linux-node1 sonarqube-scanner]# cat sonar-project.properties
sonar.projectKey=org.sonarqube:sonarqube-scanner
sonar.projectName=Example of SonarQube Scanner Usage
sonar.projectVersion=1.0

sonar.sources=src,copybooks

sonar.sourceEncoding=UTF-8

## Cobol Specific Properties

# comma-separated paths to directories with copybooks
sonar.cobol.copy.directories=copybooks
# comma-separated list of suffixes
sonar.cobol.file.suffixes=cbl,cpy
sonar.cobol.copy.suffixes=cpy


## Flex Specific Properties

# retrieve code coverage data from the Cobertura report
sonar.flex.cobertura.reportPath=coverage-report/coverage-cobertua-flex.xml


# PL/I Specific Properties
sonar.pli.marginLeft=2
sonar.pli.marginRight=0
[root@linux-node1 sonarqube-scanner]#
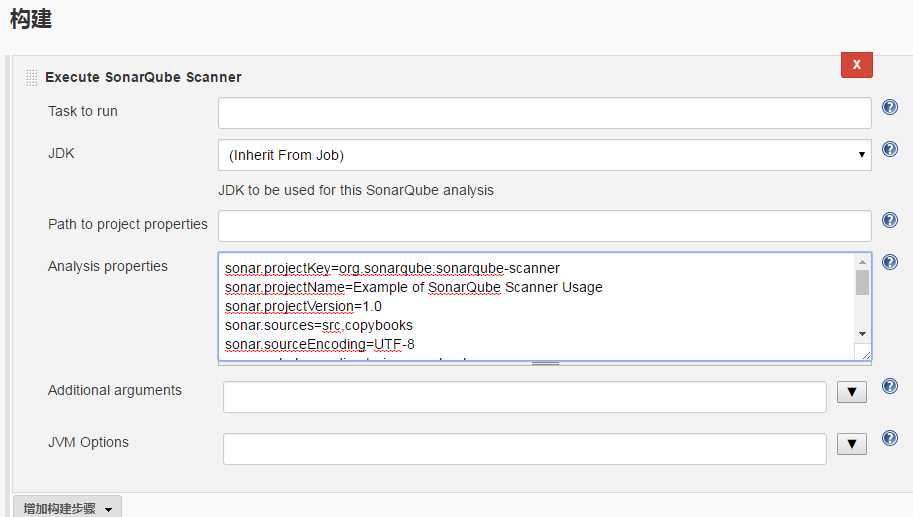
sonar.projectKey=org.sonarqube:sonarqube-scanner
sonar.projectName=Example of SonarQube Scanner Usage
sonar.projectVersion=1.0
sonar.sources=src,copybooks
sonar.sourceEncoding=UTF-8
sonar.cobol.copy.directories=copybooks
sonar.cobol.file.suffixes=cbl,cpy
sonar.cobol.copy.suffixes=cpy
sonar.flex.cobertura.reportPath=coverage-report/coverage-cobertua-flex.xml
sonar.pli.marginLeft=2
sonar.pli.marginRight=0
sonar.projectKey=demo
sonar.projectName=demo
sonar.projectVersion=1.0
sonar.sources=./
sonar.sourceEncoding=UTF-8
sonar.cobol.copy.directories=copybooks
sonar.cobol.file.suffixes=cbl,cpy
sonar.cobol.copy.suffixes=cpy
sonar.flex.cobertura.reportPath=coverage-report/coverage-cobertua-flex.xml
sonar.pli.marginLeft=2
sonar.pli.marginRight=0
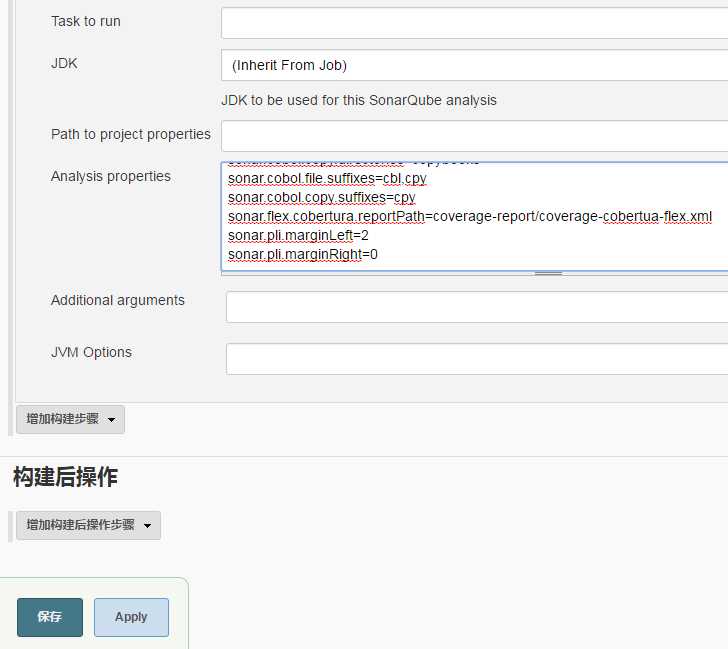
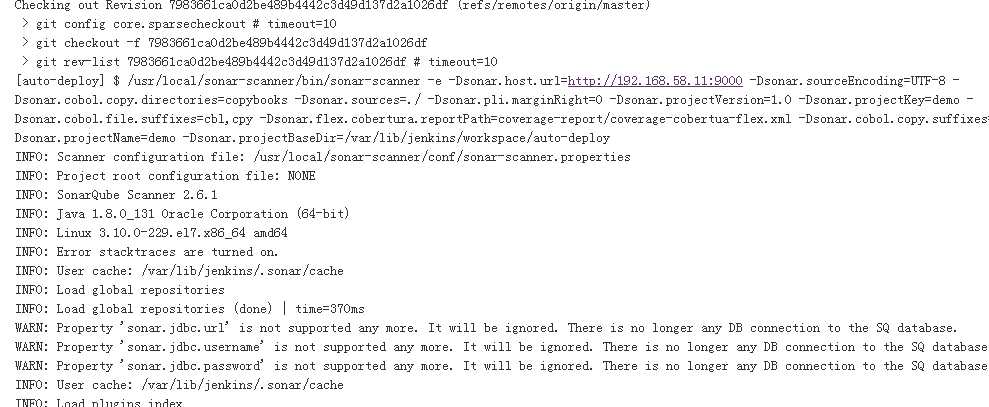
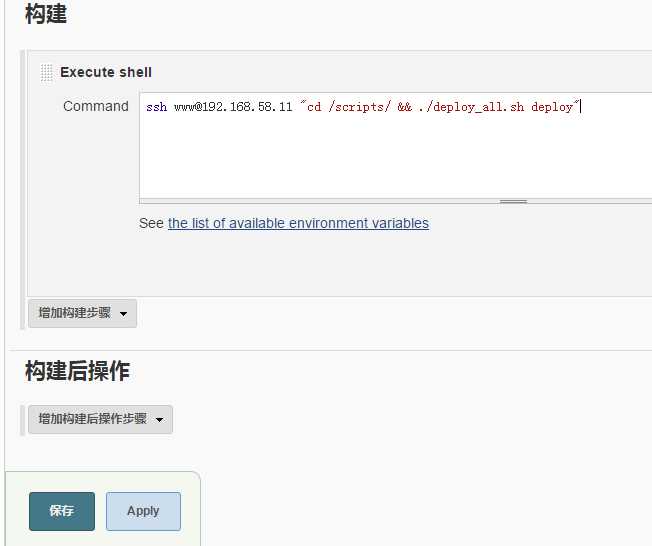
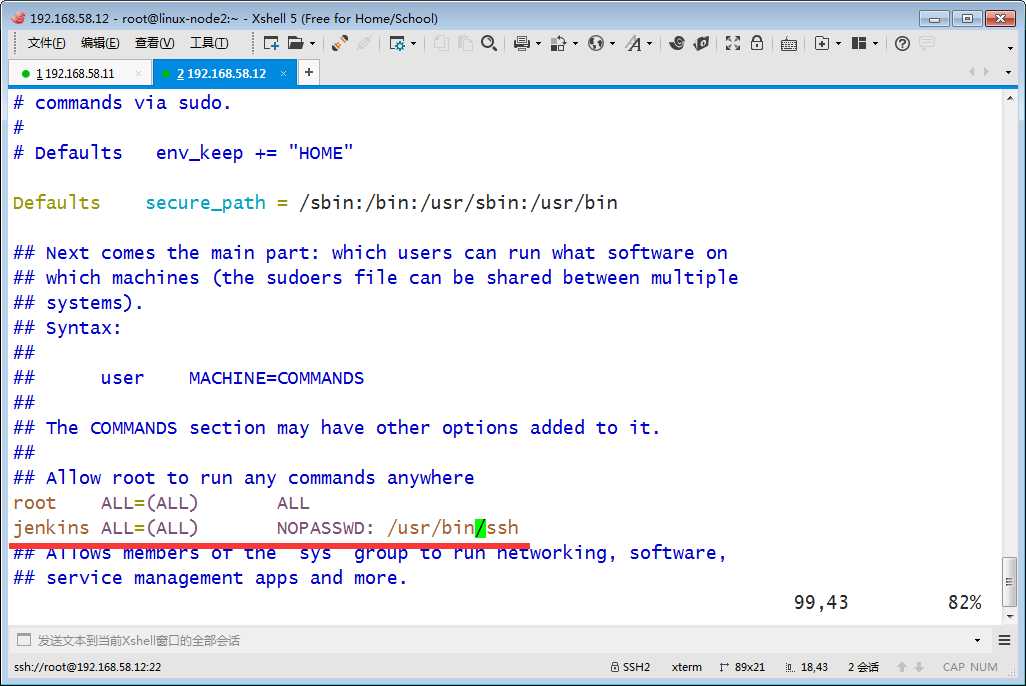
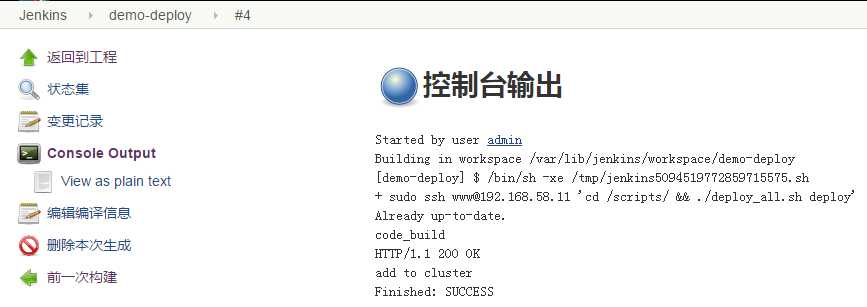
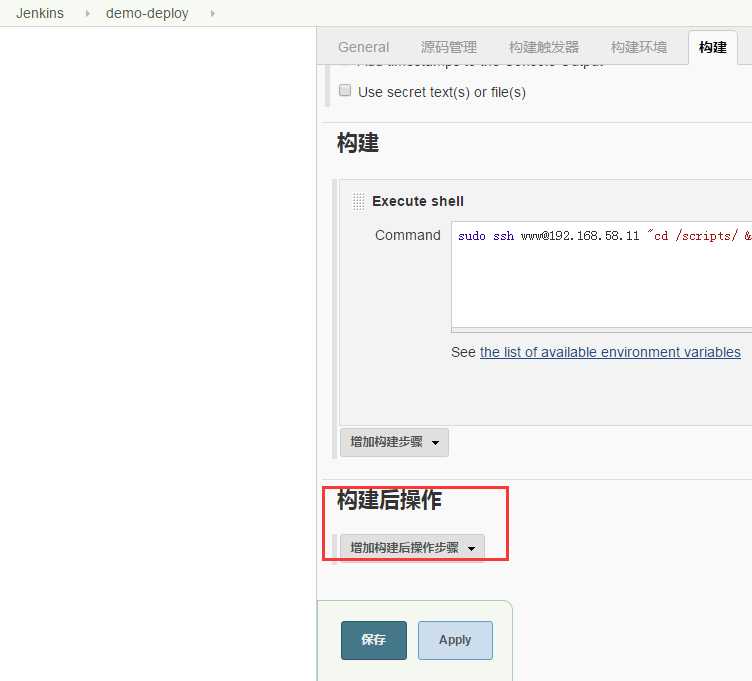
[auto-deploy] $ /usr/local/sonar-scanner/bin/sonar-scanner -e -Dsonar.host.url=http://192.168.58.11:9000 -Dsonar.sourceEncoding=UTF-8
 -Dsonar.cobol.copy.directories=copybooks -Dsonar.sources=./ -Dsonar.pli.marginRight=0 -Dsonar.projectVersion=1.0
 -Dsonar.projectKey=demo -Dsonar.cobol.file.suffixes=cbl,cpy
 -Dsonar.flex.cobertura.reportPath=coverage-report/coverage-cobertua-flex.xml -Dsonar.cobol.copy.suffixes=cpy -Dsonar.pli.marginLeft=2
 -Dsonar.projectName=demo -Dsonar.projectBaseDir=/var/lib/jenkins/workspace/auto-deploy


[root@linux-node1 src]# su - www
Last login: Sat Apr 29 14:00:45 CST 2017 on pts/0
[www@linux-node1 ~]$ cd /scripts/
[www@linux-node1 scripts]$ ./deploy_all.sh
Usage: ./deploy_all.sh { deploy | rollback [ list |version ]}
[www@linux-node1 scripts]$ ./deploy_all.sh deploy
Already up-to-date.
code_build
web-demo_798366_2017-04-30-17-09-00.tar.gz                  100% 9059     8.9KB/s   00:00
web-demo_798366_2017-04-30-17-09-00.tar.gz                  100% 9059     8.9KB/s   00:00
test error
[www@linux-node1 scripts]$ vim deploy_all.sh
[www@linux-node1 scripts]$ ./deploy_all.sh deploy
Already up-to-date.
code_build
web-demo_798366_2017-04-30-17-09-49.tar.gz                  100% 9055     8.8KB/s   00:00
web-demo_798366_2017-04-30-17-09-49.tar.gz                  100% 9055     8.8KB/s   00:00
192.168.58.12.crontab.xml                                   100%   21     0.0KB/s   00:00
HTTP/1.1 200 OK
add to cluster
[www@linux-node1 scripts]$
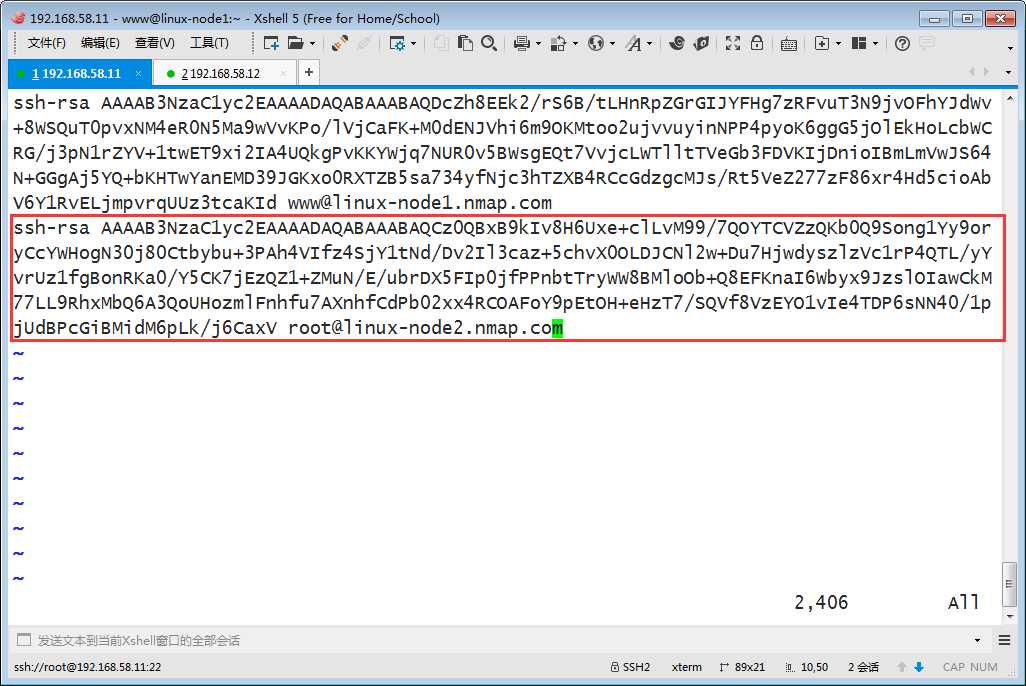
[root@linux-node2 ~]# cat .ssh/id_rsa.pub
ssh-rsa
AAAAB3NzaC1yc2EAAAADAQABAAABAQCz0QBxB9kIv8H6Uxe+clLvM99/7QOYTCVZzQKb0Q9Song1Yy9oryCcYWHogN30j80Ctbybu+3PAh4VIfz4SjY1tNd/Dv2Il3caz+5chvX0OL
DJCNl2w+Du7HjwdyszlzVc1rP4QTL/yYvrUz1fgBonRKa0/Y5CK7jEzQZ1+ZMuN/E/ubrDX5FIp0jfPPnbtTryWW8BMloOb+Q8EFKnaI6Wbyx9JzslOIawCkM77LL9RhxMbQ6A3QoU
HozmlFnhfu7AXnhfCdPb02xx4RCOAFoY9pEtOH+eHzT7/SQVf8VzEYO1vIe4TDP6sNN40/1pjUdBPcGiBMidM6pLk/j6CaxV root@linux-node2.nmap.com
[root@linux-node2 ~]#

[www@linux-node1 scripts]$ cd
[www@linux-node1 ~]$ vim .ssh/authorized_keys
[www@linux-node1 ~]$
[root@linux-node2 ~]# ssh www@192.168.58.11
Last login: Sun Apr 30 17:08:50 2017
[www@linux-node1 ~]$


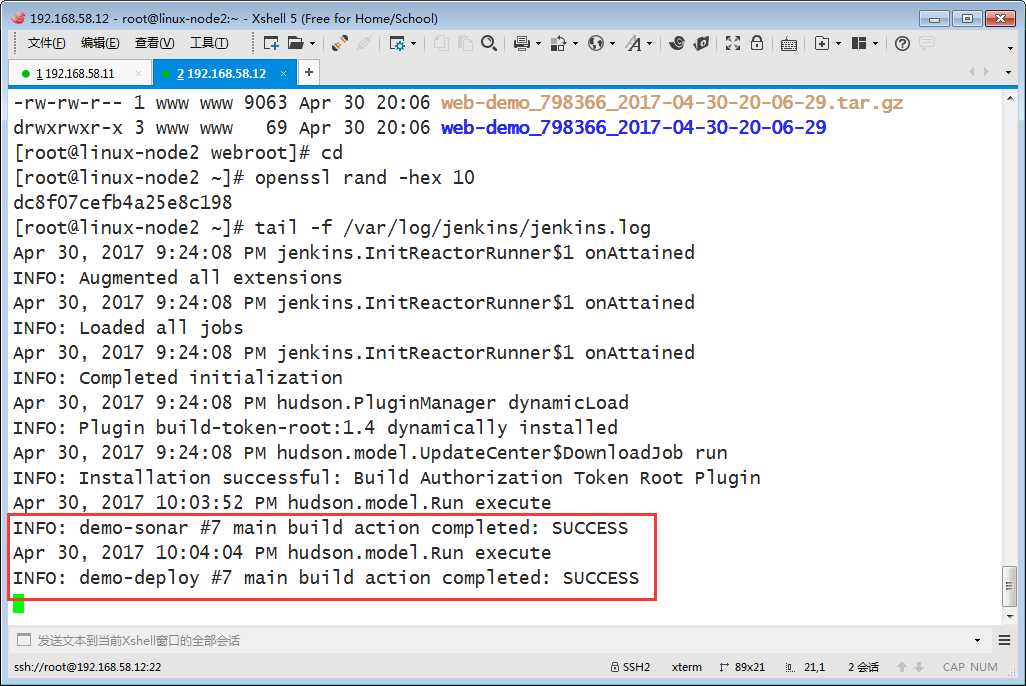
drwxrwxr-x 3 www www   69 Apr 30 17:09 web-demo_798366_2017-04-30-17-09-49
-rw-rw-r-- 1 www www 9063 Apr 30 20:06 web-demo_798366_2017-04-30-20-06-29.tar.gz
drwxrwxr-x 3 www www   69 Apr 30 20:06 web-demo_798366_2017-04-30-20-06-29
[root@linux-node2 webroot]#

[www@linux-node1 ~]$ cd web-demo/
[www@linux-node1 web-demo]$ ll
total 8
-rw-rw-r-- 1 www www 26 Apr 28 22:20 index.html
-rw-rw-r-- 1 www www  9 Apr 28 21:53 README.md
[www@linux-node1 web-demo]$

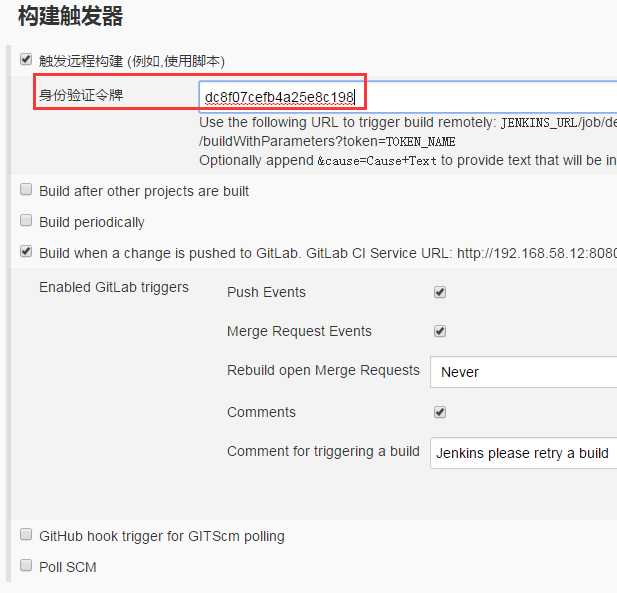
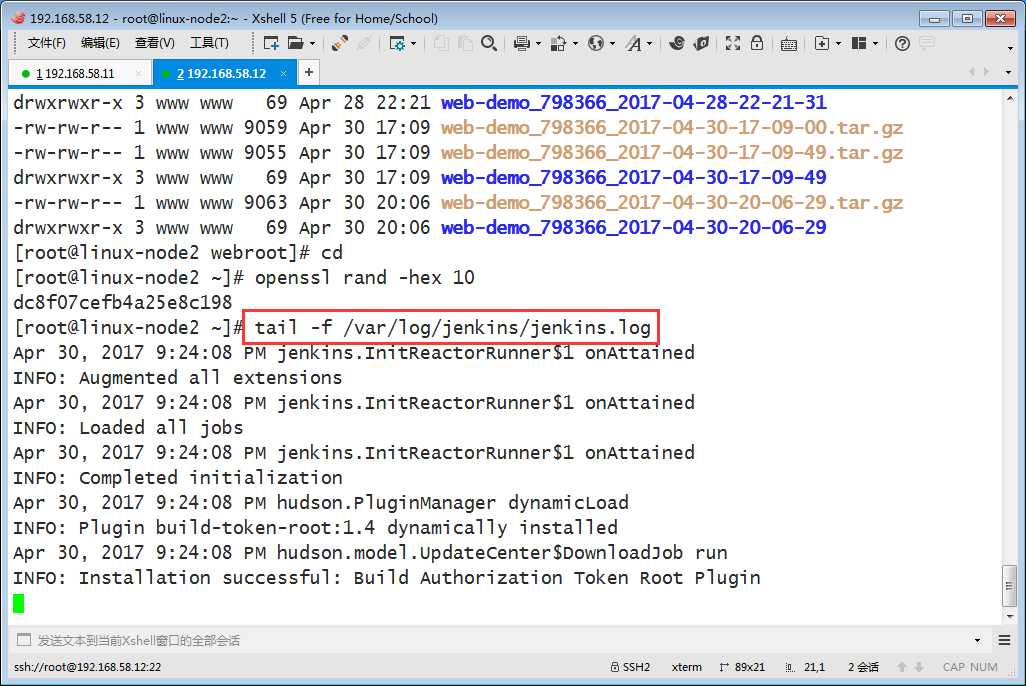
[root@linux-node2 ~]# openssl rand -hex 10
dc8f07cefb4a25e8c198
[root@linux-node2 ~]#
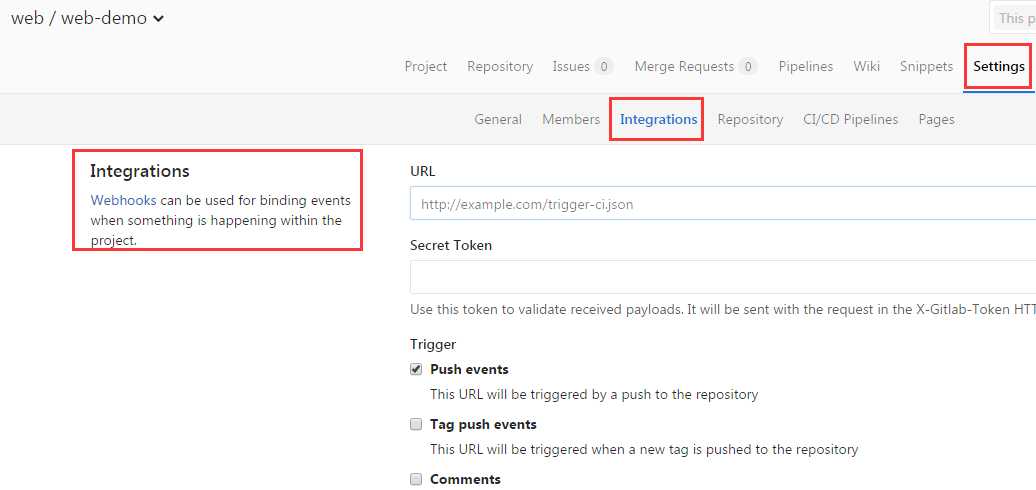
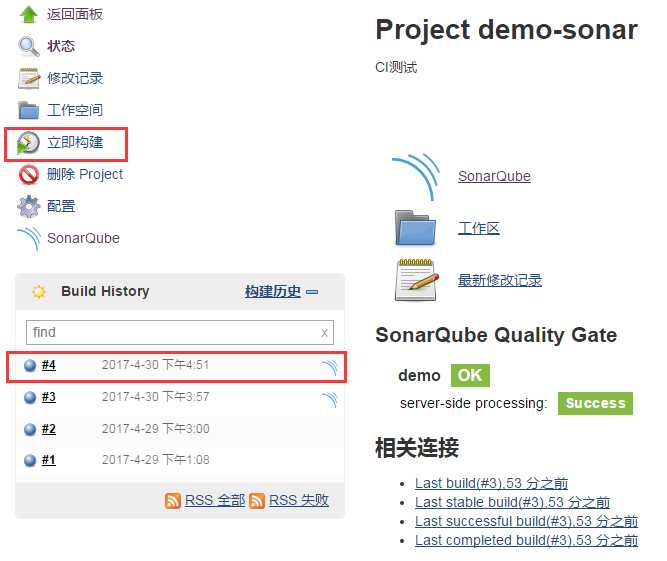
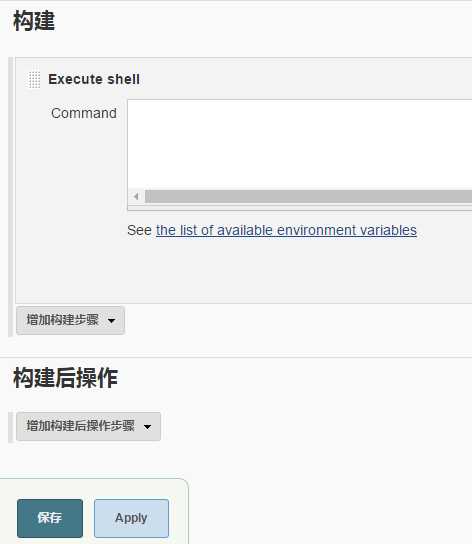
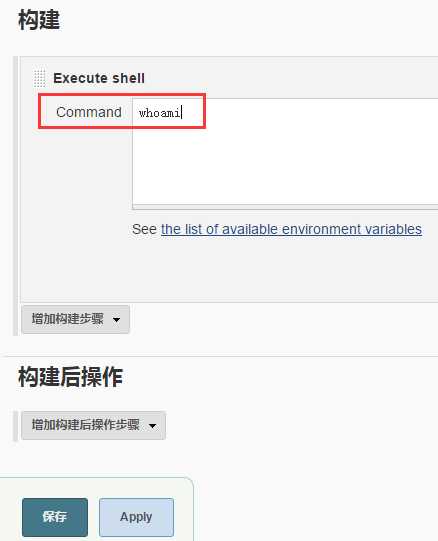
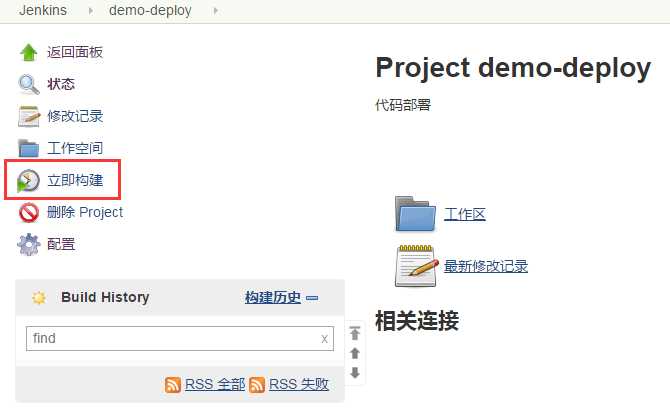
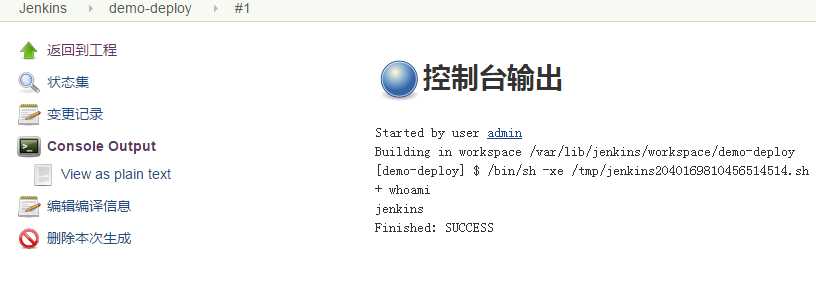
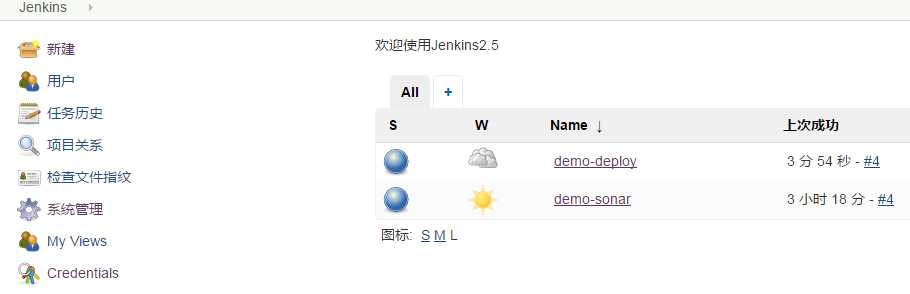
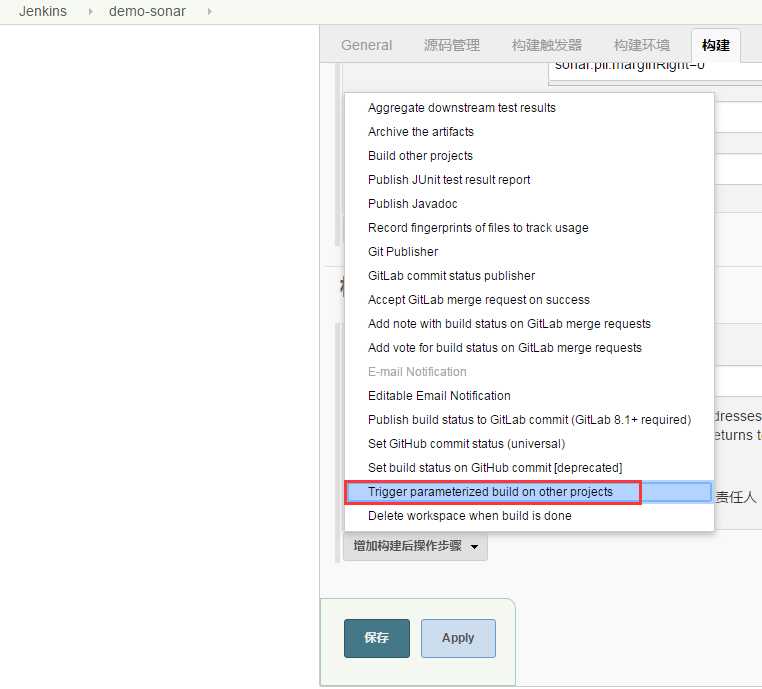
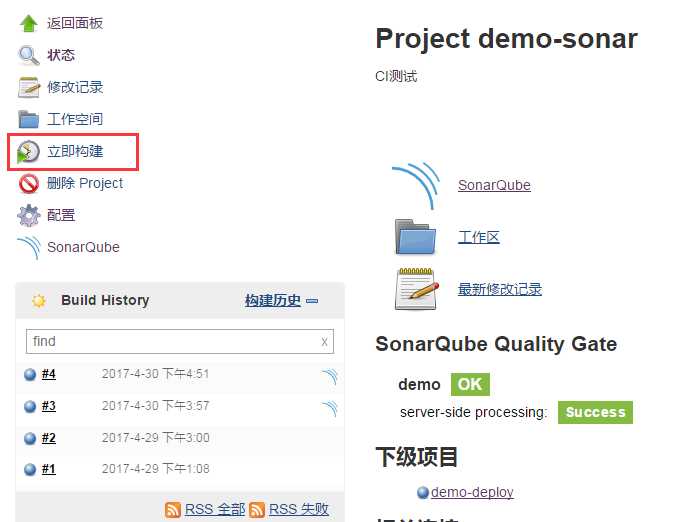
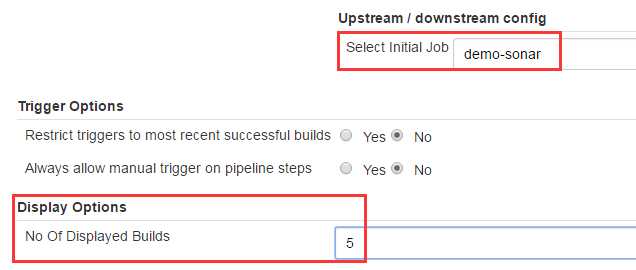
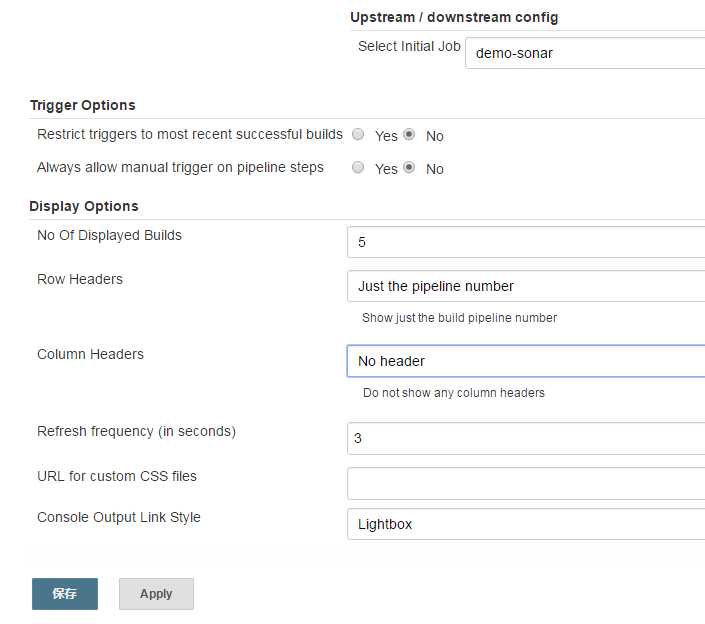
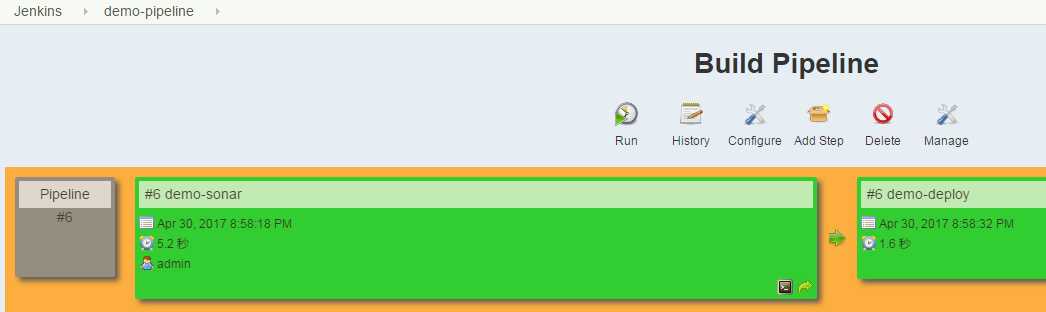
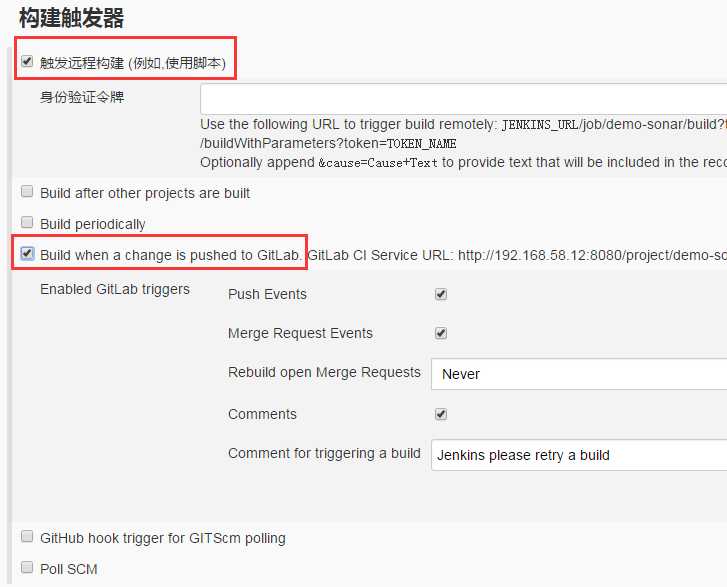
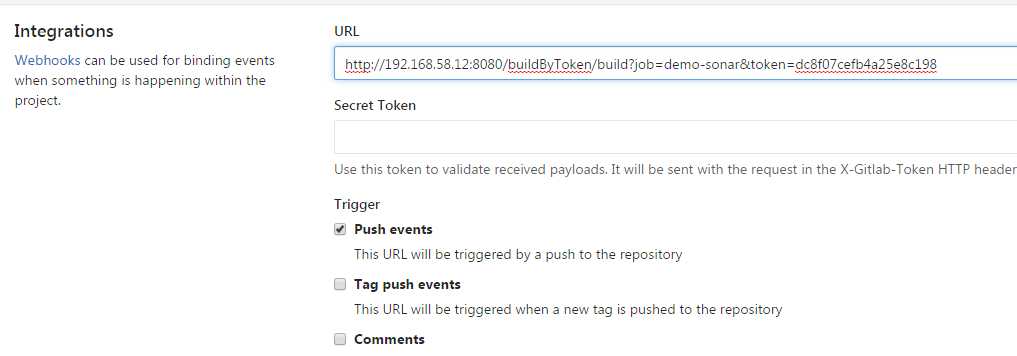
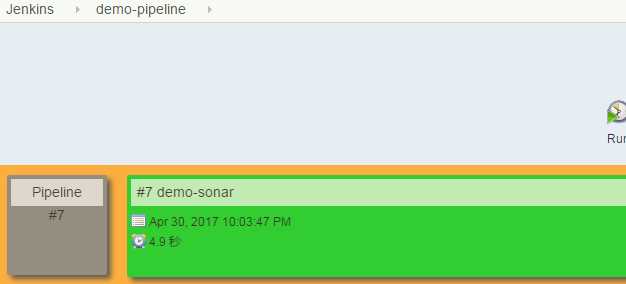
http://192.168.58.12:8080/project/demo-sonar
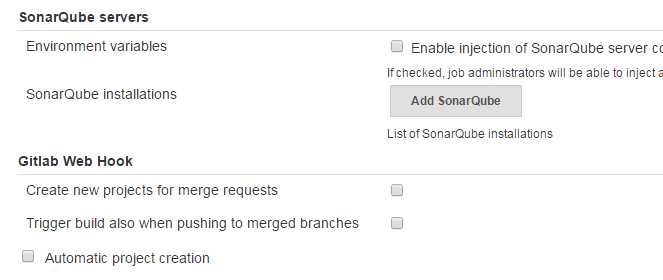
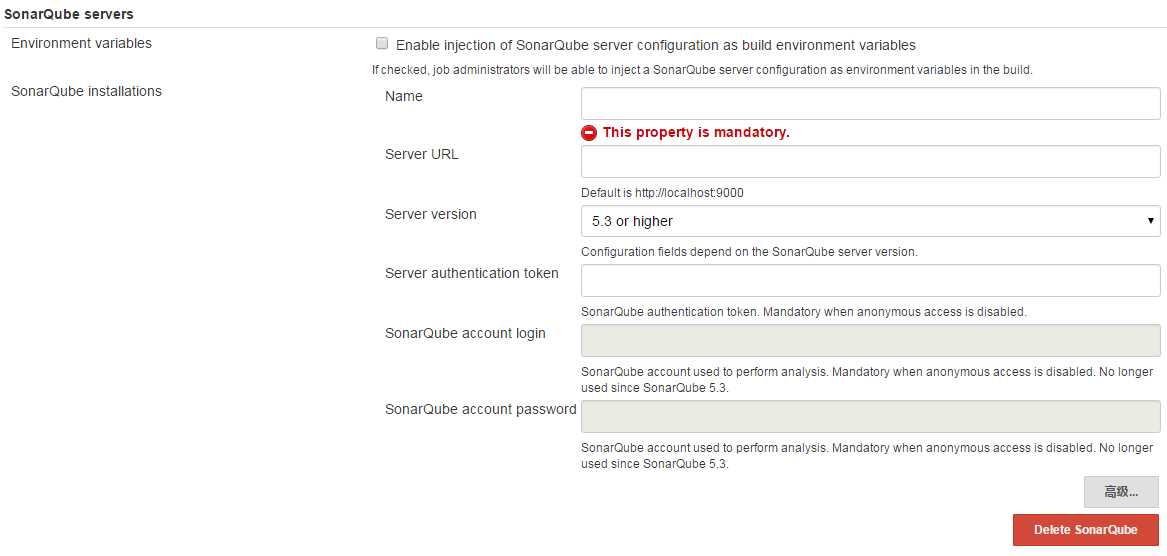
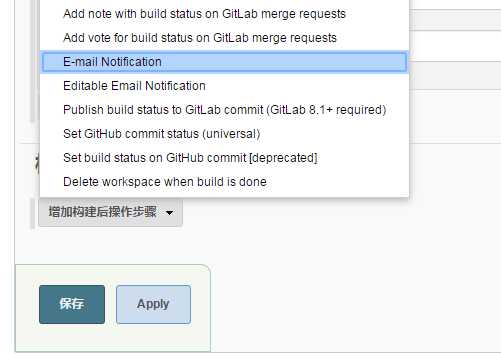
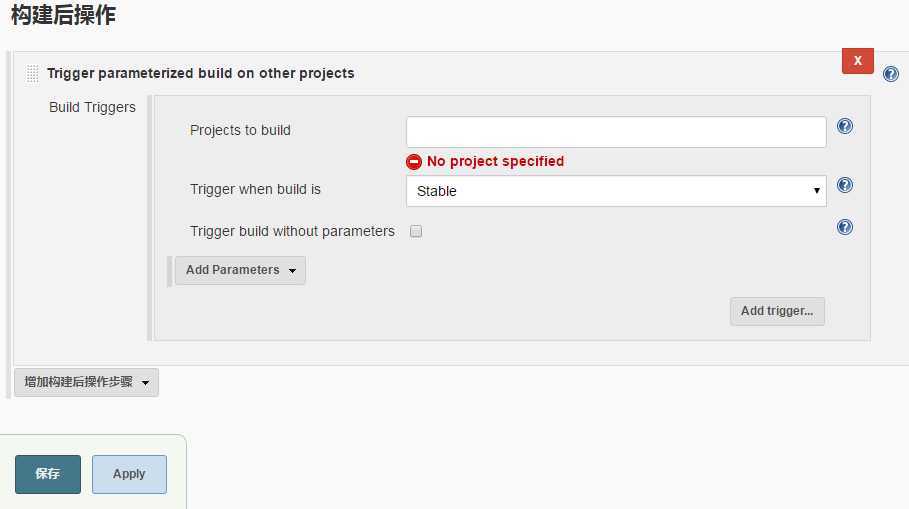
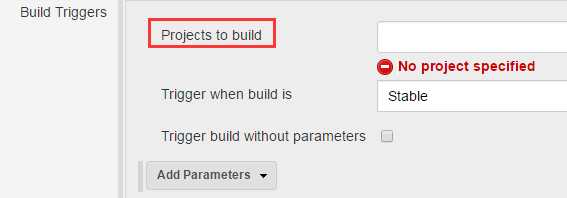
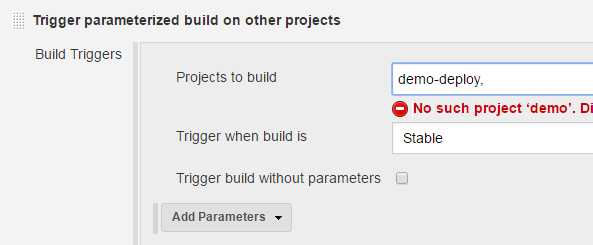
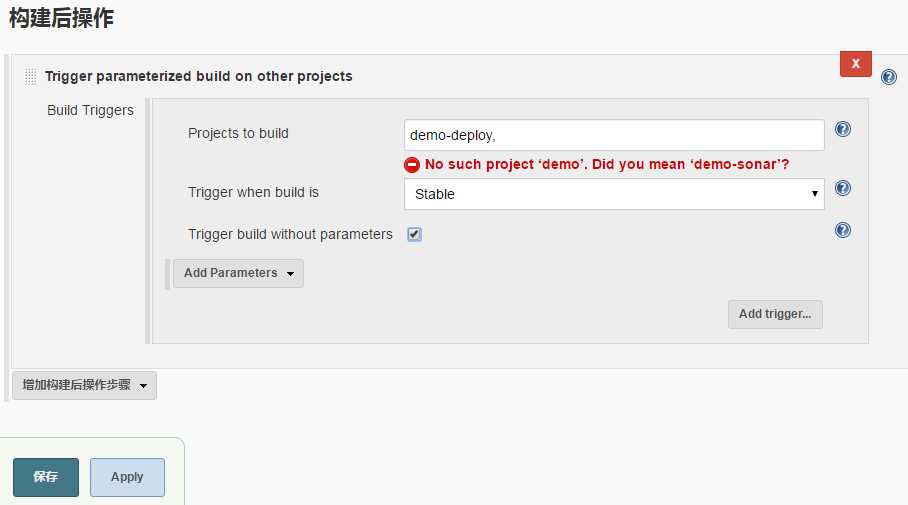
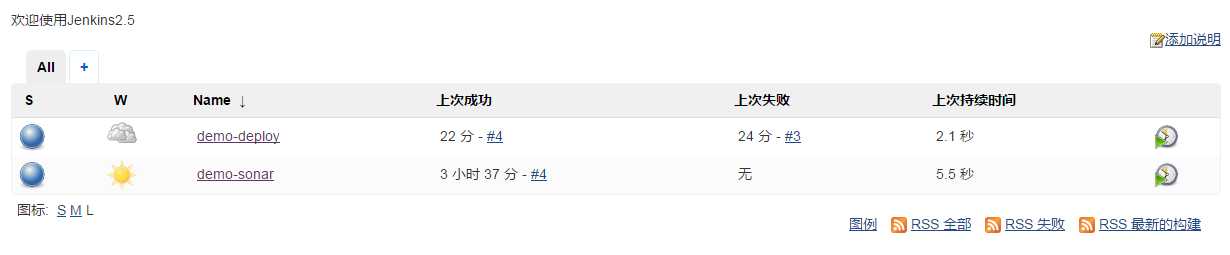
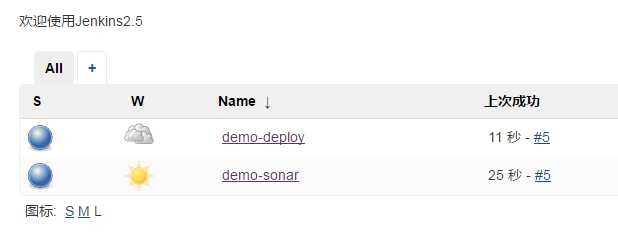
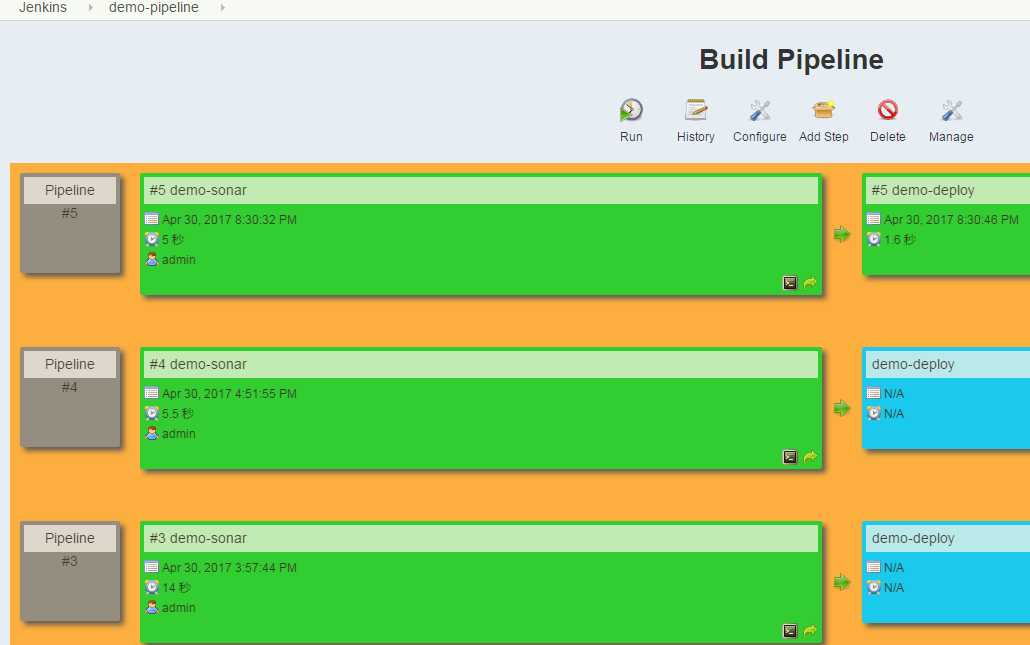
整合下
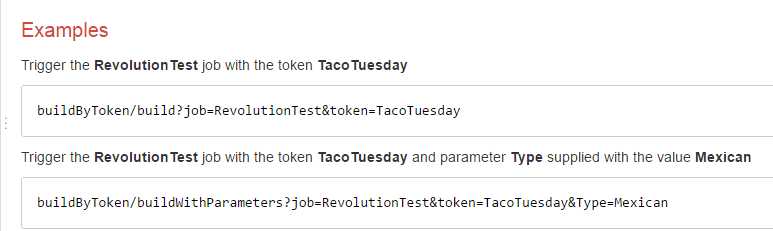
http://192.168.58.12:8080/buildByToken/build?job=demo-sonar&token=dc8f07cefb4a25e8c198
job的名称不能错,token也不能错


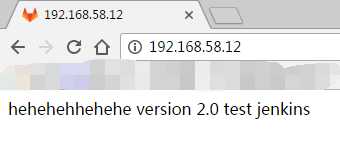
[www@linux-node1 web-demo]$ pwd
/home/www/web-demo
[www@linux-node1 web-demo]$ ll
total 8
-rw-rw-r-- 1 www www 26 Apr 28 22:20 index.html
-rw-rw-r-- 1 www www  9 Apr 28 21:53 README.md
[www@linux-node1 web-demo]$ cat index.html
hehehehhehehe
version 2.0
[www@linux-node1 web-demo]$ echo "test jenkins">>index.html
[www@linux-node1 web-demo]$ cat index.html
hehehehhehehe
version 2.0
test jenkins
[www@linux-node1 web-demo]$
[www@linux-node1 web-demo]$ git add *
[www@linux-node1 web-demo]$ git commit -m "jenkins hook test"
[master bd2b985] jenkins hook test
 1 file changed, 1 insertion(+)
[www@linux-node1 web-demo]$ git push
warning: push.default is unset; its implicit value is changing in
Git 2.0 from ‘matching‘ to ‘simple‘. To squelch this message
and maintain the current behavior after the default changes, use:

  git config --global push.default matching

To squelch this message and adopt the new behavior now, use:

  git config --global push.default simple

See ‘git help config‘ and search for ‘push.default‘ for further information.
(the ‘simple‘ mode was introduced in Git 1.7.11. Use the similar mode
‘current‘ instead of ‘simple‘ if you sometimes use older versions of Git)

Counting objects: 5, done.
Delta compression using up to 4 threads.
Compressing objects: 100% (2/2), done.
Writing objects: 100% (3/3), 304 bytes | 0 bytes/s, done.
Total 3 (delta 0), reused 0 (delta 0)
To git@192.168.58.11:web/web-demo.git
   7983661..bd2b985  master -> master
[www@linux-node1 web-demo]$

标签:UI book 登录 after less remove node system epo
原文地址:http://www.cnblogs.com/nmap/p/6792148.html