标签:class 调整 orm mis mode route ble 技术 倒计时
本小节,我们来完成最后一个模块--用户模块的开发。
用户模块一共有5个页面,分别是登录页面,注册页面,用户操作页面,收藏职位页面以及投递记录页面,先在src/view/目录下,创建这五个页面的视图文件login.html,register.html,my.html,favorite.html,post.html。
然后给视图添加路由,打开router.js文件:
    .state(‘login‘,{
        url:‘/login‘,
        templateUrl:‘view/login.html‘,
        controller:‘loginCtrl‘
    })
    .state(‘register‘,{
        url:‘/register‘,
        templateUrl:‘view/register.html‘,
        controller:‘registerCtrl‘
    })
    .state(‘my‘,{
        url:‘/my‘,
        templateUrl:‘view/my.html‘,
        controller:‘myCtrl‘
    })
    .state(‘favorite‘,{
        url:‘/favorite‘,
        templateUrl:‘view/favorite.html‘,
        controller:‘favoriteCtrl‘
    })
    .state(‘post‘,{
        url:‘/post‘,
        templateUrl:‘view/post.html‘,
        controller:‘postCtrl‘
    });
然后给这五个页面分别创建5个controller,进入src/script/controller/目录下,新建文件loginCtrl.js,registerCtrl.js,myCtrl.js,favoriteCtrl.js,postCtrl.js,分别写入内容:
‘use strict‘;
angular.module(‘app‘)
.controller(‘loginCtrl‘,[‘$http‘, ‘$scope‘, function ($http, $scope) {

}]);
(这五个控制器的代码基本相同,只是控制器的名字不同,大家可以手动改一下,这里我只贴一个控制器的代码了)
我们先来完成登录页面,打开login.html文件:
<div class="login">
    <form class="d-b ta-c">
        <div class="form-line ta-l">
            <span class="account va-m d-ib"></span>
            <input class="d-ib" type="text" placeholder="输入手机号">
        </div>
        <div class="form-line ta-l">
            <span class="lock va-m d-ib"></span>
            <input class="d-ib" type="text" placeholder="输入密码">
        </div>
        <button class="login-btn">登录</button>
        <button class="register-btn">注册</button>
    </form>
</div>
在src/style/目录下创建login.less文件并引入index.less文件添加样式后,登录页面如下:

下面我们来开发注册静态页面,打开register.html文件:
<div class="register">
    <form class="d-b ta-c">
        <div class="form-line ta-l">
            <span class="account va-m d-ib"></span>
            <input class="d-ib" type="text" placeholder="输入手机号">
        </div>
        <div class="form-line ta-l">
            <span class="lock va-m d-ib"></span>
            <input class="d-ib" type="text" placeholder="设置6位以上的密码">
        </div>
        <div class="msgwrap ta-l">
           <input class="msgbox" type="text" placeholder="短信验证码">
            <span class="msg f-r">发送短信</span>
        </div>
        <button class="login-btn">登录</button>
        <button class="register-btn">注册</button>
    </form>
</div>
在src/style/目录下创建register.less文件并引入index.less文件添加样式后,登录页面如下:

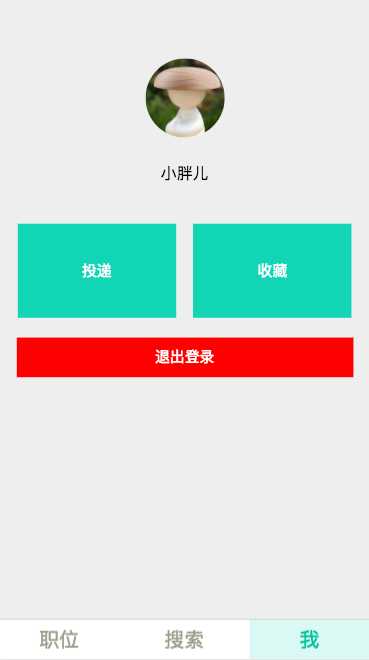
下面我们来开发第三个页面我的操作页面,打开my.html:
<div class="my ta-c">
    <img class="d-b" src="image/head.png">
    <div class="name">小胖儿</div>
    <div class="btns">
        <button>投递</button>
        <button>收藏</button>
        <button class="logout">退出登录</button>
    </div>
</div>
<div app-foot></div>
在src/style/目录下创建my.less文件并引入index.less文件添加样式后,登录页面如下:
第四个和第五个页面,分别是投递记录和收藏页面,它俩的入口都是my.html,我们先来修改一下my.html文件:
        <button ui-sref="favorite">收藏</button>
        <button class="logout">退出登录</button>
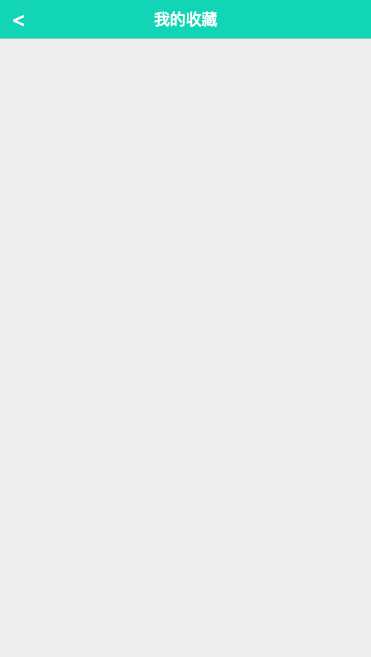
然后进入收藏页面favorite.html:
<div app-head-bar text="我的收藏"></div>
<div app-position-list></div>
页面如下所示,暂时没有职位列表的内容:
下面是投递记录页面,打开post.html文件:
<div app-head-bar text="投递记录"></div>
<div app-tab list="tabList"></div>
<div app-position-list></div>
然后打开postCtrl.js文件,给app-tab添加数据接口:
‘use strict‘;
angular.module(‘app‘)
.controller(‘postCtrl‘,[‘$http‘, ‘$scope‘, function ($http, $scope) {
    $scope.tabList = [{
        id:‘all‘,
        name:‘全部‘
    },{
        id:‘pass‘,
        name:‘面试邀请‘
    },{
        id:‘fail‘,
        name:‘不合适‘
    }];
}]);
现在我们可以看到投递记录的页面如下所示:

现在,用户模块的五个静态页面都已经开发完了,我们开始编写用户模块的逻辑。
先写注册页面的业务逻辑,在开发这部分的逻辑之前,我们先来安装一个angular的验证表单的插件和cookie模块,打开终端,进入项目目录,执行命令:
$ bower install --save angular-validation
安装完成后会提示安装的版本号
$ bower install --save angular-cookies
安装完成后会显示版本号
将安装的插件引入到index.html文件中:
    <script src="vendor/angular-cookies/angular-cookies.min.js"></script>
    <script src="vendor/angular-validation/dist/angular-validation.min.js"></script>
同时在app.js文件中,声明对validation模块的依赖:
angular.module(‘app‘,[‘ui.router‘,‘ngCookies‘, ‘validation‘]);
新建文件:cache.js在src/script/service/目录下:
‘use strict‘;
angular.module(‘app‘).service(‘cache‘, [‘$cookies‘, function($cookies){
    this.put = function(key,value){
        $cookies.put(key,value);
    };
    this.get = function(key){
        return $cookies.get(key);
    };
    this.remove = function(key){
        return $cookies.remove(key);
    };
}]);
在src/script/config/目录下创建validation.js文件用来表单校验:
‘use strict‘;
angular.module(‘app‘).config([‘$validationProvider‘, function($validationProvider){
    var expression = {
        phone:/^1[\d]{10}$/,
        password:function(value){
            var str = value+‘‘;
            return str.length > 5;
        },
     required:function(value){
            return !!value;
        }
    };
    var defaultMsg = {
        phone:{
            success:‘‘,
            error:‘必须为11位手机号‘
        },
        password:{
            success:‘‘,
            error:‘长度至少6位‘
        },
     required:{
            success:‘‘,
            error:‘不能为空‘
        }
    };
    $validationProvider.setExpression(expression).setDefaultMsg(defaultMsg);
}]);
打开register.html文件,引入我们编写好的校验逻辑:
<div class="register">
    <form class="d-b ta-c" name="form">
        <div class="form-line ta-l">
            <span class="account va-m d-ib"></span>
            <input name="phone" ng-model="user.phone" validator="required,phone" class="d-ib" type="text" placeholder="输入手机号">
        </div>
        <div class="form-line ta-l">
            <span class="lock va-m d-ib"></span>
            <input name="password" ng-model="user.password" validator="required,password" class="d-ib" type="text" placeholder="设置6位以上的密码">
        </div>
        <div class="msgwrap ta-l">
           <input name="code" validator="required" class="msgbox" type="text" placeholder="短信验证码">
            <span class="msg f-r">发送短信</span>
        </div>
        <button class="login-btn">登录</button>
        <button class="register-btn" validation-submit="form" ng-click="submit()">注册</button>
    </form>
</div>
但是我们发现,当我们在注册页面电话号码的位置输入非数字时,没有报错也没有提示信息,控制台选中表单元素,我们可以看到提示信息已经有了,放在一个span标签里:
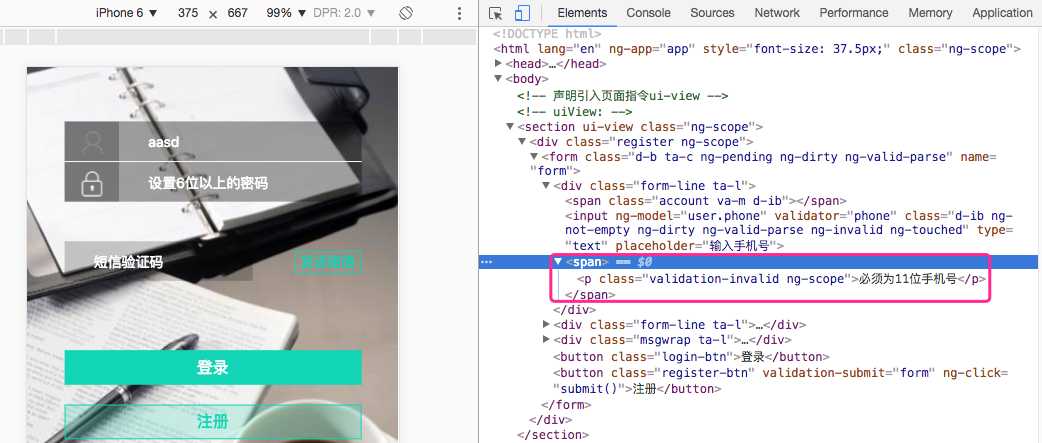
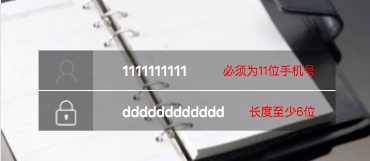
但是我们的页面没有显示,当修改调整样式后,我们可以看到提示信息出现在了我们期望的位置如下:
当我们点击注册的时候,调用submit()函数,打开register.js文件,添加点击事件的方法:
‘use strict‘;
angular.module(‘app‘)
.controller(‘registerCtrl‘,[‘$http‘, ‘$scope‘, function ($http, $scope) {
    $scope.submit = function(){
        console.log($scope.user);
    };
}]);
这时,我们输入的手机号和密码通过验证了,点击注册,控制台会打印出电话号码和密码。
下面我们来完成验证码部分的逻辑。修改register.html代码:
<div class="msgwrap ta-l">
           <input validator="required" ng-model="user.code" class="msgbox" type="text" placeholder="短信验证码">
            <span ng-click="time?1==1:send();" ng-bind="time?time:‘发送短信‘" class="{{time?‘disabled‘:‘‘}} msg f-r"></span>
        </div>
然后打开register.js文件编写send()函数:
‘use strict‘;
angular.module(‘app‘)
.controller(‘registerCtrl‘,[‘$interval‘, ‘$http‘, ‘$scope‘, function ($interval, $http, $scope) {
    $scope.submit = function(){
        console.log($scope.user);
    };
    var count = 60;
    $scope.send = function(){
        $http.get(‘/data/code.json‘).success(function(resp){
            if(resp.state===1){
                count = 60;
                $scope.time = ‘60s‘;
                var interval = $interval(function(){
                    if(count<=0){
                        $interval.cancel(interval);
                        $scope.time =‘‘;
                        return;
                    }else{
                        count--;
                        $scope.time = count+‘s‘;
                    }
                },1000);
            }
        })
    };
}]);
这样我们就实现了,点击发送短信,变成灰色倒计时的效果了:

还要记得改一下登录按钮的跳转指向 打开register.html:
<button class="login-btn" ui-sref="login">登录</button>
下面我们要用装饰器,将一个post请求改为一个get请求,因为我们短信验证没有实际后台,所以这里我们使用这种方法,新建文件src/script/config/http.js:
‘use strict‘;
angular.module(‘app‘).config([‘$provide‘,function($provide) {
    $provide.decorator(‘$http‘, [‘$delegate‘, ‘$q‘, function($delegate, $q){
        var get = $delegate.get;
        $delegate.post = function(url, data, config){
            var def = $q.defer();
            get(url).success(function(resp){
                def.resolve(resp);
            }).error(function(){
                def.reject(resp);
            })
            return {
                success:function(cb){
                    def.promise.then(cb);
                },
                error:function(cb){
                    def.promise.then(null, cb);
                }
            }
        }
        return $delegate;
    }]);
}]);
然后打开register.js文件,修改我们的submit()函数:
‘use strict‘;
angular.module(‘app‘)
.controller(‘registerCtrl‘,[‘$interval‘, ‘$http‘, ‘$scope‘,‘$state‘, function ($interval, $http, $scope, $state) {
    $scope.submit = function(){
        //console.log($scope.user);
        $http.post(‘/data/regist.json‘, $scope.user).success(function(resp){
            // console.log(resp);
            $state.go(‘login‘);
        });
    };
现在,我们在注册页面填写注册信息后,点击注册就可以跳转到登录页面了:

注册页面的业务逻辑我们已经完成了,下面完成登录页面的逻辑。
进入登录页面模板login.html:
<div class="login">
    <form class="d-b ta-c" name="form">
        <div class="form-line ta-l">
            <span class="account va-m d-ib"></span>
            <input name="phone" validator="required,phone" ng-model="user.phone" class="d-ib" type="text" placeholder="输入手机号">
        </div>
        <div class="form-line ta-l">
            <span class="lock va-m d-ib"></span>
            <input name="password" validator="required,password" ng-model="user.password" class="d-ib" type="password" placeholder="输入密码">
        </div>
        <button class="login-btn" validation-submit="form" ng-click="submit()">登录</button>
        <button class="register-btn" ui-sref="register">注册</button>
    </form>
</div>
然后修改登录的控制器文件loginCtrl.js:
‘use strict‘;
angular.module(‘app‘)
.controller(‘loginCtrl‘,[‘cache‘, ‘$http‘, ‘$scope‘, ‘$state‘, function (cache, $http, $scope, $state) {
    $scope.submit = function(){
        $http.post(‘/data/login.json‘, $scope.user).success(function(resp){
            cache.put(‘id‘, resp.id);
            cache.put(‘name‘, resp.name);
            cache.put(‘image‘, resp.image);
            $state.go(‘main‘);
        })
    }
}]);
现在我们来修改登录后我的页面的逻辑,先修改视图代码my.html:
<div class="my ta-c">
    <div ng-if="name">
        <img class="d-b" ng-src="{{image}}">
        <div class="name" ng-bind="name"></div>
        <div class="btns">
            <button ui-sref="post">投递</button>
            <button ui-sref="favorite">收藏</button>
            <button class="logout" ng-click="logout()">退出登录</button>
        </div>
    </div>
    <div ng-hide="name" ui-sref="login">
        <button class="login-btn">去登录</button>
    </div>
</div>
<div app-foot></div>
然后修改my部分的逻辑,打开myCtrl.js文件:
‘use strict‘;
angular.module(‘app‘)
.controller(‘myCtrl‘,[‘$state‘, ‘cache‘, ‘$http‘, ‘$scope‘, function ($state, cache, $http, $scope) {
    if(cache.get(‘name‘)){
        $scope.name = cache.get(‘name‘);
        $scope.image = cache.get(‘image‘);
    };
    $scope.logout = function(){
        cache.remove(‘id‘);
        cache.remove(‘name‘);
        cache.remove(‘image‘);
        $state.go(‘main‘);
    };
}]);
我的页面退出登录的逻辑我们在上面已经完成了,现在还剩下投递和收藏两个功能,先来完成投递功能,打开post.html:
<div app-head-bar text="投递记录"></div>
<div app-tab list="tabList" tab-click="tClick(id,name)"></div>
<div app-position-list data="positionList" class="my-post" filter-obj="filterObj"></div>
然后打开post.js文件添加逻辑:
‘use strict‘;
angular.module(‘app‘)
    .controller(‘postCtrl‘, [‘$http‘, ‘$scope‘, function($http, $scope) {
        $scope.tabList = [{
            id: ‘all‘,
            name: ‘全部‘
        }, {
            id: ‘pass‘,
            name: ‘面试邀请‘
        }, {
            id: ‘fail‘,
            name: ‘不合适‘
        }];
        $http.get(‘data/myPost.json‘).success(function(resp) {
            $scope.positionList = resp;
        });
        $scope.filterObj = {};
        $scope.tClick = function(id, name) {
            switch (id) {
                case ‘all‘:
                    delete $scope.filterObj.state;
                    break;
                case ‘pass‘:
                    $scope.filterObj.state = "1";
                    break;
                case ‘fail‘:
                    $scope.filterObj.state = "-1";
                    break;
                default:
            }
        };
    }]);
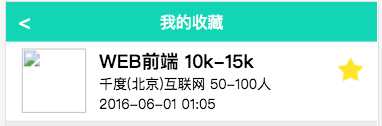
现在就剩下最后一个功能啦--收藏功能,因为已经收藏的职位,我们先让收藏页面可以显示出来收藏列表,打开favorite.html文件:
<div app-head-bar text="我的收藏"></div>
<div app-position-list data="list"></div>
然后打开favoriteCtrl.js文件:
‘use strict‘;
angular.module(‘app‘)
.controller(‘favoriteCtrl‘,[‘$http‘, ‘$scope‘, function ($http, $scope) {
    $http.get(‘data/myFavorite.json‘).success(function(resp){
        $scope.list = resp;
    });
}]);
此时已经可以显示出来收藏列表了:

但是我们希望的是,在每项收藏的职位后面,都有一个五角星来显示页面的收藏选项的功能,要实现这个功能,我们需要修改职位列表页面以及其逻辑,打开positionlist.html文件:
<ul class="position-list bg-w">
    <li ui-sref="position({id:item.id})" class="item p-r" ng-repeat="item in data|filterByObj:filterObj">
        <img class="f-l logo" ng-src="{{item.imageUrl}}" alt="">
        <h3 class="title" ng-bind="item.job+‘ ‘+item.salaryName"></h3>
        <p class="text" ng-bind="item.companyName+‘(‘+item.cityName+‘)‘+item.industryName+‘ ‘+item.scaleName"></p>
        <p class="text" ng-bind="item.date"></p>
        <span ng-click="$event.stopPropagation();select(item)" ng-if="name" class="p-a icon {{item.select?‘star-active‘:‘star‘}}"></span>
        <div class="clear"></div>
    </li>
</ul>
然后打开positionlist.js文件:
‘use strict‘;
angular.module(‘app‘).directive(‘appPositionList‘,[‘cache‘,‘$http‘, function(cache, $http){
    return {
        restrict:‘A‘,
        replace:true,
        templateUrl:‘view/template/positionlist.html‘,
        scope:{
            data:‘=‘,
            filterObj:‘=‘
        },
        link:function($scope){
            $scope.name = cache.get(‘name‘) || ‘‘;
            $scope.select = function(item){
                $http.post(‘data/favorite.json‘,{
                    id:item.id,
                    select: !item.select
                }).success(function(resp){
                    item.select = !item.select;
                });
            };
        }
    };
}]);
收藏功能的逻辑已经完成:
到这里,用户模块的逻辑,我们已经完成了。
标签:class 调整 orm mis mode route ble 技术 倒计时
原文地址:http://www.cnblogs.com/jiangtengteng/p/6847071.html