标签:应用服务器 成功 mysq next nec error sql utf8 hang
环境说明:
nginx 反向代理服务器 ip 为: 10.219.24.26
tomcat1 应用服务器 ip 为: 10.219.24.21
tomcat3 应用服务器 ip 为: 10.219.24.23
os 环境为 :linux x86_64
参考连接: 为了节约劳动力,给出作者先前的完整连接,按照链接+下面的流程,即可搭建成功!
nginx之 nginx-1.9.7 编译安装、理论简介: http://blog.csdn.net/zhang123456456/article/details/73228668
tomcat之 JDK8.0安装、tomcat-8.5.15安装: http://blog.csdn.net/zhang123456456/article/details/73382524
1、 按照上面指定链接,完成 nginx 与 tomcat 安装后,接着进行下面的操作
2、 配置 webapps/ROOT/index.jsp 修改成如下所示
[root@mysql apache-tomcat-8.5.15]# pwd
/usr/local/tomcat/apache-tomcat-8.5.15
[root@mysql apache-tomcat-8.5.15]# vi webapps/ROOT/index.jsp
[root@mysql apache-tomcat-8.5.15]# cat webapps/ROOT/index.jsp
<html>
<h1>this is my tomcat1</h1>
</html>
说明: 同理配置另外一台 tomcat 服务器
3、 配置完 tomcat 后,接下来,修改 nginx.conf 配置,如下
[root@mysql03 nginx]# pwd
/usr/local/nginx
[root@mysql03 nginx]# cat conf/nginx.conf
user root root;
worker_processes 1;
events {
worker_connections 1024;
}
http {
include mime.types;
default_type application/octet-stream;
upstream web_app {
server 10.219.24.21:8080 weight=1 max_fails=2 fail_timeout=30s;
server 10.219.24.23:8080 weight=1 max_fails=2 fail_timeout=30s;
}
server {
listen 80;
server_name aa.com;
charset utf8;
location / {
proxy_next_upstream error timeout invalid_header http_500 http_502 http_503 http_504;
proxy_pass http://web_app;
proxy_redirect default;
}
}
}
说明: server段 proxy_pass定义的web_app需要跟upstream 里面定义的web_app一致,否则server找不到均衡。
4、 启动 tomcat 与 Nginx
5、 测试
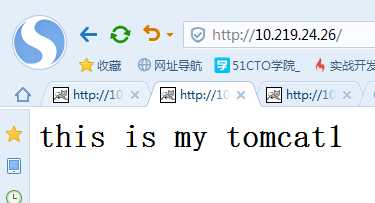
本机浏览器输入:http://10.219.24.26/ 反复点击刷新 发现链接在 tomcat1 与 tomcat2 之间轮转,达到负载均衡。


nginx之 nginx-1.9.7 + tomcat-8.5.15 反向代理+应用负载均衡 安装配置
标签:应用服务器 成功 mysq next nec error sql utf8 hang
原文地址:http://www.cnblogs.com/andy6/p/7041604.html