标签:mixin 配置文件 run file 方法 nal tar turn 运行时
由于Jmeter是一个纯JAVA的应用,用GUI模式运行压力测试时,对客户端的资源消耗是相当惊人的,所以在进行正式的压测时一定要使用non-gui模式运行,
如果并发数很高或者客户端的硬件资源比较一般的话,还可以以server模式用多个client进行分布式测试。
准备工作
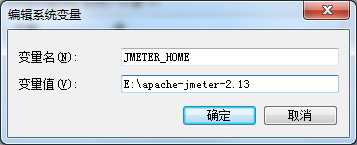
export JMETER_HOME=/yourpath/apache-jmeter-x.y
#yourpath是你的Jmeter解压目录
#x.y是Jmeter版本,当然你也可以重命名此目录
source ~/.profile

官方文档
1. the firewalls on the systems are turned off.
#1.关闭防火墙
2. all the clients are on the same subnet.
#2.所有的客户端都在同一个子网内
3. the server is in the same subnet, if 192.x.x.x or 10.x.x.x ip addresses are used. If the server
doesn‘t use 192 or 10 ip address, there shouldn‘t be any problems.
#3.server也必须在同一子网内如果使用192.x.x.x或者10.x.x.x这样的IP地址,如果server没有使用192或者10这样的IP地址,(server同client不在同一子网内)将不会有任何问题
4. Make sure JMeter can access the server.
#4.确保Jmeter可以访问到server
5. Make sure you use the same version of JMeter on all the systems. Mixing versions may not work
correctly.
#5.确保各系统的Jmeter版本保持一致,不同版本的Jmeter将不能很好的工作
----------------------------------------------------------------------
一些术语的解释:
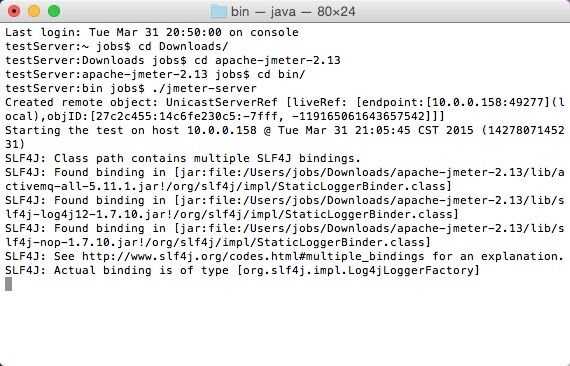
设置jmeter-server:
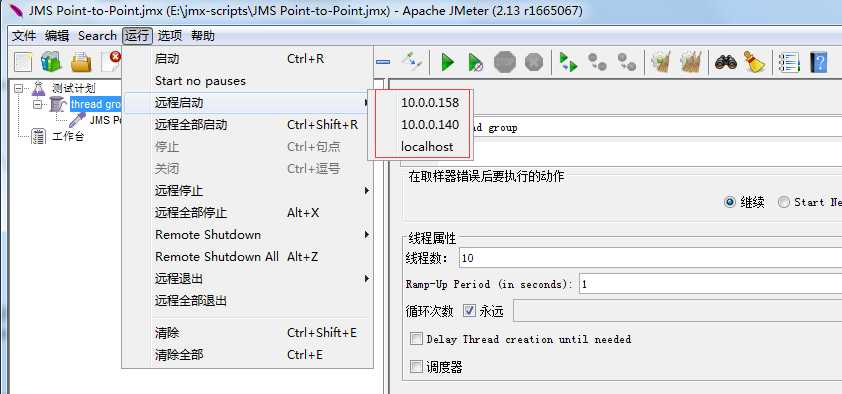
用文本编辑器打开JMETER_HOME/bin目录下的jmeter.properties文件,添加运行jmeter-server的主机IP到remote-hosts
remote_hosts=10.0.0.158, 10.0.0.140,localhost


既然是要通过non-gui模式运行,那么我们就不得不去了解下在non-gui模式下jmeter命令的参数,下面是Jmeter官方文档中列出来的一些参数,中文注释部分为我加入的解释
-h, --help
print usage information and exit
#打印帮助信息
-v, --version
print the version information and exit
#打印版本信息
-p, --propfile {argument}
the jmeter property file to use
#运行时指定property文件,默认是使用JMETER_HOME/bin目录下的jmeter.properties,如果用户自定义有其它的配置,在这里加上
#用法如下: -p user.properties
-q, --addprop {argument}
additional property file(s)
#其它配置文件,如JVM参数等等
-t, --testfile {argument}
the jmeter test(.jmx) file to run
#要运行的jmeter脚本
-j, --jmeterlogfile {argument}
the jmeter log file
#指定记录jmeter log的文件,默认为jmeter.log
-l, --logfile {argument}
the file to log samples to
#记录采样器Log的文件
-n, --nongui
run JMeter in nongui mode
#以nongui模式运行jmeter
-s, --server
run the JMeter server
#运行JMeter server
-H, --proxyHost {argument}
Set a proxy server for JMeter to use
#代理服务器地址
-P, --proxyPort {argument}
Set proxy server port for JMeter to use
#代理服务器端口
-u, --username {argument}
Set username for proxy server that JMeter is to use
#代理服务器的用户名
-a, --password {argument}
Set password for proxy server that JMeter is to use
#代理服务器用户名对应的密码
-J, --jmeterproperty {argument}={value}
Define additional JMeter properties
#定义额外的Jmeter属性
-G, --globalproperty (argument)[=(value)]
Define Global properties (sent to servers)
e.g. -Gport=123
or -Gglobal.properties
#定义发送给server的全局属性
#如:-Gport=123 或者-Gglobal.properties(指定监听server的端口)
-D, --systemproperty {argument}={value}
Define additional System properties
#定义系统属性
-S, --systemPropertyFile {filename}
a property file to be added as System properties
#通过指定的property文件定义系统属性
-L, --loglevel {argument}={value}
Define loglevel: [category=]level
e.g. jorphan=INFO or jmeter.util=DEBUG
#定义日志等级
-r, --runremote (non-GUI only)
Start remote servers (as defined by the jmeter property remote_hosts)
#启动远程server(在jmeter property中定义好的remote_hosts),公在non-gui模式下此参数才生效
-R, --remotestart server1,... (non-GUI only)
Start these remote servers (overrides remote_hosts)
#启动远程server(如果使用此参数,将会忽略jmeter property中定义的remote_hosts)
-d, --homedir {argument}
the jmeter home directory to use
#Jmeter运行的主目录
-X, --remoteexit
Exit the remote servers at end of test (non-GUI)
#测试结束时,退出(在non-gui模式下)
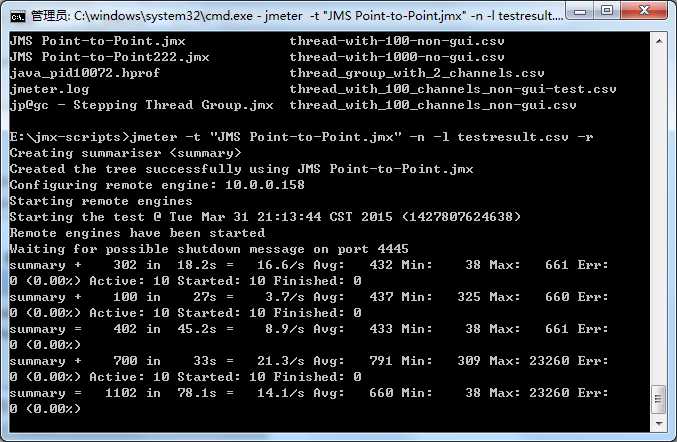
jmeter -t "JMS Point-to-Point.jmx" -n -l testresult.csv -r
运行成功后,在客户端机器上可以看到以下Log输出:

至此,以经通过non-gui模式运行Jmeter分布式测试了
这里有一点小贴士:以分布式运行Jmeter,是在所有的server上运行同样的测试脚本,也就是说,如果你打算1s起100个线程,如果你用5台机器进行分布式测试,那么将脚本调试至1s起20个线程,否则则是1s起了500个线程,这样可能跟你的预期有所差别。
标签:mixin 配置文件 run file 方法 nal tar turn 运行时
原文地址:http://www.cnblogs.com/yecao8888/p/7058857.html