标签:doctype title prototype 接收 获取数据 _id 关系 body sources
在完成了ssh框架搭建的基础上,我尝试着去了解更多。新一阶段还是一些简单的增删改查,只是提高自己的熟练度。
这一片我要创建一个登录页面,并查询数据库完成登录。
一、创建实体:
1、1新建职员实体employee:
package com.ssh.entity;

import java.util.Date;

public class Employee {

	private int employee_id;
	private String username;
	private String password;
	private String sex;
	private String positioin;
	private int phone;
	private Date birthday;

	//所属部门
	private Department department;

	public int getEmployee_id() {
		return employee_id;
	}

	public void setEmployee_id(int employeeId) {
		employee_id = employeeId;
	}

	public String getUsername() {
		return username;
	}

	public void setUsername(String username) {
		this.username = username;
	}

	public String getPassword() {
		return password;
	}

	public void setPassword(String password) {
		this.password = password;
	}

	public String getSex() {
		return sex;
	}

	public void setSex(String sex) {
		this.sex = sex;
	}

	public String getPositioin() {
		return positioin;
	}

	public void setPositioin(String positioin) {
		this.positioin = positioin;
	}

	public int getPhone() {
		return phone;
	}

	public void setPhone(int phone) {
		this.phone = phone;
	}

	public Date getBirthday() {
		return birthday;
	}

	public void setBirthday(Date birthday) {
		this.birthday = birthday;
	}

	public Department getDepartment() {
		return department;
	}

	public void setDepartment(Department department) {
		this.department = department;
	}


}
1、2创建部门实体department:
package com.ssh.entity;

import java.util.HashSet;
import java.util.Set;

public class Department {

	private int department_id;
	private String department_name;
	private String department_parent_id;

	//部门员工集合(hibernate有单向关联,这里用双向关联)
	private Set<Employee> employees = new HashSet<Employee>();

	public int getDepartment_id() {
		return department_id;
	}
	public void setDepartment_id(int departmentId) {
		department_id = departmentId;
	}
	public String getDepartment_name() {
		return department_name;
	}
	public void setDepartment_name(String departmentName) {
		department_name = departmentName;
	}
	public String getDepartment_parent_id() {
		return department_parent_id;
	}
	public void setDepartment_parent_id(String departmentParentId) {
		department_parent_id = departmentParentId;
	}
	public Set<Employee> getEmployees() {
		return employees;
	}
	public void setEmployees(Set<Employee> employees) {
		this.employees = employees;
	}

}
二、实体映射文件:
2、1employee的映射文件employee.hbm.xml:
(注意职员表和部门表的对应关系多对一)
<?xml version="1.0" encoding="UTF-8"?>
<!DOCTYPE hibernate-mapping PUBLIC
    "-//Hibernate/Hibernate Mapping DTD 3.0//EN"
    "http://hibernate.sourceforge.net/hibernate-mapping-3.0.dtd">

<hibernate-mapping>
	<class name="com.ssh.entity.Employee" table="employee">
		<id name="employee_id" column="employee_id">
			<generator class="native"></generator>
		</id>

		<property name="username" column="username" length="20"></property>
		<property name="password" column="password" length="20"></property>
		<property name="sex" column="sex" length="2"></property>
		<property name="positioin" column="positioin" length="20"></property>
		<property name="phone" column="phone" length="20"></property>
		<property name="birthday" column="birthday" ></property>

		<!-- 配置关联关系,员工对部门是多对一,这里生成的也是数据库表的外键。 -->
		<many-to-one name="department" class="com.ssh.entity.Department" column="depart_id"/>
	</class>
</hibernate-mapping>
2、2department实体映射文件:department.hmb.xml:
<?xml version="1.0" encoding="UTF-8"?>
<!DOCTYPE hibernate-mapping PUBLIC
    "-//Hibernate/Hibernate Mapping DTD 3.0//EN"
    "http://hibernate.sourceforge.net/hibernate-mapping-3.0.dtd">

<hibernate-mapping>
	<class name="com.ssh.entity.Department" table="department">
		<id name ="department_id" column="department_id">
			<generator class="native"></generator>
		</id>

		<property name="department_name" column="department_name" length="20"></property>
		<property name="department_parent_id" column="department_parent_id" length="50"></property>

		<!-- 配置关联关系 -->
		<set name="employees">
			<key column="depart_id"></key>
			<one-to-many class="com.ssh.entity.Employee"/>
		</set>
	</class>

</hibernate-mapping>
3、3在applicationcontext.xml→sessionFactory→mappingResources引入hibernate映射文件:
        	<property name="mappingResources">
        		<list>
        			<!-- 映射文件全路径 -->
        			<value>com/ssh/entity/product.hbm.xml</value>
        			<value>com/ssh/entity/Department.hbm.xml</value>
        			<value>com/ssh/entity/Employee.hbm.xml</value>

        		</list>
        	</property>
运行项目,让ssh为你在数据库去创建你要的employee、department表。
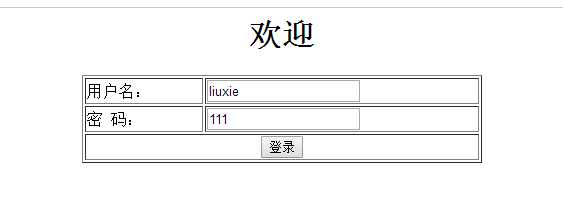
三、新建登录页面
就在index.xml基础上修改吧。
这里有一个struts2的标签可以学习下:<h1><s:actionerror/></h1>他可以将后台的错误提示信息自动显示。
<%@ page language="java" import="java.util.*" pageEncoding="utf-8"%>
<!-- struts2 标签库 -->
<%@taglib uri ="/struts-tags" prefix="s" %>
<%
String path = request.getContextPath();
String basePath = request.getScheme()+"://"+request.getServerName()+":"+request.getServerPort()+path+"/";
%>

<!DOCTYPE HTML PUBLIC "-//W3C//DTD HTML 4.01 Transitional//EN">
<html>
  <head>
    <base href="<%=basePath%>">

    <title>登录页面</title>

	<meta http-equiv="pragma" content="no-cache">
	<meta http-equiv="cache-control" content="no-cache">
	<meta http-equiv="expires" content="0">
	<meta http-equiv="keywords" content="keyword1,keyword2,keyword3">
	<meta http-equiv="description" content="This is my page">
	<!--
	<link rel="stylesheet" type="text/css" href="styles.css">
	-->

  </head>

  <body>
  	<div align="center">
  		<h1><s:actionerror/></h1>
  		<h1>欢迎</h1>
    <s:form action="door_login" method="post" namespace="/" theme="simple">
    	<table border="1" width="400">
    		<tr>
    			<td>用户名:</td>
    			<td><s:textfield name="username"/></td>
    		</tr>
    		<tr>
    			<td>密    码:</td>
    			<td><s:textfield name="password"/></td>
    		</tr>
    		<tr>
    			<!-- colspan: 合并单元格-->
    			<td align="center" colspan="2"><input type="submit" value="登录"> </td>
    		</tr>
    	</table>
    </s:form>
  	</div>
  </body>
</html>
四、控制层、业务层、持久层登录方法的实现:
employeeAction:使用模型驱动ModelDriven接收前端数据
这里面有一个addActionError的方法,就是将错误提示信息返回给前端页面。
package com.ssh.action;
import java.util.Date;
import com.opensymphony.xwork2.ActionContext;
import com.opensymphony.xwork2.ActionSupport;
import com.opensymphony.xwork2.ModelDriven;
import com.ssh.entity.Employee;
import com.ssh.service.employeeService;
public class employeeAction extends ActionSupport implements ModelDriven<Employee> {
private Employee employee = new Employee();
//使用模型驱动接收前段页面数据,并将获取数据封装到employee对象。
public Employee getModel() {
// TODO Auto-generated method stub
return employee;
}
//注入业务层类
private employeeService employeeService;
public void setEmployeeService(employeeService employeeService) {
this.employeeService = employeeService;
}
public String login(){
Employee existEmployee = employeeService.login(employee);
Date date = new Date();
if (existEmployee != null) {
System.out.println("acction"+existEmployee);
//登陆成功,提示登录成功!把登录信息存入session
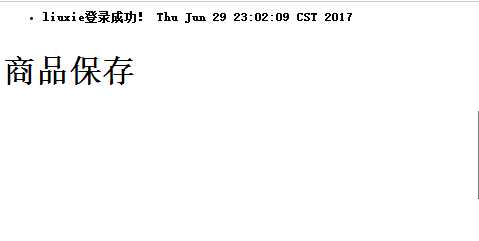
this.addActionMessage(existEmployee.getUsername()+"登录成功!"+"\t"+date);
ActionContext.getContext().getSession().put("existEmployee", employee);
return SUCCESS;
}else {
//登录失败,提示错误信息,返回登录界面。
this.addActionError("用户名或密码错误!");
return INPUT;
}
//return NONE;
}
}
employeeService:
public interface employeeService {

	Employee login(Employee employee);

}
实现类employeeServiceImpl:
public class employeeServiceImpl implements employeeService {
	private employeeDao employeeDao;
	//注入dao
	public void setEmployeeDao(employeeDao employeeDao) {
		this.employeeDao = employeeDao;
	}

	public Employee login(Employee employee) {
		Employee existEmployee = employeeDao.findUsernameAndPassword(employee);
		return existEmployee;
	}

}
employeeDao:
public interface employeeDao {

	Employee findUsernameAndPassword(Employee employee);

}
实现类employeeDaoImpl:注意继承hibernate模板
public class employeeDaoImpl extends HibernateDaoSupport implements employeeDao {

	public Employee findUsernameAndPassword(Employee employee) {
		String hql ="from Employee where username = ? and password = ?";
		List<Employee> list =this.getHibernateTemplate().find(hql, employee.getUsername(),employee.getPassword());
		if (!list.isEmpty()) {
			System.out.println("dao:"+list.get(0));
			return list.get(0);
		}
		return null;
	}

}
五、配置applicationcontext.xml以及struts.xml:
5、1控制层、业务层、持久层的注入配置:
		<bean id="employeeAction" class="com.ssh.action.employeeAction" scope="prototype">
			<!-- 需要手动注入service -->
			<property name="employeeService" ref="employeeService"></property>
		</bean>

		<!-- 配置业务层的类 -->
		<bean id="employeeService" class="com.ssh.service.impl.employeeServiceImpl">
			<property name="employeeDao" ref="employeeDao"></property>
		</bean>

	    <!-- 配置dao层:注入hibernate模板 -->
        <bean id="employeeDao" class="com.ssh.dao.impl.employeeDaoImpl">
        	<!-- ref 值与sessionFactory bean id保持一致 -->
        	<property name="sessionFactory" ref="sessionFactory"></property>
        </bean>
5.2struts.xml的action配置:
注意这里配置的两个返回结果标签result,成功的跳转addproduct。jsp,失败的返回登录页。
<?xml version="1.0" encoding="UTF-8" ?>
<!DOCTYPE struts PUBLIC
	"-//Apache Software Foundation//DTD Struts Configuration 2.3//EN"
	"http://struts.apache.org/dtds/struts-2.3.dtd">

<struts>

    <constant name="struts.enable.DynamicMethodInvocation" value="false" />
    <constant name="struts.devMode" value="false" />

  <package name="default" namespace="/" extends="struts-default">
        <action name="door_*" class="employeeAction" method="{1}">
        	<result name="success">/addproduct.jsp</result>
        	<result name="input">/index.jsp</result>
        </action>
    </package>

</struts>
六、运行项目
成功跳转:
标签:doctype title prototype 接收 获取数据 _id 关系 body sources
原文地址:http://www.cnblogs.com/ckxlovejava/p/7083048.html