标签:insecure cut nginx cep nmp 交互 http服务器 custom .exe
本篇文章涉及到的知识点有:Python爬虫,MySQL数据库,html/css/js基础,selenium和phantomjs基础,MVC设计模式,django框架(Python的web开发框架),apache服务器,linux(centos 7为例)基本操作。因此适合有以上基础的同学学习。
声明:本博文只是为了纯粹的技术交流,敏感信息本文会有所过滤,大家见谅(由于任何缘故导致长江大学教务处网站出现问题,都与本人无关)。
实现思路:在没有教务处数据接口的前提下(学生的信息安全),那也只有自己写爬虫去模拟登陆教务处,然后爬数据,为了防止教务处网站崩溃,导致爬虫失败,可以进行数据缓存,下次可以直接从自己的数据库中取数据,而我们要做的就是定时更新数据与教务处实现同步。
技术架构:centos 7 + apache2.4 + mariadb5.5 + Python2.7.5 + mod_wsgi 3.4 + django1.11
------------------------------------------------------------------------
一、Python爬虫:
1、先看一下登录入口 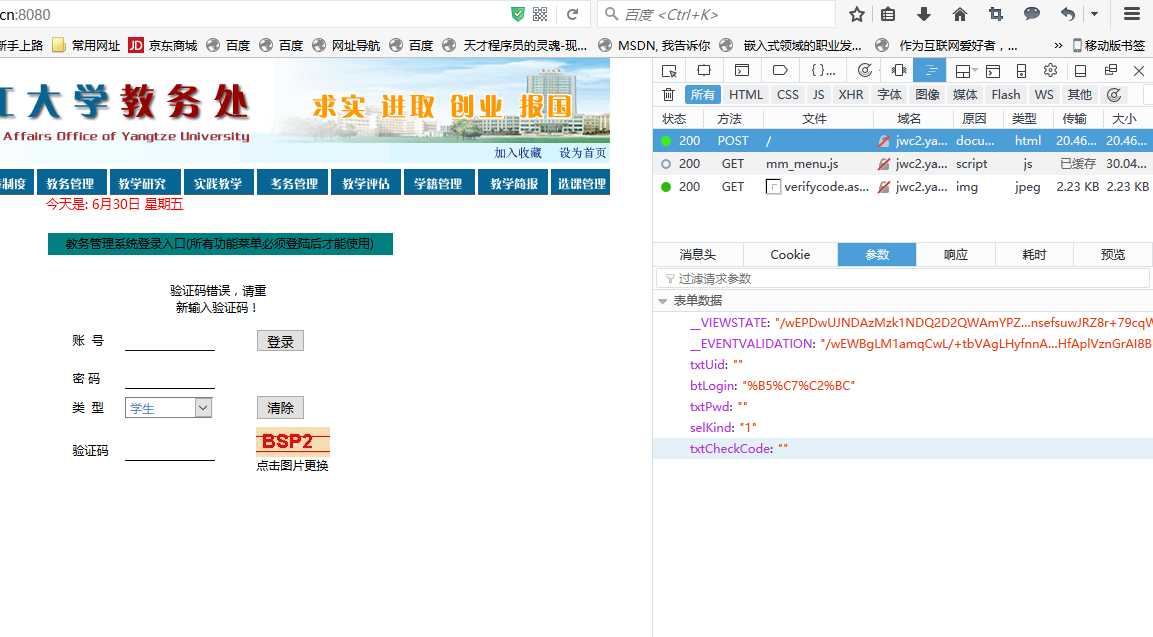
我们这里用FireFox进行抓包分析,我们发现登录是post上去的,并且带有7个参数,发现有验证码,此时有两种解决办法,一种是运用现在很火的技术用DL做图片识别,一种是down下来让用户自己输。第一种成本比较高。。等不忙了可以试一下,记得Python有个库叫Pillow还是PIL可以做图片识别,,暑假用TF试一下。第二种很low就不说了。
2、 还有种高大上的方式,,,可以不用管验证码,这里就不细说了,我们模拟登陆上去:
#coding:utf8
from bs4 import BeautifulSoup
import urllib
import urllib2
import requests
import sys

reload(sys)
sys.setdefaultencoding(‘gbk‘)

loginURL = "教务处登陆地址"
cjcxURL = "http://jwc2.yangtzeu.edu.cn:8080/cjcx.aspx"
html = urllib2.urlopen(loginURL)
soup = BeautifulSoup(html,"lxml")
__VIEWSTATE = soup.find(id="__VIEWSTATE")["value"]
__EVENTVALIDATION = soup.find(id="__EVENTVALIDATION")["value"]

data = {
        "__VIEWSTATE":__VIEWSTATE,
        "__EVENTVALIDATION":__EVENTVALIDATION,
        "txtUid":"账号",
        "btLogin":"%B5%C7%C2%BC",
        "txtPwd":"密码",
        "selKind":"1"
        }
header = {
#        "Host":"jwc2.yangtzeu.edu.cn:8080",
        "User-Agent":"Mozilla/5.0 (Windows NT 10.0;… Gecko/20100101 Firefox/54.0",
        "Accept":"text/html,application/xhtml+x…lication/xml;q=0.9,*/*;q=0.8",
        "Accept-Language":"zh-CN,zh;q=0.8,en-US;q=0.5,en;q=0.3",
        "Accept-Encoding":"gzip, deflate",
        "Content-Type":"application/x-www-form-urlencoded",
#        "Content-Length":"644",
        "Referer":"http://jwc2.yangtzeu.edu.cn:8080/login.aspx",
#        "Cookie":"ASP.NET_SessionId=3zjuqi0cnk5514l241csejgx",
#        "Connection":"keep-alive",
#        "Upgrade-Insecure-Requests":"1",
        }

UserSession = requests.session()
Request = UserSession.post(loginURL,data,header)
Response = UserSession.get(cjcxURL,cookies = Request.cookies,headers=header)
soup = BeautifulSoup(Response.content,"lxml")
print soup
接下来我们可以看到:
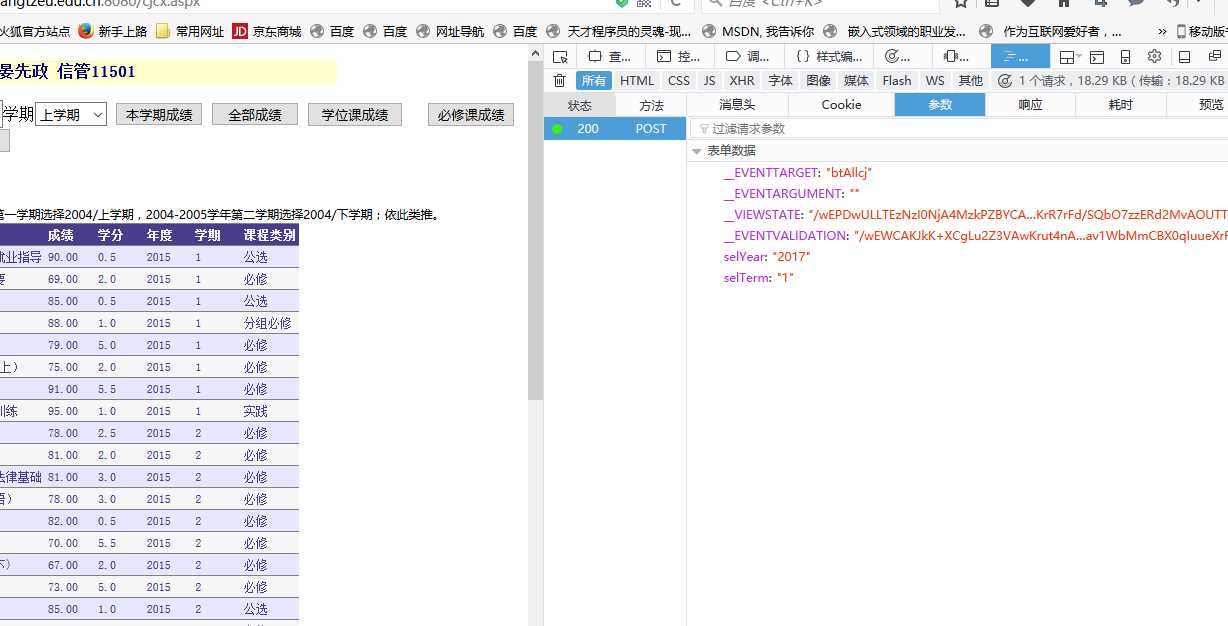
再来post(此代码接上面):
__VIEWSTATE2 = soup.find(id="__VIEWSTATE")["value"]
__EVENTVALIDATION2 = soup.find(id="__EVENTVALIDATION")["value"]

AllcjData = {
            "__EVENTTARGET":"btAllcj",
            "__EVENTARGUMENT":"",
            "__VIEWSTATE":__VIEWSTATE2,
            "__EVENTVALIDATION":__EVENTVALIDATION2,
            "selYear":"2017",
            "selTerm":"1",
#            "Button2":"%B1%D8%D0%DE%BF%CE%B3%C9%BC%A8"
        }
AllcjHeader = {
#       "Host":"jwc2.yangtzeu.edu.cn:8080",
        "User-Agent":"Mozilla/5.0 (Windows NT 10.0;… Gecko/20100101 Firefox/54.0",
        "Accept":"text/html,application/xhtml+x…lication/xml;q=0.9,*/*;q=0.8",
        "Accept-Language":"zh-CN,zh;q=0.8,en-US;q=0.5,en;q=0.3",
        "Accept-Encoding":"gzip, deflate",
        "Content-Type":"application/x-www-form-urlencoded",
#        "Content-Length":"644",
        "Referer":"http://jwc2.yangtzeu.edu.cn:8080/cjcx.aspx",
#        "Cookie":,
        "Connection":"keep-alive",
        "Upgrade-Insecure-Requests":"1",
        }
Request1 = UserSession.post(cjcxURL,AllcjData,AllcjHeader)
Response1 = UserSession.get(cjcxURL,cookies = Request.cookies,headers=AllcjHeader)
soup = BeautifulSoup(Response1.content,"lxml")
print soup
发现不行。。。这次get的页面还是原来的页面。。。我觉得有两种原因导致这次post失败:一是asp.net的__VIEWSTATE和__EVENTVALIDATION变量导致post失败,二是一个form多个button用了js做判断,导致爬虫失败,对于动态加载的页面,普通爬虫还是不行。。。。
3、再来点高大上的用selenium(web自动化测试工具,可以模拟鼠标点击)+ phantomjs(没有界面的浏览器,比chrome和Firefox都要快)
selenium安装:pip install selenium
phantomjs安装:
(1)地址:http://phantomjs.org/download.html(我下载的是Linux 64位的)
(2)解压缩:tar -jxvf phantomjs-2.1.1-linux-x86_64.tar.bz2 /usr/share/
(3)安装依赖:yum install fontconfig freetype libfreetype.so.6 libfontconfig.so.1
(4)配置环境变量:export PATH=$PATH:/usr/share/phantomjs-2.1.1-linux-x86_64/bin
(5)shell下输入phantomjs,如果能进入命令行,安装成功。
请忽略我的注释:
#coding:utf8
from bs4 import BeautifulSoup
from selenium import webdriver
from selenium.webdriver.common.keys import Keys
import time
import urllib
import urllib2
import sys


reload(sys)
sys.setdefaultencoding(‘utf8‘)

driver = webdriver.PhantomJS();
driver.get("教务处登录地址")
driver.find_element_by_name(‘txtUid‘).send_keys(‘账号‘)
driver.find_element_by_name(‘txtPwd‘).send_keys(‘密码‘)
driver.find_element_by_id(‘btLogin‘).click()
cookie=driver.get_cookies()
driver.get("http://jwc2.yangtzeu.edu.cn:8080/cjcx.aspx")
#print driver.page_source
#driver.find_element_by_xpath("//input[@name=‘btAllcj‘][@type=‘button‘]")
#js = "document.getElementById(‘btAllcj‘).onclick=function(){__doPostBack(‘btAllcj‘,‘‘)}"
#js = "var ob; ob=document.getElementById(‘btAllcj‘);ob.focus();ob.click();)"
#driver.execute_script("document.getElementById(‘btAllcj‘).click();")
#time.sleep(2)                            #让操作稍微停一下
#driver.find_element_by_link_text("全部成绩").click() #找到‘登录’按钮并点击
#time.sleep(2)
#js1 = "document.Form1.__EVENTTARGET.value=‘btAllcj‘;"
#js2 = "document.Form1.__EVENTARGUMENT.value=‘‘;"
#driver.execute_script(js1)
#driver.execute_script(js2)
#driver.find_element_by_name(‘__EVENTTARGET‘).send_keys(‘btAllcj‘)
#driver.find_element_by_name(‘__EVENTARGUMENT‘).send_keys(‘‘)
#js = "var input = document.createElement(‘input‘);input.setAttribute(‘type‘, ‘hidden‘);input.setAttribute(‘name‘, ‘__EVENTTARGET‘);input.setAttribute(‘value‘, ‘‘);document.getElementById(‘Form1‘).appendChild(input);var input = document.createElement(‘input‘);input.setAttribute(‘type‘, ‘hidden‘);input.setAttribute(‘name‘, ‘__EVENTARGUMENT‘);input.setAttribute(‘value‘, ‘‘);document.getElementById(‘Form1‘).appendChild(input);var theForm = document.forms[‘Form1‘];if (!theForm) {    theForm = document.Form1;}function __doPostBack(eventTarget, eventArgument) {    if (!theForm.onsubmit || (theForm.onsubmit() != false)) {        theForm.__EVENTTARGET.value = eventTarget;        theForm.__EVENTARGUMENT.value = eventArgument;        theForm.submit();    }   }__doPostBack(‘btAllcj‘, ‘‘)"
#js = "var script = document.createElement(‘script‘);script.type = ‘text/javascript‘;script.text=‘if (!theForm) {    theForm = document.Form1;}function __doPostBack(eventTarget, eventArgument) {    if     (!theForm.onsubmit || (theForm.onsubmit() != false)) {        theForm.__EVENTTARGET.value = eventTarget;        theForm.__EVENTARGUMENT.value = eventArgument;        theForm.submit();  }}‘;document.body.appendChild(script);"
#driver.execute_script(js)
driver.find_element_by_name("Button2").click()
html=driver.page_source
soup = BeautifulSoup(html,"lxml")
print soup
tables = soup.findAll("table")
for tab in tables:
  for tr in tab.findAll("tr"):
    print "--------------------"
    for td in tr.findAll("td")[0:3]:
      print td.getText()
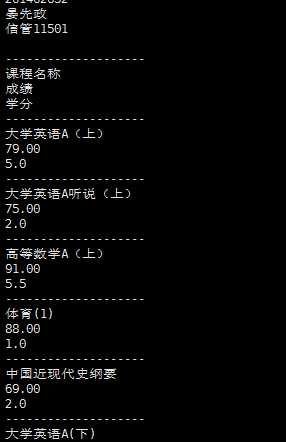
现在只能拿到必修课成绩。。。。。因为全部成绩是ASP生成的js触发的。。。而不是直接submit。。。正在寻找解决的办法。下面开始我们数据库的设计。。。
二、Mariadb学生数据库设计,,,这里引用了我们SQL server数据库原理上机的内容。。。
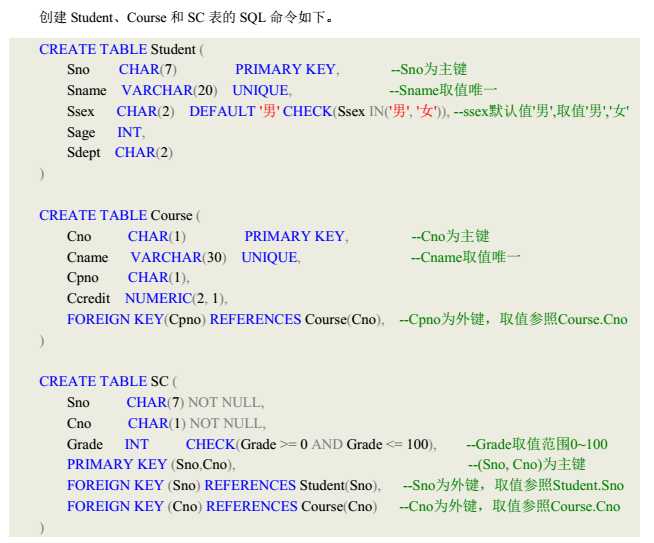
我的建库语句:
create database jwc character set utf8;

use jwc;

create table Student(
    Sno char(9) primary key,
    Sname varchar(20) unique,
    Sdept char(20),
    Spwd char(20)
);
create table Course(
    Cno   char(2) primary key,
    Cname varchar(30) unique,
    Credit  numeric(2,1)
);
create table SC(
    Sno char(9) not null,
    Cno char(2) not null,
    Grade int check(Grade>=0 and Grade<=100),
    primary key(Sno,Cno),
    foreign key(Sno) references Student(Sno),
    foreign key(Cno) references Course(Cno)
);
三、Python web环境的搭建(LNMP):
因为这次选的http服务器时apache,所以要安装mod_wsgi(python通用网关接口)来实现apache和Python程序的交互。。。如果用nginx就要安装配置uwsgi。。。类似java的servlet和PHP的php-fpm。
安装:yum install mod_wsgi
配置:vim /etc/httpd/conf/httpd.conf
这个配置花费了我不少心思和时间。。。网上的有很多错误。。。最标准的Python web django开发配置。。。拿走不谢。
#config python web
LoadModule wsgi_module modules/mod_wsgi.so
<VirtualHost *:8080>
    ServerAdmin root@Vito-Yan
    ServerName www.yuol.onlne
    ServerAlias yuol.online

    Alias /media/ /var/www/html/jwc/media/
    Alias /static/ /var/www/html/jwc/static/
    <Directory /var/www/html/jwc/static/>
        Require all granted
    </Directory>

    WSGIScriptAlias / /var/www/html/jwc/jwc/wsgi.py
#    DocumentRoot "/var/www/html/jwc/jwc"
    ErrorLog "logs/www.yuol.online-error_log"
    CustomLog "logs/www.yuol.online -access_log" common

    <Directory "/var/www/html/jwc/jwc">
        <Files wsgi.py>
            AllowOverride All
            Options Indexes FollowSymLinks Includes ExecCGI
            Require all granted
        </Files>
    </Directory>
</VirtualHost>
暑假闲着没事第一弹:基于Django的长江大学教务处成绩查询系统
标签:insecure cut nginx cep nmp 交互 http服务器 custom .exe
原文地址:http://www.cnblogs.com/Vito-Yan/p/7101132.html