标签:http p2p 接口 property code init 不同的 多个 有一个
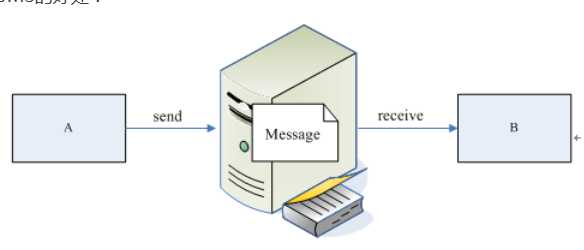
JSM(Java Message Service)既消息服务,JMS的客户端之间可以通过JMS服务进行异步的消息传输。
消息模型分为点对点和发布订阅两种模式:
Point-to-Point(P2P):

每个消息都被发送到一个特定的队列,接收者从队列中获取消息,队列保留着消息,直到他们被消费或超时。
每个消息只有一个消费者,一旦被消费,消息就从消息队列中消失。发送者和接收者在时间上没有依赖性,也就是说党发送者发送了消息之后,不管接受者是不是正在运行,都不会影响到消息被发送到队列。接收者成功接收消息之后需要向队列应答成功。
Publish/Subscribe(Pub/Sub):
客户端将消息发送到主题,多个发布者将消息发布到Topic,系统将这些消息传递给多个订阅者。
每个消息可以有多个消费者,发布者和订阅者之间有时间上的依赖性,针对某个主题的订阅者,必须创建一个订阅者后才能消费消息发布者的消息,而且为了消费消息,订阅者必须保持运行的状态。为了缓和这样严格的时间相关性,JMS允许订阅者创建一个可持久化的订阅,这样即使订阅者没有运行,他也能接收到发布者的消息。
ConnectionFactory:
创建ConnectionFactory对象的工厂,针对两种不同的jms消息模型,分别有QueueConnectionFactory和TopicConnectionFactory两种,可以通过JNDI来查找ConnectionFactory。
Destination:
Destination的意思是生产者的消息发送目标,或消费者的消息来源,对于生产者来说他的Destination是某个队列(Queue)或某个主题(Topic),对于消费者来说,他的Destination也是某个队列或主题。所以,Destination实际上就是两种类型对象,Queue,Topic,可以通过JNDI来查找Destination。
Connection:
Connection表示客户端和JMS系统之间建立的链接(对TCP、IP socket的包装)。Connection可以产生一个或多个Session,和ConnectionFactory一样,Connection也有两种类型QueueConnection和TopicConnection。
Session:
这里的Session是我没操作消息的接口,可以通过Session创建生产者,消费者,消息等。Session提供了事物的功能,当我们需要使用Session发送或接收消息时,可以将这些发送、接收动作放到一个事物中,同样,Session也分QueueSession和TopicSession两种。
provider:
消息 生产者由Session创建,并用于将消息发送到Destination,同样消息生产者也分为两种类型QueueSender、TopicPublisher,通过调用消息生产者的方法send、publish发送消息。
consumer:
消息消费者通过Session创建,用于接收被发送到Destionation的消息,同样消息消费者也分两种类型QueueReceiver、TopicSubscriber,通过session的createReceiver(Queue)、createSubscriber(Topic)创建,同时,也可以通过session的createDurableSubscriber方法来创建持久化的订阅者。
MessageListener:
消息监听器,如果注册了消息监听器,一旦消息到达,将自动调用监听器的onMessage方法。

消息队列可以提供消息的灵活性(将数据从一个应用程序传送到另一个应用程序,从软件的一个模块传递到另一个模块),松耦合,异步性(允许接收者在消息发送很长时间后再取回消息,提高服务器处理性能),进行数据的可靠传输保证数据不重发不丢失,能够实现跨平台操作。
activeMQ实例:
spring 配置:
<?xml version="1.0" encoding="UTF-8"?>
<beans xmlns="http://www.springframework.org/schema/beans"
    xmlns:xsi="http://www.w3.org/2001/XMLSchema-instance"
    xsi:schemaLocation="http://www.springframework.org/schema/beans http://www.springframework.org/schema/beans/spring-beans.xsd">

    <!-- Root Context: defines shared resources visible to all other web components -->
    <bean id="connectionFactory" class="org.apache.activemq.spring.ActiveMQConnectionFactory">
        <property name="brokerURL" value="tcp://localhost:61616" />
    </bean>

    <!-- config  jmsTemplate-->
     <bean id="jmsTemplate" class="org.springframework.jms.core.JmsTemplate">
         <property name="connectionFactory" ref="connectionFactory" />
         <property name="defaultDestination" ref="defaultDestination" />
     </bean>

     <!--  Default Destination Queue Definition-->
    <bean id="defaultDestination" class="org.apache.activemq.command.ActiveMQQueue">
        <constructor-arg index="0" value="springQueue"/>
    </bean>


    <!-- Message Receiver Definition  Listener -->
    <!-- <bean id="messageReceiver" class="com.wutuobang.jms.MessageReceiver">
    </bean>

    <bean class="org.springframework.jms.listener.SimpleMessageListenerContainer">
        <property name="connectionFactory" ref="connectionFactory" />
        <property name="destinationName" value="springQueue" />
        <property name="messageListener" ref="messageReceiver" />
    </bean> -->


</beans>
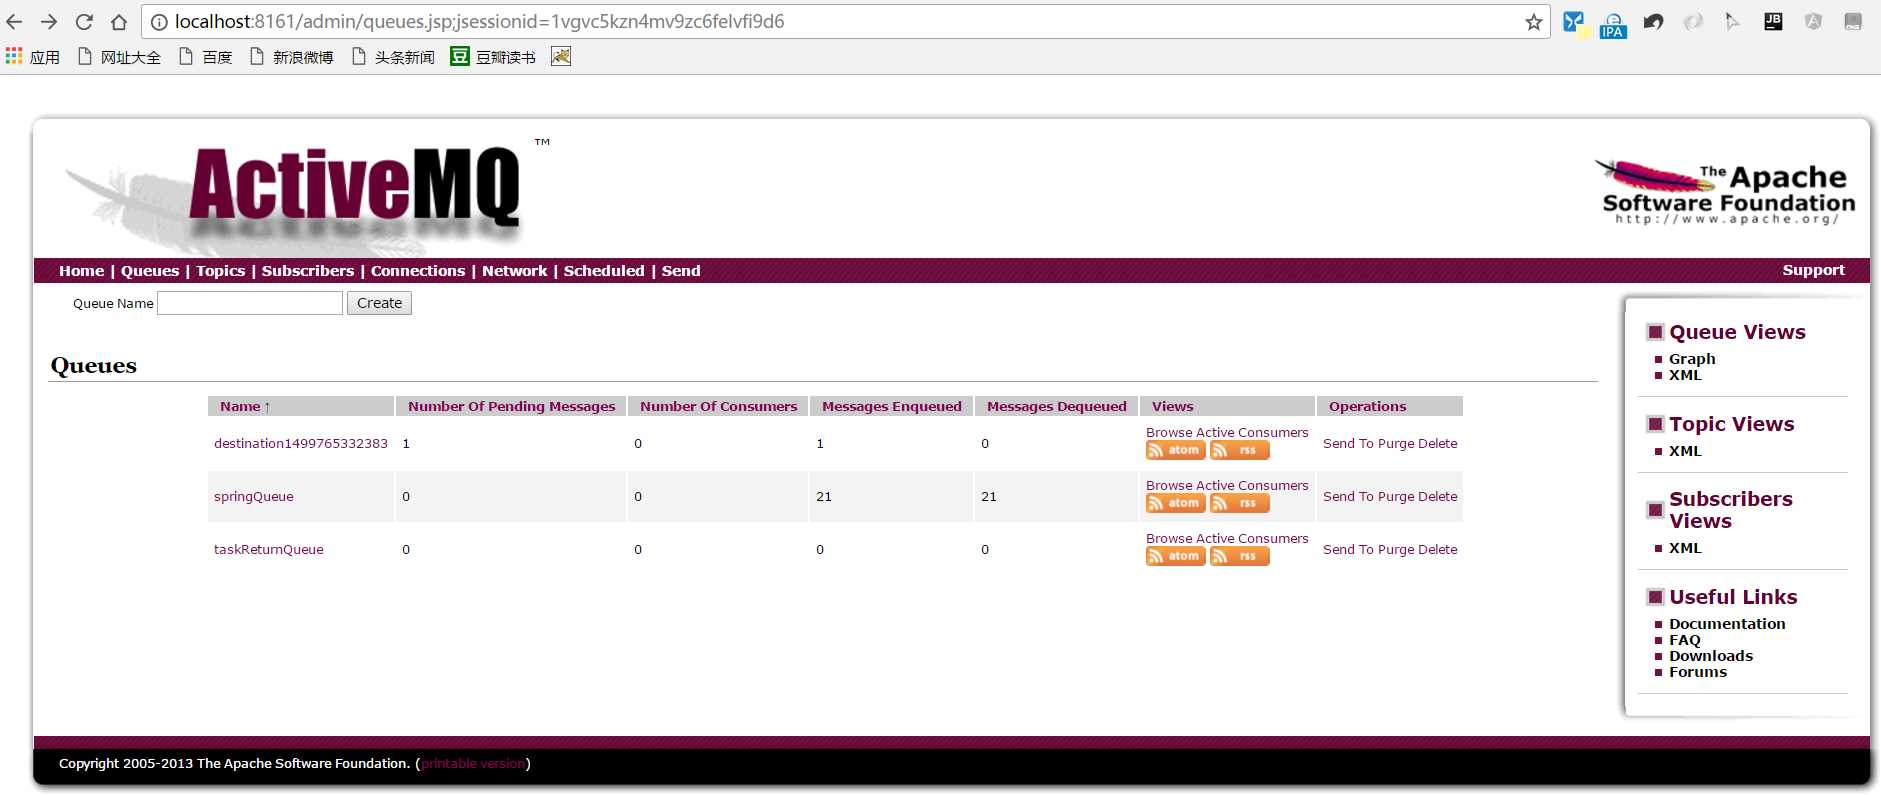
发送消息到Queue:
@RequestMapping(value = "/send", method = RequestMethod.GET)
    public String send(Locale locale, Model model) {
        /**
         * send mapMessage
         */
        Map map = new HashMap();
        map.put("Name", "welcome.");

        jmsTemplate.convertAndSend(map);
        model.addAttribute("send", "sucess");
        return "home";
    }
    @RequestMapping("/sendDestination")
    public String send(Model model){
        Map map = new HashMap();
        map.put("Name", new Date().getTime());
        jmsTemplate.convertAndSend("destination" + System.currentTimeMillis(), map);
        model.addAttribute("send","success");
        return "home";
    }
主动接收消息:
@RequestMapping(value = "/receive", method = RequestMethod.GET)
    public String test(Locale locale, Model model) {
        Message message = jmsTemplate.receive();

        if (message instanceof MapMessage) {
            final MapMessage mapMessage = (MapMessage) message;

            try {
                logger.info(mapMessage.getString("Name"));
                model.addAttribute("content", mapMessage.getString("Name"));
            } catch (JMSException e) {
                // do something
            }
        }

        return "receive";
    }
自动接收消息:
启动配置文件中监听相关配置
public class MessageReceiver implements MessageListener {

    Logger logger = LoggerFactory.getLogger(MessageReceiver.class);

    public void onMessage(final Message message) {

        if (message instanceof MapMessage) {

            final MapMessage mapMessage = (MapMessage) message;

            try {
                logger.info(mapMessage.getString("Name"));

            } catch (JMSException e) {
                // do something
            }
        }
    }
}

标签:http p2p 接口 property code init 不同的 多个 有一个
原文地址:http://www.cnblogs.com/yangfei-beijing/p/7151727.html