标签:with moc .com webpack 构建 view out 技术分享 锚点
1,在上一篇的创建工程中,使用的的模版 webpack-simple 只是创建了一个简单的demo,并没有组件和路由功能,此次采用了webpack模版,自动生成组件和路由。^_^
在模版初始化时,因为ESLint语法检查过于严格,可以暂时不要开启。
vue init webpack myapp

? Install vue-router? Yes
? Use ESLint to lint your code? No
? Setup unit tests with Karma + Mocha? Yes
? Setup e2e tests with Nightwatch? Yes

cd myapp
npm install
npm run dev
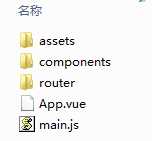
2,安装完成后,你会发现 src 目录中多了 components 和 router 。
此时,App.vue 依然是 template、script、style三部分组成,但是在template中,你会发现多了一个router-view标签。
<template>
  <div id="app">
    <h1>{{ msg }}</h1>
    <router-view></router-view>
  </div>
</template>

<script>
export default {
  name: ‘app‘,
  data () {
    return {
      msg: ‘我是一个banner‘
    }
  }
}
</script>
3,router目录中,自动生成了默认的index.js路由文件,其中默认的访问指向了Hello组件,我们来增加一个Game组件。
在了解不深入的时候,模仿就好了。^_^
import Vue from ‘vue‘
import Router from ‘vue-router‘
import Hello from ‘@/components/Hello‘
import Game from ‘@/components/Game‘//新增Game组件

Vue.use(Router)

export default new Router({
  routes: [
    {
      path: ‘/‘,
      name: ‘Hello‘,
      component: Hello
    },
    {
      path: ‘/game‘,//新增game路由
      name: ‘Game‘,
      component: Game
    }
  ]
})
4,在components目录中,原有个Hello.vue组件文件,我们简单改写一下,再新增个Game.vue 组件。(样式已被移到html中)
a) Hello.vue
<template>
  <div class="hello">
    <h2>{{ msg }}</h2>
    <ul>
      <li><a href="#/game">我是一个链接</a></li>
    </ul>
  </div>
</template>

<script>
export default {
  name: ‘hello‘,
  data () {
    return {
      msg: ‘我是hello模块‘
    }
  }
}
</script>
b) Game.vue
<template>
  <div class="game">
    <h2>{{ msg }}</h2>
    <ul>
      <li><a href="#/">返回</a></li>
    </ul>
  </div>
</template>

<script>
export default {
  name: ‘game‘,
  data () {
    return {
      msg: ‘我是game模块‘
    }
  }
}
</script>
5,main.js 文件无需改写,但我们可以看一下内容,主要是启用了路由模块。 ^_^
// The Vue build version to load with the `import` command
// (runtime-only or standalone) has been set in webpack.base.conf with an alias.
import Vue from ‘vue‘
import App from ‘./App‘
import router from ‘./router‘

Vue.config.productionTip = false

/* eslint-disable no-new */
new Vue({
  el: ‘#app‘,
  router,
  template: ‘<App/>‘,
  components: { App }
})
6,在调试通过后,可以使用 vue run build 构建发布包。默认生成的文件(html、css、js)路径在dist,可以通过修改config目录中index.js 来决定发布代码的结构与路径。
访问效果,默认首页:http://localhost/myapp/dist/#/

点击超链接,跳转到game模块:http://localhost/myapp/dist/#/game

7,至此,一个简单的通过路由来实现组件化的前端应用demo就完成了。
因为这是一个单页应用,url是使用锚点的方式来进行页面切换的。
关于vue的配置信息,会在后续的章节中介绍,下一篇会先介绍vue中ajax的使用。
标签:with moc .com webpack 构建 view out 技术分享 锚点
原文地址:http://www.cnblogs.com/phptree/p/7197761.html