标签:c3p0 ica prepare pattern ons 最好 manager cap param
第一步 添加spring
1.新建webproject
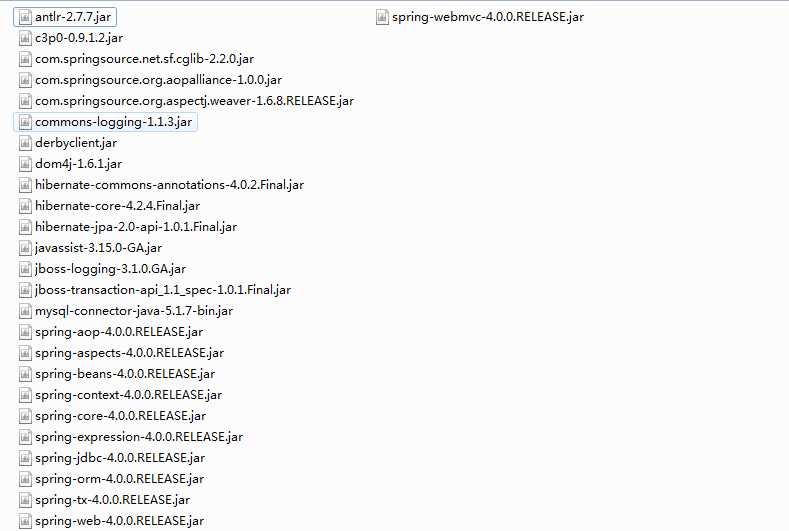
2.导包 spring jar和hibernate jar
3.添加spring能力 add Spring capabilities 得到applicationContext.xml
加入头文件
<?xml version="1.0" encoding="UTF-8"?>
<beans xmlns="http://www.springframework.org/schema/beans"
xmlns:xsi="http://www.w3.org/2001/XMLSchema-instance"
xmlns:aop="http://www.springframework.org/schema/aop"
xmlns:context="http://www.springframework.org/schema/context"
xmlns:tx="http://www.springframework.org/schema/tx"
xsi:schemaLocation="http://www.springframework.org/schema/beans http://www.springframework.org/schema/beans/spring-beans.xsd
http://www.springframework.org/schema/aop http://www.springframework.org/schema/aop/spring-aop-4.0.xsd
http://www.springframework.org/schema/context http://www.springframework.org/schema/context/spring-context-4.0.xsd
http://www.springframework.org/schema/tx http://www.springframework.org/schema/tx/spring-tx-4.0.xsd">
4.lib 下的web.xml添加ioc容器引用地址,添加ioc容器在web下的启动标签(listener中获得ioc后添加到application域中)
<context-param>
<param-name>contextConfigLocation</param-name>
<param-value>classpath:applicationContext*.xml</param-value>
</context-param>
<listener>
<listener-class>org.springframework.web.context.ContextLoaderListener</listener-class>
</listener>
第二步 添加hibernate

1.添加hibernate.cfg.xml文件
2.添加db.properties数据库参数文件配置
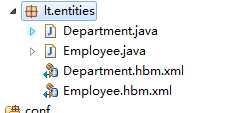
3.添加bean及其对应的hbm.xml文件(最好是自动生成,太容易写错了)

4.application中配置c3p0数据源
<!-- 配置 C3P0 数据源 -->
<bean id="dataSource" class="com.mchange.v2.c3p0.ComboPooledDataSource">
<property name="user" value="${jdbc.user}"></property>
<property name="password" value="${jdbc.password}"></property>
<property name="driverClass" value="${jdbc.driverClass}"></property>
<property name="jdbcUrl" value="${jdbc.jdbcUrl}"></property>
<property name="initialPoolSize" value="${jdbc.initPoolSize}"></property>
<property name="maxPoolSize" value="${jdbc.maxPoolSize}"></property>
</bean>
5applicationContext中配置SessionFactory
<!-- 配置 SessionFactory -->
<bean id="sessionFactory" class="org.springframework.orm.hibernate4.LocalSessionFactoryBean">
<property name="dataSource" ref="dataSource"></property>
<property name="configLocation" value="classpath:hibernate.cfg.xml"></property>
<property name="mappingLocations" value="classpath:lt/entities/*.hbm.xml"></property>
</bean>
hibernate配置完成 启动tomcat若自动生成表,则配置成功(ioc容器自动启动)
6.配置spring的事务
1添加事务
2添加事务属性
3添加事务切入点
<!-- 配置声明式事务 -->
<bean id="transactionManager"
class="org.springframework.orm.hibernate4.HibernateTransactionManager">
<property name="sessionFactory" ref="sessionFactory"></property>
</bean>
<!-- 配置事务属性 -->
<tx:advice id="txAdvice" transaction-manager="transactionManager">
<tx:attributes>
<tx:method name="get*" read-only="true" />
<tx:method name="*" />
</tx:attributes>
</tx:advice>
<!-- 配置事务切入点 -->
<aop:config>
<!-- 第二个* -->该包下的任意class -->
<!-- 第三个* -->该包下的任意方法 -->
<aop:pointcut expression="execution(* lt.service.*.*(..))" id="txPointcut"/>
<aop:advisor advice-ref="txAdvice" pointcut-ref="txPointcut"/>
</aop:config>
第三步:添加struct2
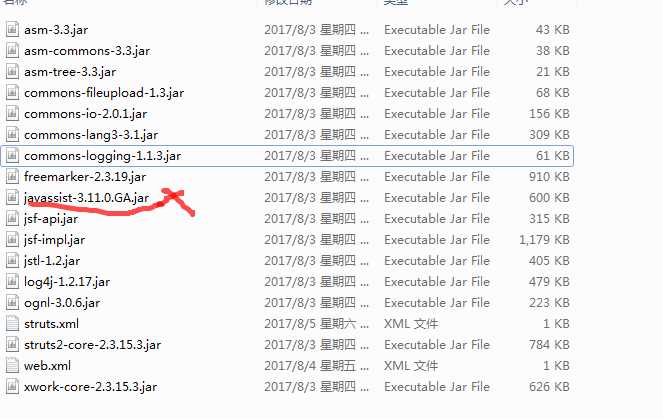
1.导包
javasist 3.1.1.0 GA删掉
2.配置web.xml 添加filter标签
<filter>
<filter-name>struts2</filter-name>
<filter-class>org.apache.struts2.dispatcher.ng.filter.StrutsPrepareAndExecuteFilter</filter-class>
</filter>
<filter-mapping>
<filter-name>struts2</filter-name>
<url-pattern>/*</url-pattern>
</filter-mapping>
3.添加struct2.xml配置文件
4.添加jar包![]() 用户整合 spring和struct2的jar
用户整合 spring和struct2的jar
5.添加Action类
6.applicationContext-beans.xml中添加action Bean 注意scope要改为prototype(默认是单例的)
7.struct2中配置Action标签
class指向IOC容器的id
标签:c3p0 ica prepare pattern ons 最好 manager cap param
原文地址:http://www.cnblogs.com/lt123/p/7357219.html