标签:creat 1.0 开始 结果 com ++ 测试 math.h osi
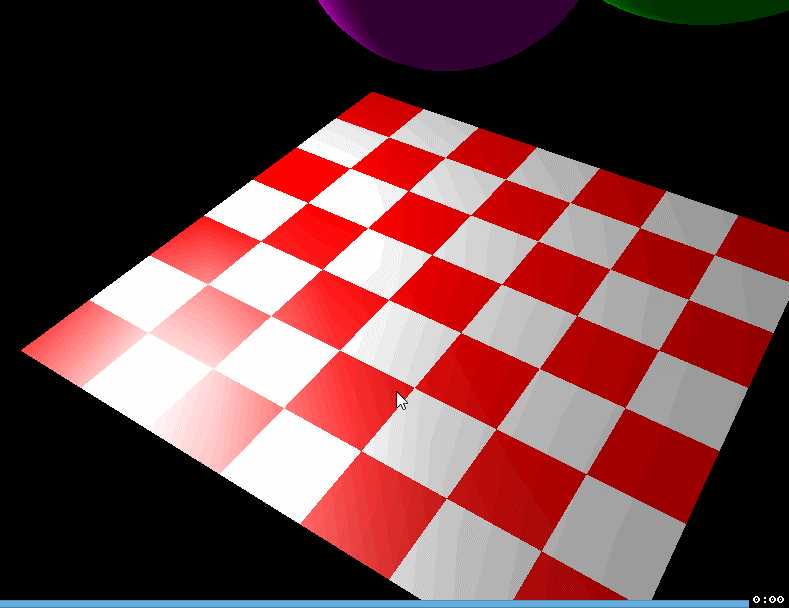
掌握OpenGL中显示列表对象的使用方法。
#include "stdafx.h"
#include <GL/glut.h>
#include <cmath>
#include <stdlib.h>
#include <GL/glut.h>
#include <math.h>

//色彩全局常量
GLfloat WHITE[] = { 1, 1, 1 };    //白色
GLfloat RED[] = { 1, 0, 0 };    //红色
GLfloat GREEN[] = { 0, 1, 0 };    //绿色
GLfloat MAGENTA[] = { 1, 0, 1 };  //洋红

//摄像机类:水平移动半径为10,按上下键则垂直移动
class Camera {
public:
    double theta;      //确定x和z的位置
    double y;          //y位置
    double dTheta;     //角度增量
    double dy;         //上下y增量
public:
    //类构造函数—默认初始化用法
    Camera() : theta(0), y(3), dTheta(0.04), dy(0.2) {}
    //类方法
    double getX() { return 10 * cos(theta); }
    double getY() { return y; }
    double getZ() { return 10 * sin(theta); }
    void moveRight() { theta += dTheta; }
    void moveLeft() { theta -= dTheta; }
    void moveUp() { y += dy; }
    void moveDown() { if (y > dy) y -= dy; }
};

//球类定义
//半径、颜色、最大高度
//x和z固定
//用lame bouncing algorithm
//每帧上下移动0.05单位
class Ball {
    //类的属性
    double radius;
    GLfloat* color;
    double maximumHeight;
    double x;
    double y;
    double z;
    int direction;   //方向
public:
    //构造函数
    Ball(double r, GLfloat* c, double h, double x, double z) :
        radius(r), color(c), maximumHeight(h), direction(-1),
        y(h), x(x), z(z) {
    }

    //更新和绘制方法
    void update() {
        //正反运动
        y += direction * 0.05;
        if (y > maximumHeight) {
            y = maximumHeight;
            direction = -1;
        }
        else if (y < radius) {
            y = radius;
            direction = 1;
        }
        glPushMatrix();
        //单独设置每个球的材质参数
        glMaterialfv(GL_FRONT, GL_AMBIENT_AND_DIFFUSE, color);
        glTranslated(x, y, z);
        //创建球
        glutSolidSphere(radius, 30, 30);
        glPopMatrix();
    }
};

//棋盘格:沿x和z平面分布
//点光源位置设置为(4, 3, 7).
class Checkerboard {
    int displayListId;
    int width;
    int depth;
public:
    //构造函数
    Checkerboard(int width, int depth) : width(width), depth(depth) {}

    //中心X
    double centerx() { return width / 2; }

    //中心Y
    double centerz() { return depth / 2; }

    //创建方法
    void create() {
        displayListId = glGenLists(1);     //每个显示列表对应1个编号——关联起来
        //新建操作表
        glNewList(displayListId, GL_COMPILE);   //把下述命令装入显示列表但不显示
        //光源位置参数
        GLfloat lightPosition[] = { 4, 3, 7, 1 };
        //设置光源位置
        glLightfv(GL_LIGHT0, GL_POSITION, lightPosition);
        //开始绘制四边形
        glBegin(GL_QUADS);
        //法向量方向
        glNormal3d(0, 1, 0);
        for (int x = 0; x < width - 1; x++) {
            for (int z = 0; z < depth - 1; z++) {
                //设置每个格子的材质属性
                glMaterialfv(GL_FRONT, GL_AMBIENT_AND_DIFFUSE,
                    (x + z) % 2 == 0 ? RED : WHITE);
                //四边形的4个点坐标
                glVertex3d(x, 0, z);
                glVertex3d(x + 1, 0, z);
                glVertex3d(x + 1, 0, z + 1);
                glVertex3d(x, 0, z + 1);
            }
        }
        glEnd();
        glEndList();
    }
    //按列表编号绘制棋盘格
    void draw() {
    glCallList(displayListId);
    }
};

//全局变量:棋盘格、相机和3个球的数组
Checkerboard checkerboard(8, 8);
Camera camera;
//创建3个小球的数组
Ball balls[] = {
    Ball(1, GREEN, 7, 6, 1),
    Ball(1.5, MAGENTA, 6, 3, 4),
    Ball(0.4, WHITE, 5, 1, 7)
};

//自定义初始化方法
void init() {
    //允许深度测试
    glEnable(GL_DEPTH_TEST);
    //设置散射和镜像反射为白光
    glLightfv(GL_LIGHT0, GL_DIFFUSE, WHITE);
    glLightfv(GL_LIGHT0, GL_SPECULAR, WHITE);
    //设置前表面的高光镜像反射为白光
    glMaterialfv(GL_FRONT, GL_SPECULAR, WHITE);
    //设置前表面散射光反光系数
    glMaterialf(GL_FRONT, GL_SHININESS, 30);
    //允许灯光
    glEnable(GL_LIGHTING);
    //打开0#灯
    glEnable(GL_LIGHT0);
    //创建棋盘格
    checkerboard.create();
}

//自定义绘制函数
//通过类绘制各对象,display函数代码得以简化
void display() {
    //清除前一帧绘图结果
    glClear(GL_COLOR_BUFFER_BIT | GL_DEPTH_BUFFER_BIT);
    //装入单位阵
    glLoadIdentity();
    //设置视角——摄像机参数
    gluLookAt(camera.getX(), camera.getY(), camera.getZ(),    //摄像机位置
        checkerboard.centerx(), 0.0, checkerboard.centerz(),   //焦点坐标
        0.0, 1.0, 0.0);   //摄像机机顶方向矢量
    //绘制棋盘
    checkerboard.draw();
    //绘制小球
    for (int i = 0; i < sizeof balls / sizeof(Ball); i++) {
        //更新位置并绘图
        balls[i].update();
    }
    //glFlush();
    glutSwapBuffers();
}

//窗口调整大小时调用的函数
void reshape(GLint w, GLint h) {
    glViewport(0, 0, w, h);
    glMatrixMode(GL_PROJECTION);
    glLoadIdentity();
    gluPerspective(40.0, GLfloat(w) / GLfloat(h), 1.0, 150.0);
    glMatrixMode(GL_MODELVIEW);
}

//自定义计时器函数
void timer(int v) {
    //当计时器唤醒时所调用的函数
    glutPostRedisplay();
    //设置下一次计时器的参数
    glutTimerFunc(1000 / 60, timer/*函数名*/, v);
}

//键盘处理函数
void onKey(int key, int, int) {
    //按键:上下左右
    switch (key) {
    case GLUT_KEY_LEFT: camera.moveLeft(); break;
    case GLUT_KEY_RIGHT: camera.moveRight(); break;
    case GLUT_KEY_UP: camera.moveUp(); break;
    case GLUT_KEY_DOWN: camera.moveDown(); break;
    }
    glutPostRedisplay();
}

int main(int argc, char** argv) {
    glutInit(&argc, argv);
    glutInitDisplayMode(GLUT_DOUBLE | GLUT_RGB | GLUT_DEPTH);
    glutInitWindowPosition(80, 80);
    glutInitWindowSize(800, 600);
    glutCreateWindow("跳跃的球");
    glutDisplayFunc(display);   //设置显示函数
    glutReshapeFunc(reshape);   //设置窗口调整大小的函数
    glutSpecialFunc(onKey);   //设置按键处理函数
    glutTimerFunc(100, timer, 0);  //设置计时器函数--每100ms被调用1次
    init();//自定义初始化函数
    glutMainLoop();//进入opengl主循环

    return 0;
}

标签:creat 1.0 开始 结果 com ++ 测试 math.h osi
原文地址:http://www.cnblogs.com/OctoptusLian/p/7367349.html