标签:pre find class jpg ssi imshow key ted opencv
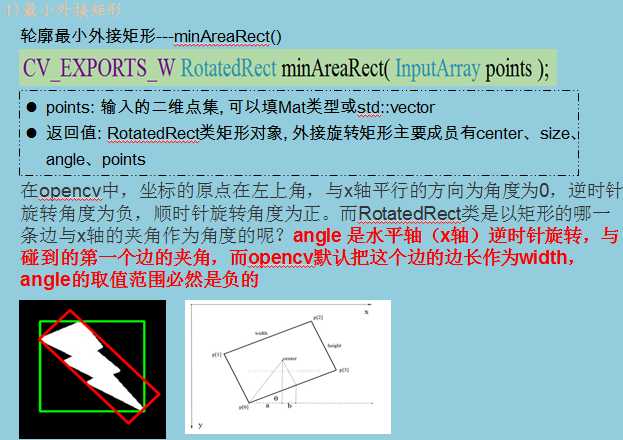
 1 #include "opencv2/opencv.hpp"
 2 using namespace cv;
 3
 4 void main()
 5 {
 6     //轮廓最小外接矩形的绘制
 7     Mat srcImg = imread("E://00.png");
 8     Mat dstImg = srcImg.clone();
 9     cvtColor(srcImg, srcImg, CV_BGR2GRAY);
10     threshold(srcImg, srcImg, 100, 255, CV_THRESH_BINARY); //二值化
11     imshow("threshold", srcImg);
12
13     vector<vector<Point>> contours;
14     vector<Vec4i> hierarcy;
15     findContours(srcImg, contours, hierarcy, CV_RETR_EXTERNAL, CV_CHAIN_APPROX_NONE);
16     vector<Rect> boundRect(contours.size());  //定义外接矩形集合
17     vector<RotatedRect> box(contours.size()); //定义最小外接矩形集合
18     Point2f rect[4];
19     for(int i=0; i<contours.size(); i++)
20     {
21         box[i] = minAreaRect(Mat(contours[i]));  //计算每个轮廓最小外接矩形
22         boundRect[i] = boundingRect(Mat(contours[i]));
23         circle(dstImg, Point(box[i].center.x, box[i].center.y), 5, Scalar(0, 255, 0), -1, 8);  //绘制最小外接矩形的中心点
24         box[i].points(rect);  //把最小外接矩形四个端点复制给rect数组
25         rectangle(dstImg, Point(boundRect[i].x, boundRect[i].y), Point(boundRect[i].x + boundRect[i].width, boundRect[i].y + boundRect[i].height), Scalar(0, 255, 0), 2, 8);
26         for(int j=0; j<4; j++)
27         {
28             line(dstImg, rect[j], rect[(j+1)%4], Scalar(0, 0, 255), 2, 8);  //绘制最小外接矩形每条边
29         }
30     }
31     imshow("dst", dstImg);
32     waitKey(0);
33 }
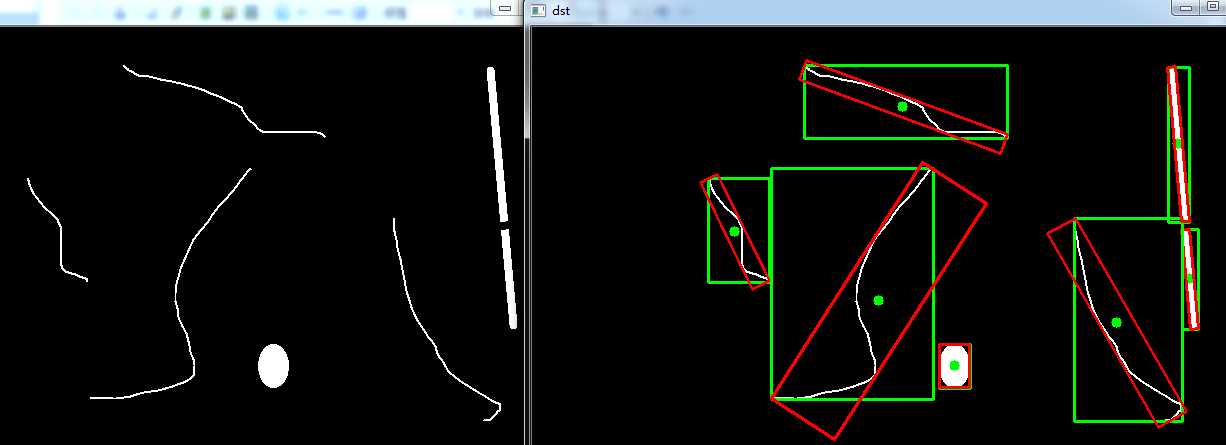
 1 #include "opencv2/opencv.hpp"
 2 #include<iostream>
 3 using namespace std;
 4 using namespace cv;
 5
 6 void main()
 7 {
 8     Mat srcImg = imread("E://cup.jpg");
 9     imshow("src", srcImg);
10     Mat dstImg = srcImg.clone();
11     medianBlur(srcImg, srcImg, 5);
12     GaussianBlur(srcImg, srcImg, Size(3, 3), 0, 0);
13     cvtColor(srcImg, srcImg, CV_BGR2GRAY);
14     threshold(srcImg, srcImg, 100, 255, CV_THRESH_BINARY_INV); //INV是因为背景白色,物体黑色,需要反转一下
15     imshow("threshold", srcImg);
16
17     vector<vector<Point>> contours;
18     vector<Vec4i> hierarcy;
19
20     findContours(srcImg, contours, hierarcy, CV_RETR_EXTERNAL, CV_CHAIN_APPROX_NONE);
21     cout<<"num="<<contours.size()<<endl;
22     vector<Rect> boundRect(contours.size());
23     vector<RotatedRect> box(contours.size());
24     Point2f rect[4];
25     for(int i=0; i<contours.size(); i++)
26     {
27         box[i] = minAreaRect(Mat(contours[i]));
28         boundRect[i] = boundingRect(Mat(contours[i]));
29         cout<<box[i].angle<<endl;
30         cout<<box[i].center<<endl;
31         cout<<box[i].size.width<<endl;
32         cout<<box[i].size.height<<endl;
33         circle(dstImg, Point(box[i].center.x, box[i].center.y), 5, Scalar(0, 255, 0), -1, 8);
34
35         //绘制外接矩形和    最小外接矩形(for循环)
36         rectangle(dstImg, Point(boundRect[i].x, boundRect[i].y), Point(boundRect[i].x + boundRect[i].width, boundRect[i].y + boundRect[i].height), Scalar(0, 255, 0), 2, 8);
37         box[i].points(rect);//把最小外接矩形四个端点复制给rect数组
38         for(int j=0; j<4; j++)
39         {
40             line(dstImg, rect[j], rect[(j+1)%4], Scalar(0, 0, 255), 2, 8);
41         }
42
43         char width[20], height[20];
44         sprintf(width, "width=%0.2f", box[i].size.width);
45         sprintf(height, "height=%0.2f", box[i].size.height);
46         putText(dstImg, width, Point(235, 260), CV_FONT_HERSHEY_COMPLEX_SMALL, 0.85, Scalar(0, 255, 0));
47         putText(dstImg, height, Point(235, 285), CV_FONT_HERSHEY_COMPLEX_SMALL, 0.85, Scalar(0, 255, 0));
48
49     }
50     imshow("dst", dstImg);
51     waitKey(0);
52 }
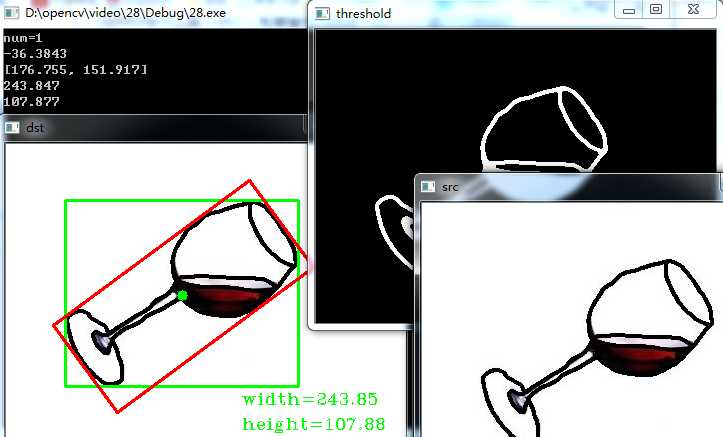
 1 #include "opencv2/opencv.hpp"
 2 #include<iostream>
 3 using namespace std;
 4 using namespace cv;
 5
 6 void main()
 7 {
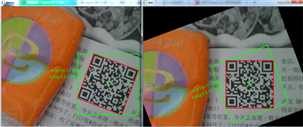
 8     Mat srcImg = imread("E://qrcode.jpg");
 9     imshow("src", srcImg);
10     Mat dstImg = srcImg.clone();
11     GaussianBlur(srcImg, srcImg, Size(3, 3), 0, 0);
12     cvtColor(srcImg, srcImg, CV_BGR2GRAY);
13     Canny(srcImg, srcImg, 100, 200);//因为原图比较复杂,所以需要将canny的值调大,去除不想要的成分
14     //threshold(srcImg, srcImg, 100, 255, CV_THRESH_BINARY_INV); //二值化也可以实现canny效果,不过在本例中杂絮较多
15     imshow("canny", srcImg);
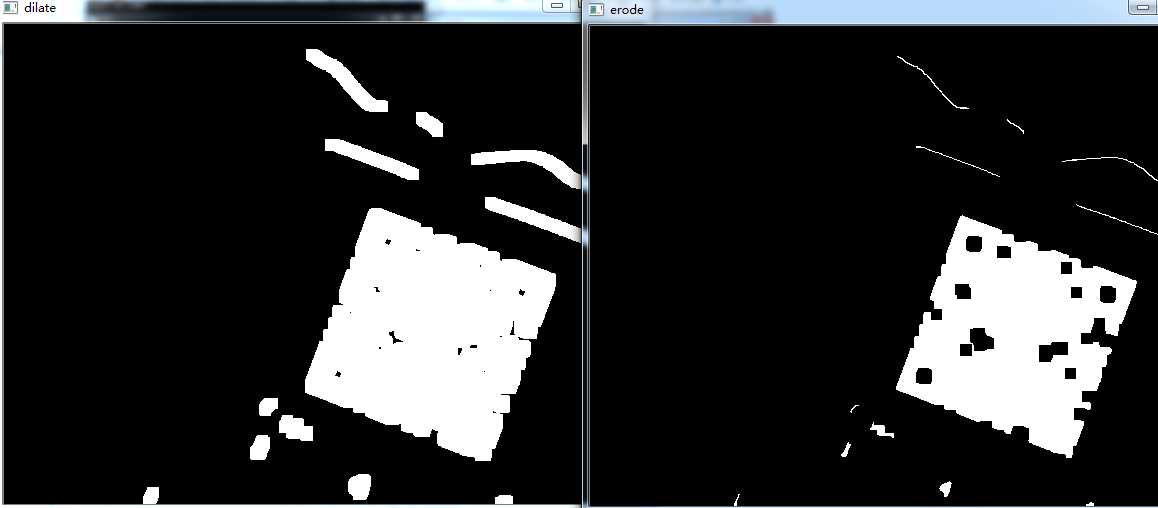
16     Mat element = getStructuringElement(MORPH_RECT, Size(11, 11), Point(-1, -1)); //定义结构元素
17     dilate(srcImg, srcImg, element); //膨胀
18     imshow("dilate", srcImg);
19     erode(srcImg, srcImg, element);
20     imshow("erode", srcImg);
21
22     vector<vector<Point>> contours;
23     vector<Vec4i> hierarcy;
24     findContours(srcImg, contours, hierarcy, CV_RETR_TREE, CV_CHAIN_APPROX_NONE);
25     vector<Rect> boundRect(contours.size());
26     vector<RotatedRect> box(contours.size());
27     Point2f rect[4];
28     for(int i=0; i<contours.size(); i++)
29     {
30         box[i] = minAreaRect(Mat(contours[i]));
31         boundRect[i] = boundingRect(Mat(contours[i]));
32
33         if(box[i].size.width < 100 || box[i].size.height<100)//筛选
34             continue;
35         rectangle(dstImg, Point(boundRect[i].x, boundRect[i].y), Point(boundRect[i].x + boundRect[i].width, boundRect[i].y + boundRect[i].height), Scalar(0, 255, 0), 2, 8);
36         circle(dstImg, Point(box[i].center.x, box[i].center.y), 5, Scalar(0, 255, 0), -1, 8);
37         box[i].points(rect);
38         for(int j=0; j<4; j++)
39         {
40             line(dstImg, rect[j], rect[(j+1)%4], Scalar(0, 0, 255), 2, 8);
41         }
42
43         float angle;
44         cout<<"angle="<<box[i].angle<<endl;
45         angle = box[i].angle;
46         char width[20], height[20];
47         sprintf(width, "width=%0.2f", box[i].size.width);
48         sprintf(height, "height=%0.2f", box[i].size.height);
49         putText(dstImg, width, Point(195, 260), CV_FONT_HERSHEY_COMPLEX_SMALL, 0.85, Scalar(0, 255, 0));
50         putText(dstImg, height, Point(190, 285), CV_FONT_HERSHEY_COMPLEX_SMALL, 0.85, Scalar(0, 255, 0));
51         imshow("temp", dstImg);
52
53         //利用仿射变换进行旋转        另一种方法,透视变换
54         if (0< abs(angle) && abs(angle)<=45)
55             angle = angle;//负数,顺时针旋转
56         else if (45< abs(angle) && abs(angle)<90)
57             angle = 90 -  abs(angle);//正数,逆时针旋转
58         Point2f center = box[i].center;  //定义旋转中心坐标
59         double angle0 = angle;
60         double scale = 1;
61         Mat roateM = getRotationMatrix2D(center, angle0, scale);  //获得旋转矩阵,顺时针为负,逆时针为正
62         warpAffine(dstImg, dstImg, roateM, dstImg.size()); //仿射变换
63
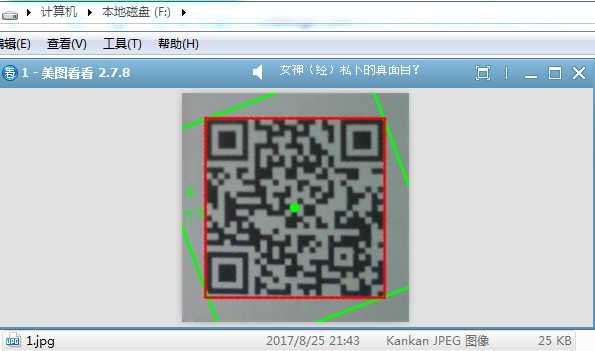
64         //保存二维码
65         int x0=0, y0=0, w0=0, h0=0;
66         x0 = boundRect[i].x;
67         y0 = boundRect[i].y;
68         w0 = boundRect[i].width;
69         h0 = boundRect[i].height;
70         Mat ROI = dstImg(Rect(x0, y0, w0, h0));
71         imwrite("F://1.jpg", ROI);
72     }
73     imshow("dst", dstImg);
74     waitKey(0);
75 }
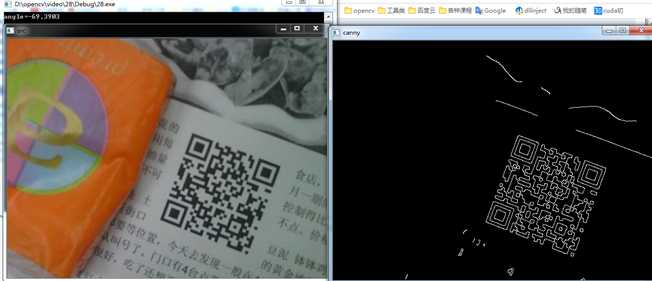
opencv学习之路(26)、轮廓查找与绘制(五)——最小外接矩形
标签:pre find class jpg ssi imshow key ted opencv
原文地址:http://www.cnblogs.com/little-monkey/p/7429579.html