标签:命令 gis .so adf ftpclient ftp服务器 ddr code bst
我们在开发项目时,肯定需要专门的一台ftp服务器来存在上传的静态资源,今天我们就在CentOS下搭建一个ftp服务器。
1.安装vsftpd组件,安装完后,有/etc/vsftpd/vsftpd.conf 文件,用来配置,还有新建了一个ftp用户和ftp的组,指向home目录为/var/ftp,默认是nologin(不能登录系统)
yum -y install vsftpd
可以用下面命令查看用户
cat /etc/passwd
默认ftp服务是没有启动的,用下面命令启动
/bin/systemctl start vsftpd.service
2.安装ftp客户端组件(用来验证是否vsftpd)
yum -y install ftp
执行命令尝试登录
ftp localhost
输入用户名ftp,密码随便(因为默认是允许匿名的)
登录成功,就代表ftp服务可用了。但是,外网是访问不了的,所以还要继续配置。
3.取消匿名登陆
vi /etc/vsftpd/vsftpd.conf
把第一行的 anonymous_enable=YES ,改为NO
重启
/bin/systemctl restart vsftpd.service
4.新建一个用户(ftpuser为用户名,随便就可以)
useradd ftpuser
修改密码
passwd ftpuser
这样一个用户建完,可以用这个登录,记得用普通登录不要用匿名了。登录后默认的路径为 /home/ftpuser
5.开放21端口
因为ftp默认的端口为21,而Centos默认是没有开启的,所以要修改iptables文件
vi /etc/sysconfig/iptables
在行上面有22 -j ACCEPT 下面另起一行输入跟那行差不多的,只是把22换成21,然后:wq保存。
还要运行下,重启iptables
/bin/systemctl restart iptables.service
外网是可以访问上去了,可是发现没法返回目录,也上传不了,因为selinux作怪了。
6.修改selinux
getsebool -a | grep ftp
执行上面命令,再返回的结果看到两行都是off,代表,没有开启外网的访问
....
allow_ftpd_full_access off
....
....
ftp_home_dir off
只要把上面都变成on就行
执行
setsebool -P allow_ftpd_full_access 1
setsebool -P ftp_home_dir off 1
再重启一下vsftpd。
 <!-- ftp client -->
		<dependency>
			<groupId>commons-net</groupId>
			<artifactId>commons-net</artifactId>
			<version>3.4</version>
		</dependency>
		<dependency>
			<groupId>org.springframework.boot</groupId>
			<artifactId>spring-boot-starter-web</artifactId>
			<exclusions>
				<exclusion>
					<groupId>org.apache.tomcat</groupId>
	                <artifactId>tomcat-juli</artifactId>
				</exclusion>
			</exclusions>
		</dependency>
除了引入ftp client包外,还需要引入spring-boot-starter-web,这样就可以做为一个单独的应用启动了。
在src/test/java目录下新建Test01.java文件,测试对FTP资源文件的基本操作,包括连接,上传、下载和删除等。
public class Test02 {

	private static FTPClient ftpClient = null;

	private static FTPClientConfig getFtpConfig() {
		FTPClientConfig ftpConfig = new FTPClientConfig(FTPClientConfig.SYST_UNIX);
		ftpConfig.setServerLanguageCode(FTP.DEFAULT_CONTROL_ENCODING);
		return ftpConfig;
	}


	public static boolean connectServer() {
		boolean flag = true;
		if (ftpClient == null) {
			int reply;
			try {
				ftpClient = new FTPClient();
				ftpClient.setControlEncoding("GBK");
				ftpClient.configure(getFtpConfig());

				ftpClient.connect("192.168.2.129");
				ftpClient.login("ftpuser", "ftpuser");
				ftpClient.setDefaultPort(21);

				reply = ftpClient.getReplyCode();
				ftpClient.setDataTimeout(120000);
				if (!FTPReply.isPositiveCompletion(reply)) {
					ftpClient.disconnect();
					flag = false;
				}
			} catch (SocketException e) {
				flag = false;
				e.printStackTrace();
			} catch (IOException e) {
				flag = false;
				e.printStackTrace();
			}
		}
		return flag;
	}

	/**
	 * 功能说明:获取工作区
	 */
	public static String getWorkingDirectory(File localFile, File rootFile) {
		String localDir = localFile.getAbsoluteFile().toURI().toString();
		String root = rootFile.getAbsoluteFile().toURI().toString();
		if (localDir.length() <= root.length()) {
			return "/";
		} else {
			return "/" + localDir.substring(root.length());
		}
	}

	/**
	 * 上传单个文件,并重命名
	 */
	public static boolean uploadFile(File localFile,String newFileName,final String distFolder) {
		boolean flag = true;
		try {
			ftpClient.setFileType(FTP.BINARY_FILE_TYPE);
			/*
			 * 每次数据连接之前,ftp client告诉ftp server开通一个端口来传输数据。为什么要这样做呢,
			 * 因为ftp server可能每次开启不同的端口来传输数据,但是在linux上或者其他服务器上面,由于安全限制,可能某些端口没有开启
			 */
			ftpClient.enterLocalPassiveMode();
			ftpClient.setFileTransferMode(FTP.STREAM_TRANSFER_MODE);
			InputStream input = new FileInputStream(localFile);
			ftpClient.changeWorkingDirectory(distFolder);
			flag = ftpClient.storeFile(newFileName, input);
			if (flag) {
				System.out.println("upload file success:" + localFile.getName());
			} else {
				System.out.println("upload file filed:" + localFile.getName());
			}
			input.close();

		} catch (IOException e) {
			e.printStackTrace();
		} catch (Exception e) {
			e.printStackTrace();
		}
		return flag;
	}

	/**
	 * 列出服务器上文件和目录
	 * @param regStr--匹配的正则表达式
	 * @throws IOException
	 */
	public static void listRemoteFiles(String regStr) throws IOException {
		try {
			ftpClient.setFileType(FTP.BINARY_FILE_TYPE);
			ftpClient.enterLocalPassiveMode();
			ftpClient.setFileTransferMode(FTP.STREAM_TRANSFER_MODE);
			FTPFile files[] = ftpClient.listFiles(regStr);

			if (files == null || files.length == 0)
				System.out.println("没有任何文件!");
			else {
				for (int i = 0; i < files.length; i++) {
					System.out.println(files[i].getName()+"  "+files[i].getTimestamp().getTime()+" "+files[i].isDirectory()+" "+files[i].getSize()/1024+"k");
				}
			}
		} catch (Exception e) {
			e.printStackTrace();
		}
	}

	/**
	 * 功能说明:从ftp上下载文件到本地
	 */
	public static boolean loadFile(String remoteFileName, String localFileName) {
		boolean flag = true;
		connectServer();
		// 下载文件
		BufferedOutputStream buffOut = null;
		try {
			buffOut = new BufferedOutputStream(new FileOutputStream(localFileName));
			flag = ftpClient.retrieveFile(remoteFileName, buffOut);
		} catch (Exception e) {
			e.printStackTrace();
		} finally {
			try {
				if (buffOut != null)
					buffOut.close();
			} catch (Exception e) {
				e.printStackTrace();
			}
		}
		return flag;
	}

	/**
	 * 删除ftp中的文件
	 */
	public static boolean deleteFile(String pathname) {
		try {
			return ftpClient.deleteFile(pathname);
		} catch (IOException e) {
			return false;
		}
	}


	public static void main(String[] args) throws IOException {

		boolean flag = new Test02().connectServer();
		System.out.println("是否连接成功?"+flag);

		uploadFile(new File("C:/1.png"),"ddd.png", "upload");
//		String  workDir = ftpClient.printWorkingDirectory();
//		System.out.println(workDir);
//		listRemoteFiles("*");
//		deleteFile("/home/ftpuser/images/bb.png");
//		loadFile("/home/ftpuser/images/1459584546868_aabb.jpg","C://dd.png");


	}


}
@SpringBootApplication
public class Application extends WebMvcConfigurerAdapter{

	public static void main(String[] args) throws Exception {
		SpringApplication.run(Application.class, args);
	}

	// 要调用这个方法必须要继承类:WebMvcConfigurerAdapter
	public void addResourceHandlers(ResourceHandlerRegistry registry) {
	    	registry.addResourceHandler("/static/**").addResourceLocations("file:upload/");
	}

}
注意这个类一定要继承WebMvcConfigurerAdapter类并且要写上你的addResourceHandlers()方法。
不要忘记引入application.yml文件!!
pom.xml文件在<project>节点下加入如下内容。
<build>
		<resources>
			<resource>
				<directory>src/main/resources</directory>
			</resource>
		</resources>
		<plugins>
			<plugin>
				<groupId>org.springframework.boot</groupId>
				<artifactId>spring-boot-maven-plugin</artifactId>
				<executions>
					<execution>
						<goals>
							<goal>repackage</goal>
						</goals>
					</execution>
				</executions>
			</plugin>
		</plugins>
	</build>
	<profiles>
		<profile>
			<id>jdk-1.6</id>
			<activation>
				<activeByDefault>true</activeByDefault>
				<jdk>1.6</jdk>
			</activation>
			<properties>
				<maven.compiler.source>1.6</maven.compiler.source>
				<maven.compiler.target>1.6</maven.compiler.target>
				<maven.compiler.compilerVersion>1.6</maven.compiler.compilerVersion>
			</properties>
		</profile>
	</profiles>
然后用Maven Install一下,在target目录中得到mazhi-core-0.0.1-SNAPSHOT.jar文件,上传到与upload目录同级的目录下,通过如下的命令启动这个jar。
java -jar mazhi-core-0.0.1-SNAPSHOT.jar
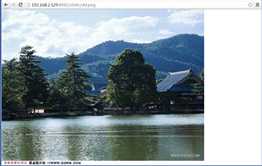
启动成功后,就可以在windows中通过浏览器进行图片的访问了,访问地址如下:
http://192.168.2.129:8081/static/bb.png
图片在浏览器里显示出来,表示访问成功。
标签:命令 gis .so adf ftpclient ftp服务器 ddr code bst
原文地址:http://www.cnblogs.com/mazhimazhi/p/7499351.html