标签:daemon 运行 client ring 用户 ica actor load 工程
我们在VMware中安装CentOS 64位系统后,在用户目录下下载安装Redis。
wget http://download.redis.io/releases/redis-stable.tar.gz
tar -xzvf redis-stable.tar.gz
cd redis-stable
make PREFIX=/usr/local/redis01 install
cd /usr/local/redis01/bin
加上`&`号使redis以后台程序方式运行
./redis-server &
或者也可以到 redis-stable/src目录下进行启动。
检测后台进程是否存在
ps -ef |grep redis
检测6379端口是否在监听
netstat -lntp | grep 6379
或者我们可以直接到redis-stable目录下修改配置文redis.conf,找到如下配置:
daemonize yes

# When running daemonized, Redis writes a pid file in /var/run/redis.pid by
# default. You can specify a custom pid file location here.
pidfile "/var/run/redis/redis01.pid"

# Accept connections on the specified port, default is 6379.
# If port 0 is specified Redis will not listen on a TCP socket.
port 7001
将daemonize值改为yes,修改进行pid的存在路径,然后重新指定一下port端口。
最后我们设置一下redis的log日志存放的地方,如果没有redis目录,需要切换到路径下进行新建。
logfile "/var/log/redis/redis01.log"
修改配置文件后我们需要指定使用哪个配置文件启动Redis
./redis-server ../redis.conf
用`redis-cli`客户端检测连接是否正常
./redis-cli
127.0.0.1:6379> keys *
(empty list or set)
127.0.0.1:6379> set key "hello world"
OK
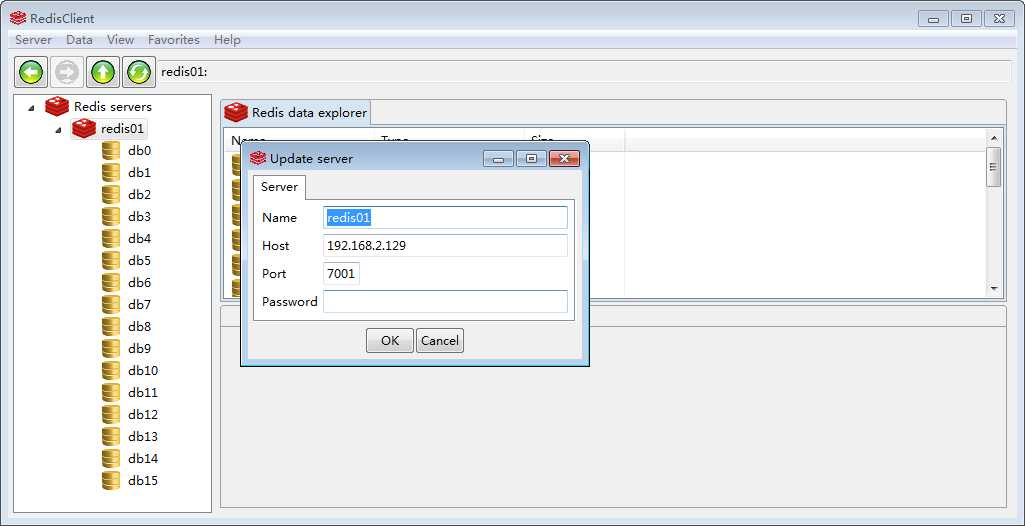
我们可以在Windows下直接下载一个RedisClient直接连接VMware中安装的Redis即可。如下图。
如果连接不上,需要关闭一下防火墙,使用
iptables -F
来禁用linux的防火墙或者使用:
vi /etc/selinux/config
然后把修改 SELINUX=enforcing的值为disabled
在mazhi工程下新建Maven Module,名称为mazhi-redis,然后在 pom.xml文件中添加redis的包引用和spring boot的包引用,如下:
 <!-- Add typical dependencies for a web application -->
    <dependencies>
       <dependency>
			<groupId>org.mazhi</groupId>
			<artifactId>mazhi-core</artifactId>
			<version>0.0.1-SNAPSHOT</version>
	   </dependency>
        <dependency>
            <groupId>org.springframework.boot</groupId>
            <artifactId>spring-boot-starter-web</artifactId>
        </dependency>
         <!-- redius  -->
	    <dependency>
			<groupId>org.springframework.session</groupId>
			<artifactId>spring-session-data-redis</artifactId>
			<version>1.0.0.RELEASE</version>
		</dependency>
    </dependencies>
然后引入application.yml文件,指定端口为8081。并且在src/java/main的org.mazhi.redis目录下新建Application.java文件,内容如下:
@SpringBootApplication
public class Application {
    public static void main(String[] args) throws Exception {
        SpringApplication.run(Application.class, args);
    }

}
下面就来为系统配置Redis了,在org.mazhi.redis.config目录下新建RedisCacheConfig.java文件,内容如下:
@Configuration
@PropertySource(value = "classpath:/redis.properties")
@EnableCaching
public class RedisCacheConfig extends CachingConfigurerSupport {

		  @Value("${spring.redis.host}")
		  private String host;
		  @Value("${spring.redis.port}")
		  private int port;
		  @Value("${spring.redis.timeout}")
		  private int timeout;

		  @Bean
		  public KeyGenerator wiselyKeyGenerator(){
		      return new KeyGenerator() {
		          public Object generate(Object target, Method method, Object... params) {
		              StringBuilder sb = new StringBuilder();
		              sb.append(target.getClass().getName());
		              sb.append(method.getName());
		              for (Object obj : params) {
		                  sb.append(obj.toString());
		              }
		              return sb.toString();
		          }
		      };
		  }
		  @Bean
		  public JedisConnectionFactory redisConnectionFactory() {
		      JedisConnectionFactory factory = new JedisConnectionFactory();
		      factory.setHostName(host);
		      factory.setPort(port);
		      factory.setTimeout(timeout); //设置连接超时时间
		      return factory;
		  }
		  @Bean
		  public CacheManager cacheManager(RedisTemplate redisTemplate) {
		      RedisCacheManager cacheManager = new RedisCacheManager(redisTemplate);
		      // Number of seconds before expiration. Defaults to unlimited (0)
		      cacheManager.setDefaultExpiration(10); //设置key-value超时时间
		      return cacheManager;
		  }
		  @Bean
		  public RedisTemplate<String, String> redisTemplate(RedisConnectionFactory factory) {
		      StringRedisTemplate template = new StringRedisTemplate(factory);
		      setSerializer(template); //设置序列化工具,这样ReportBean不需要实现Serializable接口
		      template.afterPropertiesSet();
		      return template;
		  }
		  private void setSerializer(StringRedisTemplate template) {
		      Jackson2JsonRedisSerializer jackson2JsonRedisSerializer = new Jackson2JsonRedisSerializer(Object.class);
		      ObjectMapper om = new ObjectMapper();
		      om.setVisibility(PropertyAccessor.ALL, JsonAutoDetect.Visibility.ANY);
		      om.enableDefaultTyping(ObjectMapper.DefaultTyping.NON_FINAL);
		      jackson2JsonRedisSerializer.setObjectMapper(om);
		      template.setValueSerializer(jackson2JsonRedisSerializer);
		  }
}
然后新建redis.properties配置文件,内容如下:
spring.redis.database=0
spring.redis.host=192.168.2.129
# Login password of the redis server.
spring.redis.password=
spring.redis.pool.max-active=8
spring.redis.pool.max-idle=8
spring.redis.pool.max-wait=-1
spring.redis.pool.min-idle=0
spring.redis.port=7001
# Name of Redis server.
spring.redis.sentinel.master=
# Comma-separated list of host:port pairs.
spring.redis.sentinel.nodes=
spring.redis.timeout=0
注意指定spring.redis.host和spring.redis.port为你的redis配置。
在org.mazhi.redis.web目录下新建RedisTestCtrl.java,对Redis进行简单的CRUD操作,如下:
@RestController
@RequestMapping(value = "/redis")
public class RedisTestCtrl {
	@Autowired
	private StringRedisTemplate redisTemplate;

	@RequestMapping(value = "/addKey")
	public void addKey() {
		redisTemplate.execute(new RedisCallback<Object>() {
            public Object doInRedis(RedisConnection connection) throws DataAccessException {
                connection.set(  // 插入键为test,值为hello的键值对
                        redisTemplate.getStringSerializer().serialize("test"),
                        redisTemplate.getStringSerializer().serialize("hello")
                );
                return null;
            }
       });

	}

	@RequestMapping(value = "/deleteKey")
	public void deleteKey() {
		redisTemplate.delete("test");  // 删除数据库中键为test的键值对

	}
}
这样在浏览器中访问一下:
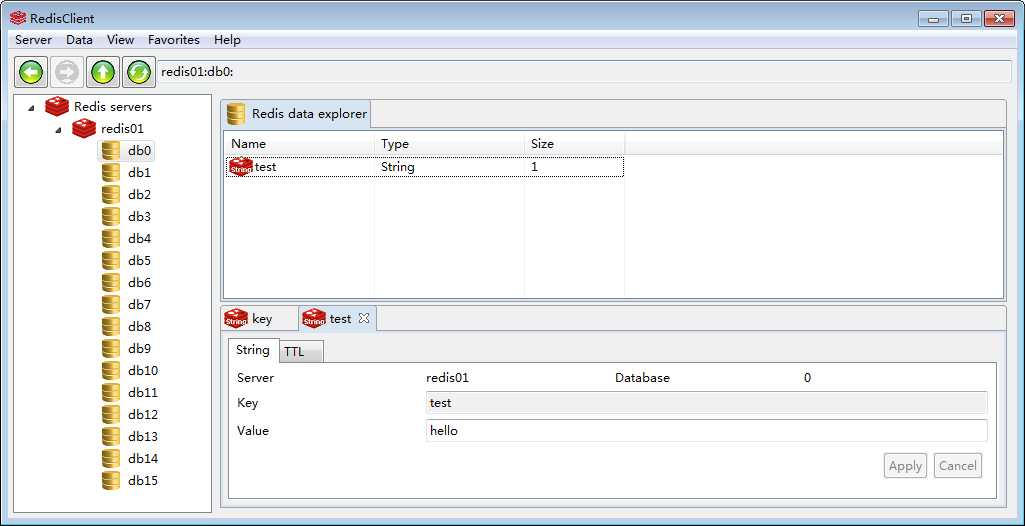
http://localhost:8081/redis/addKey
执行添加的url后,可以在RedisClient中查看,如下:
然后执行:
http://localhost:8081/redis/delete
查看RedisClient,键值被删除。
标签:daemon 运行 client ring 用户 ica actor load 工程
原文地址:http://www.cnblogs.com/mazhimazhi/p/7499335.html