标签:local login unix ase 自动 default mod off 一个
LNMP源码编译
在编译之前先把开发包组安装了
[root@tiandong63 ~]# yum groupinstall "Development Tools" "Development Libraries" -y
[root@tiandong63 ~]# yum install gcc gcc-c++ autoconf automake zlib zlib-devel openssl openssl-devel pcre* -y

[root@tiandong63 ~]# tar -xf pcre-8.37.tar.bz2 -C /usr/local/src/
解压此安装包,不需要安装nginx需要制定pcre的源码不是安装后的路径,此包的功能是支持地址重写rewrite功能,pcre的依赖可以yum安装和pcre-devel解决
编译安装:
[root@tiandong63 ~]# tar -xf nginx-1.8.0.tar.gz -C /usr/local/src/
[root@tiandong63 ~]# cd /usr/local/src/nginx-1.8.0/
[root@tiandong63 nginx-1.8.0]# ./configure --prefix=/usr/local/nginx --with-http_dav_module --with-http_stub_status_module --with-http_addition_module --with-http_sub_module --with-http_flv_module --with-http_mp4_module --with-pcre=/usr/local/src/pcre-8.37/
[root@tiandong63 nginx-1.8.0]# make -j 3 && make install
[root@tiandong63 nginx-1.8.0]# useradd -M -u 8001 -s /sbin/nologin nginx
[root@tiandong63 ~]# ll /usr/local/nginx/
total 16
drwxr-xr-x 2 root root 4096 Mar 19 21:23 conf nginx相关配置文件
drwxr-xr-x 2 root root 4096 Mar 19 21:23 html 网站根目录
drwxr-xr-x 2 root root 4096 Mar 19 21:23 logs 日志文件
drwxr-xr-x 2 root root 4096 Mar 19 21:23 sbin nginx启动脚本
[root@tiandong63 ~]# vim /usr/local/nginx/conf/nginx.conf 修改配置文件
2 user nginx nginx;
46 index index.php index.html index.htm;

[root@tiandong63 ~]# /usr/local/nginx/sbin/nginx 启动nginx服务
[root@tiandong63 ~]# netstat -tlunp|grep nginx
tcp 0 0 0.0.0.0:80 0.0.0.0:* LISTEN 7080/nginx
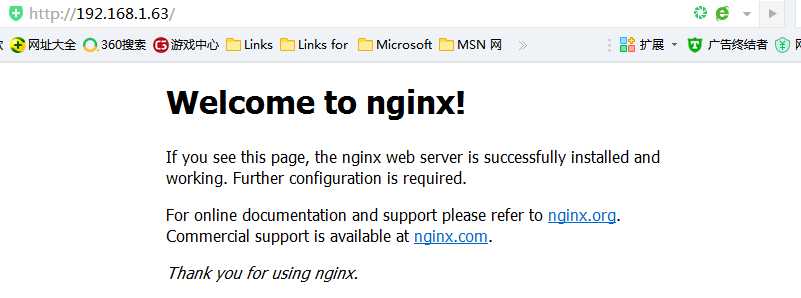
进行测试:

nginx相关维护命令:
[root@tiandong63 ~]# /usr/local/nginx/sbin/nginx -t 检测配置文件语法是否错误
nginx: the configuration file /usr/local/nginx/conf/nginx.conf syntax is ok
nginx: configuration file /usr/local/nginx/conf/nginx.conf test is successful
[root@tiandong63 ~]# /usr/local/nginx/sbin/nginx -s reload 重新加载配置文件(平滑重启)
[root@tiandong63 ~]# /usr/local/nginx/sbin/nginx -s stop 关闭nginx服务
编译安装MySQL:
在安装之前确保没有安装MySQL.
[root@tiandong63 ~]# yum remove mysql
编译安装MySQL之前解决依赖关系
[root@tiandong63 ~]# yum install -y cmake ncurses-devel
[root@tiandong63 ~]# tar -xvf mysql-5.6.26.tar.gz -C /usr/local/src/
[root@tiandong63 ~]# cd /usr/local/src/mysql-5.6.26/
[root@tiandong63 mysql-5.6.26]# useradd -M -s /sbin/nologin mysql
[root@tiandong63 mysql-5.6.26]# cmake -DCMAKE_INSTALL_PREFIX=/usr/local/mysql -DMYSQL_UNIX_ADDR=/tmp/mysql.sock -DDEFAULT_CHARSET=utf8 -DDEFAULT_COLLATION=utf8_general_ci -DWITH_EXTRA_CHARSETS=all -DWITH_MYISAM_STORAGE_ENGINE=1 -DWITH_INNOBASE_STORAGE_ENGINE=1 -DWITH_MEMORY_STORAGE_ENGINE=1 -DWITH_READLINE=1 -DENABLED_LOCAL_INFILE=1 -DMYSQL_DATADIR=/usr/local/mysql/data -DMYSQL-USER=mysql
参数解释:
-DCMAKE_INSTALL_PREFIX=/usr/local/mysql MySQL的安装根目录,目录安装的时候会自动创建
-DMYSQL_UNIX_ADDR=/tmp/mysql.sock
-DDEFAULT_CHARSET=utf8
-DDEFAULT_COLLATION=utf8_general_ci 默认字符校对
-DWITH_EXTRA_CHARSETS=all
-DWITH_MYISAM_STORAGE_ENGINE=1
-DWITH_INNOBASE_STORAGE_ENGINE=1
-DWITH_MEMORY_STORAGE_ENGINE=1
-DWITH_READLINE=1 支持readline库
-DENABLED_LOCAL_INFILE=1 允许本地倒入数据,启用加载本地数据
-DMYSQL_DATADIR=/usr/local/mysql/data mysql数据库存放路径
-DMYSQL-USER=mysql 运行mysql的用户
[root@tiandong63 mysql-5.6.26]# make -j 4 && make install
配置MySQL
[root@tiandong63 mysql-5.6.26]# chown -R mysql:mysql /usr/local/mysql/
[root@tiandong63 mysql-5.6.26]# cd
[root@tiandong63 ~]# cp /usr/local/mysql/support-files/my-default.cnf /etc/my.cnf 覆盖原配置文件
cp: overwrite `/etc/my.cnf‘? yes
[root@tiandong63 ~]# cp /usr/local/mysql/support-files/mysql.server /etc/init.d/mysqld 启动脚本
[root@tiandong63 ~]# vim /etc/init.d/mysqld
basedir=/usr/local/mysql
datadir=/usr/local/mysql/data
[root@tiandong63 ~]# chkconfig mysqld on 开机自启
[root@tiandong63 ~]# chkconfig --list mysqld
mysqld 0:off 1:off 2:on 3:on 4:on 5:on 6:off
初始化数据库:
[root@tiandong63 mysql-5.6.26]# /usr/local/mysql/scripts/mysql_install_db --defaults-file=/etc/my.cnf --basedir=/usr/local/mysql/ --datadir=/usr/local/mysql/data/ --user=mysql
查看初始化后data目录下有没有mysql和test等数据库

[root@tiandong63 ~]# ln -s /usr/local/mysql/bin/* /bin/ 做一个软链接系统可以自己调用
[root@tiandong63 ~]# /etc/init.d/mysqld start
Starting MySQL..... SUCCESS!
[root@tiandong63 ~]# mysql_secure_installation 初始安全设置
标签:local login unix ase 自动 default mod off 一个
原文地址:http://www.cnblogs.com/winter1519/p/7523441.html