标签:command toolbar 文件 点击 director 其他 imp osi log
1.在github中创建一个账号:https://github.com/join?source=header-home
2.下载并安装git:https://git-scm.com/downloads
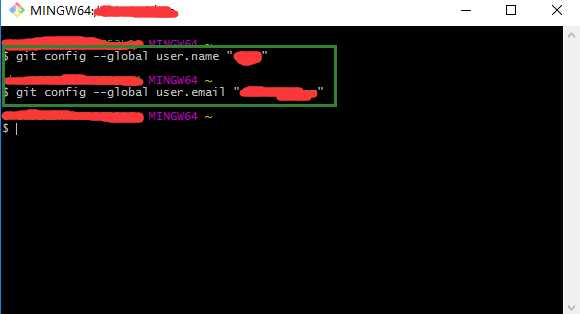
3.安装成功后打开Git Bash,输入下列命令,设置git全局用户名和邮箱
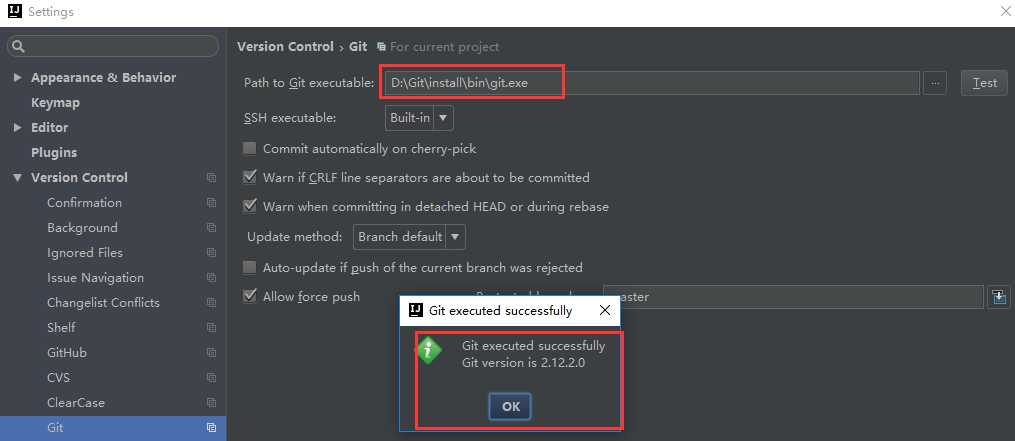
4.在IDEA中设置Git,在File-->Setting->Version Control-->Git-->Path to Git executable选择你的git安装后的git.exe文件,然后点击Test,测试是否设置成功
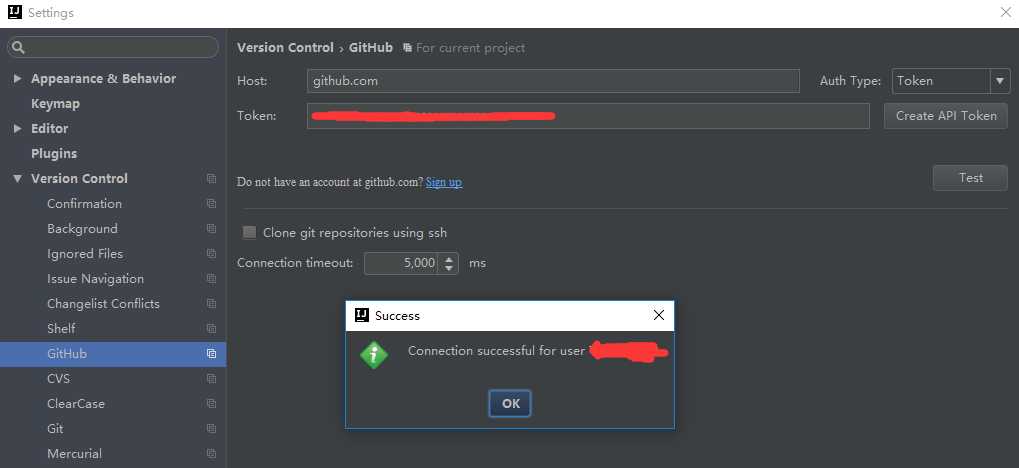
5.在IDEA中设置GitHub,File-->Setting->Version Control-->GibHub
Host:github.com
Token:点击Create API Token,输入在github中注册的用户名和密码生成token
点击Test,测试是否连接成功
6.创建本地仓库,VCS-->Import into Version Control-->Create Git Repository...
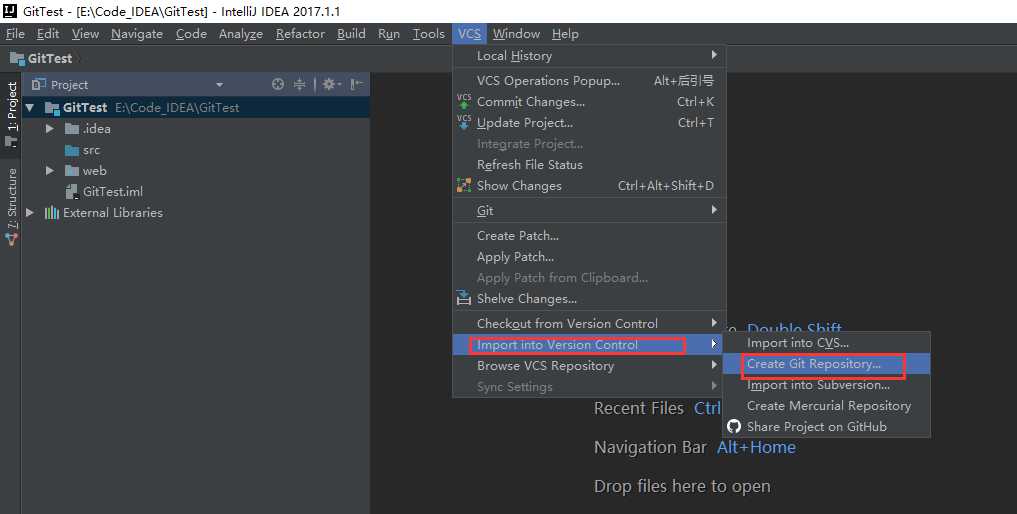
在弹框中选中项目所在的位置,点击OK,此时项目文件全部变成红色(若选中其他位置,则git-->add不可点选,不知为何)
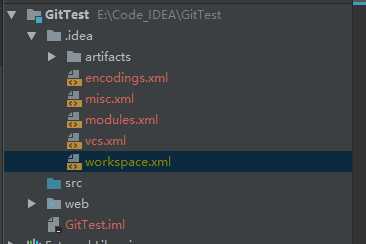
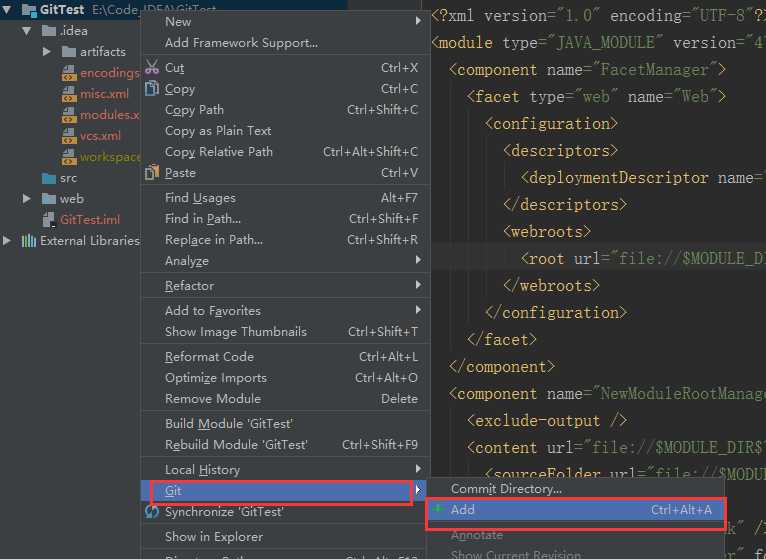
7.上传项目到本地仓库,项目右键选择Git-->add,此时项目文件变成绿色,此时文件只是处于暂存区,并没有真正进入到版本库中
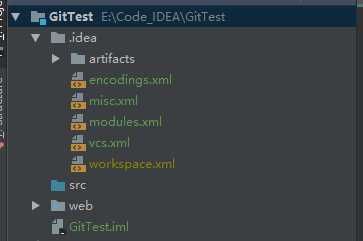
项目右键Git--> Commit Directory,在弹窗中输入Commit Message,点击commit,此时项目文件从暂存区真正进入版本库中,项目文件变成白色
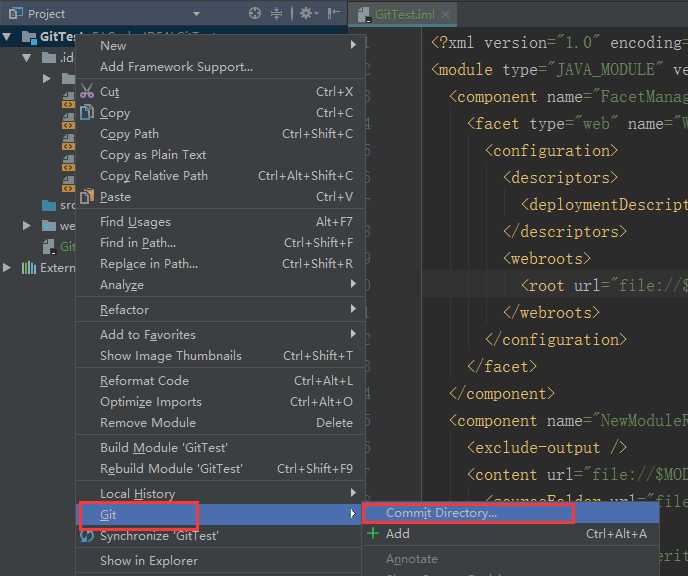
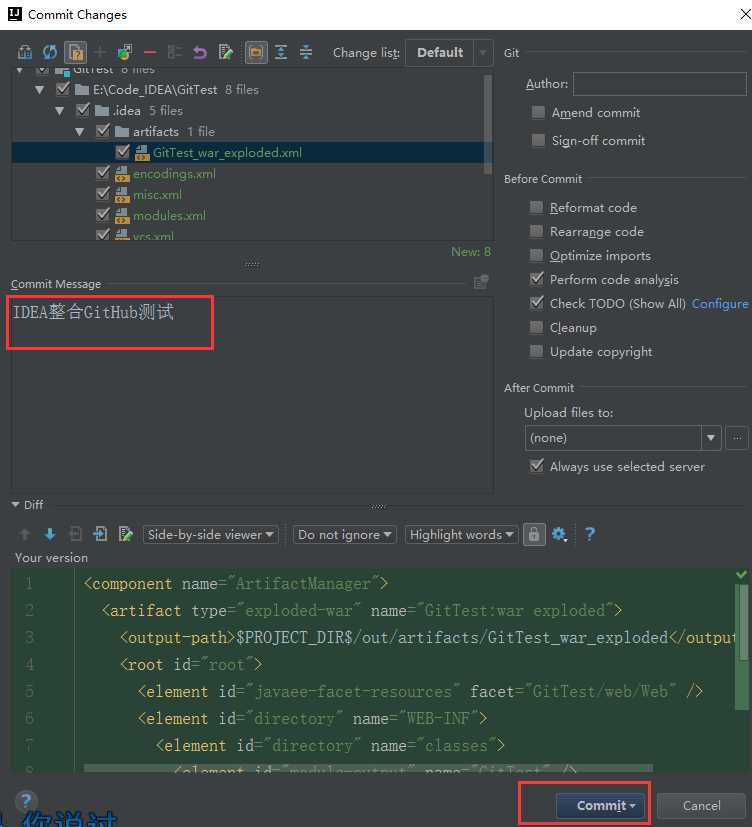
这里选择commit and push
然后配置push的信息 push即可
标签:command toolbar 文件 点击 director 其他 imp osi log
原文地址:http://www.cnblogs.com/hkgov/p/7694101.html