标签:text 过滤 整合 actor 扫描 listener ini 技术分享 spring
首先创建一个web工程,我这里使用的IDE为eclipse。转载请注明出处:http://www.cnblogs.com/smfx1314/p/7749684.html
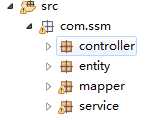
结果目录如下:
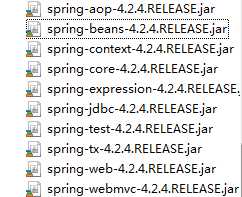
添加相关的jar包:

接下来是完成配置文件
首先我们先配置web.xml:
<?xml version="1.0" encoding="UTF-8"?>
<web-app xmlns:xsi="http://www.w3.org/2001/XMLSchema-instance" xmlns="http://xmlns.jcp.org/xml/ns/javaee" xsi:schemaLocation="http://xmlns.jcp.org/xml/ns/javaee http://xmlns.jcp.org/xml/ns/javaee/web-app_3_1.xsd" id="WebApp_ID" version="3.1">
<display-name>ssm-bbs</display-name>
<welcome-file-list>
<welcome-file>index.jsp</welcome-file>
</welcome-file-list>
<listener>
<listener-class>org.springframework.web.context.ContextLoaderListener</listener-class>
</listener>
<context-param>
<param-name>contextConfigLocation</param-name>
<param-value>classpath:applicationContext.xml</param-value>这里是加载spring的配置文件
</context-param>
<servlet>
<servlet-name>springmvc</servlet-name>
<servlet-class>org.springframework.web.servlet.DispatcherServlet</servlet-class>
<init-param>
<param-name>contextConfigLocation</param-name>
<param-value>classpath:springmvc.xml</param-value>这里是加载springmvc的配置文件
</init-param>
<load-on-startup>1</load-on-startup>
</servlet>
<servlet-mapping>
<servlet-name>springmvc</servlet-name>
<url-pattern>*.do</url-pattern>
</servlet-mapping>
<filter>
<filter-name>encodingFilter</filter-name>
<filter-class>org.springframework.web.filter.CharacterEncodingFilter</filter-class>
<init-param>
<param-name>encoding</param-name>
<param-value>UTF-8</param-value>
</init-param>
</filter>
<filter-mapping>
<filter-name>encodingFilter</filter-name>
<url-pattern>/*</url-pattern>
</filter-mapping>
</web-app>
上面添加了编码过滤。
注意:springmvc的<url-pattern>*.do</url-pattern>配置不能用/*,不然会拦截jsp,页面无法显示。推荐用*.do或者是/
然后我们在src下创建一个config源码包,专门防止配置文件
配置springmvc的配置文件springmvc.xml
<?xml version="1.0" encoding="UTF-8"?>
<beans xmlns="http://www.springframework.org/schema/beans"
xmlns:mvc="http://www.springframework.org/schema/mvc"
xmlns:xsi="http://www.w3.org/2001/XMLSchema-instance"
xmlns:context="http://www.springframework.org/schema/context"
xsi:schemaLocation="
http://www.springframework.org/schema/beans
http://www.springframework.org/schema/beans/spring-beans.xsd
http://www.springframework.org/schema/context
http://www.springframework.org/schema/context/spring-context.xsd
http://www.springframework.org/schema/mvc
http://www.springframework.org/schema/mvc/spring-mvc.xsd">
<!-- 扫描注解的包 -->
<context:component-scan base-package="com.ssm.controller"></context:component-scan>
<!-- 开启注解 -->
<mvc:annotation-driven/>
<!--静态资源访问-->
<mvc:default-servlet-handler/>
<bean class="org.springframework.web.servlet.view.InternalResourceViewResolver">
<property name="prefix" value="/WEB-INF/jsp/"></property>
<property name="suffix" value=".jsp"></property>
</bean>
</beans>
接下来是spring整合mybatis以及数据源,事务管理等
在config源码包中创建applicationContext.xml
<?xml version="1.0" encoding="UTF-8"?>
<beans xmlns="http://www.springframework.org/schema/beans"
xmlns:xsi="http://www.w3.org/2001/XMLSchema-instance"
xmlns:aop="http://www.springframework.org/schema/aop"
xmlns:tx="http://www.springframework.org/schema/tx"
xmlns:context="http://www.springframework.org/schema/context"
xsi:schemaLocation="http://www.springframework.org/schema/beans
http://www.springframework.org/schema/beans/spring-beans.xsd
http://www.springframework.org/schema/tx
http://www.springframework.org/schema/tx/spring-tx.xsd
http://www.springframework.org/schema/aop
http://www.springframework.org/schema/aop/spring-aop.xsd
http://www.springframework.org/schema/context
http://www.springframework.org/schema/context/spring-context.xsd">
<!-- 扫描注解的包 -->
<context:component-scan base-package="com.ssm.service"></context:component-scan>
<!-- 配置数据库 -->
<!-- 加载配置文件 -->
<!-- <context:property-placeholder location="classpath:jdbc.properties"/> -->
<bean id="dataSource" class="com.mchange.v2.c3p0.ComboPooledDataSource">
<property name="driverClass" value="com.mysql.jdbc.Driver"></property>
<property name="jdbcUrl" value="jdbc:mysql://localhost:3306/forum"></property>
<property name="user" value="root"></property>
<property name="password" value="1234"></property>
</bean>
<!-- 配置sqlSessionFactory, 并将数据源注入 -->
<bean id="sqlSessionFactory" class="org.mybatis.spring.SqlSessionFactoryBean">
<!-- 引入数据源 -->
<property name="dataSource" ref="dataSource"></property>
<!--载入配置mapper映射的xml-->
<property name="mapperLocations" value="classpath:com/ssm/mapper/*.xml"/>
</bean>
<!-- 配置映射接口 -->
<bean class="org.mybatis.spring.mapper.MapperScannerConfigurer">
<property name="basePackage" value="com.ssm.mapper"/>
<property name="sqlSessionFactoryBeanName" value="sqlSessionFactory"></property>
</bean>
<!-- 配置声明式事务 -->
<bean id="transactionManager" class="org.springframework.jdbc.datasource.DataSourceTransactionManager">
<property name="dataSource" ref="dataSource"></property>
</bean>
<tx:annotation-driven transaction-manager="transactionManager"/>
</beans>
实体类对应的mapper.xml
<?xml version="1.0" encoding="UTF-8" ?>
<!DOCTYPE mapper PUBLIC "-//mybatis.org//DTD Mapper 3.0//EN"
"http://mybatis.org/dtd/mybatis-3-mapper.dtd">
<mapper namespace="com.ssm.mapper.UserMapper">这里的namespcae路径是你mapper接口的路径
</mapper>
框架大致为以上内容。另外,mybatis的核心配置文件我这里直接在spring中整合了,你也可以单独创建一个mybatis的配置文件,mybatis-config.xml.
标签:text 过滤 整合 actor 扫描 listener ini 技术分享 spring
原文地址:http://www.cnblogs.com/smfx1314/p/7749684.html