标签:blog http io os 使用 ar strong 文件 数据
转:http://blog.csdn.net/fxhflower/article/details/7274925
WCF服务开发与调用的完整示例
开发工具:VS2008
开发语言:C#
开发内容:简单的权限管理系统
第一步、建立WCF服务库
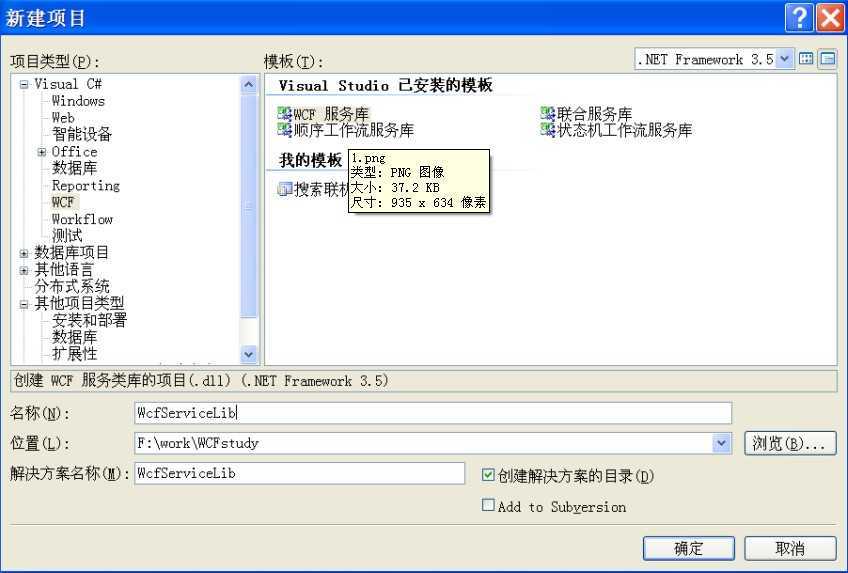
点击确定,将建立一个WCF 服务库示例程序,自动生成一个包括IService1.cs和Service1.cs两个类文件。我们可以直接对其修改开发我们的服务,但一般直接删除。
第二步:开发实体类
在解决方案中,添加新类Module.cs
在类中要首先引入using System.Runtime.Serialization命名空间
实体类具体代码如下:
namespace WcfServiceLib.model
{
/// <summary>
/// 模块实体
/// </summary>
[DataContract]
class Module
{
[DataMember]
public string ModuleNO;
[DataMember]
public string ModuleName;
}
}
为使在WCF服务被调用过程中科被序列化,在实体类前加[DataContract]标签,实体类每个成员前加[DataMember]标签
第三步:创建WCF服务接口
WCF服务要对外提供服务,需要创建服务的接口,声明对外服务的内容。
在解决方案中添加新的接口类imoduleservice.cs,然后引入名门空间using System.ServiceModel;
具体代码如下:
using System;
using System.Collections.Generic;
using System.Linq;
using System.Text;
using System.ServiceModel;
using WcfServiceLib.model;
namespace WcfServiceLib.iservice
{
/// <summary>
/// 接口类
/// </summary>
[ServiceContract]
public interface imoduleservice
{
[OperationContract]
void AddModules(Module book);
[OperationContract]
Module GetModuleByID(string id);
[OperationContract]
void RemoveModule(string id);
[OperationContract]
void ModuleUpdate(Module book);
}
}
接口类前要加[ServiceContract]标签,每个成员前要加[OperationContract]标签,标签的作用是保证外部调用可以访问到该方法。
第四步:接口类的实现
实现第三步中声明的接口类,只有这样WCF服务才会正在提供服务。
在解决方案中添加接口实现类moduleservice,引入名称空间using System.ServiceModel;
具体代码如下:
using System;
using System.Collections.Generic;
using System.Linq;
using System.Text;
using WcfServiceLib.iservice;
using System.ServiceModel;
using WcfServiceLib.model;
namespace WcfServiceLib.service
{
/// <summary>
/// 接口类实现
/// </summary>
[ServiceBehavior(InstanceContextMode = InstanceContextMode.Single)]
class moduleservice : imoduleservice
{
#region imoduleservice 成员
List<Module> _Modules = new List<Module>();
public void AddModules(Module m)
{
m.ModuleNO = Guid.NewGuid().ToString();
_Modules.Add(m);
}
public Module GetModuleByID(string id)
{
Module m = _Modules.Find(p => p.ModuleNO == id);
return m;
}
public void RemoveModule(string id)
{
Module m = _Modules.Find(p => p.ModuleNO == id);
_Modules.Remove(m);
}
public void ModuleUpdate(Module module)
{
Module m = _Modules.Find(p => p.ModuleNO == module.ModuleNO);
m.ModuleName = module.ModuleName;
}
#endregion
}
}
到此为止,WCF服务的主体就开发完成了,那么如何才可以让调用者使用这个服务呢?我们就需要吧WCF服务注册并发布一下。
第五步:WCF服务发布
在VS2008以上的版本中都提供了对WCF服务可视化注册和发布的工具。
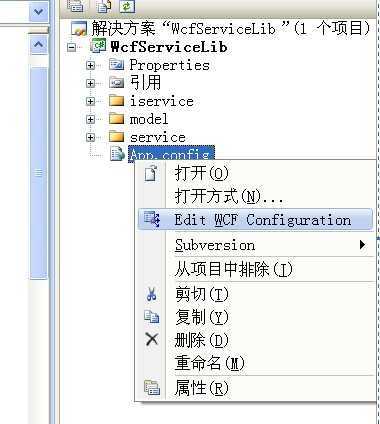
出现如下界面:
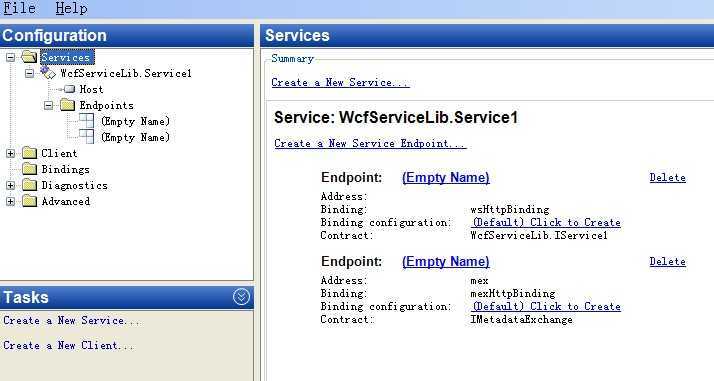
可以看到有两个终结点,第一个是服务节点,第二个是元数据节点。由于我们是用VS自带的服务库项目来创建的,配置文件中还没有删除这些信息,所以第一个节点里还保留着自带的服务信息Iservice.下面我们把这个服务更改为我们上文编写的服务的信息。
单击左侧的“Services”-“Services.Service1”在右侧的Name,弹出“服务类型浏览器”对话框,在此类型中我们找到此WCF服务项目编译出来的dll文件,双击它就可以出现此服务中的对外公布的服务,点击选中它单击确定。
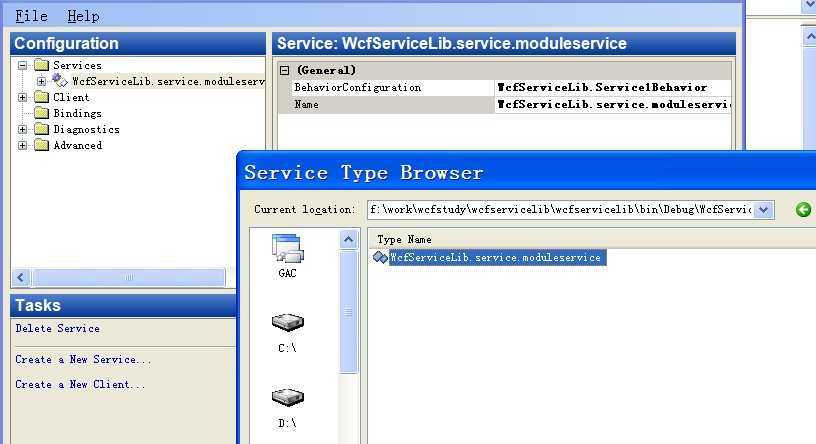
然后,我们展开左侧“Services”->“WcfServiceLib.service.moduleservice”->“Endpoints”,单击第一个“Empty Name”,从右边的“EmptyProperties”中的Contract中我们可以看到,这里的Contract仍然用的是Services.IService1。按照上文的步骤在走一遍,找到DLL后确定。
最后关闭配置窗口,保存。
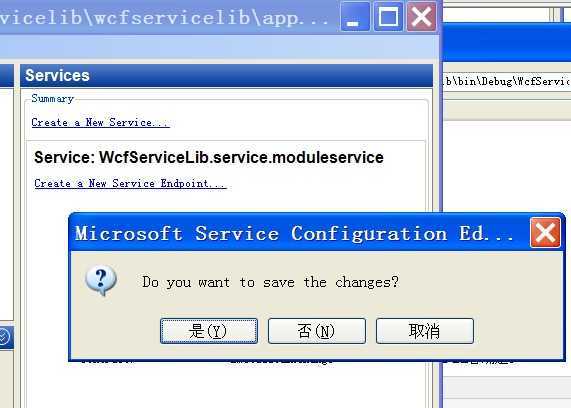
到此为止,服务就开发并发布完成了。接下来我们将WCF进行托管后就可以使用了。WCF服务托管有三种方式,最常用的是IIS托管。我们看一下WCF服务是如何进行IIS托管的。
第六步:WCF服务IIS发布
1、在解决方案上右键添加网站,类型选择WCF服务。
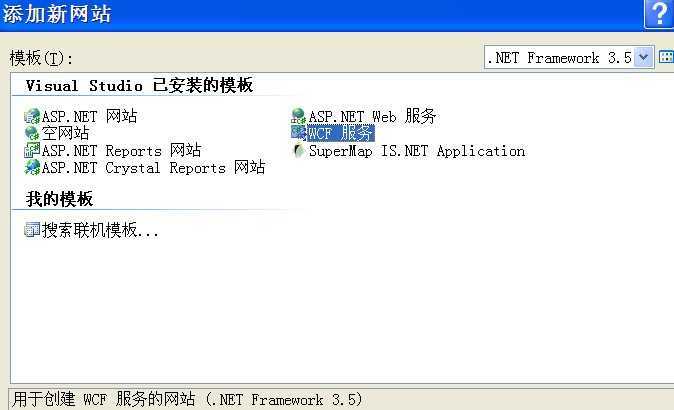
2、建立起来的新的WCF服务站点中在App_Code文件中自动为我们生成两个类文件:IService.cs和Service.cs。这两个文件对我们来说没有用,我们删掉。
3、然后添加对WCF服务库项目的引用。结果如下:
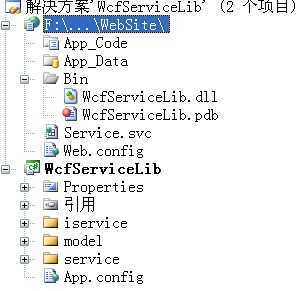
4、然后修改Service.svc文件,代码如下:
<%@ ServiceHost Language="C#" Debug="true" Service="WcfServiceLib.service.moduleservice" %>
5、在web.config上右击选择“编辑WCF配置”。
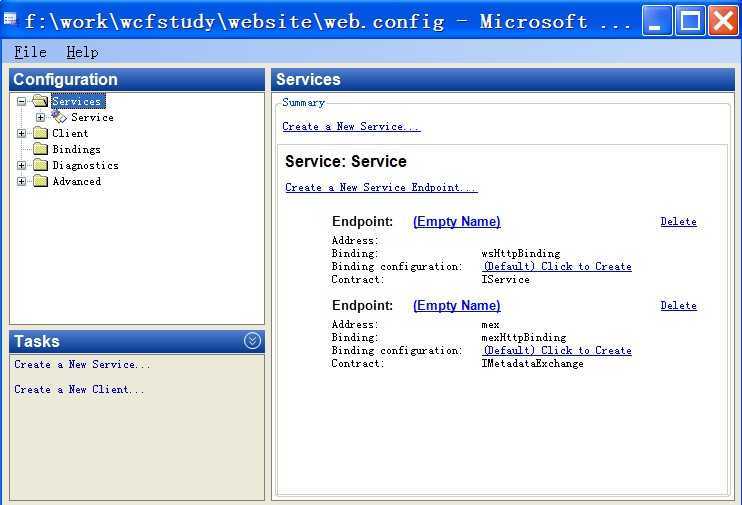
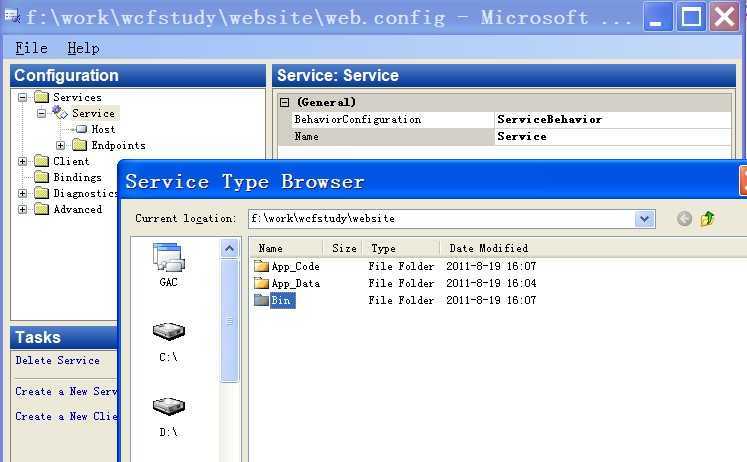
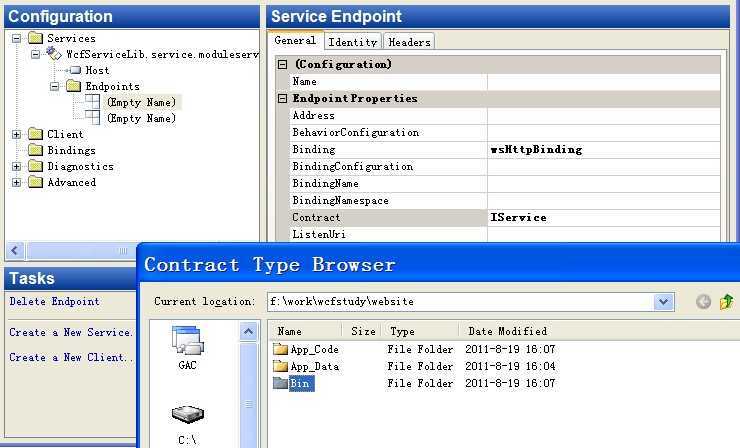
关闭WCF编辑工具,保存即完成了服务的发布配置。
6、在Service.svc上右击,选择“在浏览器中查看”,在IE中运行此服务。
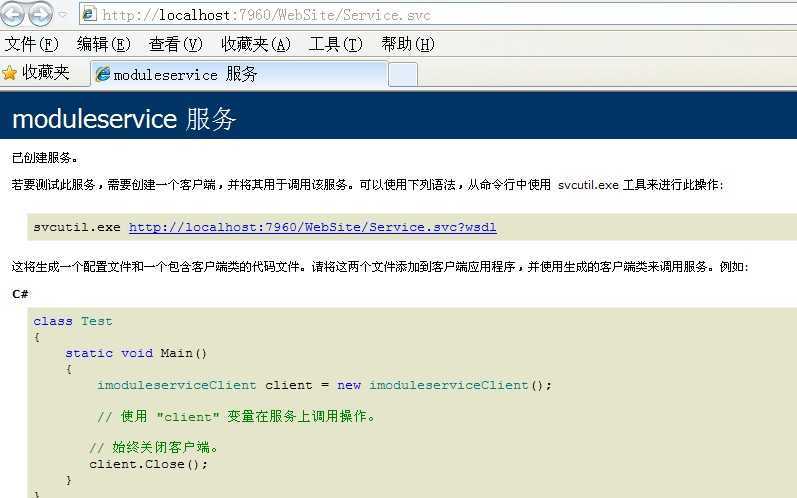
7、在IIS中部署站点,建立虚拟目录指向该站点。然后浏览界面如下。
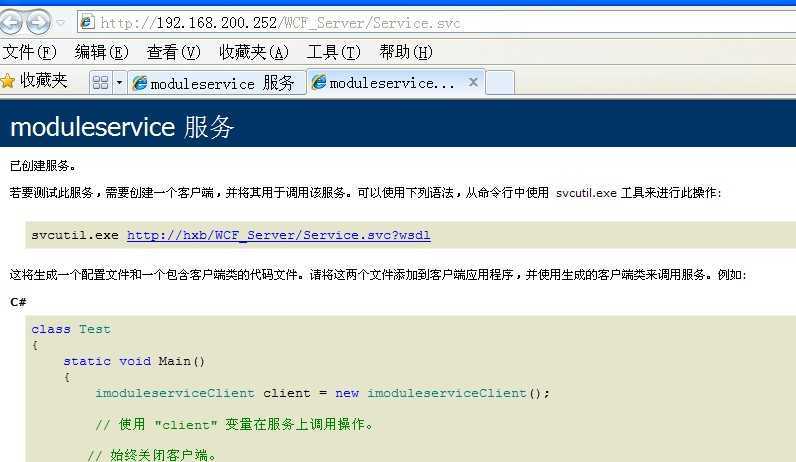
到此,WCF服务在IIS中托管成功。接下来,我们看一下如何使用WCF服务。
第七步:WCF服务的使用
1、新建Asp.net应用程序
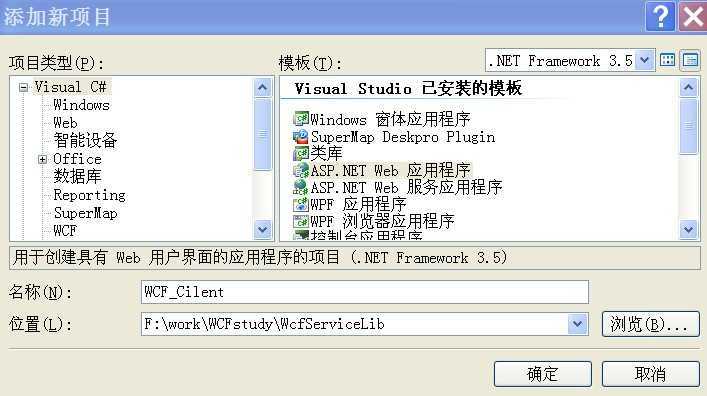
2、右键点击“引用”--->添加服务引用
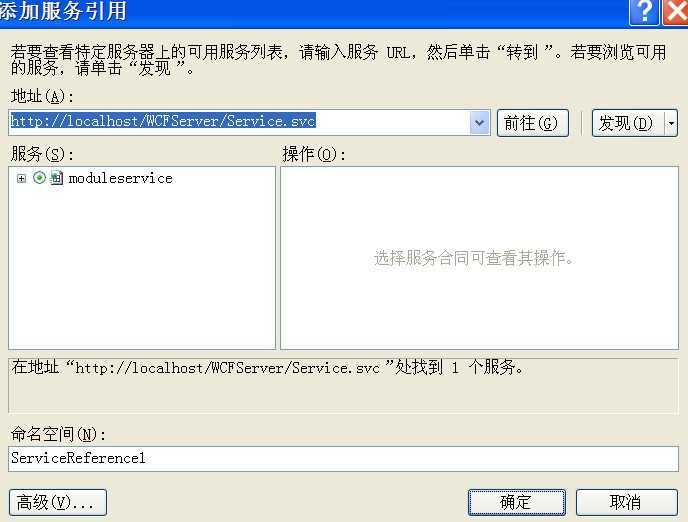
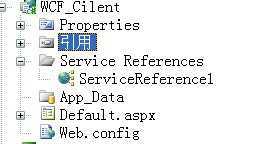
添加成功后,解决方案中文件如下:
3、后台调用WCF服务,代码如下:
protected void Page_Load(object sender, EventArgs e)
{
if (!IsPostBack)
{
ServiceReference1.imoduleserviceClient c = new WCF_Cilent.ServiceReference1.imoduleserviceClient();
c.AddModules(new WCF_Cilent.ServiceReference1.Module());
if (c.GetAllModule().Length > 0)
{
Response.Write(c.GetAllModule()[0].ModuleNO.ToString());
Response.End();
}
}
4、运行程序,出现如下调用结果,调用成功。

标签:blog http io os 使用 ar strong 文件 数据
原文地址:http://www.cnblogs.com/ookami/p/3969932.html