标签:数字 cts org primary cloc doc stl 如何使用 cloud
引用 ;http://www.jb51.net/article/87189.htm
一、时间组件
bootstrap风格的时间组件非常多,你可以在github上面随便搜索“datepicker”关键字,可以找到很多的时间组件。博主原来也用过其中的两个,发现都会有一些大大小小的问题。经过一番筛选,找到一个效果不错、能适用各种场景的时间组件,下面就来一睹它的风采吧。
1、效果展示
初始效果

组件中文化和日期格式自定义:只显示日期

显示日期和时间(手机、平板类设备可能体验会更好)

2、源码说明
初初看了下组件效果,还是给出源码地址
3、代码示例
首先引用需要的文件
|
1
2
3
4
5
6
|
<link href="~/Content/bootstrap/css/bootstrap.css" rel="stylesheet" /> <link href="~/Content/bootstrap-datetimepicker-master/build/css/bootstrap-datetimepicker.css" rel="stylesheet" /> <script src="~/Content/jquery-1.9.1.js"></script> <script src="~/Content/bootstrap/js/bootstrap.js"></script> <script src="//cdnjs.cloudflare.com/ajax/libs/moment.js/2.9.0/moment-with-locales.js"></script> <script src="~/Content/bootstrap-datetimepicker-master/build/js/bootstrap-datetimepicker.min.js"></script> |
JQuery和bootstrap是必须的。除此之外,还得引用moment-with-locales.js这个文件,当然,你也可以不用这种cdn的方式,完全可以下载这个js文件到你的本地,然后添加本地引用。
(1)初始效果
|
1
2
3
4
5
6
7
8
9
10
11
12
|
<label class="control-label col-xs-3">日期:</label> <div class=‘input-group date‘ id=‘datetimepicker1‘> <input type=‘text‘ class="form-control" /> <span class="input-group-addon"> <span class="glyphicon glyphicon-calendar"></span> </span> </div> <script type="text/javascript"> $(function () { $(‘#datetimepicker1‘).datetimepicker(); }); </script> |
这样就能出现如上图一效果。
(2)中文化和日期格式化
html部分不变。js初始化的时候增加参数即可。
|
1
2
3
4
5
6
7
8
|
<script type="text/javascript"> $(function () { $(‘#datetimepicker1‘).datetimepicker({ format: ‘YYYY-MM-DD‘,//日期格式化,只显示日期 locale: ‘zh-CN‘ //中文化 }); }); </script> |
(3)显示时间
|
1
2
3
4
5
6
7
8
9
10
11
12
13
14
15
|
<label class="control-label col-xs-3">时间:</label> <div class=‘input-group date‘ id=‘datetimepicker2‘> <input type=‘text‘ class="form-control" /> <span class="input-group-addon"> <span class="glyphicon glyphicon-calendar"></span> </span> </div> <script type="text/javascript"> $(function () { $(‘#datetimepicker2‘).datetimepicker({ format: ‘YYYY-MM-DD HH:mm:ss‘, locale: ‘zh-CN‘ }); }); </script> |
(4)最大日期、最小日期
|
1
2
3
4
5
6
|
$(‘#datetimepicker1‘).datetimepicker({ format: ‘YYYY-MM-DD‘,//日期格式化,只显示日期 locale: ‘zh-CN‘, //中文化 maxDate: ‘2017-01-01‘,//最大日期 minDate: ‘2010-01-01‘ //最小日期 }); |
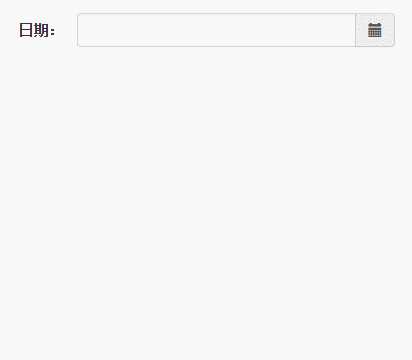
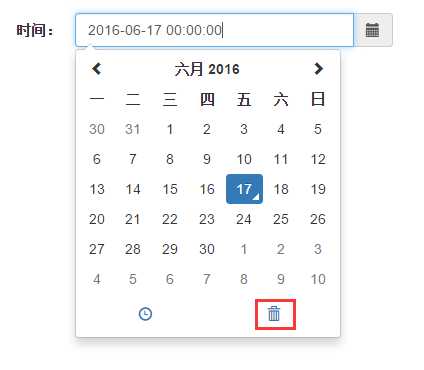
(5)启用删除按钮
|
1
|
showClear: true |
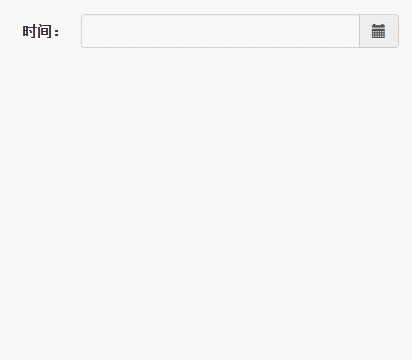
(6)View Mode属性。设置浏览器选中模式
(7)其他
更多强大的功能可以参看API,这里就不一一列举。里面有大量的属性、事件、方法来满足你各种特殊的需求。
二、自增器组件
关于bootstrap自增器,可能并非每一个项目里面都需要用到。有一些特殊场景,比如:某一个文本框需要数据数字、数组的大小需要微调等一些情况。说了半天,可能有园友都不知道它长啥样,上点图吧。
1、效果展示

其实效果很简单,但它可以自动设置最大值、最小值、自增值还是挺方便的,并且可以自动做数字校验。最最方便的是它并需要使用JavaScript去做初始化,只需要在html里面初始化即可。
2、源码说明
3、代码示例
首先需要引用的文件如下:
|
1
2
3
4
5
6
|
<link href="~/Content/bootstrap/css/bootstrap.css" rel="stylesheet" /> <link rel="stylesheet" href="https://maxcdn.bootstrapcdn.com/font-awesome/4.6.3/css/font-awesome.min.css"> <link href="~/Content/jquery.spinner-master/dist/css/bootstrap-spinner.css" rel="stylesheet" /> <script src="~/Content/jquery-1.9.1.js"></script> <script src="~/Content/bootstrap/js/bootstrap.js"></script> <script src="~/Content/jquery.spinner-master/dist/js/jquery.spinner.js"></script> |
font-aweaome.min.css文件也是一个cdn引用的文件,你也可以它引用到你的本地。
(1)初始化
|
1
2
3
4
5
6
7
|
<div class="input-group spinner" data-trigger="spinner"> <input type="text" class="form-control text-center" value="1" data-rule="quantity"> <span class="input-group-addon"> <a href="javascript:;" class="spin-up" data-spin="up"><i class="fa fa-caret-up"></i></a> <a href="javascript:;" class="spin-down" data-spin="down"><i class="fa fa-caret-down"></i></a> </span></div> |
就这么一段简单的html就能看到如上图的效果,有没有很easy~~
(2)自增类型
查看组件的源码,可以看到在它里面为我们定义了多种自增类型:
可以定义data-rule属性为这些类型,比如:
data-rule="month"可以控制自增组件的规则是按照月的规则来进行。
(3)设置最大值、最小值、自增值
除了上面的几种特定类型,组件还支持自定义最大值、最小值、自增值
|
1
2
3
4
5
6
7
|
<div class="input-group spinner" data-trigger="spinner"> <input type="text" class="form-control text-center" value="1" data-min="-10" data-max="10" data-step="2" data-rule="quantity"> <span class="input-group-addon"> <a href="javascript:;" class="spin-up" data-spin="up"><i class="fa fa-caret-up"></i></a> <a href="javascript:;" class="spin-down" data-spin="down"><i class="fa fa-caret-down"></i></a> </span></div> |
data-min="-10":最小值data-max="10":最大值data-step="2":自增值
这个很好理解,不做过多说明。效果:

(4)事件捕捉
组件提供了两个事件changed、changing,分别对应数值变化中和变化后的事件回调。
|
1
2
3
4
|
$(‘#id‘).spinner(‘changed‘, function(e, newVal, oldVal) {});$(‘[data-trigger="spinner"]‘).spinner(‘changing‘, function(e, newVal, oldVal) {}); |
三、加载效果
前几天,有群友在问bootstrap的加载效果用什么组件。其实百度搜索一下,也能找到很多的结果。在此,博主根据自己的使用经历分享下几个加载的小组件,希望大家用得着。主要分为实用型和炫酷型两种。实用型效果一般,但能适用各种浏览器;炫酷型使用最新的css3和html5写出来的,效果很炫,但基本上低版本的IE(10以下)都不能兼容。
一、实用型
1、PerfectLoading组件
这个组件是博主在网上找到的一个js,但下载下来之后发现一些大大小小的问题,于是,博主改写了下,命名为bootstrap-loading组件。它的原理就是在组件启动的时候弹出一个覆盖层,然后组件关闭时,将覆盖层的dom移除,加载效果使用了一张gif的图片。
PerfectLoad.js文件内容:
|
1
2
3
4
5
6
7
8
9
10
11
12
13
14
15
16
17
18
19
20
21
22
23
24
25
26
27
28
29
30
31
32
33
34
35
36
37
38
39
40
41
42
43
44
45
46
47
48
49
50
51
52
53
54
55
56
57
58
59
60
61
62
63
64
65
66
67
68
69
70
71
72
73
|
/******************************************* * * Plug-in:友好的页面加载效果 * Author:sqinyang (sqinyang@sina.com) * Time:2015/04/20 * Explanation:随着HTML5的流行,页面效果越来越炫,同时也需要加载大量的插件及素材,万恶的网速,特别对于挂在国外服务器的网站,一打开一堆素材缓缓加载,位置错乱不齐,故编写此方法,方便大家使用 **********************************************/jQuery.bootstrapLoading = { start: function (options) { var defaults = { opacity: 1, //loading页面透明度 backgroundColor: "#fff", //loading页面背景色 borderColor: "#bbb", //提示边框颜色 borderWidth: 1, //提示边框宽度 borderStyle: "solid", //提示边框样式 loadingTips: "Loading, please wait...", //提示文本 TipsColor: "#666", //提示颜色 delayTime: 1000, //页面加载完成后,加载页面渐出速度 zindex: 999, //loading页面层次 sleep: 0 //设置挂起,等于0时则无需挂起 } var options = $.extend(defaults, options); //获取页面宽高 var _PageHeight = document.documentElement.clientHeight, _PageWidth = document.documentElement.clientWidth; //在页面未加载完毕之前显示的loading Html自定义内容 var _LoadingHtml = ‘<div id="loadingPage" style="position:fixed;left:0;top:0;_position: absolute;width:100%;height:‘ + _PageHeight + ‘px;background:‘ + options.backgroundColor + ‘;opacity:‘ + options.opacity + ‘;filter:alpha(opacity=‘ + options.opacity * 100 + ‘);z-index:‘ + options.zindex + ‘;"><div id="loadingTips" style="position: absolute; cursor1: wait; width: auto;border-color:‘ + options.borderColor + ‘;border-style:‘ + options.borderStyle + ‘;border-width:‘ + options.borderWidth + ‘px; height:80px; line-height:80px; padding-left:80px; padding-right: 5px;border-radius:10px; background: ‘ + options.backgroundColor + ‘ url(/Content/bootstrap-loading/images/loading.gif) no-repeat 5px center; color:‘ + options.TipsColor + ‘;font-size:20px;">‘ + options.loadingTips + ‘</div></div>‘; //呈现loading效果 $("body").append(_LoadingHtml); //获取loading提示框宽高 var _LoadingTipsH = document.getElementById("loadingTips").clientHeight, _LoadingTipsW = document.getElementById("loadingTips").clientWidth; //计算距离,让loading提示框保持在屏幕上下左右居中 var _LoadingTop = _PageHeight > _LoadingTipsH ? (_PageHeight - _LoadingTipsH) / 2 : 0, _LoadingLeft = _PageWidth > _LoadingTipsW ? (_PageWidth - _LoadingTipsW) / 2 : 0; $("#loadingTips").css({ "left": _LoadingLeft + "px", "top": _LoadingTop + "px" }); //监听页面加载状态 document.onreadystatechange = PageLoaded; //当页面加载完成后执行 function PageLoaded() { if (document.readyState == "complete") { var loadingMask = $(‘#loadingPage‘); setTimeout(function () { loadingMask.animate({ "opacity": 0 }, options.delayTime, function () { $(this).hide(); }); }, options.sleep); } } }, end: function () { $("#loadingPage").remove(); }} |
这个js基本上是网上down下来的,只是在此基础上博主加了一个end的方法。
来看看组件如何使用,下面是测试代码:
|
1
2
3
4
5
6
7
8
9
10
11
12
13
14
15
16
17
18
19
20
21
22
23
24
25
26
27
28
29
30
31
32
33
34
35
36
37
38
39
40
41
42
43
44
|
<html><head> <meta name="viewport" content="width=device-width" /> <title>loading</title> <link href="~/Content/bootstrap/css/bootstrap.css" rel="stylesheet" /> <script src="~/Content/jquery-1.9.1.js"></script> <script src="~/Content/bootstrap/js/bootstrap.js"></script> <script src="~/Content/bootstrap-loading/PerfectLoad.js"></script> <script type="text/javascript"> $(function () { $("#btn_submit").on("click", function () { $.bootstrapLoading.start({ loadingTips: "正在处理数据,请稍候..." }); $.ajax({ type: ‘get‘, url: ‘/Home/TestLoading‘, data: {}, success: function (data, statu) { debugger; }, complete: function () { $.bootstrapLoading.end(); } }); }) }); </script></head><body> <div class="panel-body" style="padding:0px"> <div class="panel panel-default" style="height:450px;"> <div class="panel-heading">查询条件</div> <div class="panel-body"> <form id="formSearch" class="form-horizontal"> <div class="form-group"> <div class="col-xs-4"> <button type="button" id="btn_submit" class="btn btn-primary"><span class="glyphicon glyphicon-floppy-disk" aria-hidden="true"></span>加载测试</button> </div> </div> </form> </div> </div> </div></body></html> |
使用说明:组件不需要任何的html代码,只需要在执行loading的时候调用组件的start方法即可。 start()方法启动弹出层,并可设置defaults 变量里面的所有参数。当loading结束后再调用组件的end方法,自动将弹出层移除。来看看效果:
如果对效果不满意,可自己设置defaults里面的参数,注释写得很详细,在此就不一一列举了。
2、菊花加载组件spin.js
使用图片显示加载效果有它天生的弊端,所以现在很多的加载组件都使用css+js去实现动画效果。spin.js就是其中一个例子,spin.js是一个开源组件,开源地址。
下载源码后,初始化发现组件不带遮罩的效果,只能这样:
找了半天它的参数,硬是没找到,亦或是哪里有“机关”没发现。没办法,博主只能自己加上遮罩的效果了。于是新建了一个css样式文件暂且命名为spin.css,里面只有一个样式:
|
1
2
3
4
5
6
7
8
9
10
|
.fade { position: fixed; top: 0; right: 0; bottom: 0; left: 0; z-index: 9999; opacity: 1; } |
然后将spin.js改写了两个地方,改写后的内容如下:
|
1
2
3
4
5
6
7
8
9
10
11
12
13
14
15
16
17
18
19
20
21
22
23
24
25
26
27
28
29
30
31
32
33
34
35
36
37
38
39
40
41
42
43
44
45
46
47
48
49
50
51
52
53
54
55
56
57
58
59
60
61
62
63
64
65
66
67
68
69
70
71
72
73
74
75
76
77
78
79
80
81
82
83
84
85
86
87
88
89
90
91
92
93
94
95
96
97
98
99
100
101
102
103
104
105
106
107
108
109
110
111
112
113
114
115
116
117
118
119
120
121
122
123
124
125
126
127
128
129
130
131
132
133
134
135
136
137
138
139
140
141
142
143
144
145
146
147
148
149
150
151
152
153
154
155
156
157
158
159
160
161
162
163
164
165
166
167
168
169
170
171
172
173
174
175
176
177
178
179
180
181
182
183
184
185
186
187
188
189
190
191
192
193
194
195
196
197
198
199
200
201
202
203
204
205
206
207
208
209
210
211
212
213
214
215
216
217
218
219
220
221
222
223
224
225
226
227
228
229
230
231
232
233
234
235
236
237
238
239
240
241
242
243
244
245
246
247
248
249
250
251
252
253
254
255
256
257
258
259
260
261
262
263
264
265
266
267
268
269
270
271
272
273
274
275
276
277
278
279
280
281
282
283
284
285
286
287
288
289
290
291
292
293
294
295
296
297
298
299
300
301
302
303
304
305
306
307
308
309
310
311
312
313
314
315
316
317
318
319
320
321
322
323
324
325
326
327
328
|
/** * Copyright (c) 2011-2014 Felix Gnass * Licensed under the MIT license * * Example: var opts = { lines: 12, // The number of lines to draw length: 7, // The length of each line width: 5, // The line thickness radius: 10, // The radius of the inner circle scale: 1.0, // Scales overall size of the spinner corners: 1, // Roundness (0..1) color: ‘#000‘, // #rgb or #rrggbb opacity: 1/4, // Opacity of the lines rotate: 0, // Rotation offset direction: 1, // 1: clockwise, -1: counterclockwise speed: 1, // Rounds per second trail: 100, // Afterglow percentage fps: 20, // Frames per second when using setTimeout() zIndex: 2e9, // Use a high z-index by default className: ‘spinner‘, // CSS class to assign to the element top: ‘50%‘, // center vertically left: ‘50%‘, // center horizontally shadow: false, // Whether to render a shadow hwaccel: false, // Whether to use hardware acceleration (might be buggy) position: ‘absolute‘ // Element positioning }; var target = document.getElementById(‘foo‘); var spinner = new Spinner(opts).spin(target); */;(function(root, factory) { if (typeof module == ‘object‘ && module.exports) module.exports = factory(); // CommonJS else if (typeof define == ‘function‘ && define.amd) define(factory); // AMD module else root.Spinner = factory(); // Browser global}(this, function() { ‘use strict‘; var prefixes = [‘webkit‘, ‘Moz‘, ‘ms‘, ‘O‘]; // Vendor prefixes var animations = {}; // Animation rules keyed by their name var useCssAnimations; // Whether to use CSS animations or setTimeout var sheet; // A stylesheet to hold the @keyframe or VML rules /** * Utility function to create elements. If no tag name is given, * a DIV is created. Optionally properties can be passed. */ function createEl(tag, prop) { var el = document.createElement(tag || ‘div‘); var n; for (n in prop) el[n] = prop[n]; return el; } /** * Appends children and returns the parent. */ function ins(parent /* child1, child2, ...*/) { for (var i = 1, n = arguments.length; i < n; i++) { parent.appendChild(arguments[i]); } return parent; } /** * Creates an opacity keyframe animation rule and returns its name. * Since most mobile Webkits have timing issues with animation-delay, * we create separate rules for each line/segment. */ function addAnimation(alpha, trail, i, lines) { var name = [‘opacity‘, trail, ~~(alpha * 100), i, lines].join(‘-‘); var start = 0.01 + i/lines * 100; var z = Math.max(1 - (1-alpha) / trail * (100-start), alpha); var prefix = useCssAnimations.substring(0, useCssAnimations.indexOf(‘Animation‘)).toLowerCase(); var pre = prefix && ‘-‘ + prefix + ‘-‘ || ‘‘; if (!animations[name]) { sheet.insertRule( ‘@‘ + pre + ‘keyframes ‘ + name + ‘{‘ + ‘0%{opacity:‘ + z + ‘}‘ + start + ‘%{opacity:‘ + alpha + ‘}‘ + (start+0.01) + ‘%{opacity:1}‘ + (start+trail) % 100 + ‘%{opacity:‘ + alpha + ‘}‘ + ‘100%{opacity:‘ + z + ‘}‘ + ‘}‘, sheet.cssRules.length); animations[name] = 1; } return name; } /** * Tries various vendor prefixes and returns the first supported property. */ function vendor(el, prop) { var s = el.style; var pp; var i; prop = prop.charAt(0).toUpperCase() + prop.slice(1); if (s[prop] !== undefined) return prop; for (i = 0; i < prefixes.length; i++) { pp = prefixes[i]+prop; if (s[pp] !== undefined) return pp; } } /** * Sets multiple style properties at once. */ function css(el, prop) { for (var n in prop) { el.style[vendor(el, n) || n] = prop[n]; } return el; } /** * Fills in default values. */ function merge(obj) { for (var i = 1; i < arguments.length; i++) { var def = arguments[i]; for (var n in def) { if (obj[n] === undefined) obj[n] = def[n]; } } return obj; } /** * Returns the line color from the given string or array. */ function getColor(color, idx) { return typeof color == ‘string‘ ? color : color[idx % color.length]; } // Built-in defaults var defaults = { lines: 12, // The number of lines to draw length: 7, // The length of each line width: 5, // The line thickness radius: 10, // The radius of the inner circle scale: 1.0, // Scales overall size of the spinner corners: 1, // Roundness (0..1) color: ‘#000‘, // #rgb or #rrggbb opacity: 1/4, // Opacity of the lines rotate: 0, // Rotation offset direction: 1, // 1: clockwise, -1: counterclockwise speed: 1, // Rounds per second trail: 100, // Afterglow percentage fps: 20, // Frames per second when using setTimeout() zIndex: 2e9, // Use a high z-index by default className: ‘spinner‘, // CSS class to assign to the element top: ‘50%‘, // center vertically left: ‘50%‘, // center horizontally shadow: false, // Whether to render a shadow hwaccel: false, // Whether to use hardware acceleration position: ‘absolute‘ // Element positioning }; /** The constructor */ function Spinner(o) { this.opts = merge(o || {}, Spinner.defaults, defaults); } // Global defaults that override the built-ins: Spinner.defaults = {}; merge(Spinner.prototype, { /** * Adds the spinner to the given target element. If this instance is already * spinning, it is automatically removed from its previous target b calling * stop() internally. */ spin: function(target) { this.stop(); var self = this; var o = self.opts; var el = self.el = createEl(null, {className: o.className}); css(el, { position: o.position, width: 0, zIndex: o.zIndex, left: o.left, top: o.top }); if (target) { target.insertBefore(el, target.firstChild || null); target.className = "fade"; } el.setAttribute(‘role‘, ‘progressbar‘); self.lines(el, self.opts); if (!useCssAnimations) { // No CSS animation support, use setTimeout() instead var i = 0; var start = (o.lines - 1) * (1 - o.direction) / 2; var alpha; var fps = o.fps; var f = fps / o.speed; var ostep = (1 - o.opacity) / (f * o.trail / 100); var astep = f / o.lines; (function anim() { i++; for (var j = 0; j < o.lines; j++) { alpha = Math.max(1 - (i + (o.lines - j) * astep) % f * ostep, o.opacity); self.opacity(el, j * o.direction + start, alpha, o); } self.timeout = self.el && setTimeout(anim, ~~(1000 / fps)); })(); } return self; }, /** * Stops and removes the Spinner. */ stop: function() { var el = this.el; if (el) { clearTimeout(this.timeout); if (el.parentNode) { var reg = new RegExp(‘(\\s|^)fade(\\s|$)‘); el.parentNode.className = el.parentNode.className.replace(reg, ‘ ‘); el.parentNode.removeChild(el); } this.el = undefined; } return this; }, /** * Internal method that draws the individual lines. Will be overwritten * in VML fallback mode below. */ lines: function(el, o) { var i = 0; var start = (o.lines - 1) * (1 - o.direction) / 2; var seg; function fill(color, shadow) { return css(createEl(), { position: ‘absolute‘, width: o.scale * (o.length + o.width) + ‘px‘, height: o.scale * o.width + ‘px‘, background: color, boxShadow: shadow, transformOrigin: ‘left‘, transform: ‘rotate(‘ + ~~(360/o.lines*i + o.rotate) + ‘deg) translate(‘ + o.scale*o.radius + ‘px‘ + ‘,0)‘, borderRadius: (o.corners * o.scale * o.width >> 1) + ‘px‘ }); } for (; i < o.lines; i++) { seg = css(createEl(), { position: ‘absolute‘, top: 1 + ~(o.scale * o.width / 2) + ‘px‘, transform: o.hwaccel ? ‘translate3d(0,0,0)‘ : ‘‘, opacity: o.opacity, animation: useCssAnimations && addAnimation(o.opacity, o.trail, start + i * o.direction, o.lines) + ‘ ‘ + 1 / o.speed + ‘s linear infinite‘ }); if (o.shadow) ins(seg, css(fill(‘#000‘, ‘0 0 4px #000‘), {top: ‘2px‘})); ins(el, ins(seg, fill(getColor(o.color, i), ‘0 0 1px rgba(0,0,0,.1)‘))); } return el; }, /** * Internal method that adjusts the opacity of a single line. * Will be overwritten in VML fallback mode below. */ opacity: function(el, i, val) { if (i < el.childNodes.length) el.childNodes[i].style.opacity = val; } }); function initVML() { /* Utility function to create a VML tag */ function vml(tag, attr) { return createEl(‘<‘ + tag + ‘ xmlns="urn:schemas-microsoft.com:vml" class="spin-vml">‘, attr); } // No CSS transforms but VML support, add a CSS rule for VML elements: sheet.addRule(‘.spin-vml‘, ‘behavior:url(#default#VML)‘); Spinner.prototype.lines = function(el, o) { var r = o.scale * (o.length + o.width); var s = o.scale * 2 * r; function grp() { return css( vml(‘group‘, { coordsize: s + ‘ ‘ + s, coordorigin: -r + ‘ ‘ + -r }), { width: s, height: s } ); } var margin = -(o.width + o.length) * o.scale * 2 + ‘px‘; var g = css(grp(), {position: ‘absolute‘, top: margin, left: margin}); var i; function seg(i, dx, filter) { ins( g, ins( css(grp(), {rotation: 360 / o.lines * i + ‘deg‘, left: ~~dx}), ins( css( vml(‘roundrect‘, {arcsize: o.corners}), { width: r, height: o.scale * o.width, left: o.scale * o.radius, top: -o.scale * o.width >> 1, filter: filter } ), vml(‘fill‘, {color: getColor(o.color, i), opacity: o.opacity}), vml(‘stroke‘, {opacity: 0}) // transparent stroke to fix color bleeding upon opacity change ) ) ); } if (o.shadow) for (i = 1; i <= o.lines; i++) { seg(i, -2, ‘progid:DXImageTransform.Microsoft.Blur(pixelradius=2,makeshadow=1,shadowopacity=.3)‘); } for (i = 1; i <= o.lines; i++) seg(i); return ins(el, g); }; Spinner.prototype.opacity = function(el, i, val, o) { var c = el.firstChild; o = o.shadow && o.lines || 0; if (c && i + o < c.childNodes.length) { c = c.childNodes[i + o]; c = c && c.firstChild; c = c && c.firstChild; if (c) c.opacity = val; } }; } if (typeof document !== ‘undefined‘) { sheet = (function() { var el = createEl(‘style‘, {type : ‘text/css‘}); ins(document.getElementsByTagName(‘head‘)[0], el); return el.sheet || el.styleSheet; }()); var probe = css(createEl(‘group‘), {behavior: ‘url(#default#VML)‘}); if (!vendor(probe, ‘transform‘) && probe.adj) initVML(); else useCssAnimations = vendor(probe, ‘animation‘); } return Spinner;})); |
spin.js
改动的两个地方:
(1)初始化的时候,如果是显示,则给对应的标签加上fade样式
(2)、每次都将fade样式删除掉。
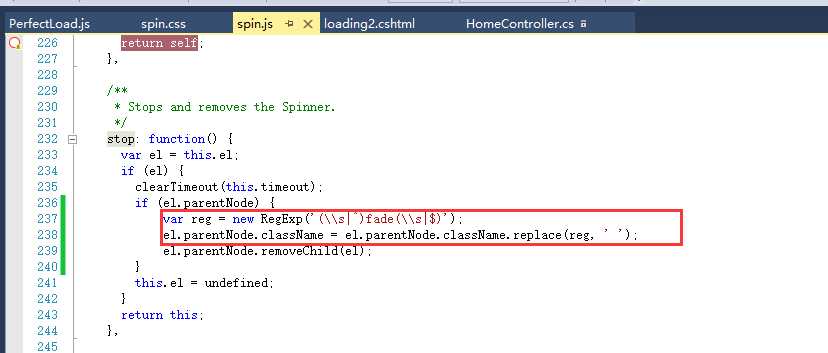
改好之后,就是测试界面了。
|
1
2
3
4
5
6
7
8
9
10
11
12
13
14
15
16
17
18
19
20
21
22
23
24
25
26
27
28
29
30
31
32
33
34
35
36
37
38
39
40
41
42
43
44
45
46
47
48
49
50
51
52
53
54
55
56
57
58
59
60
61
62
63
64
65
66
67
68
69
70
71
72
73
74
75
76
77
78
79
|
<html><head> <meta name="viewport" content="width=device-width" /> <title>loading2</title> <link href="~/Content/bootstrap/css/bootstrap.css" rel="stylesheet" /> <link href="~/Content/spin.js-master/css/spin.css" rel="stylesheet" /> <script src="~/Content/jquery-1.9.1.js"></script> <script src="~/Content/bootstrap/js/bootstrap.js"></script> <script src="~/Content/spin.js-master/js/spin.js"></script> <script type="text/javascript"> $(function () { $("#btn_submit").on("click", function () { //var opts = { // lines: 9, // 花瓣数目 // length: 1, // 花瓣长度 // width: 10, // 花瓣宽度 // radius: 15, // 花瓣距中心半径 // corners: 1, // 花瓣圆滑度 (0-1) // rotate: 0, // 花瓣旋转角度 // direction: 1, // 花瓣旋转方向 1: 顺时针, -1: 逆时针 // color: ‘#000‘, // 花瓣颜色 // speed: 1, // 花瓣旋转速度 // trail: 60, // 花瓣旋转时的拖影(百分比) // shadow: false, // 花瓣是否显示阴影 // hwaccel: false, //spinner 是否启用硬件加速及高速旋转 // className: ‘spinner‘, // spinner css 样式名称 // zIndex: 2e9, // spinner的z轴 (默认是2000000000) // top: ‘auto‘, // spinner 相对父容器Top定位 单位 px // left: ‘auto‘// spinner 相对父容器Left定位 单位 px //}; //var target = document.getElementById(‘foo‘); //var spinner = new Spinner({}).spin(target); var spinner = undefined; $.ajax({ type: ‘get‘, url: ‘/Home/TestLoading‘, data: {}, beforeSend: function () { var option = { lines: 9, // 花瓣数目 length: 1, // 花瓣长度 width: 10, // 花瓣宽度 radius: 15, // 花瓣距中心半径 shadow: true, opacity:1/8 }; var target = document.getElementById(‘foo‘); spinner = new Spinner(option).spin(target);//显示加载 }, success: function (data, statu) { //debugger; }, complete: function () { spinner.spin();//移除加载 } }); }) }); </script></head><body> <div class="panel-body" style="padding:0px"> <div class="panel panel-default" style="height:450px;"> <div class="panel-heading">查询条件</div> <div class="panel-body"> <form id="formSearch" class="form-horizontal"> <div class="form-group"> <div class="col-xs-4"> <button type="button" id="btn_submit" class="btn btn-primary"><span class="glyphicon glyphicon-floppy-disk" aria-hidden="true"></span>加载测试</button> </div> </div> </form> </div> </div> </div> <div id="foo"></div></body></html>test_spin.cshtml |
使用说明:如果你的页面不使用jQuery,引用spin.js这个文件,这个文件不需要jquery的支持;如果想要使用jQuery,则引用jquery.spin.js文件。上面的代码是不使用jQuery的情况。组件需要定义一个空的div,然后在此div上面做初始化。得到的效果如下:

当然,如果你对此效果不满意,你还可以设置遮罩层的透明度,以及整个遮罩的样式。还有旋转的各个参数,都可以通过初始化的时候自定义,上述代码里面有详细注释。
二、炫酷型
1、jquery.shCircleLoader.js组件
此组件效果不用说,使用也比较简单,但是对IE10以下版本不支持。看看效果先:
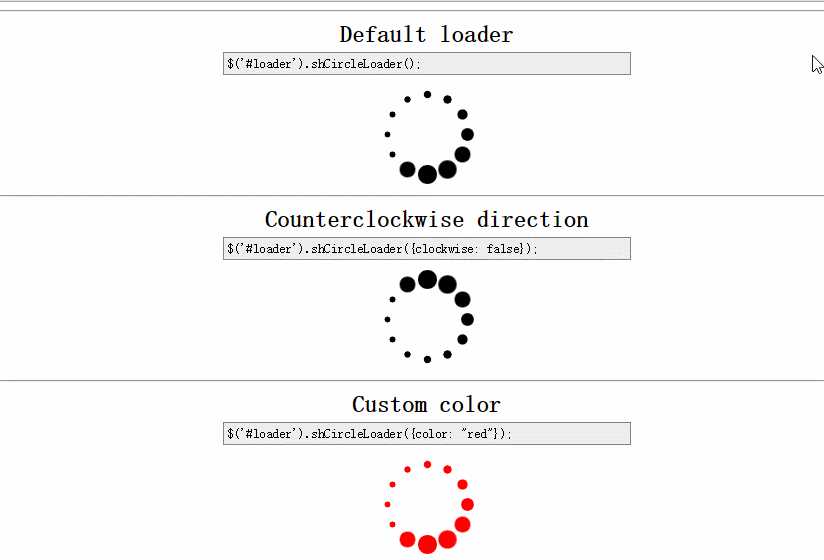
至于具体的代码使用,博主不打算深究,可以去百度或者github上面找找。
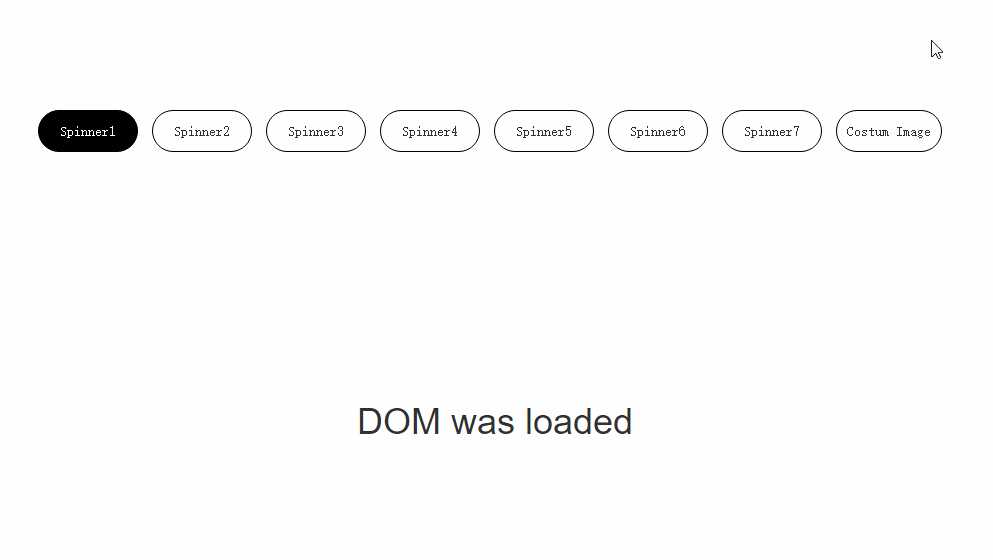
2、fakeLoader.js组件
更多的选择,更好的扁平化效果,更好的手机、平板设备体验。只需要看看图片感受下就知道了。开源地址。
四、流程图小插件
前段时间做一个工作流的需求,需要显示当前流程进行到哪一步,找到了一个流程小插件ystep。此组件优点在于使用简单、够轻量级。
1、效果展示
先来看看效果

蓝色缩小版

2、源码说明
开源地址。
3、代码示例
首先引用必须的文件
|
1
2
3
4
5
|
<link href="~/Content/bootstrap/css/bootstrap.css" rel="stylesheet" /> <link href="~/Content/ystep-master/css/ystep.css" rel="stylesheet" /> <script src="~/Content/jquery-1.9.1.js"></script> <script src="~/Content/bootstrap/js/bootstrap.js"></script> <script src="~/Content/ystep-master/js/ystep.js"></script> |
这个组件需要jQuery和bootstrap两个组件的支持。
然后定义一个空的div
|
1
|
<div id="div_ystep1"></div> |
最后在点击按钮的时候初始化组件
|
1
2
3
4
5
6
7
8
9
10
11
12
13
14
15
16
17
18
19
20
21
22
23
24
25
26
27
28
29
30
31
|
<script type="text/javascript"> $(function () { $("#btn_submit").click(function () { $("#div_ystep1").loadStep({ //ystep的外观大小 //可选值:small,large size: "small", //ystep配色方案 //可选值:green,blue color: "blue", //ystep中包含的步骤 steps: [{ //步骤名称 title: "开始", //步骤内容(鼠标移动到本步骤节点时,会提示该内容) content: "流程开始" }, { title: "审批", content: "各个角色开始审批" }, { title: "实施", content: "需求开始实施" }, { title: "结束", content: "流程结束" }] }); $("#div_ystep1").setStep(3); }); }); </script> |
如果是动态步骤,可能需要动态去构造steps属性。然后通过setStep()设置当前到了哪一步。
常用方法:
|
1
2
3
4
5
6
7
8
|
//跳转到下一个步骤$(".ystep1").nextStep();//跳转到上一个步骤$(".ystep1").prevStep();//跳转到指定步骤$(".ystep1").setStep(2);//获取当前在第几步$(".ystep1").getStep(); |
五、按钮提示组件bootstrap-confirmation
按钮提示组件有点类似js里面confirm的功能,不过这个confirm是以一种tooltip的方式弹出来的效果,给用户一个确定、取消的判断,界面更加友好。介绍这个组件之前,可以先来看看bootstrap里面提示框的效果:
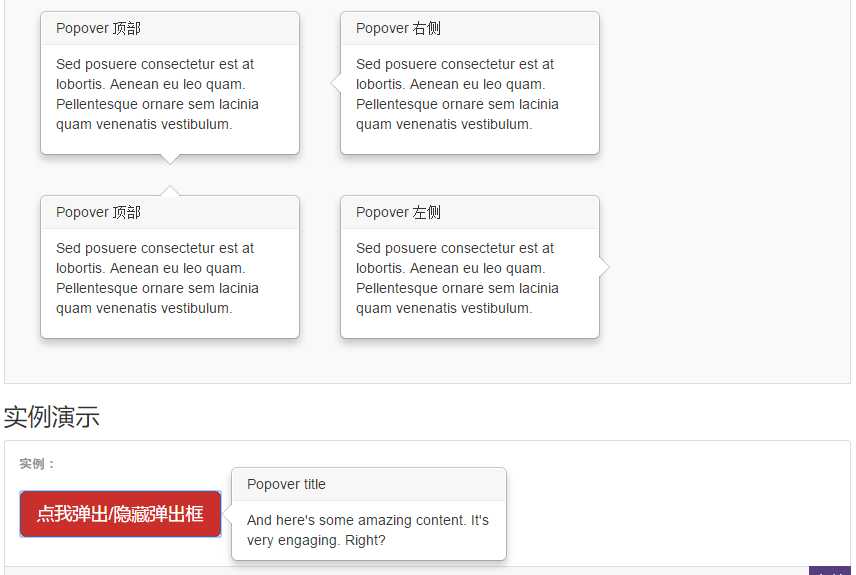
bootstrap-confirmation组件就是基于这个提示框的效果来实现的。github上面有好多个bootstrap-confirmation组件,但基本大同小异。。
1、效果展示
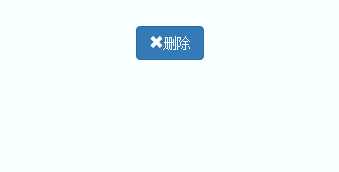
最原始的效果

自定义title、按钮文本
2、源码说明
3、代码示例
(1)引用文件:
|
1
2
3
|
<link href="~/Content/bootstrap/css/bootstrap.css" rel="stylesheet" /> <script src="~/Content/jquery-1.9.1.js"></script> <script src="~/Content/bootstrap/js/bootstrap.js"></script><script src="~/Content/bootstrap-confirmation/bootstrap-confirmation.js"></script> |
样式需要bootstrap.css的支持JavaScript需要jquery和bootstrap.js的支持。
(2)对应的点击标签(可以是任意标签)
|
1
|
<button type="button" id="btn_submit1" class="btn btn-primary"><span class="glyphicon glyphicon-remove" aria-hidden="true"></span>删除</button> |
(3)js初始化
|
1
2
3
4
5
6
7
8
9
10
11
12
13
14
15
16
|
<script type="text/javascript"> $(function () { $(‘#btn_submit1‘).confirmation({ animation: true, placement: "bottom", title: "确定要删除吗?", btnOkLabel: ‘确定‘, btnCancelLabel: ‘取消‘, onConfirm: function () { //alert("点击了确定"); }, onCancel: function () { //alert("点击了取消"); } }) }); </script> |
(4)更多属性、事件、方法
除了上述初始化的属性,还有一些常用的属性。比如:
btnOkClass:确定按钮的样式;btnCancelClass:取消按钮的样式;singleton:是否只允许出现一个确定框;popout:当用户点击其他地方的时候是否隐藏确定框;
比如你可以将btnOkClass设置成btnOkClass : ‘btn btn-sm btn-primary‘,
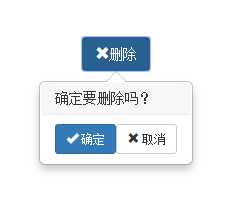
六、图片分类、过滤组件MuxitUp
这是一个效果非常炫酷的分组、过滤组件,开源地址。博主在网上看到一个它的demo,觉得效果确实很好,废话不多说,上图。
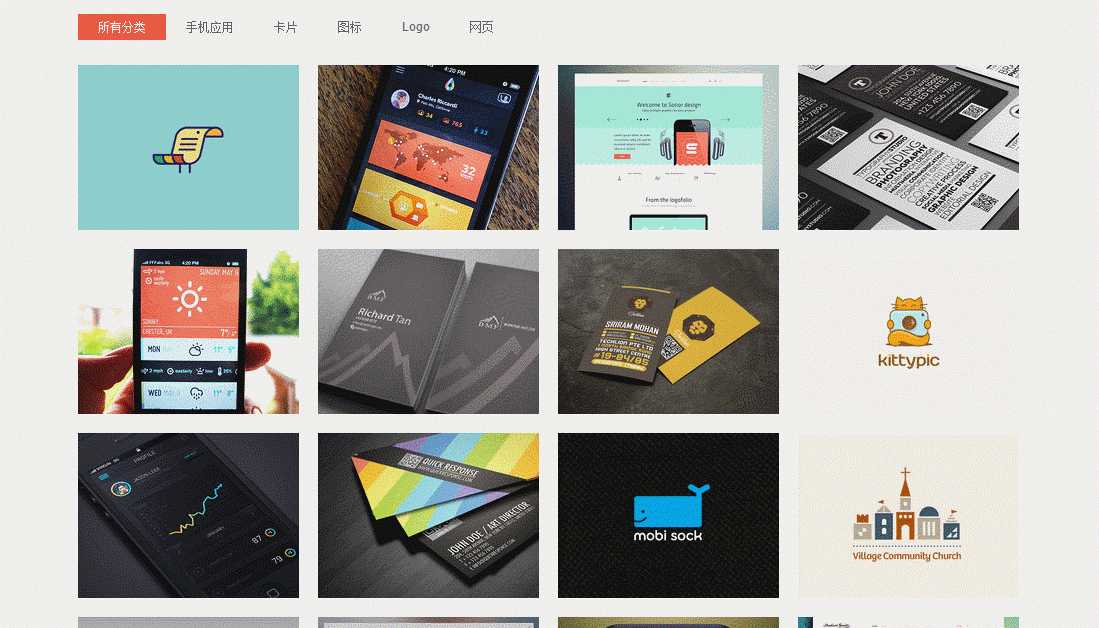
怎么样,效果还行吧。这个组件在项目里面暂时没用上,但觉得以后有需要的可能,就将此收藏了一把。实现代码是网上copy过来的,没有深究,有兴趣可以看看。html+js代码实现如下:
|
1
2
3
4
5
6
7
8
9
10
11
12
13
14
15
16
17
18
19
20
21
22
23
24
25
26
27
28
29
30
31
32
33
34
35
36
37
38
39
40
41
42
43
44
45
46
47
48
49
50
51
52
53
54
55
56
57
58
59
60
61
62
63
64
65
66
67
68
69
70
71
72
73
74
75
76
77
78
79
80
81
82
83
84
85
86
87
88
89
90
91
92
93
94
95
96
97
98
99
100
101
102
103
104
105
106
107
108
109
110
111
112
113
114
115
116
117
118
119
120
121
122
123
124
125
126
127
128
129
130
131
132
133
134
135
136
137
138
139
140
141
142
143
144
145
146
147
148
149
150
151
152
153
154
155
156
157
158
159
160
161
162
163
164
165
166
167
168
169
170
171
172
173
174
175
176
177
178
179
180
181
182
183
184
185
186
187
188
189
190
191
192
193
194
195
196
197
198
199
200
201
202
203
204
205
206
207
208
209
210
211
212
213
214
215
216
217
218
219
220
221
222
223
224
225
226
227
228
229
230
231
232
233
234
235
236
237
238
239
240
241
242
243
244
245
246
247
248
249
250
251
252
253
254
255
256
257
258
259
260
261
262
263
264
265
266
267
268
269
270
271
272
273
274
275
276
277
278
279
280
281
282
283
284
285
286
287
288
289
290
291
292
293
294
295
296
297
298
299
300
301
302
303
304
305
306
307
308
309
310
311
312
313
314
315
316
317
318
319
320
321
322
323
324
325
326
327
328
329
330
331
332
333
334
335
336
337
338
339
340
341
342
343
344
345
346
347
|
<html><head> <meta name="viewport" content="width=device-width" /> <title>mixitup</title> <link href="~/Content/image/css/normalize.css" rel="stylesheet" /> <link href="~/Content/image/css/layout.css" rel="stylesheet" /> <script src="~/Content/jquery-1.9.1.js"></script> <script src="~/Content/mixitup-master/jquery.easing.min.js"></script> <script src="~/Content/mixitup-master/build/jquery.mixitup.min.js"></script> <script type="text/javascript"> $(function () { var filterList = { init: function () { debugger; // MixItUp plugin $(‘#portfoliolist‘).mixitup({ targetSelector: ‘.portfolio‘, filterSelector: ‘.filter‘, effects: [‘fade‘], easing: ‘snap‘, // call the hover effect onMixEnd: filterList.hoverEffect() }); }, hoverEffect: function () { // Simple parallax effect $(‘#portfoliolist .portfolio‘).hover( function () { $(this).find(‘.label‘).stop().animate({ bottom: 0 }, 200, ‘easeOutQuad‘); $(this).find(‘img‘).stop().animate({ top: -30 }, 500, ‘easeOutQuad‘); }, function () { $(this).find(‘.label‘).stop().animate({ bottom: -40 }, 200, ‘easeInQuad‘); $(this).find(‘img‘).stop().animate({ top: 0 }, 300, ‘easeOutQuad‘); } ); } }; // Run the show! filterList.init(); }); </script></head><body> <div class="container"> <ul id="filters" class="clearfix"> <li><span class="filter active" data-filter="app card icon logo web">所有分类</span></li> <li><span class="filter" data-filter="app">手机应用</span></li> <li><span class="filter" data-filter="card">卡片</span></li> <li><span class="filter" data-filter="icon">图标</span></li> <li><span class="filter" data-filter="logo">Logo</span></li> <li><span class="filter" data-filter="web">网页</span></li> </ul> <div id="portfoliolist"> <div class="portfolio logo" data-cat="logo"> <div class="portfolio-wrapper"> <img src="~/Content/image/Logo/5.jpg" alt="" /> <div class="label"> <div class="label-text"> <a class="text-title">Bird Document</a> <span class="text-category">Logo</span> </div> <div class="label-bg"></div> </div> </div> </div> <div class="portfolio app" data-cat="app"> <div class="portfolio-wrapper"> <img src="~/Content/image/app/1.jpg" alt="" /> <div class="label"> <div class="label-text"> <a class="text-title">Visual Infography</a> <span class="text-category">APP</span> </div> <div class="label-bg"></div> </div> </div> </div> <div class="portfolio web" data-cat="web"> <div class="portfolio-wrapper"> <img src="~/Content/image/web/4.jpg" alt="" /> <div class="label"> <div class="label-text"> <a class="text-title">Sonor‘s Design</a> <span class="text-category">Web design</span> </div> <div class="label-bg"></div> </div> </div> </div> <div class="portfolio card" data-cat="card"> <div class="portfolio-wrapper"> <img src="~/Content/image/card/1.jpg" /> <div class="label"> <div class="label-text"> <a class="text-title">Typography Company</a> <span class="text-category">Business card</span> </div> <div class="label-bg"></div> </div> </div> </div> <div class="portfolio app" data-cat="app"> <div class="portfolio-wrapper"> <img src="~/Content/image/app/3.jpg" /> <div class="label"> <div class="label-text"> <a class="text-title">Weatherette</a> <span class="text-category">APP</span> </div> <div class="label-bg"></div> </div> </div> </div> <div class="portfolio card" data-cat="card"> <div class="portfolio-wrapper"> <img src="~/Content/image/card/4.jpg" /> <div class="label"> <div class="label-text"> <a class="text-title">BMF</a> <span class="text-category">Business card</span> </div> <div class="label-bg"></div> </div> </div> </div> <div class="portfolio card" data-cat="card"> <div class="portfolio-wrapper"> <img src="~/Content/image/card/5.jpg" /> <div class="label"> <div class="label-text"> <a class="text-title">Techlion</a> <span class="text-category">Business card</span> </div> <div class="label-bg"></div> </div> </div> </div> <div class="portfolio logo" data-cat="logo"> <div class="portfolio-wrapper"> <img src="~/Content/image/logo/1.jpg" /> <div class="label"> <div class="label-text"> <a class="text-title">KittyPic</a> <span class="text-category">Logo</span> </div> <div class="label-bg"></div> </div> </div> </div> <div class="portfolio app" data-cat="app"> <div class="portfolio-wrapper"> <img src="~/Content/image/app/2.jpg" /> <div class="label"> <div class="label-text"> <a class="text-title">Graph Plotting</a> <span class="text-category">APP</span> </div> <div class="label-bg"></div> </div> </div> </div> <div class="portfolio card" data-cat="card"> <div class="portfolio-wrapper"> <img src="~/Content/image/card/2.jpg" /> <div class="label"> <div class="label-text"> <a class="text-title">QR Quick Response</a> <span class="text-category">Business card</span> </div> <div class="label-bg"></div> </div> </div> </div> <div class="portfolio logo" data-cat="logo"> <div class="portfolio-wrapper"> <img src="~/Content/image/logo/6.jpg" /> <div class="label"> <div class="label-text"> <a class="text-title">Mobi Sock</a> <span class="text-category">Logo</span> </div> <div class="label-bg"></div> </div> </div> </div> <div class="portfolio logo" data-cat="logo"> <div class="portfolio-wrapper"> <img src="~/Content/image/logo/7.jpg" /> <div class="label"> <div class="label-text"> <a class="text-title">Village Community Church</a> <span class="text-category">Logo</span> </div> <div class="label-bg"></div> </div> </div> </div> <div class="portfolio icon" data-cat="icon"> <div class="portfolio-wrapper"> <img src="~/Content/image/icon/4.jpg" /> <div class="label"> <div class="label-text"> <a class="text-title">Domino‘s Pizza</a> <span class="text-category">Icon</span> </div> <div class="label-bg"></div> </div> </div> </div> <div class="portfolio web" data-cat="web"> <div class="portfolio-wrapper"> <img src="~/Content/image/web/3.jpg" alt="" /> <div class="label"> <div class="label-text"> <a class="text-title">Backend Admin</a> <span class="text-category">Web design</span> </div> <div class="label-bg"></div> </div> </div> </div> <div class="portfolio icon" data-cat="icon"> <div class="portfolio-wrapper"> <img src="~/Content/image/icon/1.jpg" alt="" /> <div class="label"> <div class="label-text"> <a class="text-title">Instagram</a> <span class="text-category">Icon</span> </div> <div class="label-bg"></div> </div> </div> </div> <div class="portfolio web" data-cat="web"> <div class="portfolio-wrapper"> <img src="~/Content/image/web/2.jpg" alt="" /> <div class="label"> <div class="label-text"> <a class="text-title">Student Guide</a> <span class="text-category">Web design</span> </div> <div class="label-bg"></div> </div> </div> </div> <div class="portfolio icon" data-cat="icon"> <div class="portfolio-wrapper"> <img src="~/Content/image/icon/2.jpg" alt="" /> <div class="label"> <div class="label-text"> <a class="text-title">Scoccer</a> <span class="text-category">Icon</span> </div> <div class="label-bg"></div> </div> </div> </div> <div class="portfolio icon" data-cat="icon"> <div class="portfolio-wrapper"> <img src="~/Content/image/icon/5.jpg" alt="" /> <div class="label"> <div class="label-text"> <a class="text-title">3D Map</a> <span class="text-category">Icon</span> </div> <div class="label-bg"></div> </div> </div> </div> <div class="portfolio web" data-cat="web"> <div class="portfolio-wrapper"> <img src="~/Content/image/web/1.jpg" alt="" /> <div class="label"> <div class="label-text"> <a class="text-title">Note</a> <span class="text-category">Web design</span> </div> <div class="label-bg"></div> </div> </div> </div> <div class="portfolio logo" data-cat="logo"> <div class="portfolio-wrapper"> <img src="~/Content/image/logo/3.jpg" alt="" /> <div class="label"> <div class="label-text"> <a class="text-title">Native Designers</a> <span class="text-category">Logo</span> </div> <div class="label-bg"></div> </div> </div> </div> <div class="portfolio logo" data-cat="logo"> <div class="portfolio-wrapper"> <img src="~/Content/image/logo/4.jpg" alt="" /> <div class="label"> <div class="label-text"> <a class="text-title">Bookworm</a> <span class="text-category">Logo</span> </div> <div class="label-bg"></div> </div> </div> </div> <div class="portfolio icon" data-cat="icon"> <div class="portfolio-wrapper"> <img src="~/Content/image/icon/3.jpg" alt="" /> <div class="label"> <div class="label-text"> <a class="text-title">Sandwich</a> <span class="text-category">Icon</span> </div> <div class="label-bg"></div> </div> </div> </div> <div class="portfolio card" data-cat="card"> <div class="portfolio-wrapper"> <img src="~/Content/image/card/3.jpg" alt="" /> <div class="label"> <div class="label-text"> <a class="text-title">Reality</a> <span class="text-category">Business card</span> </div> <div class="label-bg"></div> </div> </div> </div> <div class="portfolio logo" data-cat="logo"> <div class="portfolio-wrapper"> <img src="~/Content/image/logo/2.jpg" alt="" /> <div class="label"> <div class="label-text"> <a class="text-title">Speciallisterne</a> <span class="text-category">Logo</span> </div> <div class="label-bg"></div> </div> </div> </div> </div> </div><!-- container --></body></html>muxitup |
标签:数字 cts org primary cloc doc stl 如何使用 cloud
原文地址:http://www.cnblogs.com/liuq1991/p/7932192.html