标签:error ase div 技术分享 警告 efi button play 大学
公司突然组织需要重新搭建一个基于node的论坛系统,前端采用react,上网找了一些脚手架,或多或少不能满足自己的需求,最终在基于YeoMan的react脚手架generator-react-webpack上搭建改造,这里作为记录。
代码在这里:github
另外推荐地址:react-starter-kit
├── README.md                       # 项目README文件
├── conf                            # 配置文件夹
│   └── webpack                     # webpack配置(下面包括开发、生产、测试环境的配置)
├── karma.conf.js                   # karma测试配置文件
├── node_modules                    # 包文件夹
├── package.json                    # 包描述文件
├── src                             # 源文件夹
│   ├── actions                     # redux actions文件夹
│   ├── client.js                   # 客户端启动文件
│   ├── components                  # 项目组件(下面分为业务组件和公共组件)
│   ├── config                      # 环境配置文件夹(指明当前环境)
│   ├── containers                  # 入口容器
│   ├── exports.js                  # 常用组件的exports文件,可以忽略
│   ├── images                      # 图片
│   ├── index-release.html          # 生产环境模板文件
│   ├── index.html                  # 开发环境入口html
│   ├── reducers                    # redux reducers文件夹
│   ├── routes                      # 路由配置
│   ├── sources                     # 资源文件(可忽略)
│   ├── static                      # 静态文件(可以存放第三方库)
│   ├── stores                      # redux stores文件夹
│   ├── styles                      # 全局样式文件夹
│   └── views                       # 视图文件夹
├── test                            # 测试文件夹
│   ├── actions                     # 测试actions
│   ├── components                  # 测试组件
│   ├── config                      # 测试配置(检测环境)
│   ├── loadtests.js                # 加载测试文件
│   ├── reducers                    # 测试reducers
│   ├── sources                     # 测试资源(flux datasource)
│   └── stores                      # 测试stores
└── webpack.config.js # webpack配置入口文件this.config = {
cache: false,
devtool: ‘source-map‘,
entry: {
main: [‘./client.js‘],
vendor: [‘react‘, ‘react-dom‘, ‘redux‘, ‘react-redux‘, ‘react-router-dom‘,
‘react-router-redux‘, ‘react-css-modules‘, ‘history‘]
},
plugins: [
new webpack.DefinePlugin({
‘process.env.NODE_ENV‘: ‘"production"‘
}),
new webpack.optimize.AggressiveMergingPlugin(),
new webpack.NoEmitOnErrorsPlugin(),
new webpack.optimize.CommonsChunkPlugin({
name: ‘vendor‘,
minChunks: Infinity
}),
new HtmlWebpackPlugin({
filename: path.resolve(‘./dist/index.html‘),
template: path.resolve(‘./src/index-release.html‘),
inject: ‘body‘
})
]
};
this.config.output.filename = ‘[name].[chunkhash].js‘;主要在entry上做了文章,将公共库分离成vendor,同时配合CommonsChunkPlugin进行代码抽离。最后将output的文件名加上chunkhash`,这样在新打包的文件不会被浏览器缓存策略而缓存
{
    test: /\.(png|jpg|gif|ico|swf|xap)$/,
    loaders: [
        {
            loader: ‘file-loader‘,
            query: {
                name: ‘images/[name].[ext]‘
            }
        }
    ]
}主要使用query配置,区分不同文件目录。fonts/media相同道理配置即可
├── bussiness
│   └── README.md
└── common
    ├── README.md
    ├── Template.js
    ├── YeomanImage.js
└── button主要区分业务组件和公共组件。当然你也可以不区分,引用常用的公共库如蚂蚁金服的react前端库,进行改造。如果你需要自己写组件的话,个人愚见还是区分一下。
加入这个看个人意愿,加入之后必定会造成一定的学习以及开发成本,但是对redux来说,运用这个库是再好不过的了,具体表现在数据的不可变性,即每次的数据都会是一个新的,不会在原始引用的数据上进行重新操作,以免造成数据污染。
// reducers/items.js
const initialState = fromJS({
    items: [
        {
            "forum_name": "武汉大学",
            "user_level": 12,
            "user_exp": 5301,
            "id": 30996,
            "is_like": 1,
            "favo_type": 2
        },
        // ...
    ]
});

function reducer(state = initialState, action) {
    switch (action.type) {
        case GET_ITEMS:
            return state;
        default:
            return state;

    }
}

// views/Home.js
render() {
    const list = items.get(‘items‘);
    // ...
    {
      list.map((l, index) => {
        return (
            <tr key={ `list${index}` }>
                <td>{ l.get(‘forum_name‘) }</td>
                <td>{ l.get(‘user_level‘) }</td>
                <td>{ l.get(‘user_exp‘) }</td>
                <td>{ l.get(‘is_like‘) === 0 ? ‘是‘ : ‘否‘ }</td>
                <td>{ l.get(‘favo_type‘) }</td>
            </tr>
          );
        })
    }
}如果不清楚immutable,可以自行百度、谷歌。
加入react-router,脚手架中是没有生成路由的(可能有吧,只是楼主没有找到??)。于是加入配合react最紧密的react-router,官网的react-router已经到了4.x.x版本了,真是快呀。于是去了解了一下,这里只是做了基本的应用,如果用得不顺手,随时可以会退到2.x.x或者3.x.x,这个大家自行斟酌。
// routes/index.js
const routes = (
    <Switch>
        <Route exact path="/" component={ App } />
        <Route exact path="/home" component={ Home } />
        <Route exact path="/about" component={ About } />
        <Route exact path="/contact" component={ Contact } />
    </Switch>
);

// views
└── views
    ├── About.js
    ├── Contact.js
    ├── Home.js
    ├── README.md
└── app定义路由,加入exact代表所有路由唯一,即/about不会匹配到/,我的理解就是,不是子集路由。
即用到该组件的时候才会加载组件,主要是在Base.js的output中配置
chunkFilename: ‘chunk/[chunkhash].chunk.js‘,这样会生成快文件。生成块主要用到了require.ensure或者() => import(‘xxx‘)来达到,下面我用到了一个库react-loadable,可以配置组件加载过程中的过度页面。
// async.template.js
import Loadable from ‘react-loadable‘;
import MyLoadingComponent from ‘./Loading‘;

const asyncTempalte = (loaderFunc) => {
    return Loadable({
        loader: loaderFunc,
        loading: MyLoadingComponent
    });
};

export default asyncTempalte;

// 在index.js中可以这样引用
const App = asyncTemplate(() => import("views/app/App"));
const Home = asyncTemplate(() => import("views/Home"));
const About = asyncTemplate(() => import("views/About"));
const Contact = asyncTemplate(() => import("views/Contact"));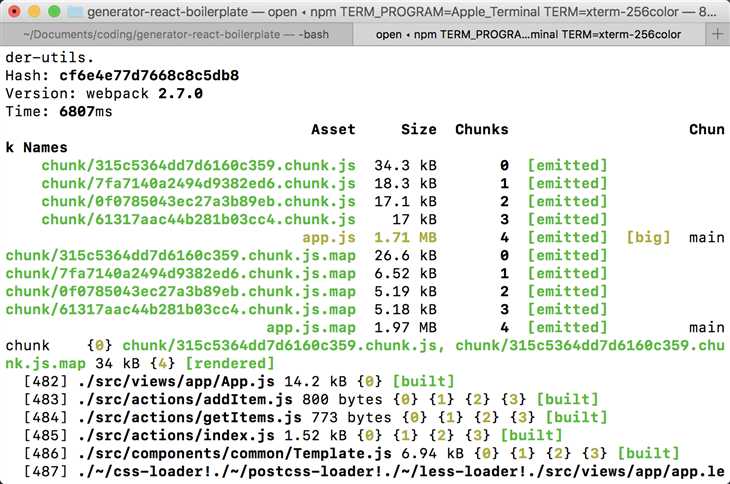
import { createStore, combineReducers, applyMiddleware, compose } from ‘redux‘;
import { routerReducer, routerMiddleware } from ‘react-router-redux‘;
import config from ‘config‘;
import reducers from ‘../reducers‘;

function reduxStore(history, initialState) {

    // Build the middleware for intercepting and dispatching navigation actions
    const rMiddleware = routerMiddleware(history);
    const middlewares = [rMiddleware];

    // ...

    const createStoreWithMiddleware = composeEnhancers(applyMiddleware(...middlewares));
    const store = createStoreWithMiddleware(createStore)(
        combineReducers({
            ...reducers,
            // 配置router reducers
            router: routerReducer
        }),
        initialState
    );

    if (module.hot) {
        // Enable Webpack hot module replacement for reducers
        module.hot.accept(‘../reducers‘, () => {
            // We need to require for hot reloading to work properly.
            const nextReducer = require(‘../reducers‘);  // eslint-disable-line global-require

            store.replaceReducer(nextReducer);
        });
    }

    return store;
}

export default reduxStore;
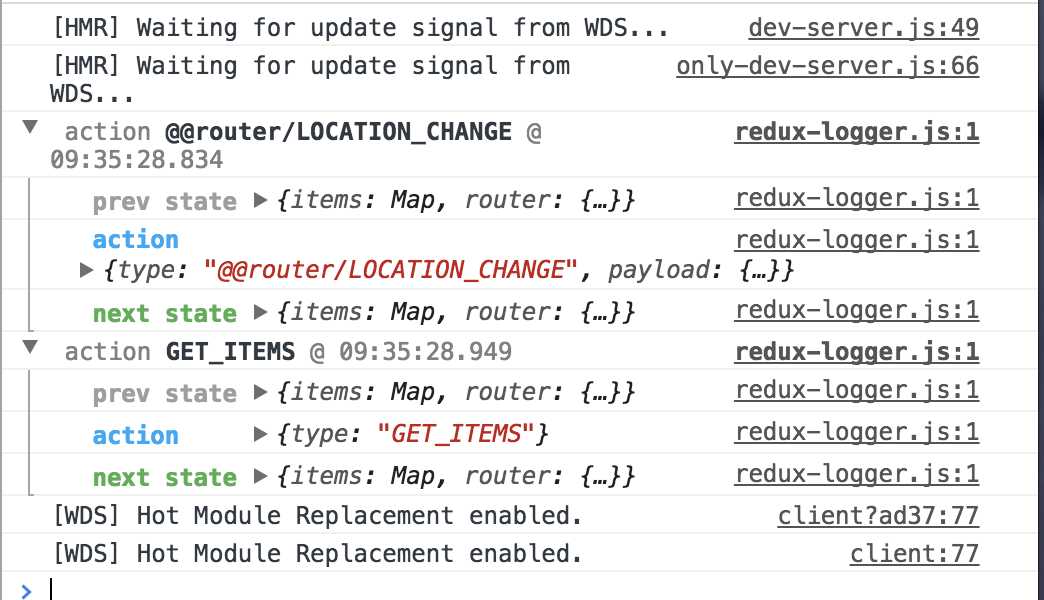
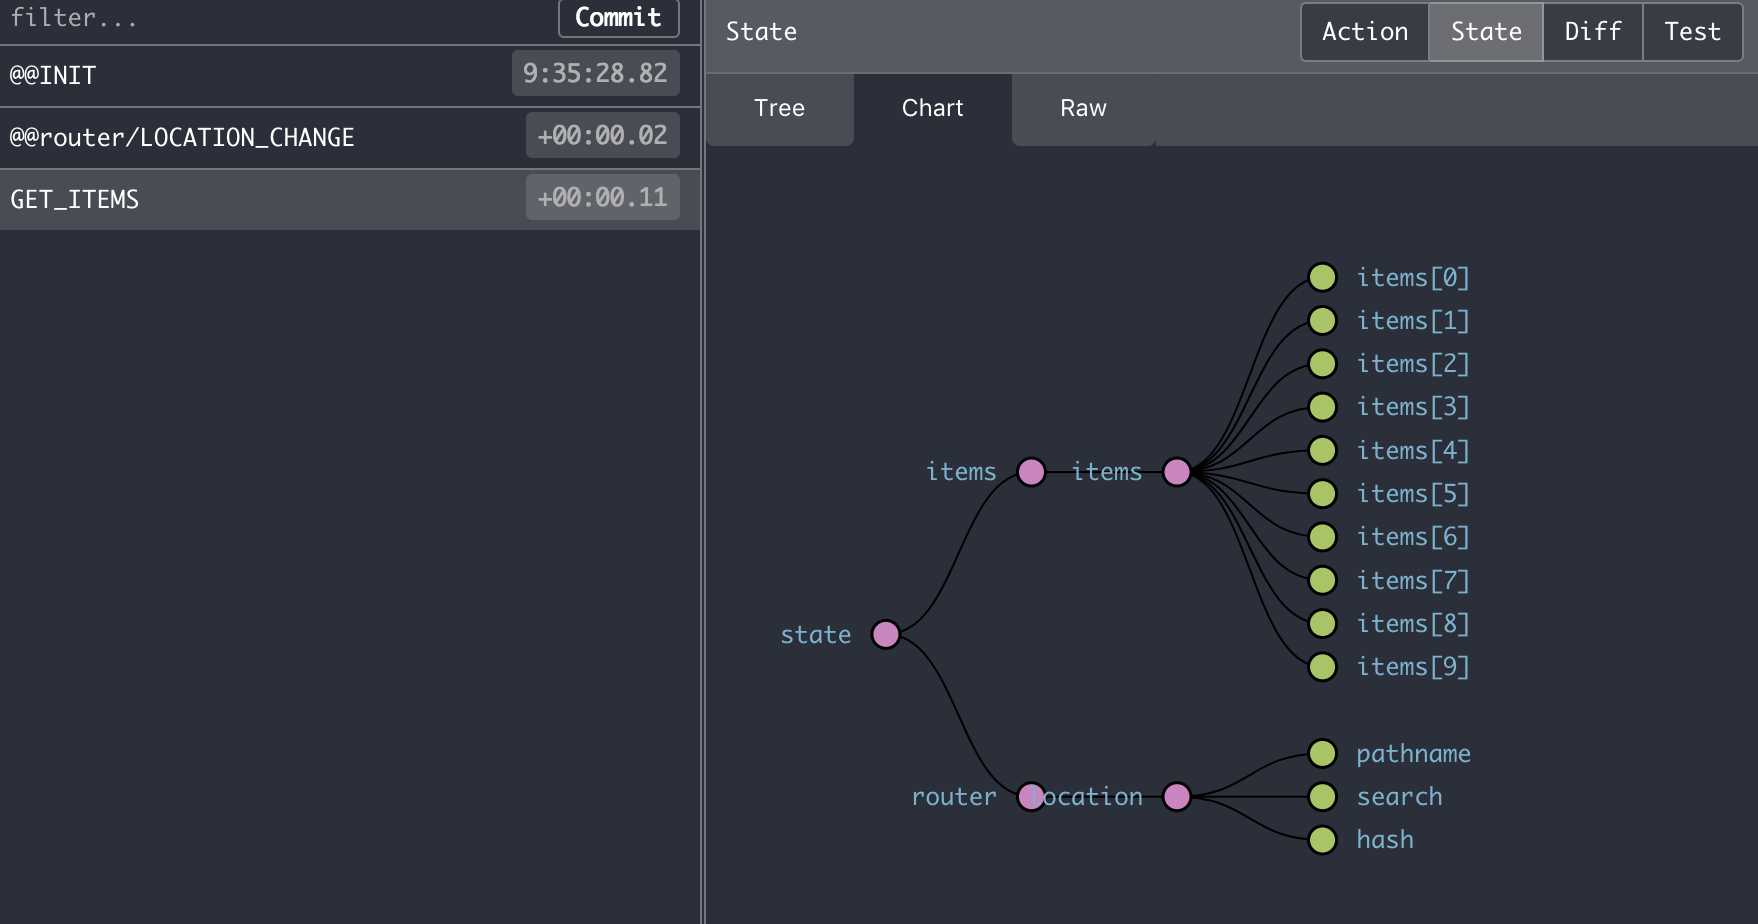
配合Redux DevTools可以实时监控到store中数据的变化,包括state的diff,action的发起情况等等,更有丰富的图表展示,还可以自定义actions,然后自行dispath。首先去谷歌安装插件Redux DevTools,需FQ安装
// stores/index.js
import { createStore, combineReducers, applyMiddleware, compose } from ‘redux‘;
// 可以另外加入redux-logger一起使用
import { createLogger } from ‘redux-logger‘;

const loggerMiddleware = createLogger({ collapsed: true });
// 主要是这个函数
let composeEnhancers = window.__REDUX_DEVTOOLS_EXTENSION_COMPOSE__ || compose;

function reduxStore(history, initialState) {
    // ...

    // 开发环境开启日志
    if (config.appEnv === ‘dev‘) {
        middlewares.unshift(loggerMiddleware);
        composeEnhancers = composeEnhancers ? composeEnhancers : compose;
    } else {
        composeEnhancers = compose;
    }
}
几乎在所有组件中,我们都需要写到connect,mapStateToProps等等,抽取出来,会显得更加方便
// components/common/Template.js
import React, { Component } from ‘react‘;
import { is, fromJS } from ‘immutable‘;
import { bindActionCreators } from ‘redux‘;
import { connect } from ‘react-redux‘;
import { withRouter } from ‘react-router-dom‘;
import actions from ‘actions/‘;

const Main = MyComponent => {
    class IndexTemplate extends Component {

        constructor(props, context) {
            super(props, context);
        }

        shouldComponentUpdate(nextProps, nextState) {
            return !is(fromJS(this.props), fromJS(nextProps))
                || !is(fromJS(this.state), fromJS(nextState));
        }

        render() {
            return <MyComponent { ...this.props } />;
        }
    }

    IndexTemplate.displayName = ‘IndexTemplate‘;
    IndexTemplate.defaultProps = {};

    function mapStateToProps(state) {
        const { items } = state;
        return {
            items
        };
    }

    function mapDispatchToProps(dispatch) {
        return { actions: bindActionCreators(actions, dispatch) };
    }

    return withRouter(connect(mapStateToProps, mapDispatchToProps)(IndexTemplate));
};

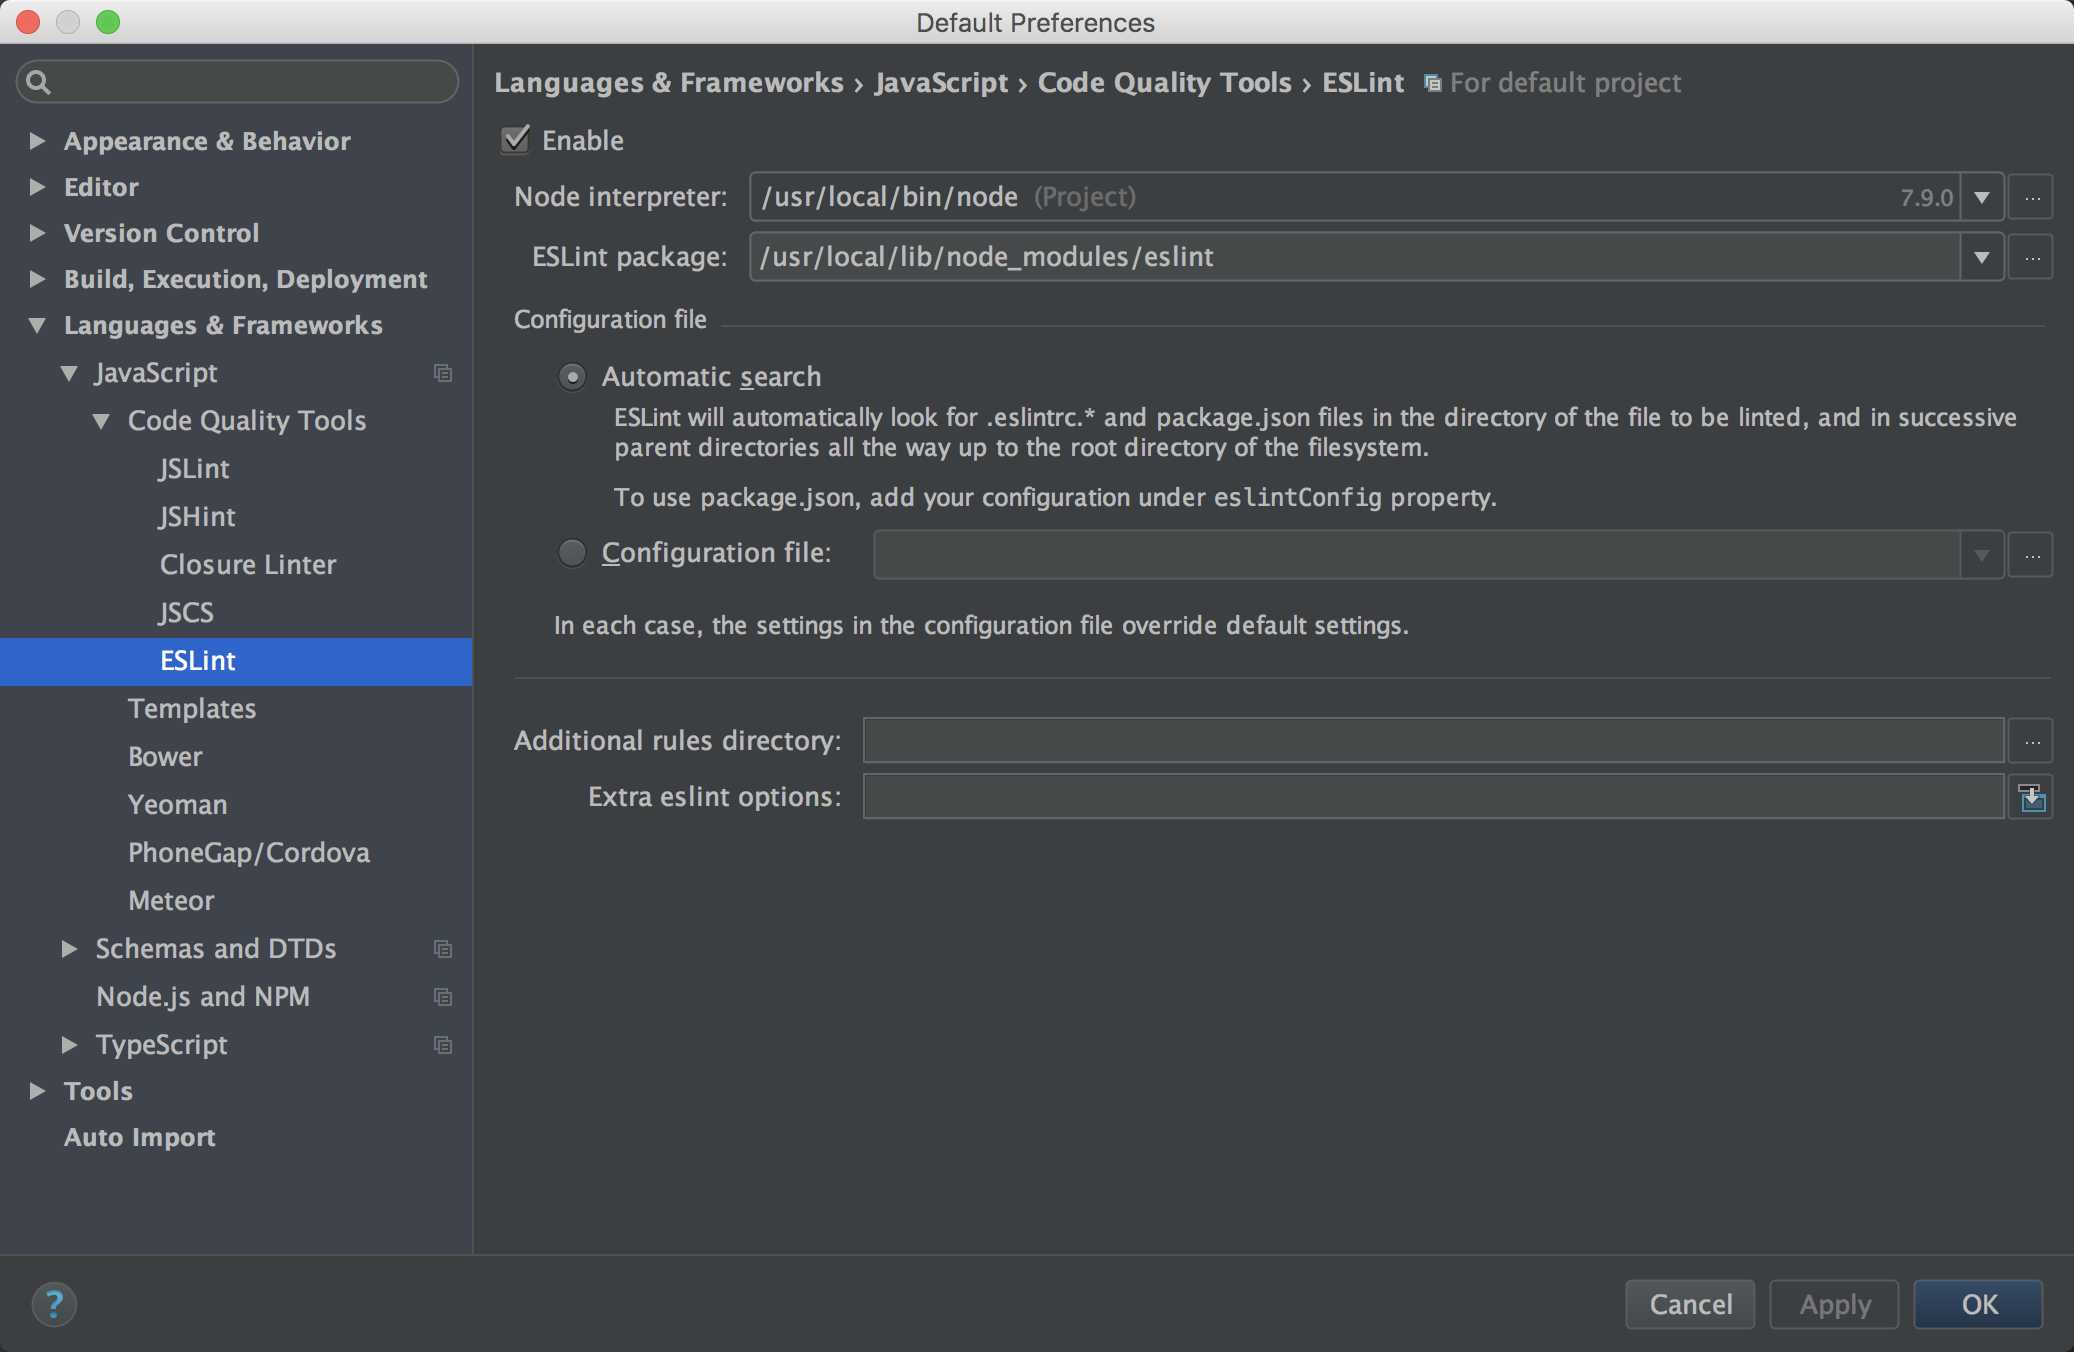
export default Main;楼主用的webstorm,所以首先开启eslint功能,其他IDE请大家自行百度。
具体路径:File -> Settings -> Languages & Frameworks -> Javascript -> Code Quality Tools -> Eslint,在右侧按钮开启即可。
// .eslintignore
node_modules/
dist/
src/static/
src/images/

// .eslintrc
{
    "parser": "babel-eslint",
    "env": {
        "browser": true,
        "node": true,
        "mocha": true
    },
    "extends": "airbnb",
    "rules": {
        "comma-dangle": ["off"],
        "import/extensions": 0,
        "no-unused-vars": ["warn"],
        "object-curly-spacing": ["off"],
        "padded-blocks": ["off"],
        "react/jsx-closing-bracket-location": ["off"],
        "react/jsx-filename-extension": [1, { "extensions": [".js", ".jsx"] }],
        "react/jsx-space-before-closing": ["off"],
        "react/prefer-stateless-function": ["off"],
        "react/jsx-indent": ["error", 4],
        "react/jsx-curly-spacing": ["off"],
        "react/jsx-indent-props": ["error", 4],
        "no-underscore-dangle": [ "off"],
        "import/no-unresolved": ["error", {
            "ignore": [
                "config",
                "components/",
                "stores/",
                "actions/",
                "sources/",
                "styles/",
                "images/",
                "containers"
            ]
        }],
        "import/no-extraneous-dependencies": ["off", {
            "devDependencies": true,
            "optionalDependencies": false,
            "peerDependencies": false
        }],
        "indent": ["error", 4, {
            "SwitchCase": 1,
            "VariableDeclarator": 1,
            "outerIIFEBody": 1,
            "FunctionDeclaration": {
                "parameters": 1,
                "body": 1
            },
            "FunctionExpression": {
                "parameters": 1,
                "body": 1
            }
        }],
        "arrow-body-style": ["warn", "as-needed"],
        "max-len": ["warn", {
            "ignoreUrls": true,
            "ignoreStrings": true
        }],
        "no-script-url": ["warn"],
        "quote-props": ["warn", "as-needed"],
        "arrow-parens": ["error", "as-needed"]
    }
}
上面贴的是我个人的配置,如果不习惯,可以自己改造。
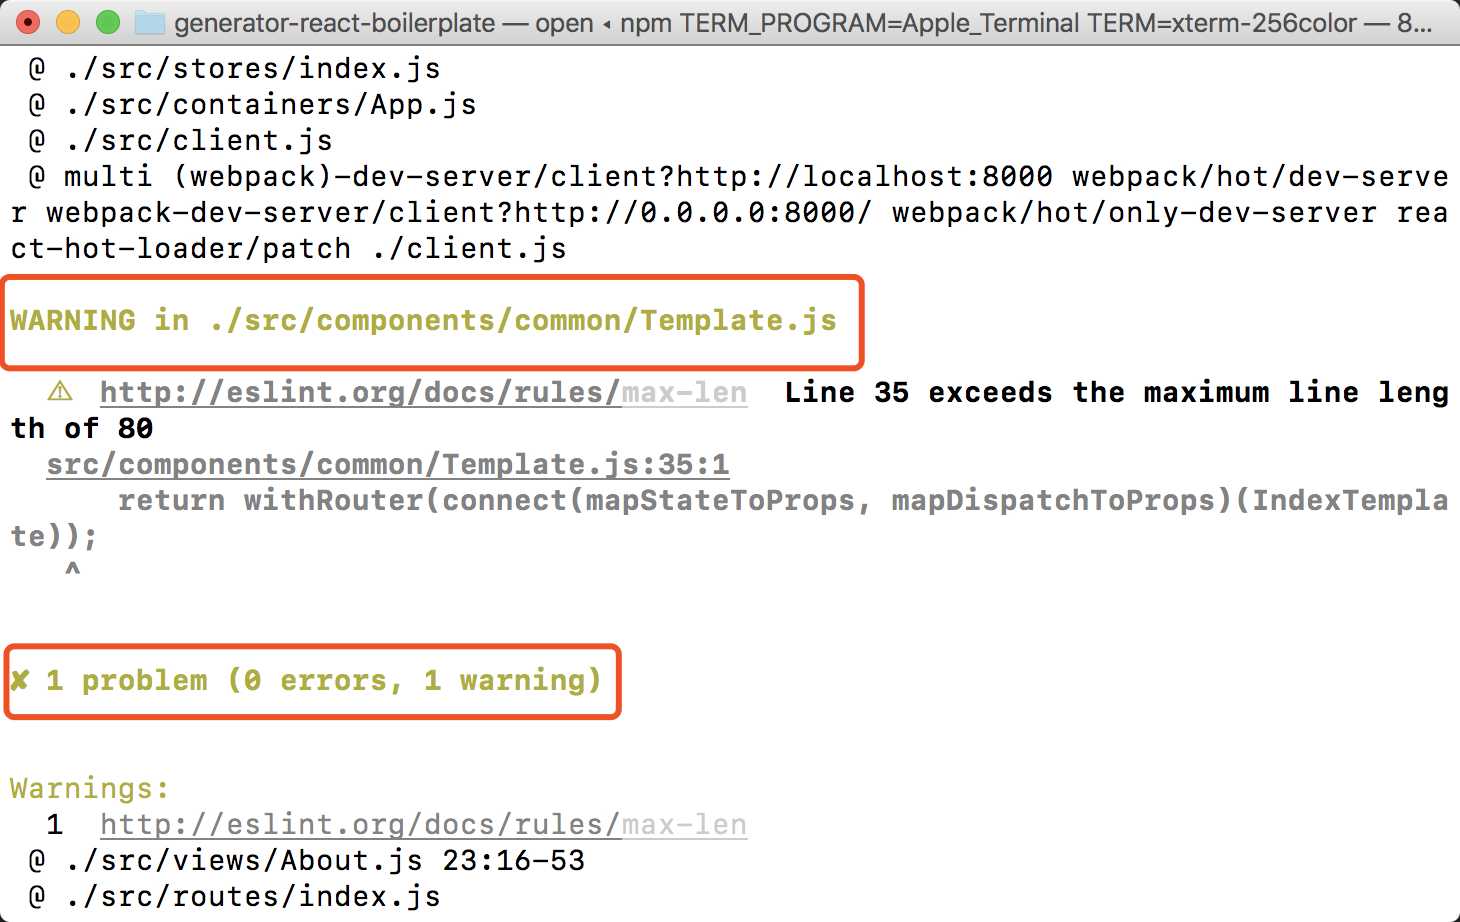
运行完成后,你可能会得到这样的截图,如果有error,编译将不能通过。
你可能会用到下面的地址:
即改变了一个视图文件之后,并不会热更新。主要是在client.js:
import React from ‘react‘;
import ReactDOM from ‘react-dom‘;
import { AppContainer } from ‘react-hot-loader‘;
import App from ‘containers/App‘;

ReactDOM.render(
    <AppContainer>
        <App />
    </AppContainer>,
    document.getElementById(‘app‘)
);

if (module.hot) {
    // module.hot.accept(‘./containers/App‘, () => {
        const NextApp = require(‘./containers/App‘).default; // eslint-disable-line global-require

        ReactDOM.render(
            <AppContainer>
                <NextApp />
            </AppContainer>,
            document.getElementById(‘app‘)
        );
    // });
}需要注释掉module.hot.accept这一行代码,如果不注释,会报<Provider></Provider>不能被热加载的一些错误。具体原因暂不清楚。
之前为3.0.0-beta.6版本,升级一下即可
npm install react-hot-loader@3.0.0-beta.7以上只是个人的改造过程中的一些想法和实践,并不是适用于所有人,拿出来和大家共同讨论,比如认为可以建立redux文件夹,将actions/reducers/stores放在一起,比如路由可以分模块化,比如每一个组件文件与样式文件可以放在一起(包括视图等等),再比如异步的action统一配置middleware处理错误情况等等。
标签:error ase div 技术分享 警告 efi button play 大学
原文地址:http://www.cnblogs.com/rynxiao/p/7933113.html