boost 1.56.0 编译及使用
来源: http://www.cnblogs.com/zhcncn/p/3950477.html
boost的编译和使用,经过搜集资料和总结,记录成文。感谢文后所列参考资料的作者。
1 下载
地址:http://sourceforge.net/projects/boost/files/boost/1.56.0/
可以选择 boost_1_56_0.7z 下载。
2 编译
2.1 生成boost的自用的编译工具bjam.exe
解压后,使用VS2013编译。首先打开“VS2013 开发人员命令提示”,cd 到boost解压后的根目录:E:\XXX\boost_1_56_0,执行bootstrap.bat。会在boost根目录生成 b2.exe 、bjam.exe 、project-config.jam 、bootstrap.log四个文件。
其中,b2.exe 、bjam.exe 这两个exe作用是一样的,bjam.exe 是老版本,b2是bjam的升级版本。
2.2 使用bjam(或b2)来编译boost
1. bjam命令参数分析
我们以文章【1】中的命令来分析一下各个参数的作用(原作者解压后的boost根目录为E:\SDK\boost)。
bjam stage --toolset=msvc-9.0 --without-python --stagedir="E:\SDK\boost\bin\vc9" link=static runtime-link=shared runtime-link=static threading=multi debug release
(1)stage/install:
stage表示只生成库(dll和lib),install还会生成包含头文件的include目录。本人推荐使用stage,因为install生成的这个include目录实际就是boost安装包解压缩后的boost目录(E:\SDK\boost\boost,只比include目录多几个非hpp文件,都很小),所以可以直接使用,而且不同的IDE都可以使用同一套头文件,这样既节省编译时间,也节省硬盘空间。
(2)toolset:
指定编译器,可选的如borland、gcc、msvc(VC6)、msvc-9.0(VS2008)等。
(3)without/with:
选择不编译/编译哪些库。因为python、mpi等库我都用不着,所以排除之。还有wave、graph、math、regex、test、program_options、serialization、signals这几个库编出的静态lib都非常大,所以不需要的也可以without掉。这可以根据各人需要进行选择,默认是全部编译。但是需要注意,如果选择编译python的话,是需要python语言支持的,应该到python官方主页http://www.python.org/下载安装。
查看boost包含库的命令是bjam --show-libraries。
(4)stagedir/prefix:
stage时使用stagedir,install时使用prefix,表示编译生成文件的路径。推荐给不同的IDE指定不同的目录,如VS2008对应的是E:\SDK\boost\bin\vc9,VC6对应的是E:\SDK\boost\bin\vc6,否则都生成到一个目录下面,难以管理。如果使用了install参数,那么还将生成头文件目录,vc9对应的就是E:\SDK\boost\bin\vc9\include\boost-1_46\boost,vc6类似(光这路径都这样累赘,还是使用stage好)。
(5)build-dir:
编译生成的中间文件的路径。这个本人这里没用到,默认就在根目录(E:\SDK\boost)下,目录名为bin.v2,等编译完成后可将这个目录全部删除(没用了),所以不需要去设置。
(6)link:
生成动态链接库/静态链接库。生成动态链接库需使用shared方式,生成静态链接库需使用static方式。一般boost库可能都是以static方式编译,因为最终发布程序带着boost的dll感觉会比较累赘。
(7)runtime-link:
动态/静态链接C/C++运行时库。同样有shared和static两种方式,这样runtime-link和link一共可以产生4种组合方式,各人可以根据自己的需要选择编译。
(8)threading:
单/多线程编译。一般都写多线程程序,当然要指定multi方式了;如果需要编写单线程程序,那么还需要编译单线程库,可以使用single方式。
(9)debug/release:
编译debug/release版本。一般都是程序的debug版本对应库的debug版本,所以两个都编译。
2. 编译boost
编译boost的命令比较复杂,尤其是 link, runtime-link 这两个选项的功能分不太清楚,他们共有4种相互组合,这些相互组合各有什么含义呢?
所以首先做个实验,仅编译date_time库,观察一下这两个选项的作用。
分别使用下面的命令行编译,
b2 stage --toolset=msvc-12.0 --with-date_time --stagedir="E:\eCode\boost_1_56_0\bin\vc12" link=static runtime-link=static threading=multi debug release
b2 stage --toolset=msvc-12.0 --with-date_time --stagedir="E:\eCode\boost_1_56_0\bin\vc12" link=static runtime-link=shared threading=multi debug release
b2 stage --toolset=msvc-12.0 --with-date_time --stagedir="E:\eCode\boost_1_56_0\bin\vc12" link=shared runtime-link=shared threading=multi debug release
b2 stage --toolset=msvc-12.0 --with-date_time --stagedir="E:\eCode\boost_1_56_0\bin\vc12" link=shared runtime-link=static threading=multi debug release
b2 stage --toolset=msvc-12.0 --with-date_time --stagedir="E:\eCode\boost_1_56_0\bin\vc12_2" (为避免将前面的结果覆盖,配置另一目录vc12_2存放)
b2 stage --toolset=msvc-12.0 --with-date_time --stagedir="E:\eCode\boost_1_56_0\bin\vc12_2" --build-type=complete(为避免将前面的结果覆盖,配置另一目录vc12_3存放)
所得到的结果如下表所示:
| 序号 | link | runtime-link | 生成物 | 备注 |
| 1 | static | static |
libboost_date_time-vc120-mt-sgd-1_56.lib libboost_date_time-vc120-mt-s-1_56.lib |
|
| 2 | static | shared |
libboost_date_time-vc120-mt-gd-1_56.lib libboost_date_time-vc120-mt-1_56.lib |
与5结果相同 |
| 3 | shared | shared |
boost_date_time-vc120-mt-gd-1_56.dll boost_date_time-vc120-mt-gd-1_56.lib boost_date_time-vc120-mt-1_56.dll boost_date_time-vc120-mt-1_56.lib |
|
| 4 | shared | static | 报错,无法编译 | |
| 5 | 使用缺省 | 使用缺省 |
libboost_date_time-vc120-mt-gd-1_56.lib libboost_date_time-vc120-mt-1_56.lib |
与2结果相同 并且在省略debug release时,debug release版本都编译 |
| 6 | 使用--build-type=complete |
boost_date_time-vc120-mt-gd-1_56.dll boost_date_time-vc120-mt-gd-1_56.lib boost_date_time-vc120-mt-1_56.dll boost_date_time-vc120-mt-1_56.lib
libboost_date_time-vc120-mt-sgd-1_56.lib libboost_date_time-vc120-mt-s-1_56.lib
libboost_date_time-vc120-mt-gd-1_56.lib libboost_date_time-vc120-mt-1_56.lib
libboost_date_time-vc120-s-1_56.lib libboost_date_time-vc120-sgd-1_56.lib |
--build-type=complete时,可以看到link,runtime-link的 3种组合下debug, release的多线程版本都生成出来了, 除此之外,还生成了link=static,runtime-link=static的debug, release的单线程版本 |
|
从上面的结果可以看到,link和runtime-link的缺省配置是 link=static runtime-link=shared,所以我们可以使用 (b2 stage --toolset=msvc-12.0 --with-date_time --stagedir="E:\eCode\boost_1_56_0\bin\vc12_2")命令行来编译boost。
另外,我们还可以分析一下 boost 库的命名特点:【2】
(1)以“lib”开头的是“link=static”版本(静态链接库版本,没有dll),而直接以“boost”开头的是“link=shared”版本(动态链接库版本,包含lib和dll)。
(2)所有的库都含有"boost"前缀。
(3)紧随其后的是boost库名称(比如date_time库)。
(4)然后是编译器的版本,与库名称之间以"-"而不是下划线"_"分隔(比如 -vc120)。
(5)有“mt”的为“threading=multi”版本,没有的则是“threading=single”版本。
(6)有“s”的为“runtime-link=static”版本,没有的则是“runtime-link=shared”版本。
(7)有“gd”的为debug版本,没有的则是release版本。
(8)所有的库都含有boost库的版本号结尾(比如1_56,其中的"."以下划线"_"代替)
3. link, runtime-link 组合分析
文章【2】给出了link,runtime-link的具体作用分析。
假设一个库A依赖于库B,我们自己的程序client依赖于库A,即:

那么,link指的是client->A,runtime-link指的是A -> B
|
配置 |
链接过程 |
运行时需要的文件 |
|
link=static runtime-link=static |
client通过A.a (A.lib)静态包含A; A通过B.a (B.lib)静态包含B; 不关 .so .dll的事 |
client |
|
link=static runtime-link=shared |
client通过A.a (A.lib)静态包含A; 在运行时,client要动态调用B.so (B.dll) |
client B.so (B.dll) |
|
link=shared runtime-link=shared |
client会包含A.a (A.lib); A会包含 B.a (B.lib); 但都只保存动态库的真正实现的stub,运行时通过stub去动态加载 A.so (A.dll), B.so (B.dll) 中的实现 |
client A.so (A.dll) B.so (B.dll) |
|
link=shared runtime-link=static |
client会包含A.a (A.lib),但只包含真正实现的stub; A通过B.a (B.lib)静态包含B; 运行时,client会动态调用A.so (A.dll) |
client A.so (A.dll)
|
3. 配置
包含头文件的Include路径:E:\eCode\boost_1_56_0
包含库文件的链接路径:E:\eCode\boost_1_56_0\bin\vc12\lib
(1)可以设置为仅用于当前project:
选中当前project->Properties->Configuration Properties->C/C++->General: Additional Include Directories: 设置 E:\eCode\boost_1_56_0
选中当前project->Properties->Configuration Properties->Linker->General: Additional LibraryDirectories: 设置 E:\eCode\boost_1_56_0\bin\vc12\lib
(2)可设置为仅用于当前Solution:
选中当前project->Properties->Configuration Properties->VC++ Directories:
Include Directories: 设置 E:\eCode\boost_1_56_0
LibraryDirectories: 设置 E:\eCode\boost_1_56_0\bin\vc12\lib
(3)可设置为OS当前用户下的VC++环境(当前用户下VC++所创建的所有Solution)
在某个已打开的工程下,切换到Property Manager 选项卡,然后然后展开当前工程的properties配置,打开Microsoft.Cpp.Win32.User
选择Common Properties->VC++ Directories:
Include Directories: 设置 E:\eCode\boost_1_56_0
LibraryDirectories: 设置 E:\eCode\boost_1_56_0\bin\vc12\lib
这样设置的仅在Win32编译选项下起作用,x64编译选项需要另外配置x64的properties sheet。
(4)可设置为OS所有用户下的VC++环境
可以编辑 Microsoft.Cpp.Default.props 、Microsoft.Cpp.props 。这里就不介绍了。
4. 测试
使用文章【3】中date_time计时函数。创建一个Win32 console 工程,然后copy下面代码
//#define BOOST_DATE_TIME_SOURCE
#include <iostream>
#include <boost/date_time/gregorian/gregorian.hpp>
#include <boost/date_time/posix_time/posix_time.hpp>
using namespace std;
using namespace boost::gregorian;
using namespace boost::posix_time;

/************************************************************************
创建微秒级的计时器
************************************************************************/

template <class T = microsec_clock>
class MyTimer
{
private:
    ptime m_startTime;

public:
    MyTimer()
    {
        Restart();
    }

    void Restart()
    {
        m_startTime = T::local_time();
    }


    void Elapsed()
    {
        cout << T::local_time() - m_startTime << endl;
    }
};


int main()
{
    MyTimer<microsec_clock> t;
    for(int i = 0; i < 100; ++i)
    {
        cout << "hello" << endl;
    }
    t.Elapsed();
}
注意开头的宏 “#define BOOST_DATE_TIME_SOURCE” 注掉了。若启用这个宏定义,则默认由编译器重新编译嵌入的头文件;若不启用这个宏定义,则表示使用系统已编译好的date_time库。
(1)禁用#define BOOST_DATE_TIME_SOURCE 宏,然后将 libboost_date_time-vc120-mt-gd-1_56.lib 从 E:\eCode\boost_1_56_0\bin\vc12\lib 中移除,编译debug版的程序时,提示连接错误,缺少libboost_date_time-vc120-mt-gd-1_56.lib。
(2)启用#define BOOST_DATE_TIME_SOURCE 宏,编译debug版的程序时,可发现即使在缺少 libboost_date_time-vc120-mt-gd-1_56.lib的情况下,也能成功编译。
References
【1】Boost下载安装编译配置使用指南(含Windows、Linux以及ARM Linux)(http://www.cnblogs.com/wondering/archive/2009/05/21/boost_setup.html)
【2】link 和 runtime-link,搭配shared 和 static(http://blog.csdn.net/yasi_xi/article/details/8660549)
【3】计时函数(二)(http://www.cnblogs.com/jerry19880126/archive/2013/02/20/2919718.html)
【4】官方文档Getting Started on Windows(http://www.boost.org/doc/libs/1_56_0/more/getting_started/windows.html)
【5】bjam使用(http://blog.chinaunix.net/uid-22301538-id-3158997.html)
来源 https://www.cnblogs.com/tongy0/p/6513641.html
编译 boost 库的步骤:
- 从官网下载最新版本的 boost 库(目前最新版本为:boost_1_63_0);下载地址:http://www.boost.org/users/download/
- 解压下载的包(boost_1_63_0.7z)。(假设解压到:F:\Download\Chrome\boost\boost_1_63_0)
- 打开 Visual Studio 2013 Tools 之 VS2013 开发人员命令提示 工具
- 将目标切换到 F:\Download\Chrome\boost\boost_1_63_0 目标
- 执行 bootstrap.bat。执行完成后,会生成:b2.exe、bjam.exe、bootstrap.log、project-config.jam 四个文件,其中 b2.exe 与 bjam.exe 都是用来编译 boost 库的两个工具。它们功能一样,bjam.exe 是老版本的,b2.exe 是升级版本的
- 执行 b2 stage --toolset=msvc-12.0 --stagedir="F:\Download\Chrome\boost\boost_1_63_0\bin\vc12" link=static runtime-link=shared runtime-link=static threading=multi debug release 执行完成后,会在 F:\Download\Chrome\boost\boost_1_63_0 目标下生成 bin 目录以及 bin.v2 目录。其中 bin 目标是保存最终编译好的各种 lib 库。(命令中的各参数意义,可参阅:http://www.cnblogs.com/zhcncn/p/3950477.html)
使用 boost 库步骤:
- 将下载解压后的 boost 库包中的 boost 目录(即:F:\Download\Chrome\boost\boost_1_63_0\boost 目录)拷贝到工程相应位置处。(如:Boost\boost_1_63_0 目录下,即最终:Boost\boost_1_63_0\boost)。注意:boost 目录为 boost 源文件目录
- 将前面编译生成的 bin\vc12\lib 目录下的 lib 库拷贝到工程目录。(如:Jacc.Kim\JK\lib\Debug)。提示:Jacc.Kim 目录是个人解决方案所在的目录。注意:bin\vc12\lib 目录下的100多个lib文件中并不需要全部拷贝,只需要拷贝自己工程需要用到的库即可。比如:如果只想使用 date_time 库,则只需要拷贝:libboost_date_time-vc120-mt-gd-1_63.lib 库即可。但是有些库是有依赖于其他的一些库的,此时,将需要将那些依赖的库一并拷贝过来。比如:asio 则依赖于 libboost_system-vc120-mt-gd-1_63.lib 库,如果在使用 asio 时,有用到 regex,则还需要拷贝:libboost_regex-vc120-mt-gd-1_63.lib。如果有用到多线程,则还需要:libboost_thread-vc120-mt-gd-1_63.lib、libboost_chrono-vc120-mt-gd-1_63.lib 等等。具体需要什么库,在工程链接时,有缺失的话,系统会提示,只需要照着去找到那些需要的库,并拷贝过来即可。
- 设置工程:属性 -> 配置属性 -> C/C++ -> 附加包含目录 增加:$(SolutionDir)Boost\boost_1_63_0 以及 $(SolutionDir)Boost\boost_1_63_0\boost
- 设置工程:属性 -> 配置属性 -> 链接器 -> 附加库目录 增加 $(SolutionDir)JK\lib\$(Configuration)。重点说明:此处设置好附加库目录即可,无需像其他静态库那样,还要设置 附加依赖项 中指定具体 libboost_xxx_vc12_-xxx.lib,具体原因,应该是编译时,使用的是 runtime_link=share,即:boost 库间的链接是动态链接的缘故
- 之后就可以在工程中使用具体的 boost 库了
编译 boost 库时必需要注意的问题:
- 如果编译的是 vs2010 版本的,则目前并没有发现什么问题,使用也正常。按前面的编译命令编译后,所有的 130 多个 lib 库,均全部正确生成
- 如果编译的是 vs2013 版本的,则请确保有更新 vs2013 update 5 补丁包。如果没有更新该补丁包,则只有其中的部分 lib 库可以使用,有些库则有可能使用过程中会出现(自己的)工程编译不过的情况。比如:在未更新 update 5 补丁包时,使用 date_time 库时,可正常使用。使用 asio 功能时,如果用到 boost::asio::write() 功能时,则会出现 common_type.hpp 编译不过。提示:msc1.cpp 第 1325 行编译不过。稍微查看一下 common_type.hpp 中的源码,大致就能明白问题原因在于:编译时,使用了 c++11 新特性之可变模板参数特性,说明:如果没更新 vs2013 update 5 则编译器对 c++11 新特性的功能支持并不全面。因此需要更新 update 5 补丁包。
- 如果没有更新 vs2013 update 5 补丁包时,在前面编译完 boost 库后,其实就会提示相应的错误。编译后,也只有其中的部分库被成功编译生成(事实上,只有80个库被正确生成,其他库都编译失败)。一旦出现编译失败,则请先正确更新 update 5 补丁包,然后再删除掉 bin 以及 bin.v2 目录,重新按前面的步骤生成 boost 库然后再使用,避免浪费时间
参考文献:
- http://www.cnblogs.com/zhcncn/p/3950477.html
- http://www.cnblogs.com/myart/p/4223451.html
- http://www.cnblogs.com/wondering/archive/2009/05/21/boost_setup.html
- common_type.hpp 编译不过问题解决参考:http://www.cnblogs.com/darkknightzh/p/5394236.html
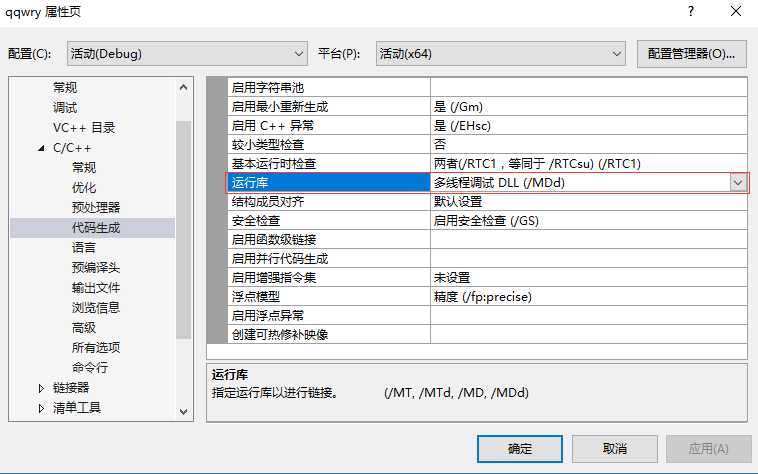
程序链接时报错: 错误 LNK1104 无法打开文件“libboost_thread-vc140-mt-gd-1_63.lib”
因为上面选择的是以动态链接库的形式编译的boost库,所以这里要选择 多线程调试 DLL(/MDd)。