集群搭建
1、部署nginx反向代理三个web服务,调度算法使用加权轮询;
2、所有web服务使用共享存储nfs,保证所有web都对其有读写权限,保证数据一致性;
开发脚本自动部署及监控
1.编写脚本自动部署反向代理、web、nfs;
2.编写监控脚本,监控集群内所有服务存活状态,内存、磁盘剩余率检测,异常则发送报警邮件
3.编写计划任务,定时运行监控脚本,完成监控操作
集群搭建:
一、部署nginx反向代理三个web服务,调度算法使用加权轮询;
解答步骤:
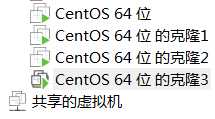
1、先克隆虚拟机,调低内存为512M,然后都打开
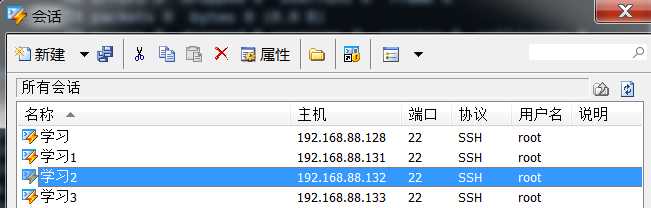
2、逐个查IP
虚拟机名:CentOS 64位
[root@bogon ~]# ifconfig
ens33: flags=4163<UP,BROADCAST,RUNNING,MULTICAST> mtu 1500
inet 192.168.88.128 netmask 255.255.255.0 broadcast 192.168.88.255
虚拟机名:CentOS 64位的克隆1
[root@bogon ~]# ifconfig
ens33: flags=4163<UP,BROADCAST,RUNNING,MULTICAST> mtu 1500
inet 192.168.88.131 netmask 255.255.255.0 broadcast 192.168.88.255
虚拟机名:CentOS 64位的克隆2
[root@bogon ~]# ifconfig
ens33: flags=4163<UP,BROADCAST,RUNNING,MULTICAST> mtu 1500
inet 192.168.88.132 netmask 255.255.255.0 broadcast 192.168.88.255
虚拟机名:CentOS 64位的克隆3
[root@bogon ~]# ifconfig
ens33: flags=4163<UP,BROADCAST,RUNNING,MULTICAST> mtu 1500
inet 192.168.88.133 netmask 255.255.255.0 broadcast 192.168.88.255
3、打开Xshell软件,分别连接上面3个虚拟机
4、写网页内容
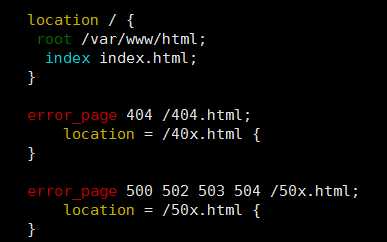
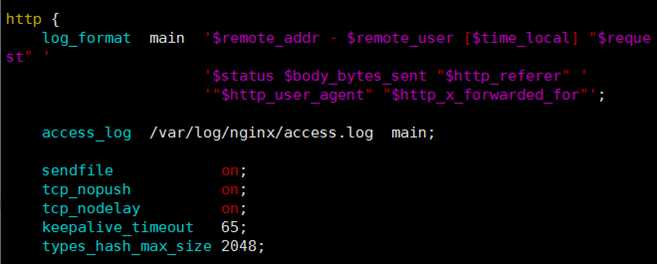
(1)先通过vim /etc/nginx/nginx.conf找网页的根目录
[root@bogon ~]# vim /etc/nginx/nginx.conf
从下面的结果得到网页的根目录是/var/www/html
(2)在默认打开的页面上写内容
在Xshell的中ip为192.168.88.131(名称为学习1),输入:
[root@bogon ~]# vim /var/www/html/index.html
在上面写
web1
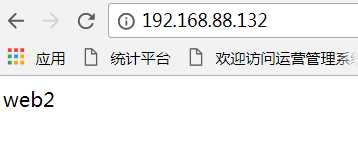
在Xshell的中ip为192.168.88.132(名称为学习2),输入:
[root@bogon ~]# vim /var/www/html/index.html
在上面写
web2
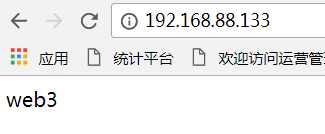
在Xshell的中ip为192.168.88.133(名称为学习3),输入:
[root@bogon ~]# vim /var/www/html/index.html
在上面写
Web3
5、分别加载nginx
systemctl reload nginx
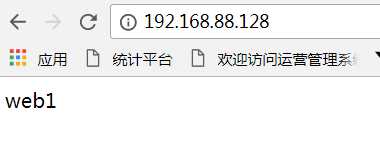
打开网页看看:

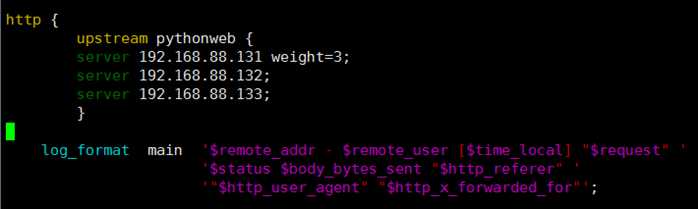
6、在Xshell的中ip为192.168.88.128(名称为学习),输入vim /etc/nginx/nginx.conf,在http大括号里面的内容,插入下面的内容:
upstream pythonweb {
server 192.168.88.131 weight=3;
server 192.168.88.132;
server 192.168.88.133;
}
插入前截图:
插入后截图:
然后在location里修改:
location / {
proxy_pass http://pythonweb;
}
修改前:
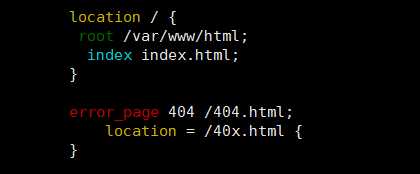
修改后:

然后保存退出。
7、重启nginx
[root@bogon ~]# systemctl reload nginx
[root@bogon ~]#
8、得到结果。
二、所有web服务使用共享存储nfs,保证所有web都对其有读写权限,保证数据一致性;
二、所有web服务使用共享存储nfs,保证所有web都对其有读写权限,保证数据一致性;
解答如下:
1、服务端和客户端都要安装:RPC协议
yum install rpcbind nfs-utils –y
检查是否安装成功:
[root@bogon ~]# rpm -qa | grep rpcbind
rpcbind-0.2.0-42.el7.x86_64
[root@bogon ~]# rpm -qa | grep nfs-utils
nfs-utils-1.3.0-0.48.el7_4.x86_64
[root@bogon ~]#
2、创建共享文件夹和添加文件,并插入内容
[root@bogon /]# mkdir /share
[root@bogon /]# touch /share/share.txt
[root@bogon /]# echo gongxiang > /share/share.txt
[root@bogon /]# echo 123 >> /share/share.txt
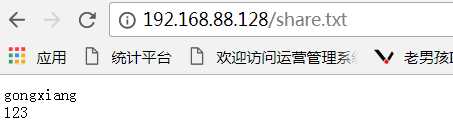
[root@bogon share]# cat share.txt
gongxiang
123
[root@bogon share]#
3、修改配置文件
[root@bogon /]# vim /etc/exports
输入(要求192.168.88.0-24端的都可以访问)
(sync是同步的意思)
/share 192.168.88.0/24(rw,sync,fsid=0)
配置生效
[root@bogon share]# exportfs -r
4、开权限:同组和别人都有读写执行权限
[root@bogon share]# chmod 777 /share
[root@bogon share]# ll -d /share
drwxrwxrwx. 2 nginx nginx 69 11月 19 19:34 /share
[root@bogon share]#
5、启动服务:
先设置开机启动
[root@bogon /]# systemctl start rpcbind.service
[root@bogon /]# systemctl start nfs-server.service
看看是否启动成功:
[root@bogon /]# systemctl status rpcbind.service
[root@bogon /]# systemctl status nfs-server.service
看看是否共享成功
[root@bogon share]# exportfs
/share 192.168.88.0/24
[root@bogon share]# showmount -e
Export list for bogon:
/share 192.168.88.0/24
[root@bogon share]#
6、去别的客户端(虚拟机)查看共享情况
[root@bogon ~]# showmount -e 192.168.88.128
Export list for 192.168.88.128:
/share 192.168.88.0/24
把别人共享的目录挂载到自己的文件夹中:
[root@bogon ~]# mount -t nfs 192.168.88.128:/share /var/www/html
[root@bogon ~]# ls /var/www/html
share.txt
[root@bogon ~]# df
文件系统 1K-块 已用 可用 已用% 挂载点
/dev/sda3 18351104 4769964 13581140 26% /
devtmpfs 227104 0 227104 0% /dev
tmpfs 241808 0 241808 0% /dev/shm
tmpfs 241808 13284 228524 6% /run
tmpfs 241808 0 241808 0% /sys/fs/cgroup
/dev/sda1 508580 154404 354176 31% /boot
tmpfs 48364 12 48352 1% /run/user/42
tmpfs 48364 0 48364 0% /run/user/0
192.168.88.128:/share 18351104 5130240 13220864 28% /var/www/html
[root@learn1 ~]#
7、查看前端结果:
8、测试
在挂载的客户端修改文件
[root@learn1 ~]# echo 45 >> /var/www/html/share.txt
[root@learn1 ~]#
在原来的客户端看文件:
[root@bogon share]# cat /share/share.txt
gongxiang
123
45
[root@bogon share]#
开发脚本自动部署及监控:
一.编写脚本自动部署反向代理、web、nfs;
解答如下:
1、主机运行这个脚本如下:
[root@bogon test]# vim zuoye1.sh
输入:
#!/bin/bash
# 判断nginx是否开启状态
function panduan_nginx() {
ps aux | grep nginx | grep -v "grep" &> /dev/null # 看看是否开启了nginx
if [ $? -eq 0 ]
then
echo "nginx running"
else
systemctl start nginx;
echo "nginx running"
fi
}
# 配置nginx相关文件
function peizhi_conf() {
msg=‘upstream zuoye1 { server 192.168.88.131 weight=3;server 192.168.88.132;server 192.168.88.133; }‘ #定义msg的值
sed -ri "/^http/a $msg" /etc/nginx/nginx.conf #在http后增加upstream
sed -ri "/^ *location \/ \{$/a proxy_pass http://zuoye1\;" /etc/nginx/nginx.conf #修改location
systemctl reload nginx #重新加载配置文件
echo ‘nginx.conf revise successfully‘
}
# 检测rpcbind和nfs-utils是否安装
function panduan_rpcbind() {
rpm -qa | grep rpcbind &> /dev/dull
if [ $? -eq 0 ]
then
echo "rpcbind yijing anzhuang"
else
yum install rpcbind –y;
echo "rpcbind yijing anzhuang"
fi
}
function panduan_nfs_utils() {
rpm -qa | grep nfs-utils &> /dev/dull
if [ $? -eq 0 ]
then
echo "nfs-utils yijing anzhuang"
else
yum install nfs-utils –y;
echo "nfs-utils yijing anzhuang"
fi
}
# 创建一个共享文件夹
function xinjian_share() {
mkdir /test/share
chmod -R 777 /test/share
touch /test/share/share.txt
echo gongxiang > /test/share/share.txt
echo "/test/share 192.168.88.0/24(rw,sync,fsid=0)" >> /etc/exports # 配置文件
exportfs -r
echo "exports has been revise"
}
# 启动服务
function start_system() {
systemctl stop firewalld #关闭防火墙
systemctl start rpcbind.service
systemctl enable rpcbind.service
systemctl start nfs-server.service
systemctl enable nfs-server.service
echo "nfs rpc service start successfully"
}
panduan_nginx # 检测并启动nginx
peizhi_conf # 配置nginx相关文件
panduan_rpcbind # 检测并启动rpcbind
panduan_nfs_utils # 检测并启动nfs-utils
xinjian_share # 创建一个共享文件夹
start_system # 启动服务
2、在客户端运行这个脚本:
[root@bogon test]# vim zuoye11.sh
输入:
#!/bin/bash
# 判断nginx是否开启状态
function panduan_nginx() {
ps aux | grep nginx | grep -v "grep" &> /dev/null # 看看是否开启了nginx
if [ $? -eq 0 ]
then
echo "nginx running"
else
systemctl start nginx
echo "nginx running"
fi
}
# 配置nginx相关文件
function peizhi_conf1(){
sed -ri "/^ *location \/ \{$/a root /var/www/html/\;" /etc/nginx/nginx.conf #修改location
# mkdir -p /var/www/html #由于已经创建了目录,所以不用再建了
# touch /var/www/html/index.html #由于文件已经存在,所以不用创建文件了
echo "web123" >> /var/www/html/index.html #写入内容
systemctl start nginx #启动nginx
systemctl reload nginx #重新加载配置文件
echo "nginx.conf revise successfully"
}
# 检测rpcbind和nfs-utils是否安装
function panduan_rpcbind() {
rpm -qa | grep rpcbind &> /dev/dull
if [ $? -eq 0 ]
then
echo "rpcbind yijing anzhuang"
else
yum install rpcbind –y;
echo "rpcbind yijing anzhuang"
fi
}
function panduan_nfs_utils() {
rpm -qa | grep nfs-utils &> /dev/dull
if [ $? -eq 0 ]
then
echo "nfs-utils yijing anzhuang"
else
yum install nfs-utils –y;
echo "nfs-utils yijing anzhuang"
fi
}
# 挂载共享文件夹
function guazai_share() {
showmount -e 192.168.88.128
mount -t nfs 192.168.88.128:/test/share /var/www/html/
}
# 启动服务
function start_system() {
systemctl stop firewalld #关闭防火墙
systemctl start rpcbind.service
systemctl enable rpcbind.service
systemctl start nfs-server.service
systemctl enable nfs-server.service
echo "nfs rpc service start successfully"
}
panduan_nginx # 判断nginx是否开启状态
peizhi_conf1 # 配置nginx相关文件
panduan_rpcbind # 检测rpcbind是否安装
panduan_nfs_utils # 检测nfs-utils是否安装
guazai_share # 挂载共享文件夹
start_system # 启动服务
二.编写监控脚本,监控集群内所有服务存活状态,内存、磁盘剩余率检测,异常则发送报警邮件
解答如下:
1、进入126邮箱-设置-客户端授权密码-开启(授权码是用于登录第三方邮件客户端的专用密码)
发件箱:jen****@126.com 客户端授权码:*****
收件箱:xz****@126.com 客户端授权码:*****
2、准备发送邮件的工具
[root@bogon /]# vim /usr/bin/mail
把里面的内容替换为:
#!/usr/bin/python
# -*- coding: UTF-8 -*-
import sys
import smtplib
import email.mime.multipart
import email.mime.text
server = ‘smtp.126.com‘
port = ‘25‘
def sendmail(server,port,user,pwd,msg):
smtp = smtplib.SMTP()
smtp.connect(server,port)
smtp.login(user, pwd)
smtp.sendmail(msg[‘from‘], msg[‘to‘], msg.as_string())
smtp.quit()
print(‘邮件发送成功email has send out !‘)
if __name__ == ‘__main__‘:
msg = email.mime.multipart.MIMEMultipart()
msg[‘Subject‘] = ‘监控报警‘
msg[‘From‘] = ‘jen*****@126.com‘
msg[‘To‘] = ‘xz*****@126.com‘
user = ‘jen*****‘
pwd = ‘*****‘
content=‘%s\n%s‘ %(‘\n‘.join(sys.argv[1:4]),‘ ‘.join(sys.argv[4:])) #格式处理,专门针对我们的邮件格式
txt = email.mime.text.MIMEText(content, _charset=‘utf-8‘)
msg.attach(txt)
sendmail(server,port,user,pwd,msg)
3、修改/usr/bin/mail权限
[root@bogon /]# ll -d /usr/bin/mail
-rw-r--r-- 1 root root 636 12月 30 10:45 /usr/bin/mail
[root@bogon /]# chmod +x /usr/bin/mail
[root@bogon /]# ll -d /usr/bin/mail
-rwxr-xr-x 1 root root 636 12月 30 10:45 /usr/bin/mail
[root@bogon /]#
4、建一个脚本servermonitor.sh,监控主机的cpu,内存,磁盘,与设定的阈值对比
#!/bin/bash
cpu_limit=0 #cpu使用超过90%则报警,此处我们为了得到报警邮件的实验效果,直接设置成0
mem_limit=0 #内存使用超过90%则报警,同上
disk=‘/dev/sda1‘ #需要监控的磁盘名
disk_inode_limit=0 #磁盘inode使用超过90%则报警,同上
disk_space_limit=0 #磁盘空间使用超过90%则报警,同上
function monitor_cpu(){
cpu_free=`vmstat 1 5 |awk ‘NR>=3{x = x + $15} END {print x/5}‘ |awk -F. ‘{print $1}‘`
# 一般vmstat工具的使用是通过两个数字参数来完成的,第一个参数是采样的时间间隔数,单位是秒,第二个参数是采样的次数
# NR>=3是从第3行开始
# {x = x + $15}是把第15列的数据加总
# {print x/5}意思是上面加总后除以5,意思是计算平均数
# {print x/5}意思是由于取平均数带小数点,我只想去小数点前面的数据
cpu_use=$((100-cpu_free))
if [ $cpu_use -gt $cpu_limit ]
then
msg="TIME:$(date +%F_%T)
HOSTNAME:$(hostname)
IPADDR:$(ifconfig |awk ‘NR==2{print $2}‘)
MSG:CPU usage exceeds the limit,current value is ${cpu_use}%"
echo $msg
/usr/bin/mail $msg
fi
}
function monitor_mem(){
mem_total=`free |awk ‘NR==2{print $2}‘`
mem_use=`free |awk ‘NR==2{print $3}‘`
mem_per=`echo "scale=2;$mem_use/$mem_total" |bc -l|cut -d. -f2`
if [ $mem_per -gt $mem_limit ]
then
msg="TIME:$(date +%F_%T)
HOSTNAME:$(hostname)
IPADDR:$(ifconfig |awk ‘NR==2{print $2}‘)
MSG:Memory usage exceeds the limit,current value is ${mem_per}%"
echo $msg
/usr/bin/mail $msg
fi
}
function monitor_disk_inode(){
inode_use=`df -i $disk |awk ‘NR==2{print $5}‘ |cut -d% -f1`
if [ $inode_use -gt $disk_inode_limit ]
then
msg="TIME:$(date +%F_%T)
HOSTNAME:$(hostname)
IPADDR:$(ifconfig |awk ‘NR==2{print $2}‘)
MSG:Disk inode usage exceeds the limit,current value is ${inode_use}%"
echo $msg
/usr/bin/mail $msg
fi
}
function monitor_disk_space(){
space_use=`df $disk |awk ‘NR==2{print $5}‘|cut -d% -f1`
if [ $space_use -gt $disk_space_limit ]
then
msg="TIME:$(date +%F_%T)
HOSTNAME:$(hostname)
IPADDR:$(ifconfig |awk ‘NR==2{print $2}‘)
MSG:Disk space usage exceeds the limit,current value is ${space_use}%"
echo $msg
/usr/bin/mail $msg
fi
}
monitor_cpu &>> /tmp/monitor.log
monitor_mem &>> /tmp/monitor.log
monitor_disk_inode &>> /tmp/monitor.log
monitor_disk_space &>> /tmp/monitor.log
5、修改servermonitor.sh的权限
[root@bogon /]# chmod u+x servermonitor.sh
[root@bogon /]# ./servermonitor.sh
[root@bogon /]#
6、执行文件
[root@bogon /]# ./servermonitor.sh
3.编写计划任务,定时运行监控脚本,完成监控操作
[root@bogon test]# which sh
/usr/bin/sh
[root@u ~]# crontab -e -u root
输入
* * * * * /usr/bin/sh /servermonitor.sh
[root@bogon /]# crontab -l
* * * * * /usr/bin/sh /servermonitor.sh
[root@bogon /]#