1. 系统环境准备
首先需要自己在虚拟机上安装CentOS或者本机直接就是CentOS,安装及其它配置过程这里不再介绍,请参考笔者的CentOS7初始配置即可。
2. 软件环境准备
首先要安装GCC等编译环境及类库。使用如下命令
yum -y install gcc
yum -y install gcc-c++
yum -y install stdlibc++-devel
yum -y install perl
由于最新版的FastDFS依赖libfastcommon。通过V1.0.36.tar.gz& V5.11.tar.gz搭配安装报错:undefined reference to `g_exe_name‘,原因尚不清楚。后来libfastcommon使用V1.0.35版本,fastdfs使用V5.10即可编译通过。
下载libfastcomon并安装,
参考地址:https://github.com/happyfish100/libfastcommon/archive/V1.0.35.tar.gz
建立libfastcommon目录存放安装包,使用如下命令下载。
wget https://github.com/happyfish100/libfastcommon/archive/V1.0.35.tar.gz
使用如下命令安装libfastcommon
./make.sh
./make.sh install
下载FastDFS并安装
参考地址:https://github.com/happyfish100/fastdfs/archive/V5.10.tar.gz
使用如下命令下载FastDFS
wget https://github.com/happyfish100/fastdfs/archive/V5.10.tar.gz
使用如下命令安装FastDFS
./make.sh
./make.sh install
3. 配置
如下是使用单台机器同时作为Tracker Server和Storage Server。
使用如下命令定位到/etc/fdfs/目录,参考这个目录的配置文件例子创建storage和tracker的配置文件
直接使用命令
cp storage.conf.sample storage.conf
cp tracker.conf.sample tracker.conf
定义storage.conf 比如修改存储数据和日志的路径
base_path=/home/yuqing/fastdfs 修改为你定义的目录比如/home/root/fastdfs
定义tracker.conf 比如修改存储数据和日志的路径
base_path=/home/yuqing/fastdfs 修改为你定义的目录/home/root/fastdfs
tracker_server=192.168.209.121:22122 修改为你的IP地址比如10.198.1.128:22122
开启端口22122,23000
firewall-cmd --zone=public --add-port=22122/tcp --permanent
firewall-cmd --zone=public --add-port=23000/tcp –permanent
systemctl stop firewalld.service
systemctl start firewalld.service
启动服务
/usr/bin/fdfs_trackerd /etc/fdfs/tracker.conf start
/usr/bin/fdfs_storage /etc/fdfs/storage.conf start
使用如下命令检查fdfs是否启动成功。
ps -ef | grep fdfs

4. 测试
使用如下命令检查是否Storage登记到Tracker
fdfs_monitor /etc/fdfs/storage.conf
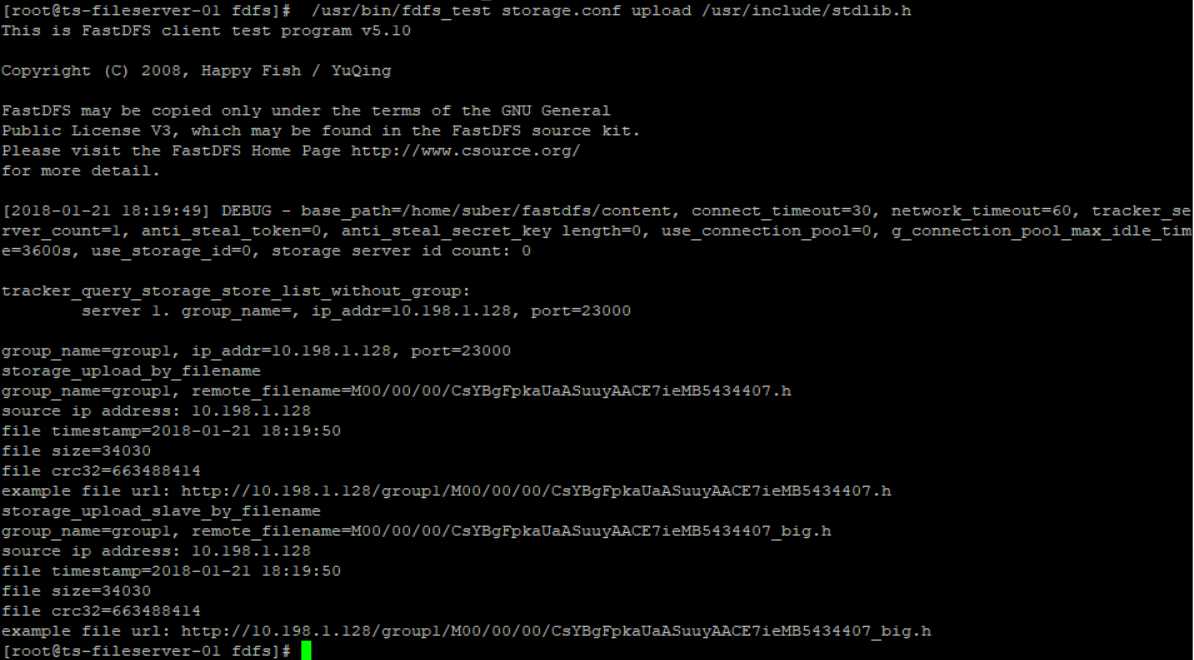
使用如下命令检查文件上传
/usr/bin/fdfs_test /etc/fdfs/conf/tracker.conf upload /usr/include/stdlib.h

