模块化开发
使用vue-cli创建项目
1. vue-router模块化
引入vue-router
cnpm install vue-router -S
1.1 编辑main.js
import Vue from ‘vue‘
import App from ‘./App.vue‘
import vueRouter from ‘vue-router‘

import routerConfig from ‘./router.config.js‘

//使用vue-router
Vue.use(vueRouter);

const router = new vueRouter(routerConfig)

new Vue({
  el: ‘#app‘,
  render: h => h(App),
  router
})
1.2 编辑App.vue
<template>
<div id="app">
<h3>{{msg}}</h3>
<div>
<router-link to="/home">主页</router-link>
<router-link to="/news">新闻</router-link>
</div>
<div>
<keep-alive>
<router-view></router-view>
</keep-alive>
</div>
</div>
</template>
<script>
export default {
name: ‘app‘,
data () {
return {
msg: ‘Welcome to Your Vue.js App‘
}
},
mounted () {
console.log(this.$route)
},
watch:{
$route:function(newView,oldView){
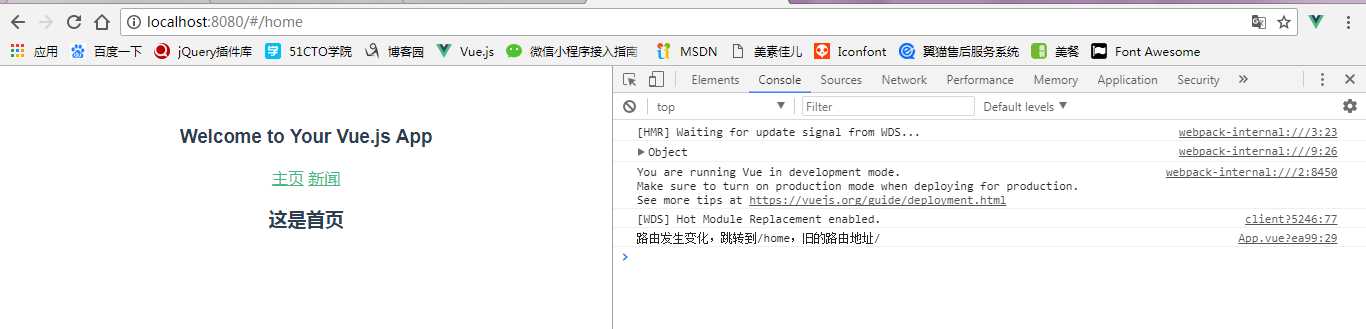
console.log(‘路由发生变化,跳转到‘ + newView.path + ‘,旧的路由地址‘ + oldView.path)
}
}
}
</script>
<style>
#app {
font-family: ‘Avenir‘, Helvetica, Arial, sans-serif;
-webkit-font-smoothing: antialiased;
-moz-osx-font-smoothing: grayscale;
text-align: center;
color: #2c3e50;
margin-top: 60px;
}
h1, h2 {
font-weight: normal;
}
ul {
list-style-type: none;
padding: 0;
}
li {
display: inline-block;
margin: 0 10px;
}
a {
color: #42b983;
}
</style>
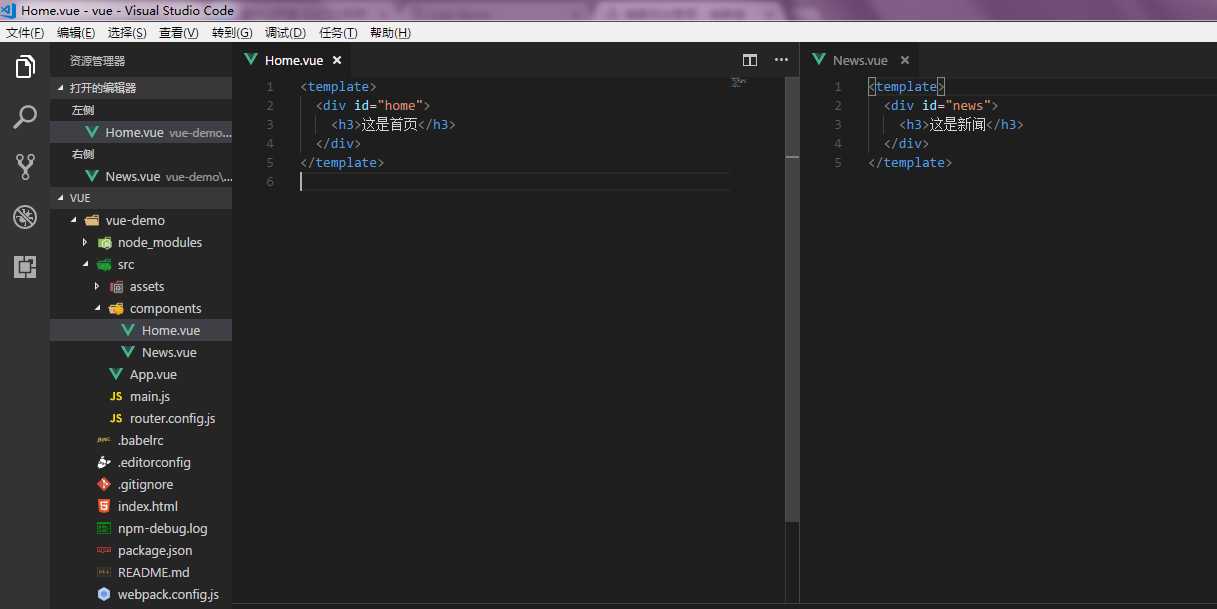
新建文件夹components,创建文件Home.vue,News.vue
1.3 编辑router.config.js
import Home from ‘./components/Home.vue‘
import News from ‘./components/News.vue‘

export default {
    routes:[
        {
            path:‘/home‘,
            component:Home
        },
        {
            path:‘/news‘,
            component:News
        }
    ]
}
页面展示
2. axios模块化
cnpm install axios -S
使用axios的两种方式:
方式1:在每个组件中引入axios
<template>
<div id="app">
<h3>{{msg}}</h3>
<div>
<router-link to="/home">主页</router-link>
<router-link to="/news">新闻</router-link>
</div>
<div>
<keep-alive>
<router-view></router-view>
</keep-alive>
</div>
<hr>
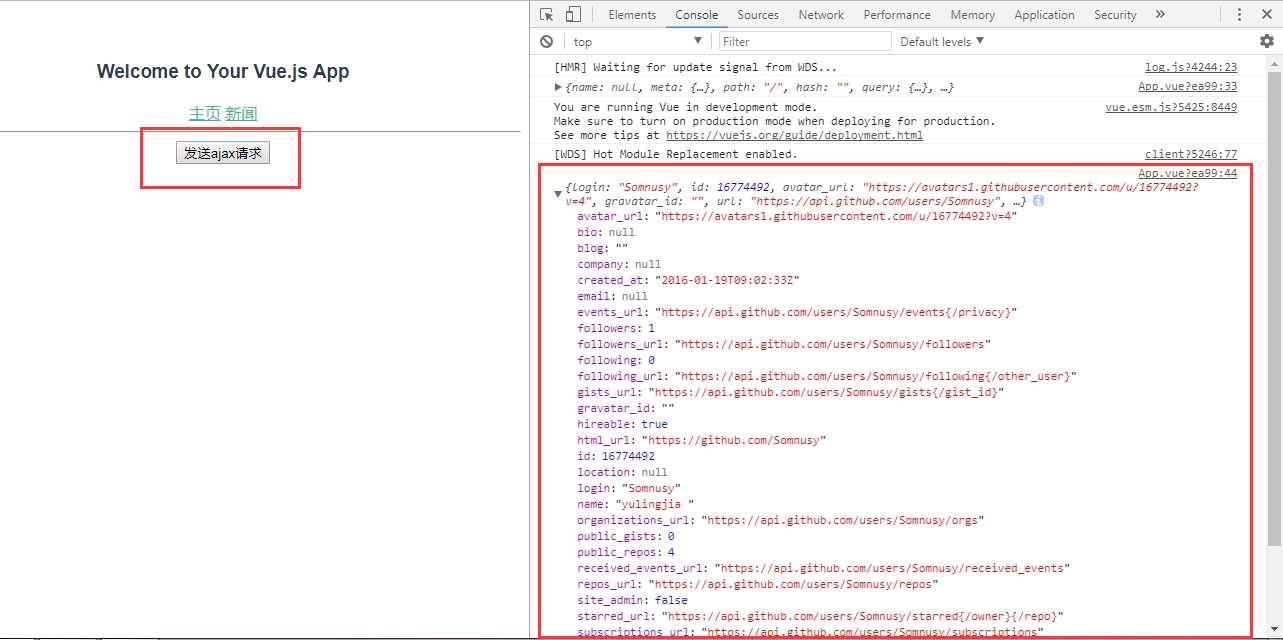
<button @click="send">发送ajax请求</button>
</div>
</template>
<script>
import axios from ‘axios‘
export default {
name: ‘app‘,
data () {
return {
msg: ‘Welcome to Your Vue.js App‘
}
},
mounted () {
console.log(this.$route)
},
watch:{
$route:function(newView,oldView){
console.log(‘路由发生变化,跳转到‘ + newView.path + ‘,旧的路由地址‘ + oldView.path)
}
},
methods: {
send(){
axios.get(‘https://api.github.com/users/Somnusy‘)
.then(response=>{
console.log(response.data);
}).catch(error=>{
console.log(error);
})
}
}
}
</script>
<style>
#app {
font-family: ‘Avenir‘, Helvetica, Arial, sans-serif;
-webkit-font-smoothing: antialiased;
-moz-osx-font-smoothing: grayscale;
text-align: center;
color: #2c3e50;
margin-top: 60px;
}
h1, h2 {
font-weight: normal;
}
ul {
list-style-type: none;
padding: 0;
}
li {
display: inline-block;
margin: 0 10px;
}
a {
color: #42b983;
}
</style>
方式2:在main.js中全局引入axios并添加到Vue原型中
### 3. 为自定义组件添加事件