标签:cal http pass uid /etc 技术 log 技术分享 yum
一、服务端(192.168.8.81):yum -y install rsyncmkdir -p /home/lee/rsyncmotd file = /etc/rsyncd.motd
transfer logging = yes
log file = /var/log/rsyncd.log
port = 873
address = 192.168.8.81
uid = nobody
gid = nobody
use chroot = no
read only = yes
max connections = 10
[common]
comment = rsync lee
path = /home/lee/rsync/
ignore errors
auth users = lee
secrets file = /etc/rsyncd.secrets
hosts allow = 192.168.8.0/255.255.255.0
hosts deny = *
list = falseecho "lee:123456" > /etc/rsyncd.secrets
chmod 600 /etc/rsyncd.secretsecho "rsync lee" > /etc/rsyncd.motdiptables -I INPUT -p tcp --dport 873 -j ACCEPTrsync --deamon
echo "rsync --deamon" >> /etc/rc.local二、客户端(192.168.8.81):
yum -y install rsyncecho "123456" > /root/passwd
chmod 600 /root/passwdrsync -avz --password-file=/root/passwd lee@192.168.8.81::common /home/lee/rsync/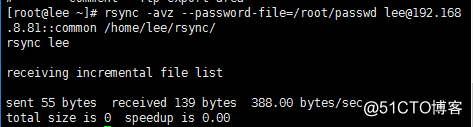
标签:cal http pass uid /etc 技术 log 技术分享 yum
原文地址:http://blog.51cto.com/12173069/2069243