先看个插槽的例子:
<div id="app">
       <child >
           <span slot-scope="props">
            {{props.text}}
           </span>
       </child>
</div>
window.onload = function() {
    Vue.component(‘child‘, {
        template: `
      <div>
        <slot text="hello from child"></slot>
      </div>
      `,
    });

    new Vue({
        el: ‘#app‘
    });
};
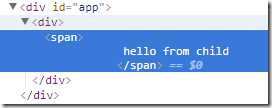
最终效果:
应该比较好理解,如果换成渲染函数,js 就是这样:
window.onload = function() {
    Vue.component(‘child‘, {
        render(createElement){
          let vnodes1 = this.$scopedSlots.default({
                  text: ‘hello from child‘
              });
          return createElement(‘div‘,[vnodes1]);
        }
    });

    new Vue({
        el: ‘#app‘
    });
};
前后比较对照下,结合文档,应该能看懂;
但是插槽有很多种形式,具名与否,作用域与否等等,综合在一起,做了个 demo,代码如下:
    <div id="app">
        <myele>
            <div>
                default slot
            </div>
            <div slot="header">
                header
            </div>
            <div slot-scope="props" slot="footer">
                <div>footer from parent!</div>
                <div>{{props.text}}</div>
            </div>
        </myele>
        <child>
            <span slot-scope="props">
            {{props.text}}
           </span>
        </child>
    </div>
如果依旧用 template ,js 就是这样:
window.onload = function() {
    Vue.component(‘myele‘, {
        template: `
        <div>
          <div>vnodes0</div>
          <slot></slot>
          <slot name="header"></slot>
          <slot name="footer" text="footer child value"></slot>
          <child>
            <span slot-scope="props">{{props.text}}</span>
          </child>
        </div>
        `
    });

    Vue.component(‘child‘, {
        render(createElement) {
            let vnodes1 = this.$scopedSlots.default({
                text: ‘hello from child‘
            });
            return createElement(‘div‘, [vnodes1]);
        }
    });

    new Vue({
        el: ‘#app‘
    });
};
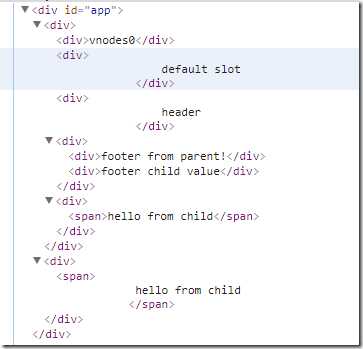
效果图:
如果用渲染函数实现,就是这样:
window.onload = function() {
    Vue.component(‘myele‘, {
         render(createElement) {
             let vnodes0 = createElement(‘div‘, ‘vnodes0‘),
                 vnodes1 = this.$slots.default,
                 vnodes2 = this.$slots.header,
                 vnodes3 = this.$scopedSlots.footer({
                     text: ‘footer child value‘
                 }),
                 vnodes4 = createElement(‘child‘, {
                     scopedSlots: {
                         default: function(props) {
                             return createElement(‘span‘, props.text);
                         }
                     }
                 });
             return createElement(‘div‘, [vnodes0, vnodes1, vnodes2, vnodes3, vnodes4]);
         }
    });

    Vue.component(‘child‘, {
        render(createElement) {
            let vnodes1 = this.$scopedSlots.default({
                text: ‘hello from child‘
            });
            return createElement(‘div‘, [vnodes1]);
        }
    });

    new Vue({
        el: ‘#app‘
    });
};
两边一对照,结合文档,应该就比较清楚了
参考文档:


