一、升级系统内核
yum update
安装gcc编译
yum -y install gcc
二、重启操作系统使得系统内核升级生效
reboot/init 6
三、安装haproxy
官网下载haproxy最新源码包

此处下载的是haproxy-1.7.9.tar.gz
下载路径:wget http://www.haproxy.org/download/1.7/src/haproxy-1.7.9.tar.gz
1、解压
[root@i-bapxgqlw package]# tar -xvzf haproxy-1.7.9.tar.gz
[root@i-bapxgqlw package]# cd haproxy-1.7.9
2、创建目录
[root@i-bapxgqlw haproxy-1.7.9]# mkdir -p /usr/local/haproxy
3、安装
cd haproxy-1.7.9
yum groupinstall -y "Development Tools"
yum install -y openssl openssl-devel
uname -a
make TARGET=linux26 USE_OPENSSL=1 ADDLIB=-lz #此处编译的时候需要让haproxy支持SSL模块
make install PREFIX=/usr/local/haproxy
4、安装完成之后查看版本
[root@i-bapxgqlw examples]# /usr/local/haproxy/sbin/haproxy -v
HA-Proxy version 1.7.9 2017/08/18
Copyright 2000-2017 Willy Tarreau <willy@haproxy.org>
[root@i-bapxgqlw examples]#
5、复制haproxy到/usr/sbin/下
[root@i-bapxgqlw examples]#cp /usr/local/haproxy/sbin/haproxy /usr/sbin/
6、复制haproxy脚本到/etc/init.d下
[root@i-bapxgqlw examples]# cp haproxy.init /etc/init.d/haproxy
赋予权限
[root@i-bapxgqlw examples]# chmod 755 /etc/init.d/haproxy
7、创建系统账号
[root@i-bapxgqlw examples]# useradd -r haproxy
HTTP配置
User --> haproxy_80--> web1_80
--> web2_80
8、创建配置文件
[root@i-bapxgqlw examples]# mkdir /etc/haproxy
[root@i-bapxgqlw examples]# vim /etc/haproxy/haproxy.cfg
####全局配置######
global
log 127.0.0.1 local0 info #[日志输出配置,所有日志都记录在本机,通过local0输出]
chroot /usr/local/haproxy #运行路径
stats socket /run/haproxy/admin.sock mode 660 level admin
user haproxy
group haproxy
maxconn 100000 #默认最大的链接数,需要考虑ulimit限制和default限制
tune.maxaccept 100000
daemon #以后台形式运行
#####默认配置#####
defaults
option dontlognull #不记录监控检查日志信息
retries 3 #三次失败认为服务器不可用,也可通过后边设置
option redispatch #当serverId对应的服务器挂掉后,强制定向到其他健康的服务器,以后将不支持
maxconn 100000 #默认最大的链接数
timeout client 50s #客户端超时
timeout server 50s #服务器超时
timeout connect 5s #连接超时
########backend后端配置##############
listen http_80
bind 0.0.0.0:80 #监听80端口
mode http #http协议
balance roundrobin #轮询,balance source 保存session值,支持static-rr,leastconn,first,uri等参数
log global
log-format "%Tl",%{+Q}ci,"%fi:%fp",%{+Q}bi,%{+Q}r,%ST,%B,%{+Q}hr,%Tt
option forwardfor #如果后端服务器需要获得客户端真实ip需要配置的参数,可以从Http Header中获得客户端ip
option httpclose #每次请求完毕后主动关闭http通道,haproxy不支持keep-alive,只能模拟这种模式的实现
option http-server-close
capture request header Host len 255
capture request header User-Agent len 255
capture request header Referer len 255
capture request header Cookie len 255
timeout http-request 10s
timeout http-keep-alive 55s
server http_01_80 192.168.1.1:80 cookie 1 weight 10 check inter 3000 rise 3 fall 5
server http_02_80 192.168.1.2:80 cookie 1 weight 10 check inter 3000 rise 3 fall 5
9、启动
/etc/init.d/haproxy start
10、nginx搭建
在192.168.1.1和192.168.1.2机器上分别搭建nginx,并添加一个测试域名
11、访问
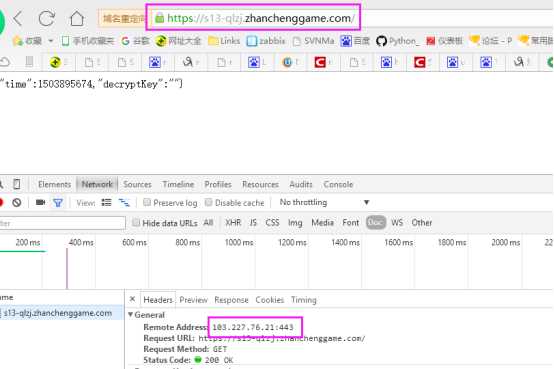
在本地host写入haproxy服务器的ip和nginx的域名,浏览器访问F12查看ip是否是haproxy的ip,并查看nginx服务器上是否有轮询的日志产生
HTTPS配置(前端443访问后端转80)
User --> haproxy_443--> web1_80
--> web2_80
在haproxy配置文件中做相关修改
vim /etc/haproxy/haproxy.cfg
在全局配置中添加tune.ssl.default-dh-param 2048 使得haproxy支持SSL配置
Listen配置如下:
listen https_443
bind 0.0.0.0:443 ssl crt /root/server.pem no-sslv3 #指定ssl证书
mode http #走http协议,不走tcp协议
balance roundrobin
option httpclose
option forwardfor
reqadd X-Forwarded-Proto:\ https
#default_backend http_80
capture request header Host len 255
capture request header User-Agent len 255
capture request header Referer len 255
capture request header Cookie len 255
timeout http-request 10s
timeout http-keep-alive 55s
server https_01_443 192.168.1.1:80 cookie 1 weight 10 check inter 3000 rise 3 fall 5
server https_02_443 192.168.1.2:80 cookie 2 weight 10 check inter 3000 rise 3 fall 5
证书配置
在配置中的指定目录下创建证书存储文件server.pem
将证书合并成为一个文件:
cat server.crt ca.crt server.key |tee server.pem
然后存储在以上配置的目录中:

完成之后重启haproxy服务
/etc/init.d/haproxy restart
然后进行测试即可
HTTP和HTTPS合并配置
可以同时支持80转80和443转80的两种方式
详细配置如下:
####全局配置######
global
log 127.0.0.1 local3 info #[日志输出配置,所有日志都记录在本机,通过local0输出]
chroot /usr/local/haproxy #运行路径
stats socket /run/haproxy/admin.sock mode 660 level admin
user haproxy
group haproxy
maxconn 100000 #默认最大的链接数,需要考虑ulimit限制和default限制
tune.maxaccept 100000
tune.ssl.default-dh-param 2048
daemon #以后台形式运行
#####默认配置#####
defaults
log global
option httplog
option dontlognull #不记录监控检查日志信息
retries 3 #三次失败认为服务器不可用,也可通过后边设置
option redispatch #当serverId对应的服务器挂掉后,强制定向到其他健康的服务器,以后将不支持
maxconn 100000 #默认最大的链接数
timeout client 50s #客户端超时
timeout server 50s #服务器超时
timeout connect 5s #连接超时
########backend后端配置##############
listen http_80
bind 0.0.0.0:80 #监听80端口
mode http #http协议
balance roundrobin #轮询,balance source 保存session值,支持static-rr,leastconn,first,uri等参数
log global
log-format "%Tl",%{+Q}ci,"%fi:%fp",%{+Q}bi,%{+Q}r,%ST,%B,%{+Q}hr,%Tt
option forwardfor #如果后端服务器需要获得客户端真实ip需要配置的参数,可以从Http Header中获得客户端ip
option httpclose #每次请求完毕后主动关闭http通道,haproxy不支持keep-alive,只能模拟这种模式的实现
option http-server-close
capture request header Host len 255
capture request header User-Agent len 255
capture request header Referer len 255
capture request header Cookie len 255
timeout http-request 10s
timeout http-keep-alive 55s
server http_01_80 192.168.1.1:80 cookie 1 weight 10 check inter 3000 rise 3 fall 5
server http_02_80 192.168.1.2:80 cookie 1 weight 10 check inter 3000 rise 3 fall 5
listen https_443
bind 0.0.0.0:443 ssl crt /root/server.pem no-sslv3 #指定ssl证书
mode http #走http协议,不走tcp协议
balance roundrobin
option httpclose
option forwardfor
reqadd X-Forwarded-Proto:\ https
#default_backend http_80
capture request header Host len 255
capture request header User-Agent len 255
capture request header Referer len 255
capture request header Cookie len 255
timeout http-request 10s
timeout http-keep-alive 55s
server https_01_443 192.168.1.1:80 cookie 1 weight 10 check inter 3000 rise 3 fall 5
server https_02_443 192.168.1.2:80 cookie 2 weight 10 check inter 3000 rise 3 fall 5
listen admin_stats
bind 0.0.0.0:8000
mode http
stats refresh 30s
stats uri /haproxy
stats auth admin:admin@123
stats hide-version
stats admin if TRUE
重启haproxy配置后查看下端口:

可以同时测试80和443的访问了
测试方法:本地host
本haproxy服务器ip 相关域名
访问之后F12查看获取的ip


