说明:本地环境idea + maven3.5 + springboot2.0.0 + springfox-swagger2 2.8.0 + springfox-swagger-ui 2.8.0 + swagger-bootstrap-ui 1.7.2(为了展示的更好看)
1 搭建完Springboot 项目后在pom文件中添加依赖
<springfox-swagger.version>2.8.0</springfox-swagger.version>
<swagger-bootstrap-ui.version>1.7.2</swagger-bootstrap-ui.version>

<!-- https://mvnrepository.com/artifact/io.springfox/springfox-swagger2 -->
    <dependency>
      <groupId>io.springfox</groupId>
      <artifactId>springfox-swagger2</artifactId>
      <version>${springfox-swagger.version}</version>
    </dependency>

    <!-- https://mvnrepository.com/artifact/io.springfox/springfox-swagger-ui -->
    <dependency>
      <groupId>io.springfox</groupId>
      <artifactId>springfox-swagger-ui</artifactId>
      <version>${springfox-swagger.version}</version>
    </dependency>

    <!-- https://mvnrepository.com/artifact/com.github.xiaoymin/swagger-bootstrap-ui -->
    <dependency>
      <groupId>com.github.xiaoymin</groupId>
      <artifactId>swagger-bootstrap-ui</artifactId>
      <version>${swagger-bootstrap-ui.version}</version>
    </dependency>
2 创建配置类 SwaggerConfig
@Configuration
@EnableSwagger2
public class SwaggerConfig {

    @Bean
    public Docket petApi() {
        return new Docket(DocumentationType.SWAGGER_2)
                .apiInfo(apiInfo())
                .select()
                .apis(RequestHandlerSelectors.basePackage("com.huitong")) //指定提供接口所在的基包
                .build();
    }

    /**
     * 该套 API 说明,包含作者、简介、版本、host、服务URL
     * @return
     */
    private ApiInfo apiInfo() {
        return new ApiInfoBuilder()
                .title("demo api 说明")
                .contact(new Contact("allen","null","name@example.com"))
                .version("0.1")
                .termsOfServiceUrl("localhost:8080/demo1/")
                .description("demo api")
                .build();
    }

}
3 对接口和实体类添加注释,生成doc。常用的标记如下
@Api()用于类;
标识这个类是swagger的资源
tags–表示分组说明标签
@ApiOperation()用于方法;
表示一个http请求的操作
value用于方法描述
notes用于提示内容
@ApiModel()用于实体类
表示对类进行说明,用于参数用实体类接收
@ApiModelProperty()用于实体类字段
表示对model属性的说明或者数据操作更改
value–字段说明
name–重写属性名字
dataType–重写属性类型
required–是否必填
example–举例说明
hidden–隐藏
@ApiImplicitParam() 用于 controller 方法
表示单独的请求参数
name–参数ming
value–参数说明
dataType–数据类型
paramType–参数类型
example–举例说明
@ApiImplicitParams() 用于 controller 方法,包含多个 @ApiImplicitParam
@ApiIgnore()用于类或者方法上,可以不被swagger显示在页面上
说明:简单的标记只需要@Api(tags="") 和 @ApiOperation(value="",notes="")
更多关于 注解用法可以参考https://github.com/swagger-api/swagger-core/wiki/Annotations
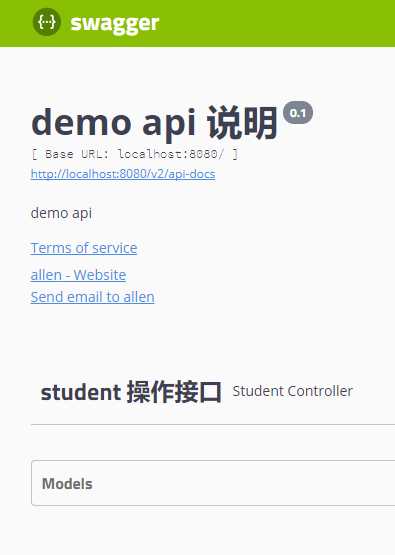
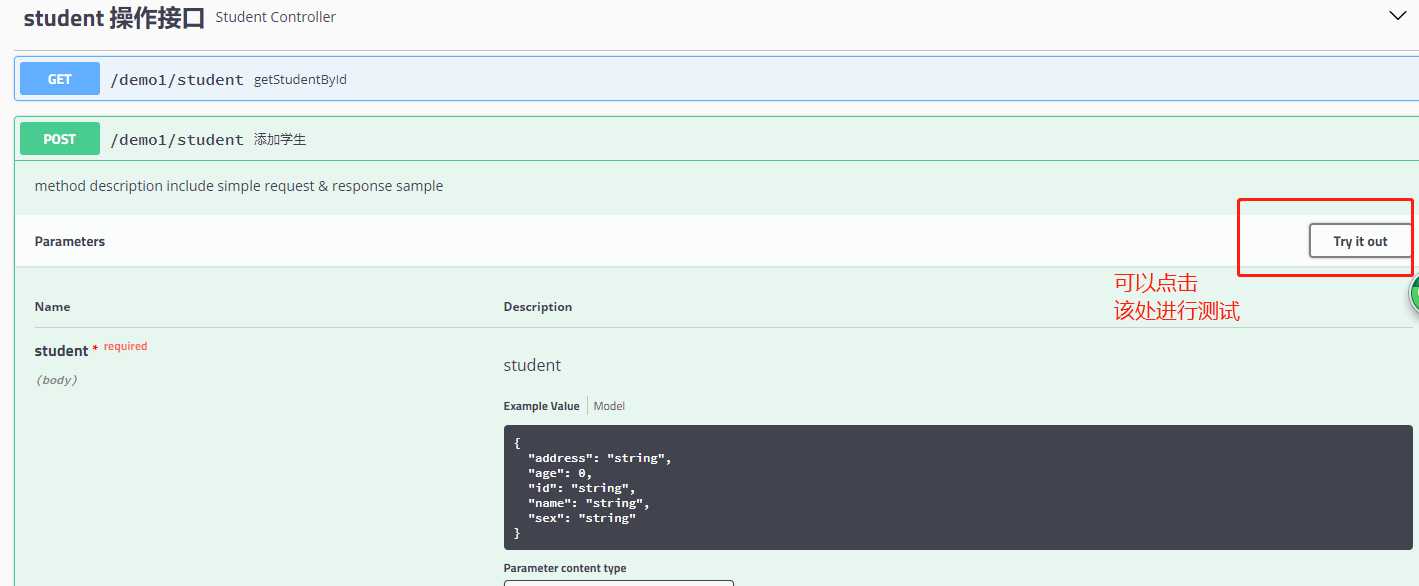
4 搭建完成后可以测试一波了。启动服务,在浏览器中输入 http://localhost:8080/swagger-ui.html ,界面如下


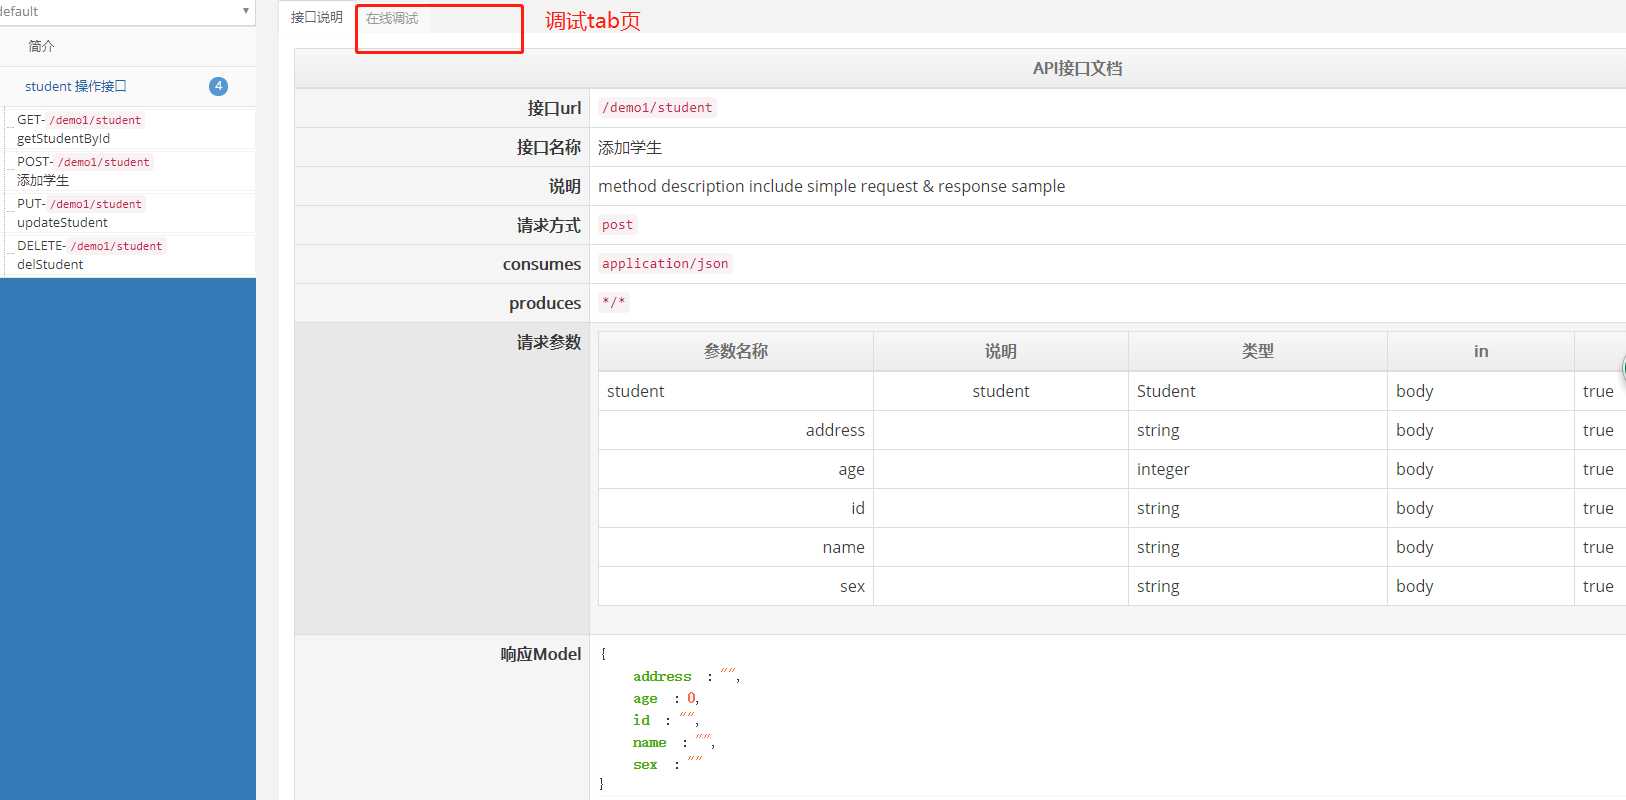
在浏览器中输入 http://localhost:8080/doc.html

从中可以看出,swagger 适合作为简单的 API 文档,并进行简单测试。
