标签:style blog http color io 使用 ar strong div
实现图片浏览器功能

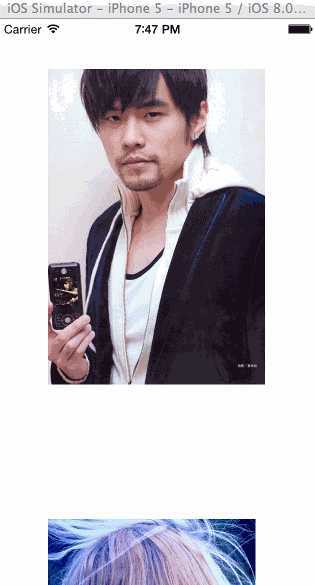
效果:

此教程涉及到较多的category的使用,注意.
思路:
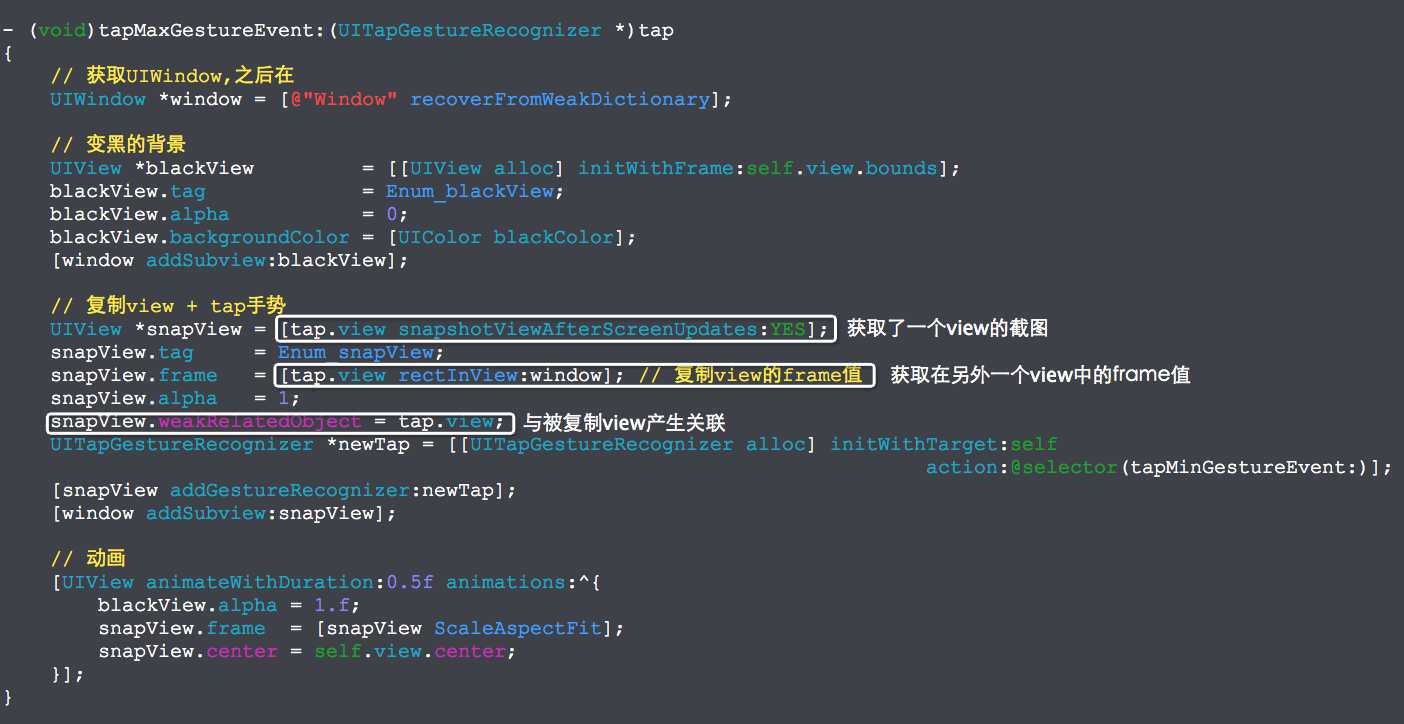
1. 获取一个view在UIWindow中的frame值
2. 获取这个view的快照
3. 对这个快照进行动画全屏
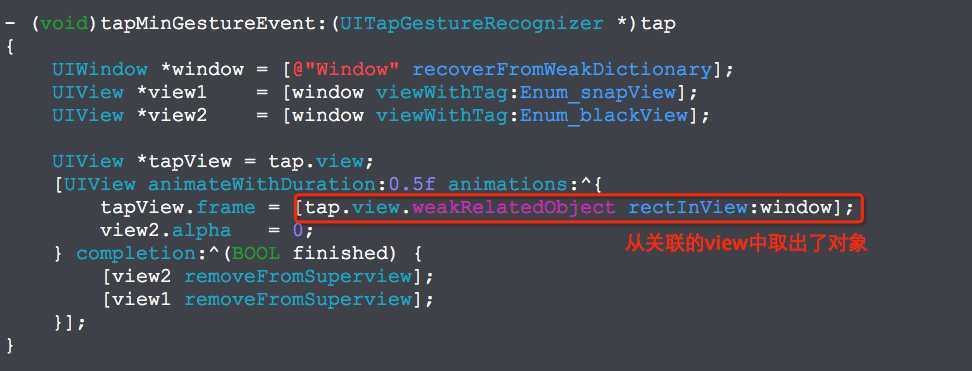
4. 全屏消失后移除掉这个快照
源码:
NSObject+WeakRelated.h 与 NSObject+WeakRelated.m (让两个对象之间产生关联)
//
//  NSObject+WeakRelated.h
//  ScrollViewShowImage
//
//  Created by YouXianMing on 14-9-24.
//  Copyright (c) 2014年 YouXianMing. All rights reserved.
//

#import <Foundation/Foundation.h>

@interface NSObject (WeakRelated)

// 与另一个对象绑定(弱相关)
@property (nonatomic, weak) id weakRelatedObject;

@end
//
//  NSObject+WeakRelated.m
//  ScrollViewShowImage
//
//  Created by YouXianMing on 14-9-24.
//  Copyright (c) 2014年 YouXianMing. All rights reserved.
//

#import "NSObject+WeakRelated.h"
#import <objc/runtime.h>

@implementation NSObject (WeakRelated)

static char customWeakRelatedObject;
- (void)setWeakRelatedObject:(id)weakRelatedObject
{
    objc_setAssociatedObject(self, &customWeakRelatedObject,
                             weakRelatedObject,
                             OBJC_ASSOCIATION_ASSIGN /**< Specifies a weak reference to the associated object. */
                             );
}

- (id)weakRelatedObject
{
    return objc_getAssociatedObject(self, &customWeakRelatedObject);
}

@end
UIView+ConvertRect.h 与 UIView+ConvertRect.m (当前view在另外一个view中的frame值)
//
//  UIView+ConvertRect.h
//  ScrollViewShowImage
//
//  Created by YouXianMing on 14-9-24.
//  Copyright (c) 2014年 YouXianMing. All rights reserved.
//

#import <UIKit/UIKit.h>

@interface UIView (ConvertRect)

// 当前view在另外一个view中的rect值
- (CGRect)rectInView:(UIView *)view;

@end
//
//  UIView+ConvertRect.m
//  ScrollViewShowImage
//
//  Created by YouXianMing on 14-9-24.
//  Copyright (c) 2014年 YouXianMing. All rights reserved.
//

#import "UIView+ConvertRect.h"

@implementation UIView (ConvertRect)

- (CGRect)rectInView:(UIView *)view
{
    return [self convertRect:self.bounds toView:view];
}

@end
UIView+RelativeToUIScreen.h 与 UIView+RelativeToUIScreen.m (将当前view的size值转换成另外一个view中的frame值)
//
//  UIView+RelativeToUIScreen.h
//  ScrollViewShowImage
//
//  Created by YouXianMing on 14-9-24.
//  Copyright (c) 2014年 YouXianMing. All rights reserved.
//

#import <UIKit/UIKit.h>

@interface UIView (RelativeToUIScreen)

// 返回的等比例尺寸,但宽度与屏幕宽度相同
- (CGRect)scaleAspectFitScreenWidth;

// 返回的等比例尺寸,但高度与屏幕高度相同
- (CGRect)scaleAspectFitScreenHeight;

// 返回等比例尺寸,进行有效填充
- (CGRect)ScaleAspectFit;

@end
//
//  UIView+RelativeToUIScreen.m
//  ScrollViewShowImage
//
//  Created by YouXianMing on 14-9-24.
//  Copyright (c) 2014年 YouXianMing. All rights reserved.
//

#import "UIView+RelativeToUIScreen.h"

#define SCR_HEIGHT             [UIScreen mainScreen].bounds.size.height
#define SCR_WIDTH              [UIScreen mainScreen].bounds.size.width

@implementation UIView (RelativeToUIScreen)

- (CGRect)scaleAspectFitScreenWidth
{
    if (self.bounds.size.height && self.bounds.size.width) {
        CGFloat calculate = SCR_WIDTH * self.bounds.size.height / self.bounds.size.width;
        CGRect rect       = CGRectMake(0, 0, SCR_WIDTH, calculate);
        return rect;
    } else {
        return CGRectZero;
    }
}

- (CGRect)scaleAspectFitScreenHeight
{
    if (self.bounds.size.height && self.bounds.size.width) {
        CGFloat calculate = SCR_HEIGHT * self.bounds.size.width / self.bounds.size.height;
        CGRect rect       = CGRectMake(0, 0, calculate, SCR_HEIGHT);
        return rect;
    } else {
        return CGRectZero;
    }
}

- (CGRect)ScaleAspectFit
{
    if (self.bounds.size.height && self.bounds.size.width) {
        if ((self.bounds.size.height / self.bounds.size.width) > (SCR_HEIGHT / SCR_WIDTH)) {
            CGFloat calculate = SCR_HEIGHT * self.bounds.size.width / self.bounds.size.height;
            CGRect rect       = CGRectMake(0, 0, calculate, SCR_HEIGHT);
            return rect;
        } else {
            CGFloat calculate = SCR_WIDTH * self.bounds.size.height / self.bounds.size.width;
            CGRect rect       = CGRectMake(0, 0, SCR_WIDTH, calculate);
            return rect;
        }
    } else {
        return CGRectZero;
    }
}

@end
控制器源码:
//
//  ViewController.m
//  ScrollViewShowImage
//
//  Created by YouXianMing on 14-9-24.
//  Copyright (c) 2014年 YouXianMing. All rights reserved.
//

#import "ViewController.h"
#import "NSObject+WeakRelated.h"

typedef enum : NSUInteger {
    Enum_blackView = 0x11,
    Enum_snapView,
} ViewTag;

@interface ViewController ()

@property (strong, nonatomic) UIScrollView *scrollView;
@property (strong, nonatomic) UIImageView  *imageView1;
@property (strong, nonatomic) UIImageView  *imageView2;

@end

@implementation ViewController

- (void)viewDidLoad {
    [super viewDidLoad];

    // scorllView
    _scrollView = [[UIScrollView alloc] initWithFrame:self.view.bounds];
    _scrollView.contentSize = CGSizeMake(self.view.bounds.size.width, self.view.bounds.size.height * 3);
    [self.view addSubview:_scrollView];

    // imageView1 +  imageView2
    _imageView1 = [[UIImageView alloc] initWithImage:[UIImage imageNamed:@"1.png"]];
    _imageView1.viewOrigin = CGPointMake(50, 50);
    _imageView1.userInteractionEnabled = YES; // 开启用户交互并添加手势
    [_scrollView addSubview:_imageView1];
    UITapGestureRecognizer *tap1 = [[UITapGestureRecognizer alloc] initWithTarget:self
                                                                          action:@selector(tapMaxGestureEvent:)];
    [_imageView1 addGestureRecognizer:tap1];
    _imageView2 = [[UIImageView alloc] initWithImage:[UIImage imageNamed:@"2.png"]];
    _imageView2.viewOrigin = CGPointMake(50, 500);
    _imageView2.userInteractionEnabled = YES; // 开启用户交互并添加手势
    [_scrollView addSubview:_imageView2];
    UITapGestureRecognizer *tap2 = [[UITapGestureRecognizer alloc] initWithTarget:self
                                                                          action:@selector(tapMaxGestureEvent:)];
    [_imageView2 addGestureRecognizer:tap2];
}

- (void)tapMaxGestureEvent:(UITapGestureRecognizer *)tap
{
    // 获取UIWindow,之后在
    UIWindow *window = [@"Window" recoverFromWeakDictionary];

    // 变黑的背景
    UIView *blackView         = [[UIView alloc] initWithFrame:self.view.bounds];
    blackView.tag             = Enum_blackView;
    blackView.alpha           = 0;
    blackView.backgroundColor = [UIColor blackColor];
    [window addSubview:blackView];

    // 复制view + tap手势
    UIView *snapView = [tap.view snapshotViewAfterScreenUpdates:YES];
    snapView.tag     = Enum_snapView;
    snapView.frame   = [tap.view rectInView:window]; // 复制view的frame值
    snapView.alpha   = 1;
    snapView.weakRelatedObject = tap.view;
    UITapGestureRecognizer *newTap = [[UITapGestureRecognizer alloc] initWithTarget:self
                                                                             action:@selector(tapMinGestureEvent:)];
    [snapView addGestureRecognizer:newTap];
    [window addSubview:snapView];

    // 动画
    [UIView animateWithDuration:0.5f animations:^{
        blackView.alpha = 1.f;
        snapView.frame  = [snapView ScaleAspectFit];
        snapView.center = self.view.center;
    }];
}

- (void)tapMinGestureEvent:(UITapGestureRecognizer *)tap
{
    UIWindow *window = [@"Window" recoverFromWeakDictionary];
    UIView *view1    = [window viewWithTag:Enum_snapView];
    UIView *view2    = [window viewWithTag:Enum_blackView];

    UIView *tapView = tap.view;
    [UIView animateWithDuration:0.5f animations:^{
        tapView.frame = [tap.view.weakRelatedObject rectInView:window];
        view2.alpha   = 0;
    } completion:^(BOOL finished) {
        [view2 removeFromSuperview];
        [view1 removeFromSuperview];
    }];
}

@end
需要注意的地方:


其实这个例子已经写得非常便利了,不需要封装任何的接口就可以很容易的实现点击浏览图片的效果.
标签:style blog http color io 使用 ar strong div
原文地址:http://www.cnblogs.com/YouXianMing/p/3991442.html