标签:use src gis white 布尔 and 项目目录 eem des
grunt也是工程化管理工具之一
首先你需要全局安装grunt,打开cmd命令
cnpm install -g grunt-cli
然后在你项目目录下执行
cnpm install --save grunt grunt-contrib-uglify
然后在项目下初始化一下
cnpm init
接着下载几个压缩插件 例如:htmlmin任务模块的/cssmin任务模块的
cnpm install grunt-contrib-htmlmin --save-dev

cnpm install grunt-contrib-cssmin --save-dev
最后在根目录上建立Gruntfile.js这个js,里面添加如下配置代码
module.exports = function(grunt){
    //1.引入
    grunt.loadNpmTasks(‘grunt-contrib-cssmin‘);
    grunt.loadNpmTasks(‘grunt-contrib-htmlmin‘); //2.设置任务:
    grunt.initConfig({
//        //压缩CSS
        cssmin:{
            yasuo:{
                options:{
                    mangle:false
                },
                expand: true,
                cwd: ‘css‘,//压缩那个文件夹里的文件
                src:‘*.css‘,//压缩那个文件
                dest:‘yscss‘,//放压缩后文件的文件夹
                ext:‘.min.css‘//压缩后文件的的名字
            }
        },
//        //压缩HTML
        htmlmin:{
            options: {
                    removeComments: true, //移除注释
                    removeCommentsFromCDATA: true,//移除来自字符数据的注释
                    collapseWhitespace: true,//无用空格
                    collapseBooleanAttributes: true,//失败的布尔属性
                    removeAttributeQuotes: true,//移除属性引号      有些属性不可移走引号
                    removeRedundantAttributes: true,//移除多余的属性
                    useShortDoctype: true,//使用短的跟元素
                    removeEmptyAttributes: true,//移除空的属性
                    removeOptionalTags: true//移除可选附加标签
                  },
            yasuo:{
                expand: true,
                cwd: ‘index‘,
                src: [‘*.html‘],
                dest: ‘yshtml‘
            }
        }


    });
    //设置默认任务
    grunt.registerTask(‘default‘,[‘cssmin‘,‘htmlmin‘]);
}
当然,你也可以在这个js中添加其他的配置
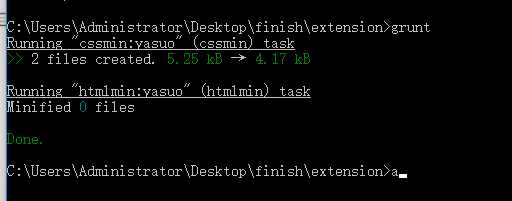
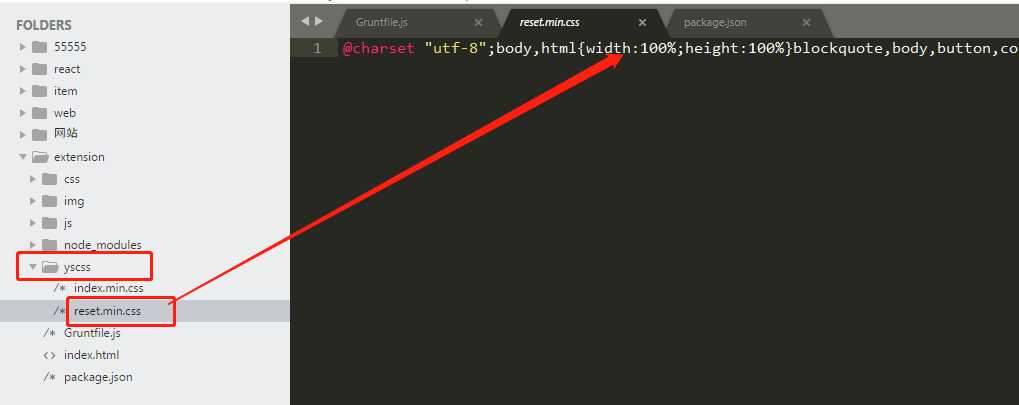
最后,直接在目录下的cmd中输入grunt,即可,你会发现目录中多了几个文件夹,css代码也被压缩了,注意的是,压缩html的是index文件夹不是文件哦


标签:use src gis white 布尔 and 项目目录 eem des
原文地址:https://www.cnblogs.com/ldlx-mars/p/9043106.html