标签:eid 依赖 foo 高效 检测方法 成都 ges cto angular 2
Angular默认情况下保守,当某个节点发生更改时,每次检查每个组件,如下图
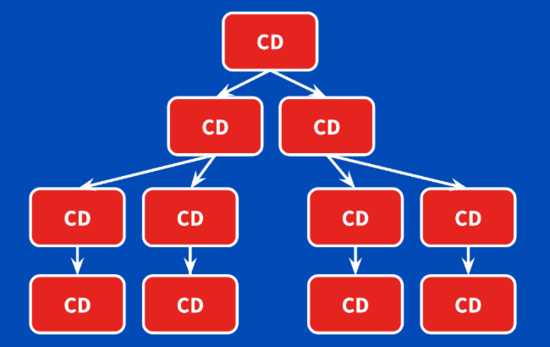
我们发现每次变化检测都是从根组件开始,从上往下执行。虽然 Angular 2 优化后的变化检测执行的速度很快,每毫秒几十万次,但我们能否只针对那些有变化的组件才执行变化检测或灵活地控制变化检测的时机呢 ? 答案是有的,接下来我们看一下具体怎么进行优化。
先来一个简单的例子:
app.component.ts
import { Component } from ‘@angular/core‘;

@Component({
  selector: ‘app-root‘,
  templateUrl: ‘./app.component.html‘
})
export class AppComponent {
  foods = [‘Bacon‘, ‘Lettuce‘, ‘Tomatoes‘];

  addFood(food) {
    this.foods.push(food);
  }
}
app.component.html
<input #newFood type="text" placeholder="Enter a new food">
<button (click)="addFood(newFood.value)">Add food</button>

<app-child [data]="foods"></app-child>
child.component.ts
import { Component, Input } from ‘@angular/core‘;

@Component({
  selector: ‘app-child‘,
  templateUrl: ‘./child.component.html‘
})
export class ChildComponent {
  @Input() data: string[];
}
child.component.html
<ul>
  <li *ngFor="let item of data">{{ item }}</li>
</ul>
这是个很简单的例子,父组件改变值,脏值检测到子组件,每当父组件有改变,子组件也跟着改变,如果父组件的输入属性没有变化的话再检测子组件,这是一件没有意义的事,还会增加性能开销,所以就有了脏值检测策略
一个简单的例子:
import { Component, Input, ChangeDetectionStrategy } from ‘@angular/core‘;

@Component({
  selector: ‘app-child‘,
  templateUrl: ‘./child.component.html‘,
  changeDetection: ChangeDetectionStrategy.OnPush
})
export class ChildComponent {
  @Input() data: string[];
}
当上面的例子运行的时候,父组件再给foods push新的值得时候,子组件视图也不会更新,这是因为,在js中,默认对象都是可变的,我们先来看一下下面这个例子
var food={
  name:‘小龙坎‘,
  from:‘成都‘
}

var fo=food;
fo.name=‘牛肉面‘;
fo.from=‘兰州‘;
console.log(food===fo);//true
通过这个例子,你也许会明白为什么前面的视图没有更新了,让我们再来了解下Immutable .
var food={
  name:‘小龙坎‘,
  from:‘成都‘
}

var fo=Objec.assign({},food);
fo.name=‘牛肉面‘;
fo.from=‘兰州‘;
console.log(food===fo);//false
Imutable表示对象不可变,我们修改一个对象的时候新建一个对象,在新对象上做修改。
在Onpush策略源码中,它是这么实现对比的:
function looseIdentical(a, b) {
    return a === b || typeof a === ‘number‘ && typeof b === ‘number‘ && isNaN(a) && isNaN(b);
}
所以当我们使用OnPush策略时,要使用Imutable对象才能实现实现我们想要的效果
上面的例子改成这种实现,页面会跟着刷新
addFood(food) {
  this.foods = [...this.foods, food];
}
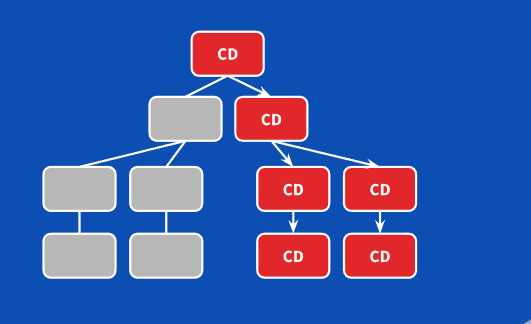
用OnPush,会大大优化我们项目的性能,
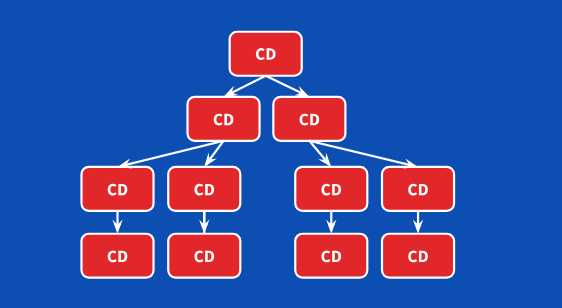
加了OnPush之后
ChangeDetectorRef
ChangeDetectorRef策略可以完全控制检测。它是通过依赖注入获取对象
import { ChangeDetectorRef } from ‘@angular/core‘;

@Component({}) class ChildComponent {
    constructor(private cdRef: ChangeDetectorRef) {}
}
检测方法有下面几个:
export abstract class ChangeDetectorRef {
  abstract markForCheck(): void;
  abstract detach(): void;
  abstract detectChanges(): void;
  abstract reattach(): void;
}
API介绍:
markForCheck() - 在组件的 metadata 中如果设置了 changeDetection: ChangeDetectionStrategy.OnPush 条件,那么变化检测不会再次执行,除非手动调用该方法。
detach() - 从变化检测树中分离变化检测器,该组件的变化检测器将不再执行变化检测,除非手动调用 reattach() 方法。
reattach() - 重新添加已分离的变化检测器,使得该组件及其子组件都能执行变化检测
detectChanges() - 从该组件到各个子组件执行一次变化检测
假如我们的子组件有个刷新按钮,如下
import { Component,
         Input,
         ChangeDetectionStrategy,
         ChangeDetectorRef } from ‘@angular/core‘;

@Component({
  selector: ‘app-child‘,
  templateUrl: ‘./child.component.html‘,
  changeDetection: ChangeDetectionStrategy.OnPush
})
export class ChildComponent {
  @Input() data: string[];

  constructor(private cd: ChangeDetectorRef) {}

  refresh() {
    this.cd.detectChanges();
  }
}
在每次手动刷新的时候,他会更改检测
如果数据是可观察的
app.component.ts
import { Component } from ‘@angular/core‘;
import { BehaviorSubject } from ‘rxjs/BehaviorSubject‘;

@Component({ ... })
export class AppComponent {
  foods = new BehaviorSubject([‘Bacon‘, ‘Letuce‘, ‘Tomatoes‘]);

  addFood(food) {
    this.foods.next(food);
  }
}
child.component.ts
import { Component,
         Input,
         ChangeDetectionStrategy,
         ChangeDetectorRef,
         OnInit } from ‘@angular/core‘;

import { Observable } from ‘rxjs/Observable‘;

@Component({
  selector: ‘app-child‘,
  templateUrl: ‘./child.component.html‘,
  changeDetection: ChangeDetectionStrategy.OnPush
})
export class ChildComponent implements OnInit {
  @Input() data: Observable<any>;
  foods: string[] = [];

  constructor(private cd: ChangeDetectorRef) {}

  ngOnInit() {
    this.data.subscribe(food => {
      this.foods = [...this.foods, ...food];
    });
  }
}
在子组件订阅了它,在每次值变化的时候进行更新检测
ngOnInit() {
  this.data.subscribe(food => {
    this.foods = [...this.foods, ...food];
    this.cd.markForCheck();
  });
}
下面三张图来说明观察者检测方式:
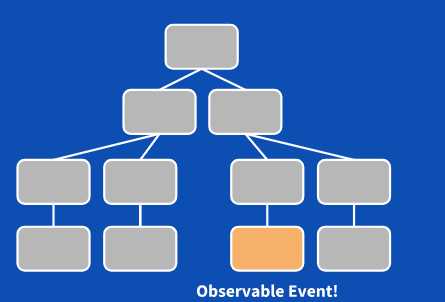
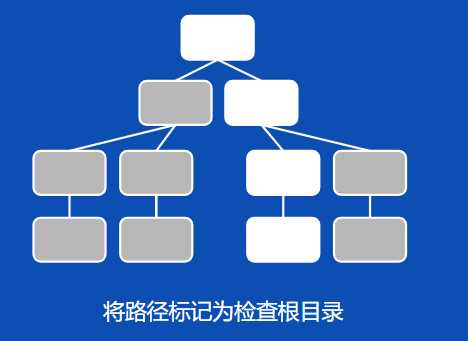
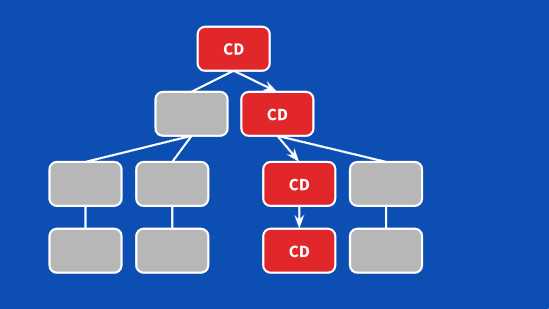
这时候我们可以脱离的检测,用观察者模式,精准高效的事件了脏值检测,提高整个系统的整体性能。
标签:eid 依赖 foo 高效 检测方法 成都 ges cto angular 2
原文地址:https://www.cnblogs.com/nanguabushuohua/p/9067716.html