标签:字符 框架 处理 使用 info 获取 tle 属性 row
<!DOCTYPE html>
<html lang="en">
<head>
    <meta charset="UTF-8">
    <title>Hello World</title>
</head>
<body>
    <!-- 模板 -->
    <div id="app">
        <!-- 声明式渲染 -->
        <h1>{{ msg }}</h1>
    </div>

    <!-- 引入vue -->
    <script src="https://unpkg.com/vue/dist/vue.js"></script>
    <script>
        // 创建一个vue对象,同时将这个对象挂载到 #app(这里是元素id) 的元素上
        let app = new Vue({
            // 挂载点
            el: ‘#app‘,
            // Vue 对象中管理的数据 VM ( ViewModel ), 可以直接在面板上通过声明来进行数据访问
            data: {
                msg: ‘Hello World‘
            }
        })
    </script>
</body>
</html>
浏览器显示如图: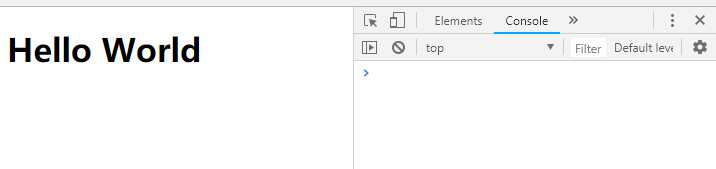
双大括号会将数据解释为纯文本,而非 HTML 。为了输出真正的 HTML ,你需要使用 v-html 指令 被插入的内容都会被当做 HTML —— 数据绑定会被忽略。注意,你不能使用 v-html 来复合局部模板,因为 Vue 不是基于字符串的模板引擎。组件更适合担任 UI 重用与复合的基本单元
<html>
<!-- ===== 2、v-heml 指令   ===== -->
<div id="app2" v-html="rawHtml"></div>

<!-- script -->
    // 2、v-heml 指令
    let app2 = new Vue({
        el: ‘#app2‘,
        data() {
            return {
                rawHtml: ‘<h1>v-heml 指令:hello world</h1>‘
            }
        }
    })
浏览器显示如图: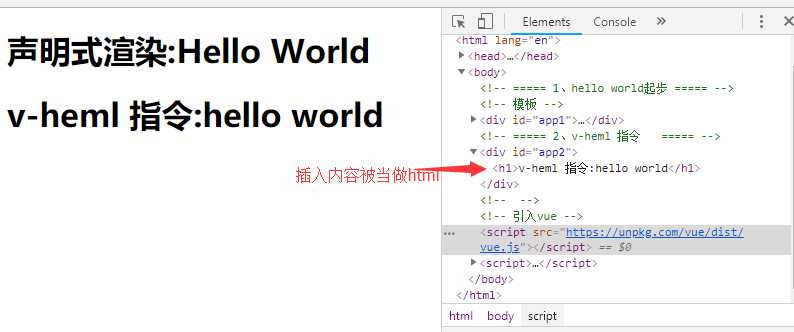
v-bind 属性被称为指令。指令带有前缀 v-,以表示它们是 Vue.js 提供的特殊属性。这个指令的简单含义是说: 将这个元素节点的 title 属性和 Vue 实例的 message 属性绑定到一起。
<html>
<!-- ===== 3、v-bind 指令   ===== -->
    <div id="app3">
        <span v-bind:title:="message">3、v-bind指令:鼠标悬停</span>
    </div>

<script>
        let app3 = new Vue({
            el: ‘#app3‘,
            data() {
                return {
                    message: ‘页面加载于 ‘ + new Date().toLocaleString(),
                    title: ‘你好程序猿‘
                }
            }
        })
浏览器显示如图: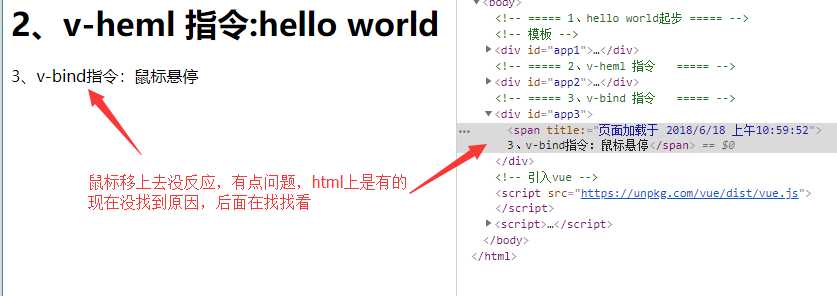
没找到悬停时显示不出来的原因,后面在看看
我们也可以在对象中传入更多属性用来动态切换多个 class 。此外, v-bind:class 指令可以与普通的 class 属性 共存。如下模板:
第一种: 绑定某一个 Class
<css>
    .test {
        color: red;
    }
    .test1 {
        color: blue;
    }

<html>
<!-- ===== 4、v-bind 指令 Class 与 Style 绑定  ===== -->
<div id="app4">
    <!-- 这个class是取决于isActive和hasError那个为true -->
    <span class="static" v-bind:class="{test: isActive, ‘test1‘: hasError}">4、Class 与 Style 绑定:你好程序猿</span>
</div>

<js>
// 4、v-bind 指令 Class 与 Style 绑定
let app4 = new Vue({
    el: ‘#app4‘,
    data: {
        isActive: false,
        hasError: true
    }
})
浏览器显示效果如图: 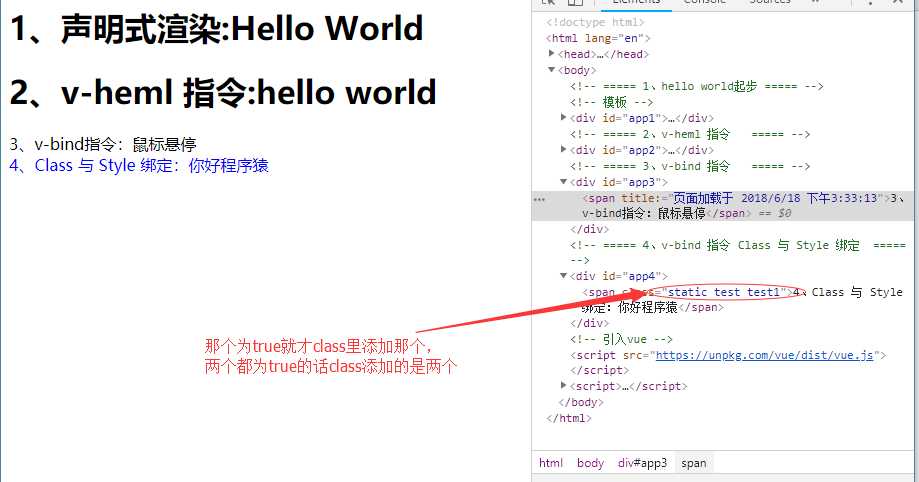
第二种: 直接绑定数据里的一个对象
<css>
    .test {
        color: red;
    }
    .test1 {
        color: blue;
    }

<html>
<!-- ===== 4、v-bind 指令 Class 与 Style 绑定  ===== -->
<div id="app4-2">
    <span class="static" v-bind:class="classObj">4、Class 与 Style 绑定2:你好程序猿</span>
</div>

<js>
let app4A = new Vue({
    el: ‘#app4-2‘,
    data: {
        classObj: {
            test: true,
            test1: false
        }
    }
})
浏览器显示效果如图: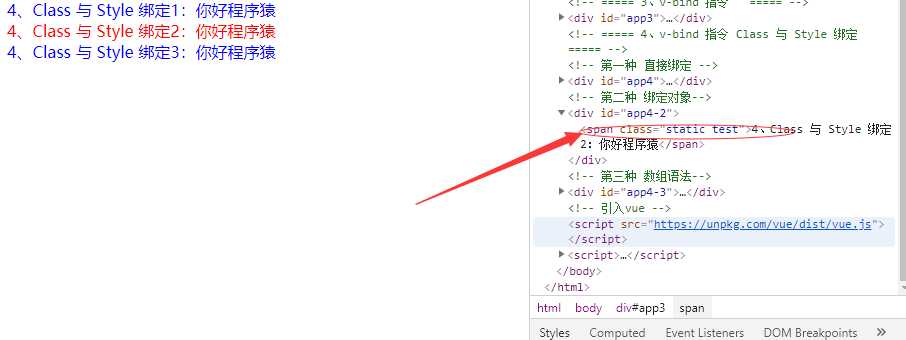
第三种: 数组语法
<css>
    .test {
        color: red;
    }
    .test1 {
        color: blue;
    }

<html>
<!-- ===== 4、v-bind 指令 Class 与 Style 绑定  ===== -->
<div id="app4-3">
    <span class="static" v-bind:class="[active, active2]">4、Class 与 Style 绑定3:你好程序猿</span>
</div>

<js>
let app4B = new Vue({
    el: ‘#app4-3‘,
    data: {
        active: ‘test‘,
        active2: ‘test1‘
    }
})
浏览器显示效果如图: 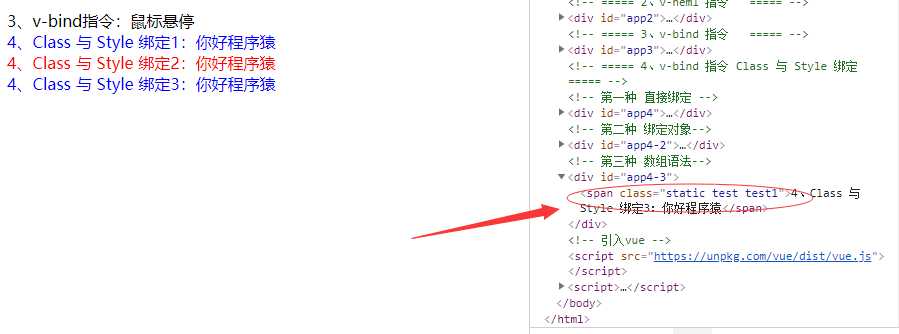
绑定内嵌style就不说了可以查一下,和这个差不多!!!!
第一种: v-if
<html>
<div id="app5">
    <!-- 通过if else 指令来控制元素的显示 -->
    <p v-if="ifElse">5、if: 我喜欢写代码</p>
    <p v-else>5、else: 我不喜欢写代码</p>
</div>

<js>
let app5 = new Vue({
    el: ‘#app5‘,
    data: {
        ifElse: false
    }
})

还可以这样判断,这里就不在做例子了
<div v-if="type === ‘A‘">  A </div>
<div v-else-if="type === ‘B‘">  B </div>
第二种: v-for
<html>
<div id="app5-1">
    <!-- 数组 -->
    <ul>
        <li v-for="(item, index) in arr">
            5、for数组:{{index}}: {{item}}
        </li>
    </ul>
    <!-- 对象 -->
    <ul>
        <li v-for="(value, key, index) in obj">
            5、for对象: {{index}}: {{key}}={{value}}
        </li>
    </ul>
</div>

<js>

let app5A = new Vue({
    el: ‘#app5-1‘,
    data: {
        // 数组
        arr: [‘zhangsan‘, ‘lisi‘, ‘guanyu‘],
        // 对象
        obj: {
            name: ‘zhangsan‘,
            age: 21,
            gender: ‘male‘
        }
    }
})

迭代整数
<p v-for="n in 10">{{ n }}</p>
结果: 1 2 3 4 5 6 7 8 9 10<html>
<!-- 第一种: v-on 指令 -->
<div id="app6">
<p>6、v-on:{{msg}}</p>
<!-- v-on 指令绑定一个监听事件用于调用我们 Vue 实例中定义的方法 -->
<button v-on:click="reverseMsg">6、v-on:点击</button>
</div>
<!-- 第二种: v-model 指令 -->
<!-- 在表单输入和应用状态中做双向数据绑定 -->
<div id="app6-1">
<p>6、v-model:{{msg}}</p>
<input type="text" v-model="msg">
</div>
<js>
// 第一种: v-on指令
// 在监听事件中触发对 this.data的修改
let app6 = new Vue({
el: ‘#app6‘,
data: {
msg: ‘hello vue‘
},
methods: {
reverseMsg: function() {
// this.msg 是指的data中的msg属性
// 当this.data 中的属性值发生变化,视图也会重新渲染
this.msg = this.msg.split(‘‘).reverse().join(‘‘)
}
}
})
// 第二种: v-model 指令
// 在表单输入和应用状态中做双向数据绑定
let app6A = new Vue({
el: ‘#app6-1‘,
data: {
msg: ‘hello 程序员‘
}
})组件可以扩展HTML元素,封装可重用的代码。在较高层面上,组件是自定义元素,Vue.js的编译器为它添加特殊功能。在有些情况下,组件也可以是原生HTML元素形式,以is特性扩展。
<html>
<!-- 全局注册 -->
<div id="app7">
    <hello></hello>
</div>
<!-- 局部注册 -->
<div id="app7-1">
    <hello></hello>
</div>

<js>
// 全局注册
Vue.component(‘hello‘, {
    template: ‘<div>7、全局注册:Hello World</div>‘
})

let app7 = new Vue({
    el: ‘#app7‘
})

// 局部注册: 通过使用组件实例选项注册,可以使用组件仅在另一个实例/组件的作用域中可用
let helloVue = {
    template: ‘<div>7、局部注册: Hello World</div>‘
}
let app7A = new Vue({
    el: ‘#app7-1‘,
    components: {
        ‘hello‘: helloVue
    }
})
=
注意:当使用DOM作为模板时(例如,将el选项挂载到一个已存在的元素上),
你会受到HTML的一些限制,因为Vue只有在浏览器解析和标准化HTML后才能获取模板内容。
尤其像这些元素<ul> <ol> <table> <select>限制了能被它包裹的元素,<option>只能出现在其它元素内部。
例如:

<html>
//这个会报错
<table id="app7-2">
    <!-- 自定义组件 <my-row>被认为是无效的内容,因此在渲染的时候会导致错误 -->
    <my-row></my-row>
</table>

//这个是正确的
<table id="app7-3">
    <!-- 变通的方法,使用特殊的is属性 -->
    <tr is="my-tr"></tr>
</table>

<js>
// 特殊
let trRow = {
    template: `
        <tr>
            <td>7、特殊: is: HTML/</td>
            <td>7、特殊: is: CSS/</td>
            <td>7、特殊: is: JS</td>
        </tr>
    `
}

let app7B = new Vue({
    el: ‘#app7-3‘,
    components: {
        ‘my-tr‘: trRow
    }
})<html>
div id="app8">
<vue-counter></vue-counter>
<vue-counter></vue-counter>
<vue-counter></vue-counter>
</div>
<js>
let data = {
counter: 0
}
Vue.component(‘vue-counter‘, {
template: ‘<button @click="counter += 1">8、data: {{counter}}</button>‘,
// data是一个函数,因此Vue不会警告
// 但是我们为没有个组件返回了同一个对象引用
data: function() {
// return data // 由于三个组件共享了同一个data,因此增加一个counter会影响所有组件,点击button按钮的时候全部的按钮上的counter变量值都会一起变
// 改为如下代码
// return {
// counter: 0
// }
}
})
let app8 = new Vue({
el: ‘#app8‘
})组件实例的作用域是孤立的。这意味着不能并且不应该在子组件的模板内直接引用父组件的数据。可以使用props把数据传给子组件
props是父组件用来传递数据的一个定义属性。子组件需要显示的用props选项声明“props”
<html>
<div id="app9">
    <container></container>
</div>

<js>
// 声明变量   对象
let container = {
    template: `
        <div>
            <span>9、props的使用: 容器组件</span>
            <child :msg="message" />
        </div>
    `,
    data() {
        return {
            message: ‘9、props的使用: 动态props‘
        }
    }
}
let child = {
    template: `
        <div>
            <span>子组件</span>
            {{ msg }}
        </div>
    `,
    // props在这里使用
    props: [‘msg‘]
}
// 注册组件
Vue.component(‘container‘, container);
Vue.component(‘child‘, child);

let app9 = new Vue({
    el: ‘#app9‘
})prop是单向绑定的,当父级组件的属性变化时,将传导给子组件,但是不会反过来。这是为了防止子组件无意修改了父组件的状态————这回让应用的数据流难以理解
这个例子和3.4的例子差不多,可以对比一下
<html>
div id="app10">
    <containers></containers>
</div>

<js>
// 声明变量   对象
let containers = {
    template: `
        <div>
            <span>10、props的使用: 容器组件</span>
            <input type="text" v-model=‘message‘ name="" value="">
            <childs :msg="message" />
        </div>
    `,
    data() {
        return {
            message: ‘10、props的使用: 动态props‘
        }
    }
}
let childs = {
    template: `
        <div>
            <span>子组件</span>
            <input type="text" v-model=‘message‘ name="" value="">
            {{ message }}
        </div>
    `,
    // props在这里使用
    props: [‘msg‘],
    data() {
        return {
            message: this.msg
        }
    }
}
// 注册组件
Vue.component(‘containers‘, containers);
Vue.component(‘childs‘, childs);

let app10 = new Vue({
    el: ‘#app10‘
})父组件是使用props传递数据给子组件,但如果子组件要把数据传递回去,应该用自定义事件方法来做
=
使用$on(eventName)监听事件
使用$emit(eventName)触发事件
<html>
<div id="app11">
    <containerS></containerS>
</div>
<js>
// 声明变量   对象
let containerS = {
    // :msg 动态props
    // v-on:click 监听子组件 $emit 触发的事件
    template: `
        <div>
            <span>11、props的使用: 容器组件</span>
            <input type="text" v-model=‘message‘ />
            <childS :msg="message" v-on:click=‘setMessage‘ />
        </div>
    `,
    data() {
        return {
            message: ‘11、hello‘
        }
    },
    methods: {
        setMessage(msg) {
            this.message = msg
        }
    }
}
let childS = {
    template: `
        <div>
            <span>子组件</span>
            <input type="text" v-model=‘message‘ v-on:input=‘setMessage‘ />
            {{ message }}
        </div>
    `,
    // props在这里使用
    props: [‘msg‘],
    data() {
        return {
            message: this.msg
        }
    },
    methods: {
        setMessage() {
            // 子组件触发父级组件监听的click事件
            this.$emit(‘click‘, this.message)
        }
    }
}
// 注册组件
Vue.component(‘containerS‘, containerS);
Vue.component(‘childS‘, childS);

let app11 = new Vue({
    el: ‘#app11‘
})标签:字符 框架 处理 使用 info 获取 tle 属性 row
原文地址:https://www.cnblogs.com/WRS7/p/9196807.html