标签:one .so size data rsh 标签 .sh selection plt
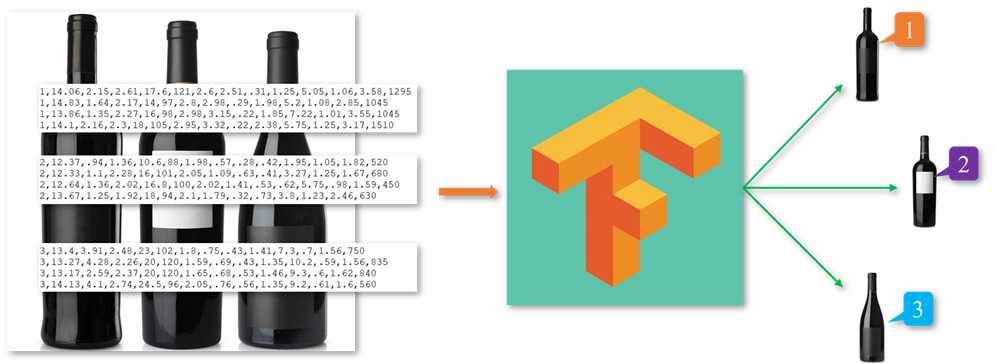
样本数据集是double类型的178 * 14矩阵,第一列表示酒所属类别,后面13列分别表示当前样本的13个属性:
1) Alcohol
2) Malic acid
3) Ash
4) Alcalinity of ash
5) Magnesium
6) Total phenols
7) Flavanoids
8) Nonflavanoid phenols
9) Proanthocyanins
10) Color intensity
11) Hue
12) OD280/OD315 of diluted wines
13) Proline
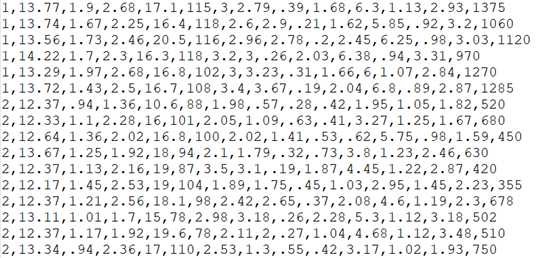
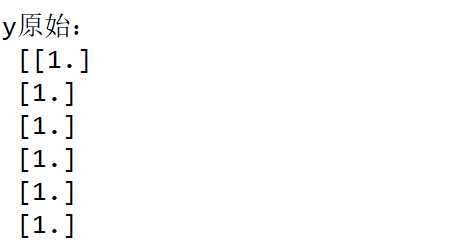
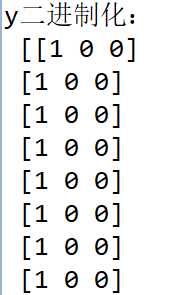
将文件内容读入矩阵,由于标签有三类,分别是1、2、3,于是进行二进制化。
由于各个特征的值差距较大,在进行训练的时候收敛的速度极慢可能会导致模型无法学习到可靠参数,于是要进行特征缩放,在此处选择均值归一化
![]()
下图给出处理后的数据信息
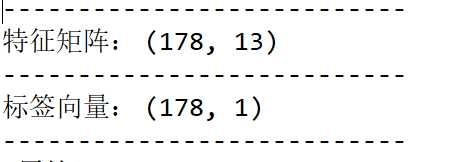
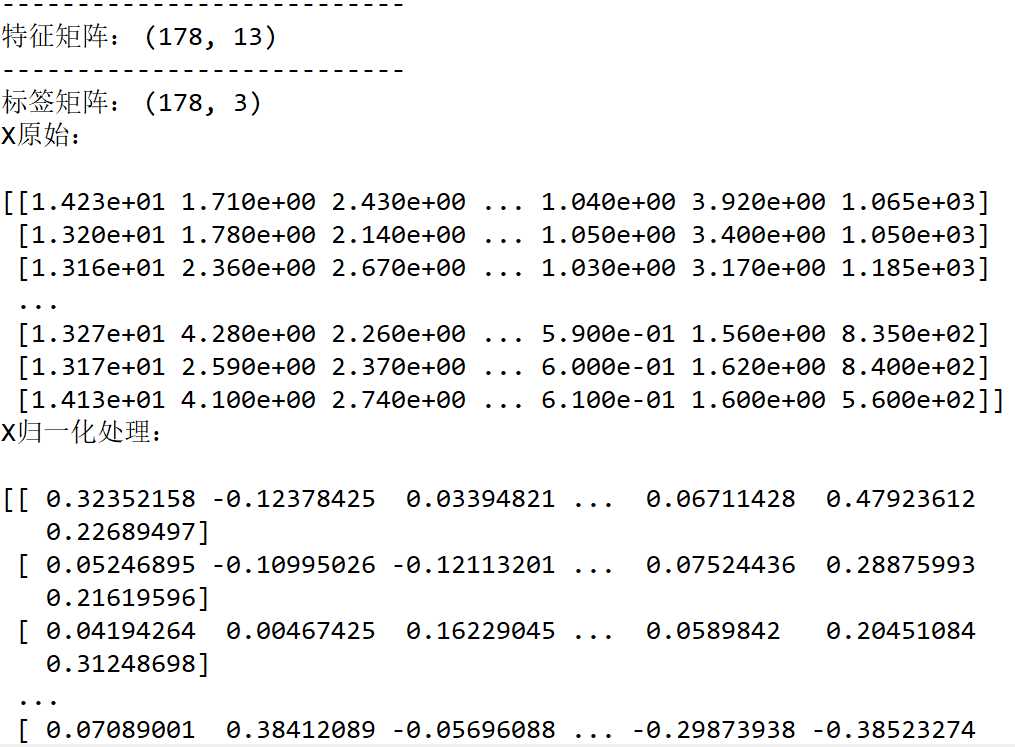
其中可以看到,在没有进行特征缩放的时候,数据间的范围差距过大,在进行归一化后数据间的范围差距明显缩小,并且所有的特征值均在-1到1之间
按照8:2比例,将数据划分为训练数据和测试数据;训练数据部分用来训练模型参数,测试部分用来验证模型效果。
下面的代码起到按照8:2比例随机分割数据的作用:
X_train, X_test, y_train, y_test = train_test_split(X, y, test_size=.2)
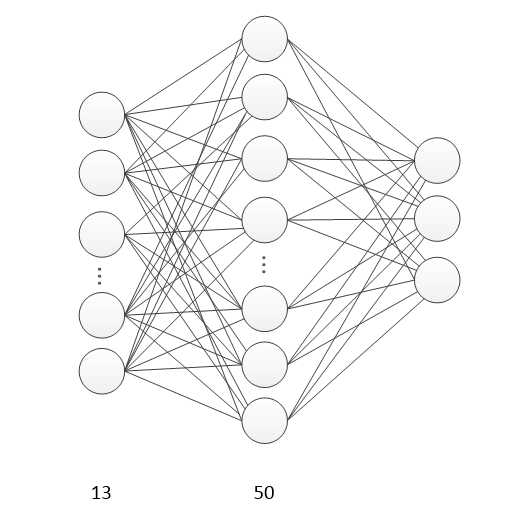
创建一个含有一个隐藏层的前馈神经网络,由于特征有13个,所以网络的输入节点有13个,添加一个隐藏层,使其含有50个节点,由于葡萄酒的种类有3种,故,网络有三个输出节点
相关参数:
隐藏层
l1 = add_layer(xs, 13, 50, ‘l1‘, activation_function=tf.nn.tanh)
输出层
prediction = add_layer(l1, 50, 3, ‘l2‘, activation_function=tf.nn.softmax)
设定学习率为0.5
train_step = tf.train.GradientDescentOptimizer(0.5).minimize(cross_entropy)
避免过拟合采用Dropout
sess.run(train_step, feed_dict={xs: X_train, ys: y_train, keep_prob: .5})
采用tensorboard绘制出整个神经网络的图结构

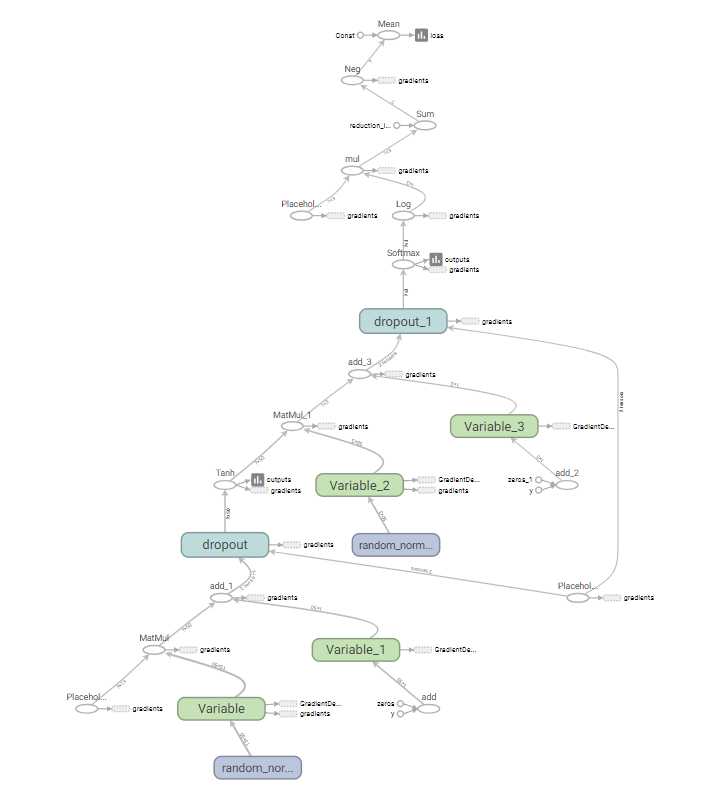
进入项目的目录,打开PowerShell,执行命令:python3 .\classify.py启动神经网络,在训练的过程中迭代1000次,并每50次输出一下此时的准确率
for i in range(1000):
    # 训练
    sess.run(train_step, feed_dict={xs: X_train, ys: y_train, keep_prob: .5})
    if i % 50 == 0:
        # 查看loss
        train_result = sess.run(merged, feed_dict={xs: X_train, ys: y_train, keep_prob: 1})
        test_result = sess.run(merged, feed_dict={xs: X_test, ys: y_test, keep_prob: 1})
        train_writer.add_summary(train_result, i)
        test_writer.add_summary(test_result, i)
        # 输出准确率
        print(compute_accuracy(X_test, y_test))
在训练的过程中迭代1000次中每50次输出一下此时的准确率
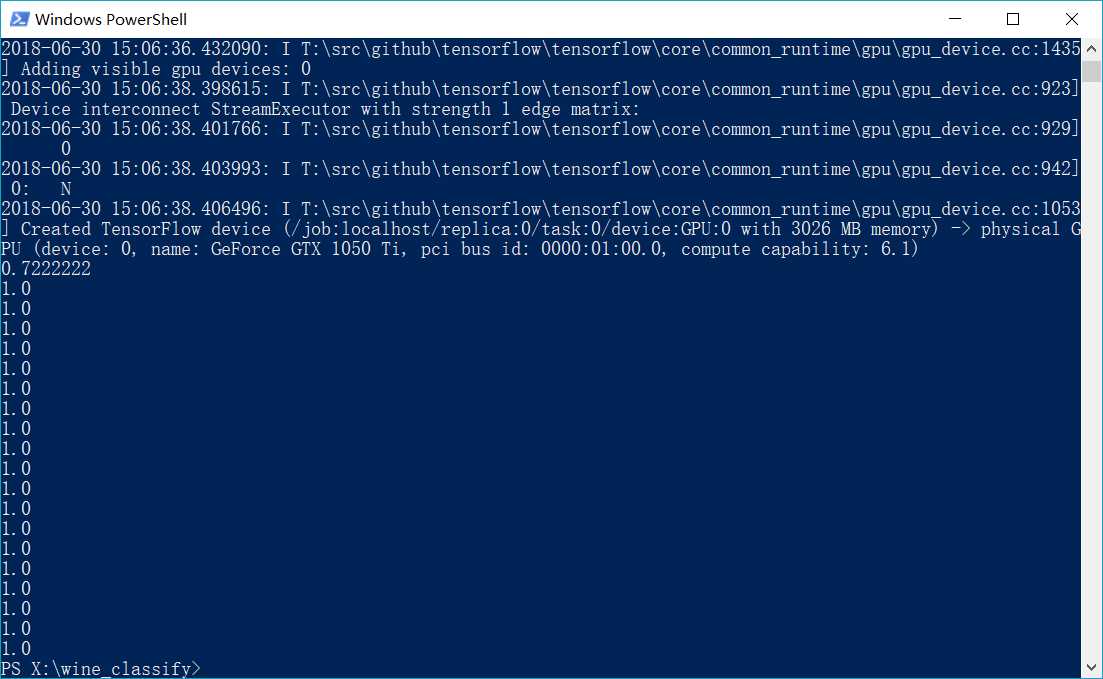
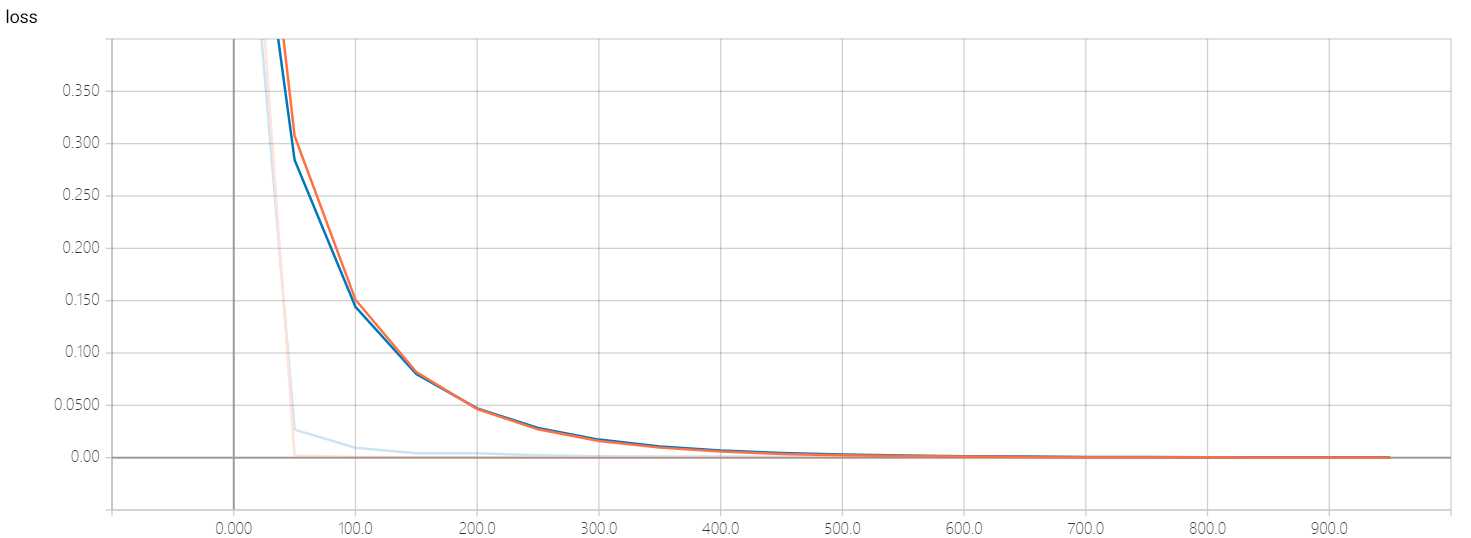
借助tensorboard,将训练过程可视化,在代码执行完毕后在项目目录中生成“logs”文件夹,可视化文件存在此处。
在项目目录中的PowerShell中执行命令tensorboard --logdir=‘logs‘得到可视化文件链接
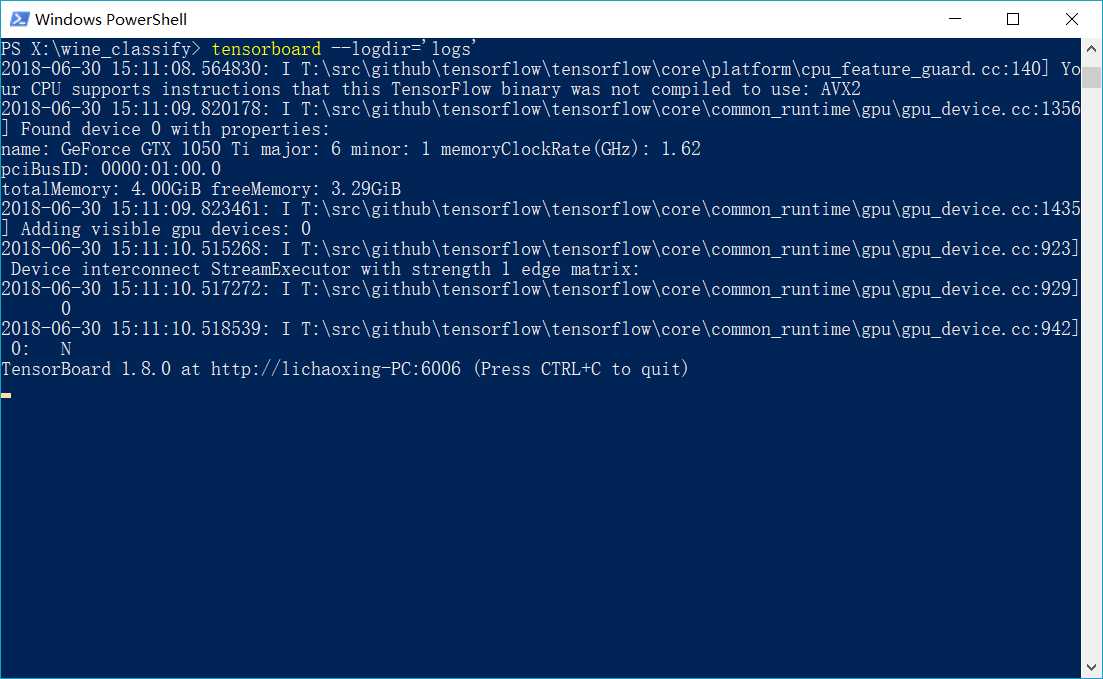
在浏览器中输入此网址(http://lichaoxing-PC:6006),可以得到详细的可视化图形
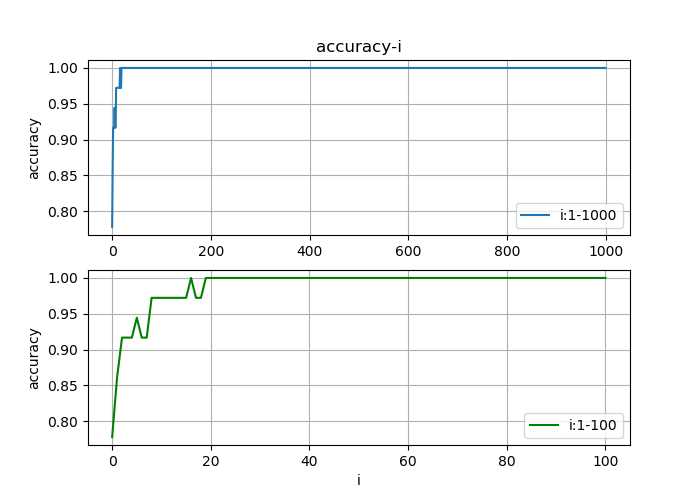
在测试的时候,绘制准确率与迭代次数(1000次)的函数图像;由于模型的收敛速度比较快,无法观察出收敛过程,于是可以在绘制一个迭代次数在0到100间的图像便于观察收敛过程
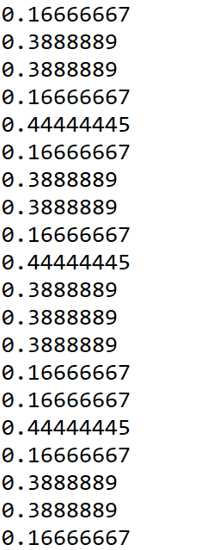
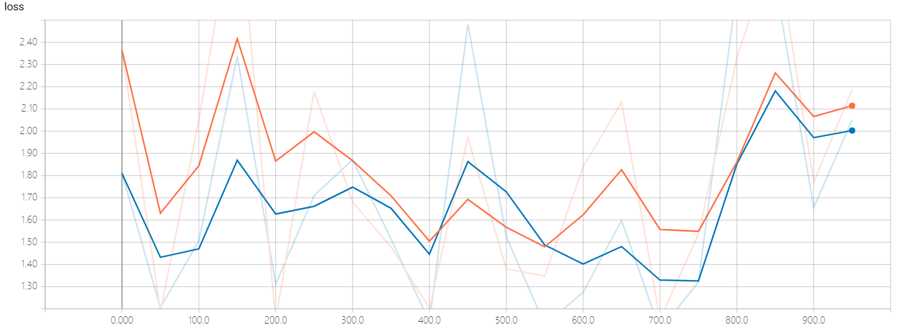
在搭建好神经网络模型后,直接将没有进行特征缩放的数据输入模型,结果发现模型收敛速度极慢,导致模型失效,测试输出的准确率非常低
观察loss函数图像,可以看出模型并没有收敛的趋势
解决此问题的办法就是进行特征缩放,可以参考:https://blog.csdn.net/u012328159/article/details/51030366
#coding:utf-8
import tensorflow as tf
from w_i_n_e import wine
import numpy as np
from sklearn.model_selection import train_test_split
from sklearn.preprocessing import LabelBinarizer
#import pylab as pl
from plot import plot_it

# 归一化方法
def Normalize(data):
    m = np.mean(data)
    mx = max(data)
    mn = min(data)
    return [(float(i) - m) / (mx - mn) for i in data]

# 加载数据
mywine = wine(‘./wine.all.txt‘)
X = mywine.data
# 特征缩放---归一化
for _ in range(13):
    X[:, _] = Normalize(X[:, _])
y = mywine.target
y = LabelBinarizer().fit_transform(y)
X_train, X_test, y_train, y_test = train_test_split(X, y, test_size=.2)

# add_layer
def add_layer(inputs, in_size, out_size, layer_name, activation_function=None, ):
    Weights = tf.Variable(tf.random_normal([in_size, out_size]))
    biases = tf.Variable(tf.zeros([1, out_size]) + 0.1, )
    Wx_plus_b = tf.matmul(inputs, Weights) + biases
    # dropout---消除过拟合
    Wx_plus_b = tf.nn.dropout(Wx_plus_b, keep_prob)
    if activation_function is None:
        outputs = Wx_plus_b
    else:
        outputs = activation_function(Wx_plus_b, )
    tf.summary.histogram(layer_name + ‘/outputs‘, outputs)
    return outputs
# 评估---准确率
def compute_accuracy(v_xs, v_ys):
    global prediction
    y_pre = sess.run(prediction, feed_dict={xs: v_xs, keep_prob: 1})
    correct_prediction = tf.equal(tf.argmax(y_pre,1), tf.argmax(v_ys,1))
    accuracy = tf.reduce_mean(tf.cast(correct_prediction, tf.float32))
    result = sess.run(accuracy, feed_dict={xs: v_xs, ys: v_ys, keep_prob: 1})
    return result

# 定义网络输入的占位符
keep_prob = tf.placeholder(tf.float32)
xs = tf.placeholder(tf.float32, [None, 13])
ys = tf.placeholder(tf.float32, [None, 3])

# 添加输出图层
l1 = add_layer(xs, 13, 50, ‘l1‘, activation_function=tf.nn.tanh)
prediction = add_layer(l1, 50, 3, ‘l2‘, activation_function=tf.nn.softmax)


# 损失函数---loss
cross_entropy = tf.reduce_mean(-tf.reduce_sum(ys * tf.log(prediction),
                                              reduction_indices=[1]))  # loss
tf.summary.scalar(‘loss‘, cross_entropy)
train_step = tf.train.GradientDescentOptimizer(0.5).minimize(cross_entropy)

sess = tf.Session()
merged = tf.summary.merge_all()
# summary
train_writer = tf.summary.FileWriter("logs/train", sess.graph)
test_writer = tf.summary.FileWriter("logs/test", sess.graph)

init = tf.global_variables_initializer()
sess.run(init)
A = []
I = []
for i in range(1000):
    # 训练
    sess.run(train_step, feed_dict={xs: X_train, ys: y_train, keep_prob: .5})
    if i % 50 == 0:
        # 查看loss
        train_result = sess.run(merged, feed_dict={xs: X_train, ys: y_train, keep_prob: 1})
        test_result = sess.run(merged, feed_dict={xs: X_test, ys: y_test, keep_prob: 1})
        train_writer.add_summary(train_result, i)
        test_writer.add_summary(test_result, i)
        # 输出准确率
        print(compute_accuracy(X_test, y_test))
    A.append(compute_accuracy(X_test, y_test))
    I.append(i)

plot_it(I, A)
#coding:utf-8
from numpy import *

# wine数据结构---读入数据到矩阵
class wine(object):

    data = zeros((178,13))
    target = zeros((178,1))
    def __init__(self, filename):
        self.filename = filename

        fl = open(self.filename, ‘r‘)
        lines = fl.readlines()
        row = 0
        for line in lines:
            list = line.strip(‘\n‘).split(‘,‘)
            wine.data[row:] = list[1:14]
            wine.target[row:] = list[0:1]
            row+=1
        fl.close()
#coding:utf-8

from w_i_n_e import wine
from sklearn.model_selection import train_test_split
from sklearn.preprocessing import LabelBinarizer
import numpy as np

mywine = wine(‘./wine.all.txt‘)
X = mywine.data
y = mywine.target
print(‘---------------------------‘)
print("特征矩阵:", X.shape)
print(‘---------------------------‘)
print("标签向量:", y.shape)
print(‘---------------------------‘)
print("y原始:\n", y)
y = LabelBinarizer().fit_transform(y)
print("y二进制化:\n", y)
X_train, X_test, y_train, y_test = train_test_split(X, y, test_size=.2)

print(‘---------------------------‘)
print("特征矩阵:", X.shape)
print(‘---------------------------‘)
print("标签矩阵:", y.shape)

def Normalize(data):
    m = np.mean(data)
    mx = max(data)
    mn = min(data)
    return [(float(i) - m) / (mx - mn) for i in data]

print("X原始:\n")
print(X)

for _ in range(13):
    X[:, _] = Normalize(X[:, _])
print("X归一化处理:\n")
print(X)
#coding:utf-8

import matplotlib.pyplot as plt

def plot_it(x, y):
    plt.figure(figsize=(7,5))
    plt.subplot(211)  #两行一列,第一个图
    plt.plot(x, y, lw = 1.5,label = ‘i:1-1000‘)
    plt.grid(True)
    plt.legend(loc = 0)
    plt.ylabel(‘accuracy‘)
    plt.title(‘accuracy-i‘)


    plt.subplot(212) #两行一列.第二个图
    plt.plot(x[0: 101], y[0: 101],‘g‘, lw = 1.5, label = ‘i:1-100‘)
    plt.grid(True)
    plt.legend(loc = 0)
    plt.xlabel(‘i‘)
    plt.ylabel(‘accuracy‘)
    plt.show()
#启动
python3 classify.py

#tensorboard
tensorboard --logdir=‘logs‘
本节完......
前馈神经网络练习:使用tensorflow进行葡萄酒种类识别
标签:one .so size data rsh 标签 .sh selection plt
原文地址:https://www.cnblogs.com/xinglichao/p/9246008.html