标签:Stub 自己 模块 图片 file amp 测试 .sh 工具
nginx-fastdfs搭建
00-预备工具包:
(1)安装fastdfs所需的软件包:
libevent-2.1.8-stable.tar.gz
(2)安装Nginx所需的软件包:(3)最少准备6台虚拟机:

01-安装fastdfs:
(1) libfastcommon-1.0.38.tar.gz安装
$ tar xzvf libfastcommon-1.0.38.tar.gz
$ cd libfastcommon-1.0.38
$ sudo ./make.sh
(2) fastdfs-5.11.tar.gz 安装
$ tar xzvf fastdfs-5.11.tar.gz
$ cd fastdfs-5.11
$ ./make.sh
$ sudo ./make.sh install
(3) 配置tracker
192.168.189.128, 192.168.189.130
$ cd /etc/fdfs
client.conf.sample  storage.conf.sample  storage_ids.conf.sample  tracker.conf.sample

$ sudo su
# cp tracker.conf.sample tracker.conf
# vim tracker.conf
修改tracker.conf:base_path=/home/sunpan/fastdfs/tracker 修改到前建立好的文件路径。
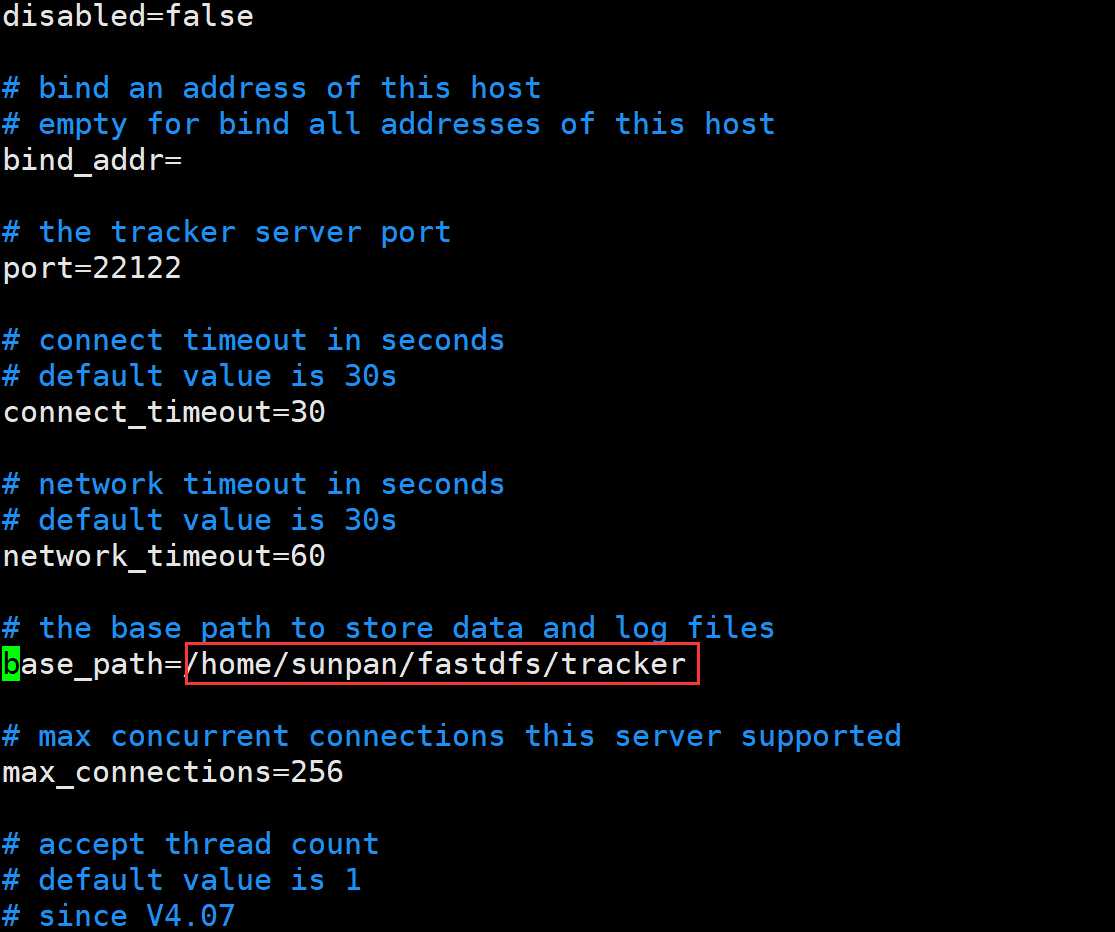
启动 fastdfs
# /etc/init.d/fdfs_trackerd start(4) 配置tracker
$ cd /etc/fdfs
client.conf.sample  storage.conf.sample  storage_ids.conf.sample  tracker.conf.sample

$ sudo su
# cp storage.conf.sample storage.conf
# vim storage.conf
修改storage.conf:group_name(本文设置两组,group1或者group2) tacker_server (前面配置的tracker的IP和端口号) base_path store_path0 ( 这两个路径设置为早已经建立的路径)
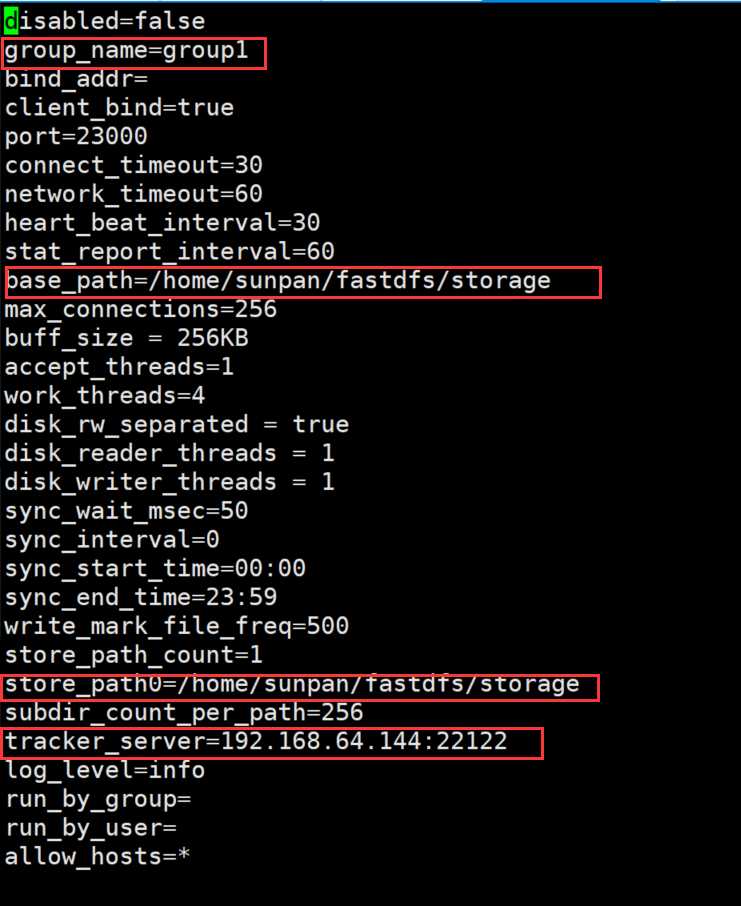
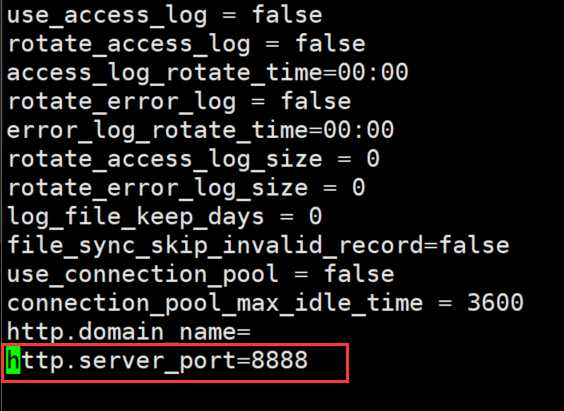
启动storage的fdfs:
# /etc/init.d/fdfs_storaged start
02-安装Nginx和fastdfs-nginx-module
** 一定要记得安装 gcc编译依赖环境 **
(1)openssl安装
[root@localhost src]# tar zxvf openssl-1.1.0g.tar.gz
省略安装内容...
[root@localhost src]# cd openssl-1.1.0g
[root@localhost openssl-1.1.0g]# ./config && make && make install
省略安装内容...
(2)pcre安装
[root@localhost src]# tar zxvf pcre-8.41.tar.gz
省略安装内容...
[root@localhost src]# cd pcre-8.41
[root@localhost pcre-8.41]# ./configure && make && make install
省略安装内容...
(3)zlib安装
[root@localhost src]# tar zxvf zlib-1.2.11.tar.gz
省略安装内容...
[root@localhost src]# cd zlib-1.2.11
[root@localhost zlib-1.2.11]# ./configure && make && make install
省略安装内容...
(4)nginx安装
[root@localhost src]# tar zxvf nginx-1.13.7.tar.gz
省略安装内容...
[root@localhost src]# cd nginx-1.13.7
[root@localhost nginx-1.13.7]# ./configure --prefix=/usr/local/nginx --with-http_realip_module --with-http_addition_module --with-http_gzip_static_module --with-http_secure_link_module --with-http_stub_status_module --with-stream --with-pcre=/home/sunpan/works/fastdfs/packet/nginx/pcre-8.41/build --with-zlib=/home/sunpan/works/fastdfs/packet/nginx/zlib-1.2.11/build --with-openssl=/home/sunpan/works/fastdfs/packet/nginx/openssl-1.1.0g/build --add-module=/home/sunpan/works/fastdfs/packet/fastdfs-nginx-module-1.20/src/
zlib openssl pcre等编译的文件路径,如果已经make install ,则可以不with上该路径。
直接configure,会出现错误:

此时,需要修改 /home/sunpan/works/fastdfs/packet/fastdfs-nginx-module-1.20/src/里的config文件里:
ngx_module_incs

configure之后就是编译和安装:
make && make install (其实直接make install就行了)(5)配置Nginx和fastdfs模块
复制fastdfs-nginx-module里的mod_fastdfs.conf(/home/sunpan/works/fastdfs/packet/fastdfs-nginx-module-1.20/src/mod_fastdfs.conf)文件到/etc/fdfs/并配置修改对应路径名。
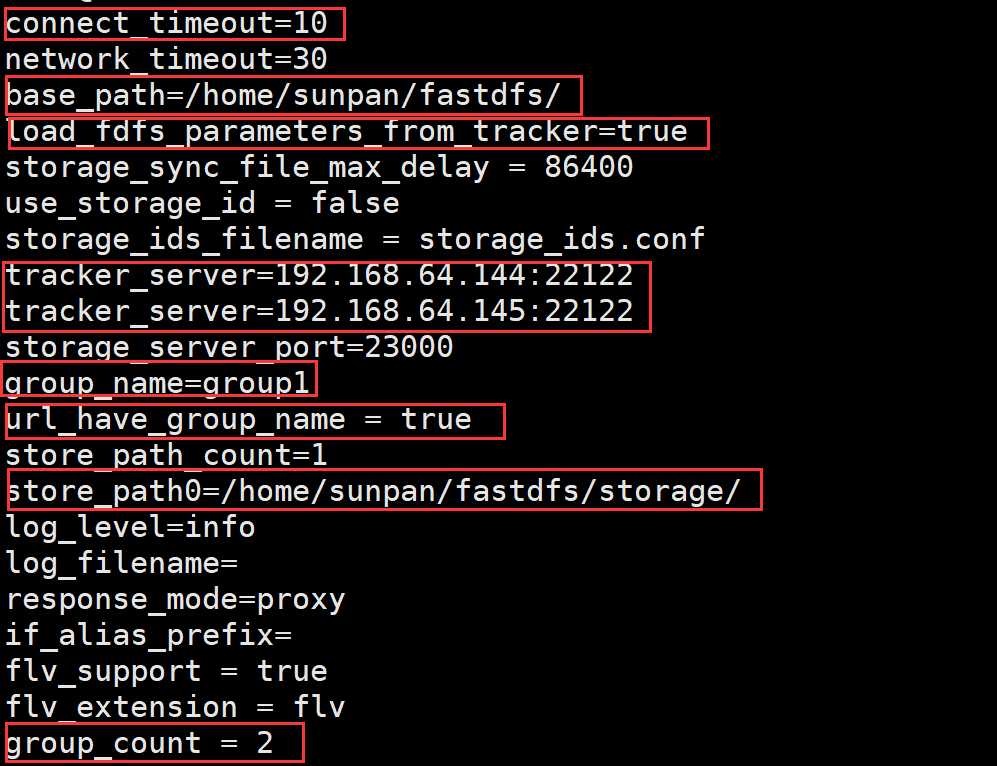
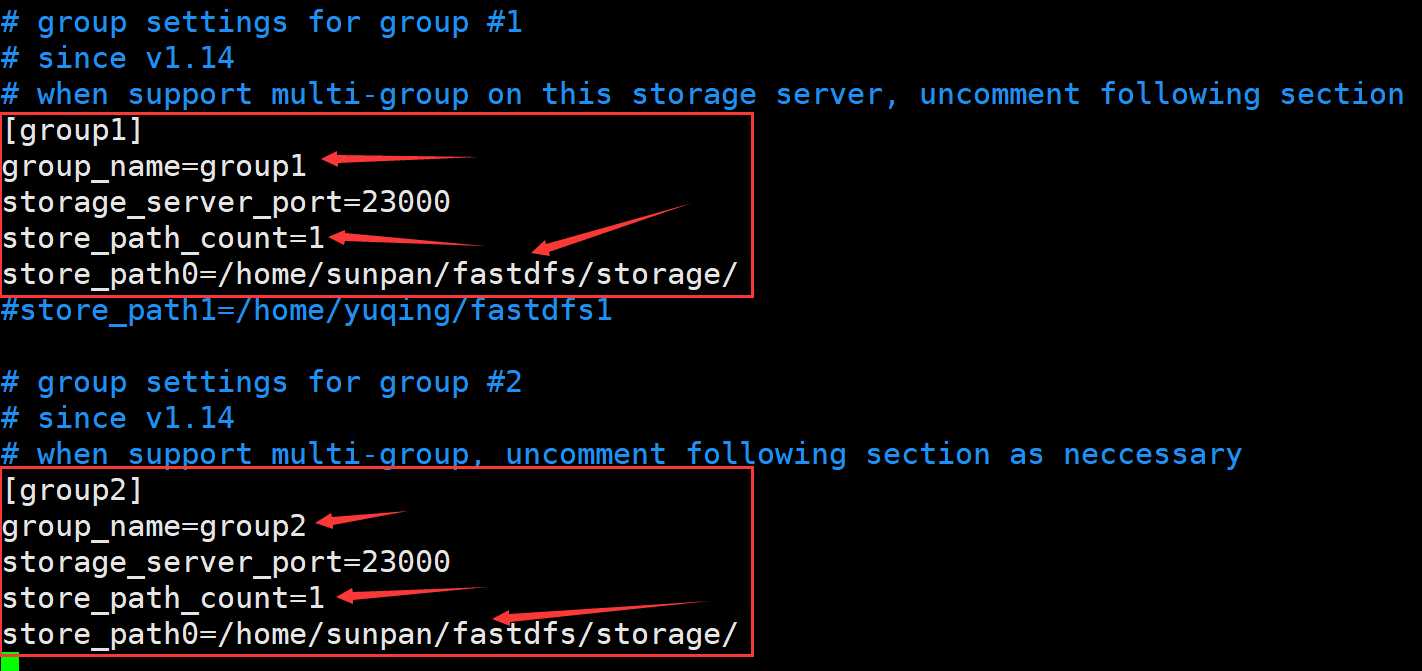
复制fastdfs的http.conf mime.types到/etc/fdfs/
cd /home/sunpan/works/fastdfs/fastdfs-5.11/conf
cp http.conf /etc/fdfs
cp mime.types /etc/fdfs
修改http.conf
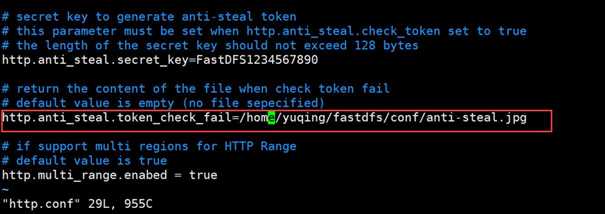
修改Nginx配置文件:/usr/local/nginx/conf/nginx
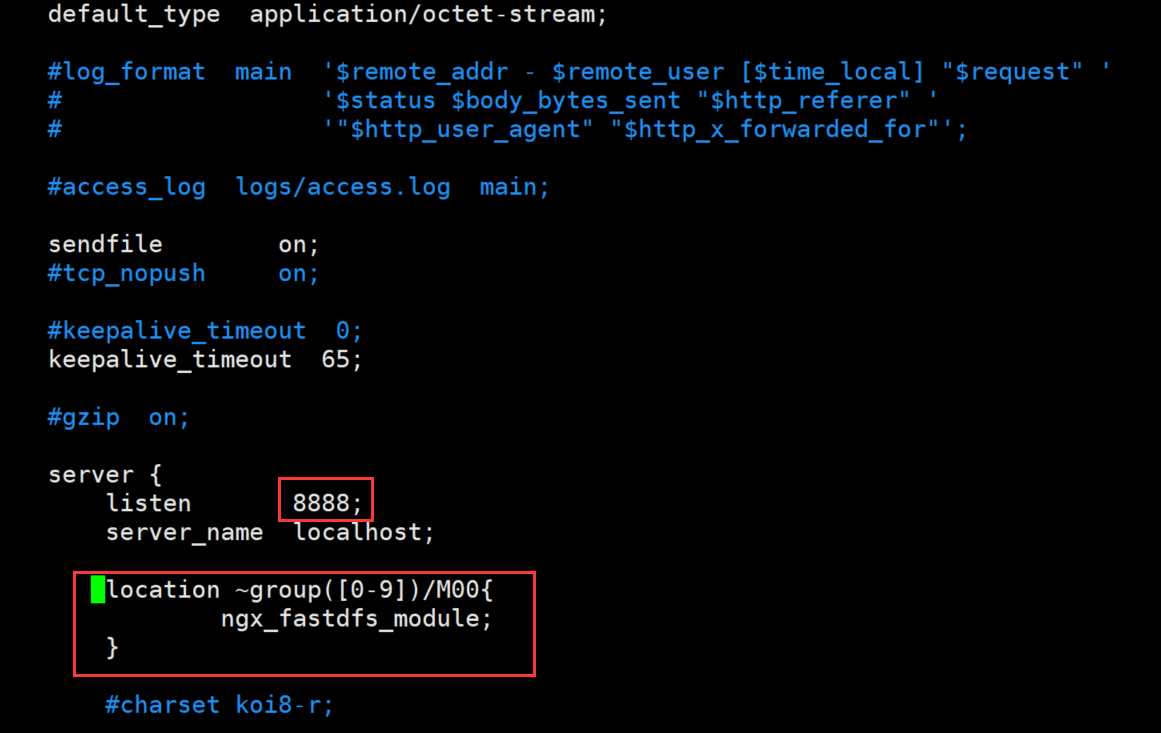
修改端口号为前面storage服务器的对应的端口号。
添加location映射。
(5)启动Nginx
/usr/local/nginx/sbin/nginx -c ./conf/nginx.conf03-测试上传文件
使用fastdfs自带的客户端或者自己编写客户端都可以。
这里使用fastdfs自带的客户端,配置好client.conf就就可以直接上传文件了。
fdfs_upload_file /etc/fdfs/client.conf image.jpg
上传成功!
可以取访问了,使用storage服务器的ip地址就可以直接在浏览器访问该图片了。

标签:Stub 自己 模块 图片 file amp 测试 .sh 工具
原文地址:https://www.cnblogs.com/sunpan822/p/9397076.html