标签:length httpd 触发器 .gz 格式 enable hang ESS usr
zabbix3.2.1
[root@centos7-2 ~]#
[root@centos7-2 ~]# hostname -I
10.0.0.10 172.16.1.10
[root@centos7-2 ~]# cat /etc/redhat-release
CentOS Linux release 7.2.1511 (Core)
[root@centos7-2 ~]# uname -r
3.10.0-327.el7.x86_64
[root@centos7-2 ~]# uname -m
x86_64
[root@centos7-2 ~]#
rpm -ivh http://repo.zabbix.com/zabbix/3.2/rhel/7/x86_64/zabbix-release-3.2-1.el7.noarch.rpm
# 安装zabbix,httpd,php
yum install -y zabbix-server-mysql zabbix-web-mysql
# 安装mariadb
yum -y install mariadb-server
systemctl start mariadb.service
# 创建数据库,权限
mysql
create database zabbix character set utf8 collate utf8_bin;
grant all privileges on zabbix.* to zabbix@localhost identified by ‘zabbix‘;
exit
# 导入数据库sql文件
zcat /usr/share/doc/zabbix-server-mysql-3.2.11/create.sql.gz|mysql -uzabbix -pzabbix zabbix
# 配置zabbix Server连接mysql
sed -i.ori ‘115a DBPassword=zabbix‘ /etc/zabbix/zabbix_server.conf
# 修改apache-php配置时区
sed -i.ori ‘18a php_value date.timezone Asia/Shanghai‘ /etc/httpd/conf.d/zabbix.conf
#启动并加入开机自启动
systemctl start zabbix-server
systemctl start httpd
systemctl enable zabbix-server.service httpd.service mariadb.service
# 只能在服务端操作,-s执行相应客户端IP 用来获取agent的相关信息
yum install zabbix-get -y
zabbix_get -s 172.16.1.11 -p 10050 -k "system.cpu.load[all,avg1]"
==================================================================
#配置 rpm
rpm -ivh http://repo.zabbix.com/zabbix/3.2/rhel/7/x86_64/zabbix-release-3.2-1.el7.noarch.rpm
#暗转zabbix-agent
yum install zabbix-agent -y
#修改zabbix-server的ip
sed -i.ori ‘s#Server=127.0.0.1#Server=172.16.1.10#‘ /etc/zabbix/zabbix_agentd.conf
#开机启动&自启动
systemctl start zabbix-agent.service
systemctl enable zabbix-agent
#编写自定义监控脚本
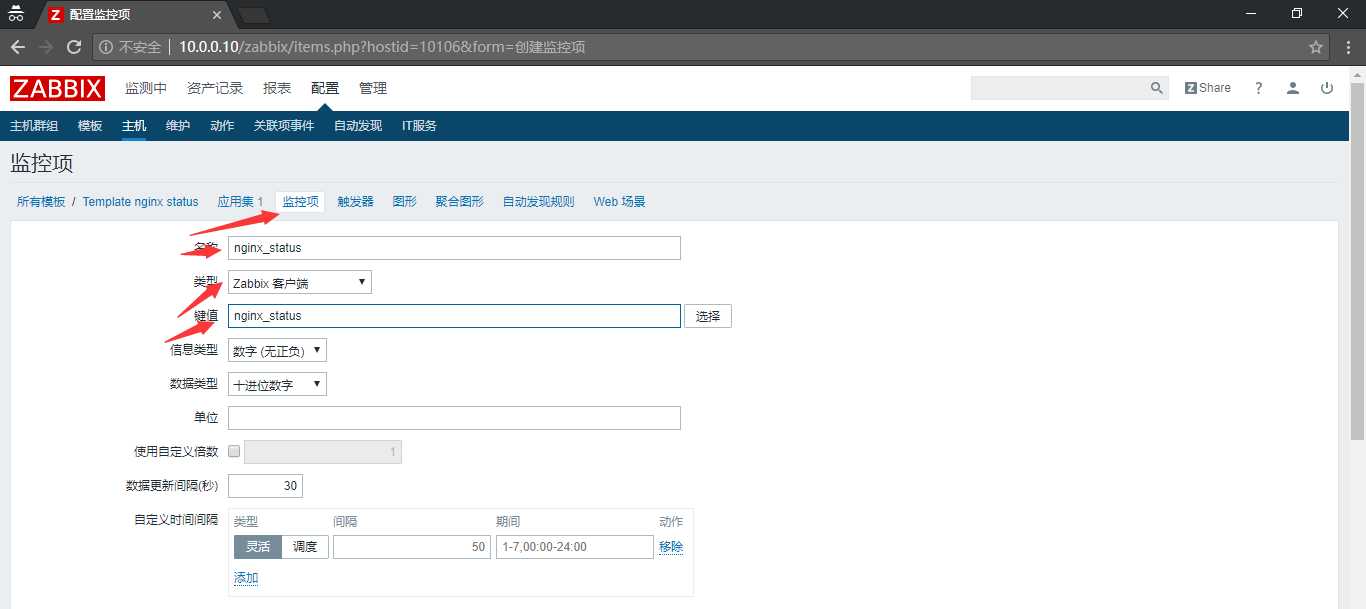
echo "UserParameter=nginx_status,who |wc -l" > /etc/zabbix/zabbix_agentd.d/userparameter_nginx.statu.conf
systemctl restart zabbix-agent.service
服务端测试命令
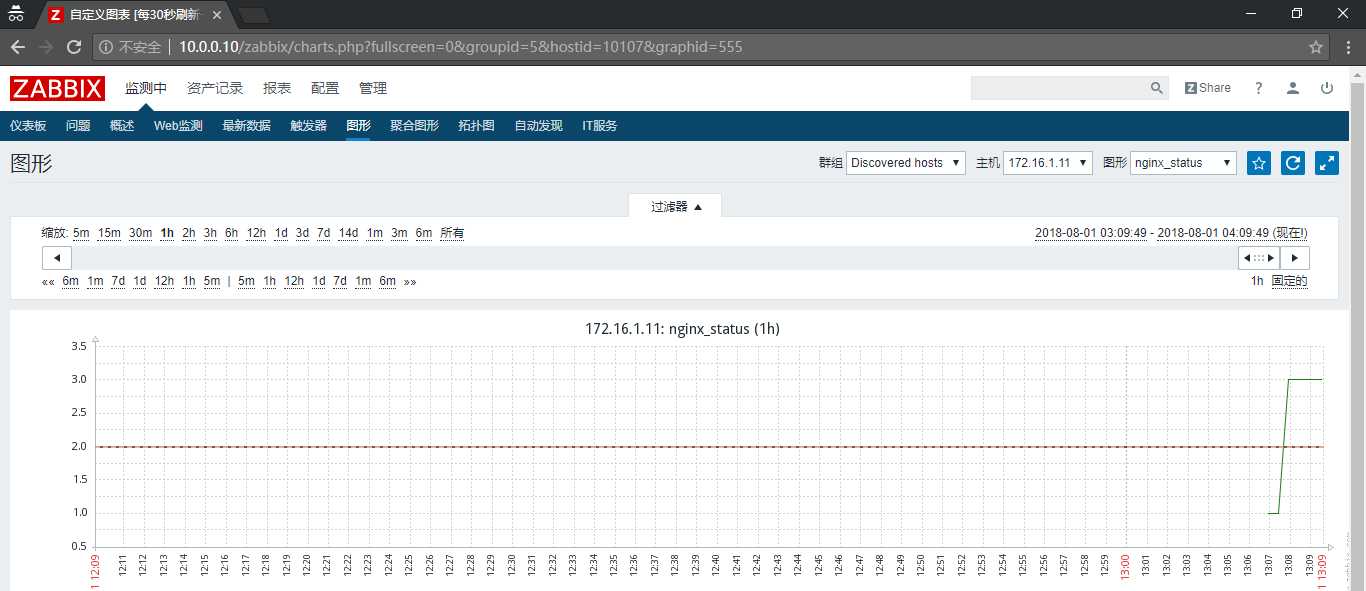
zabbix_get -s 172.16.1.11 -p 10050 -k "nginx_status"
2
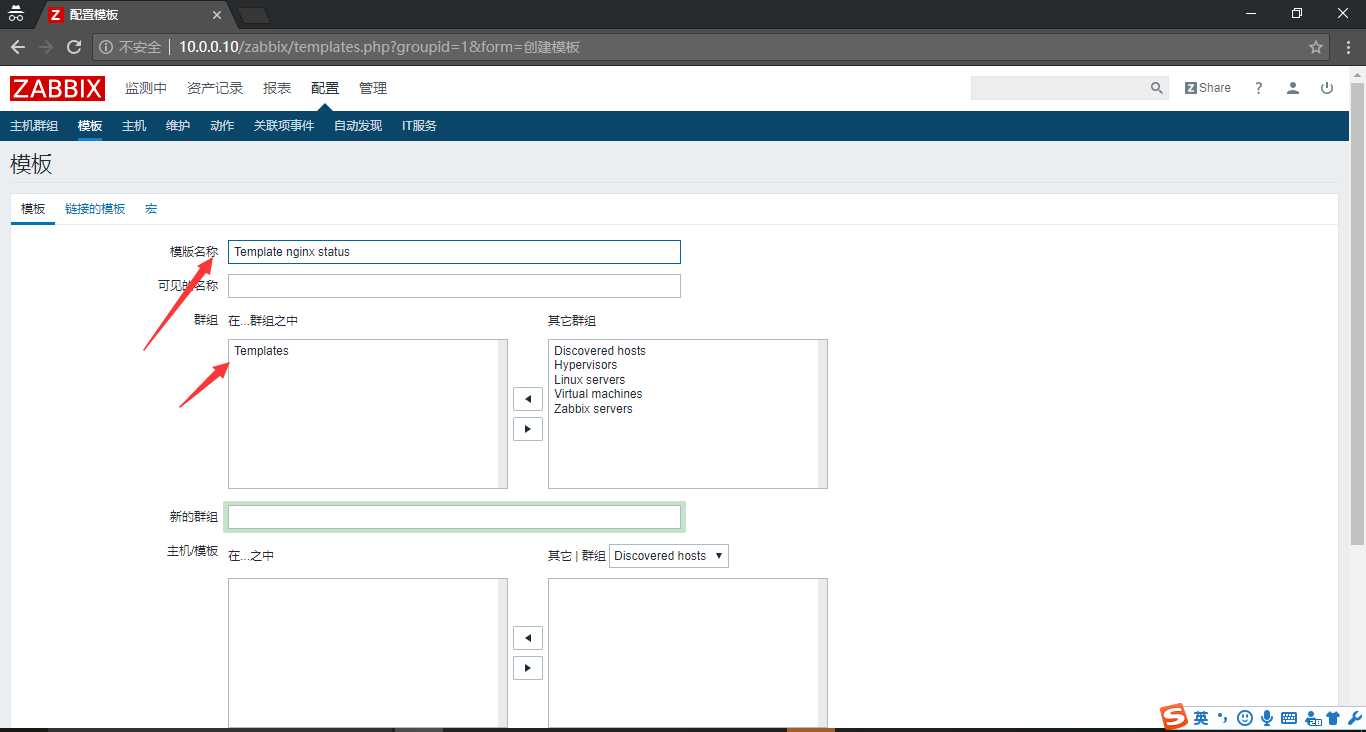
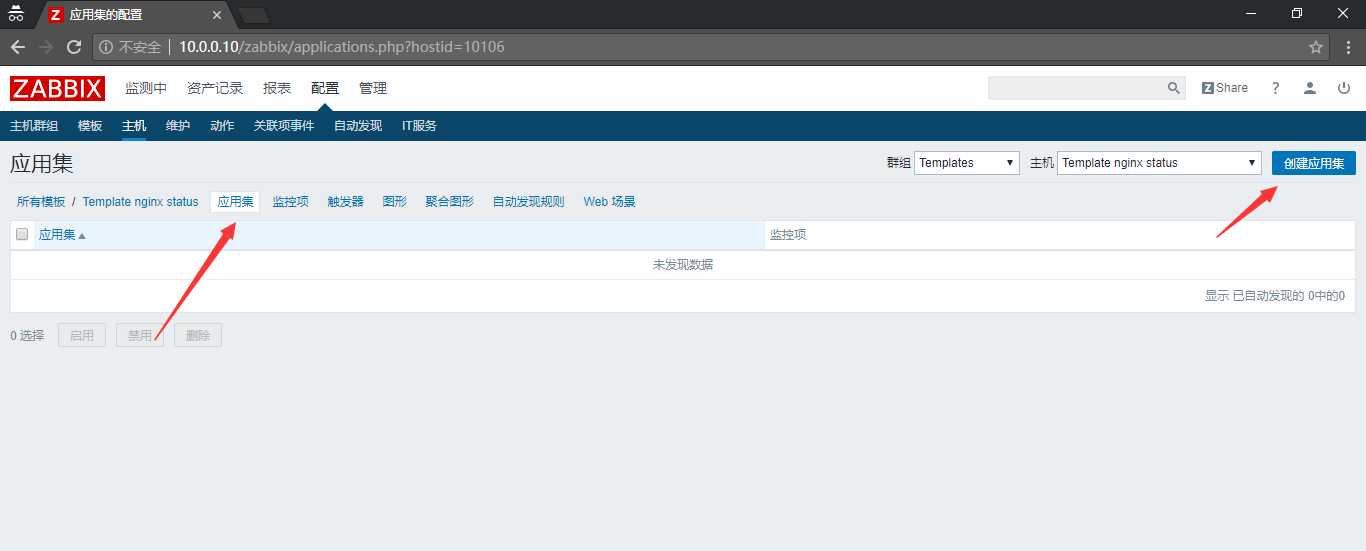
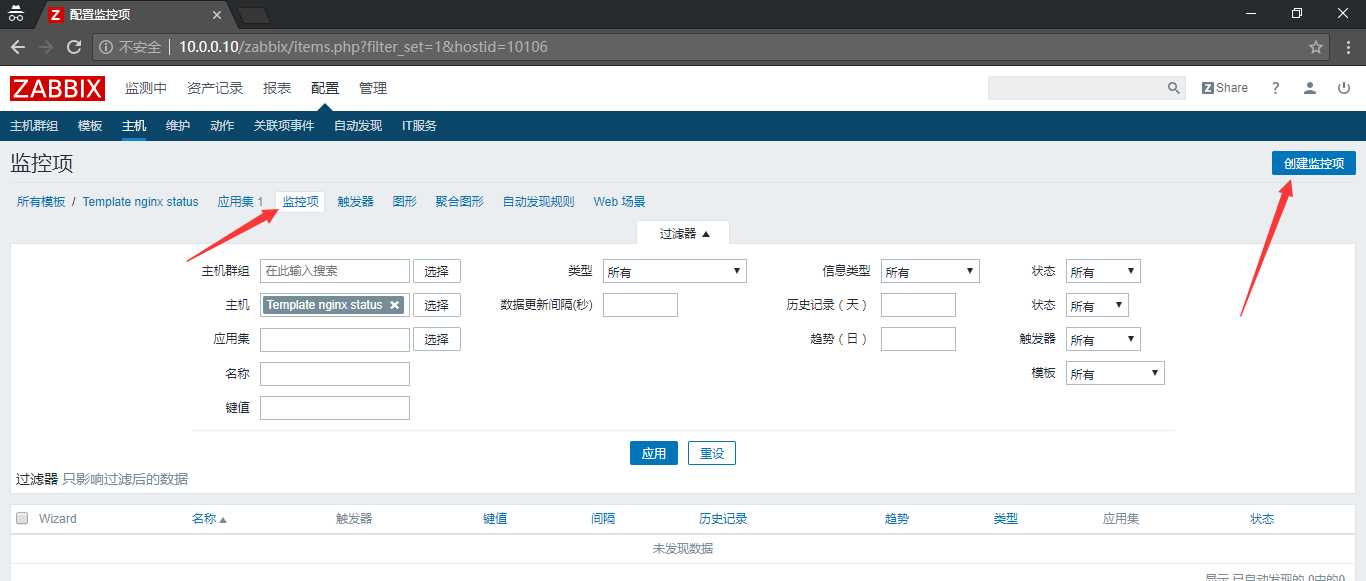
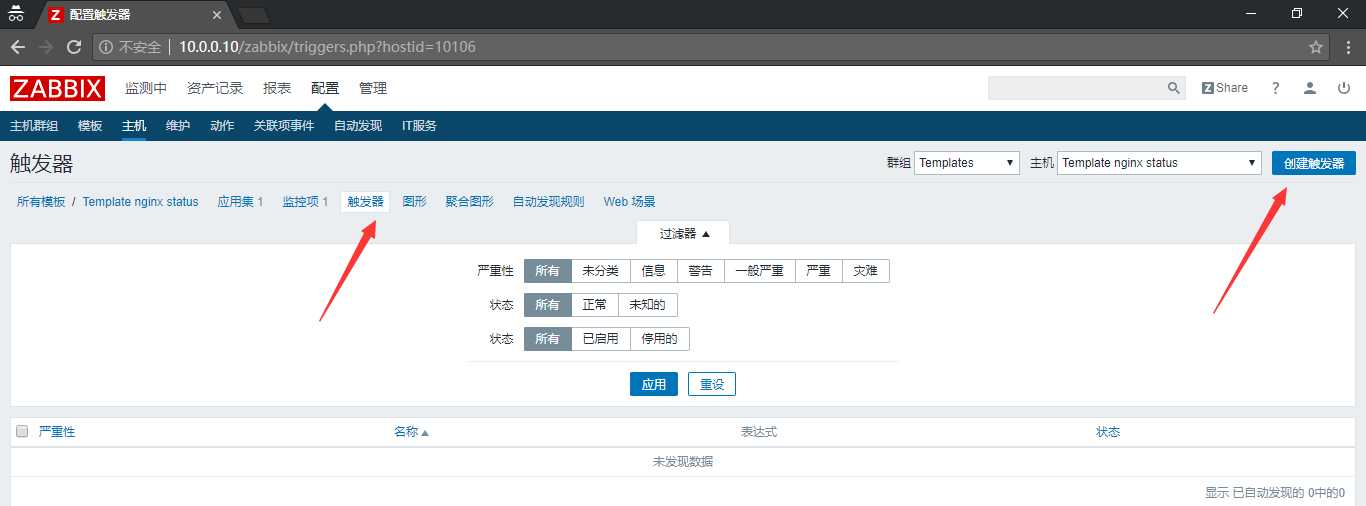
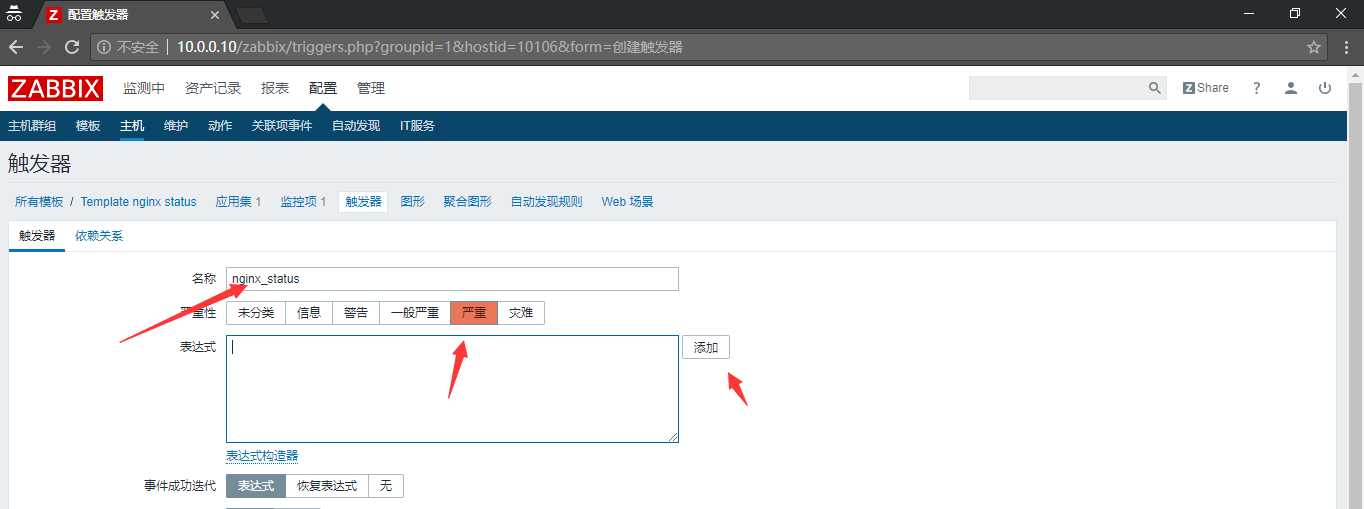
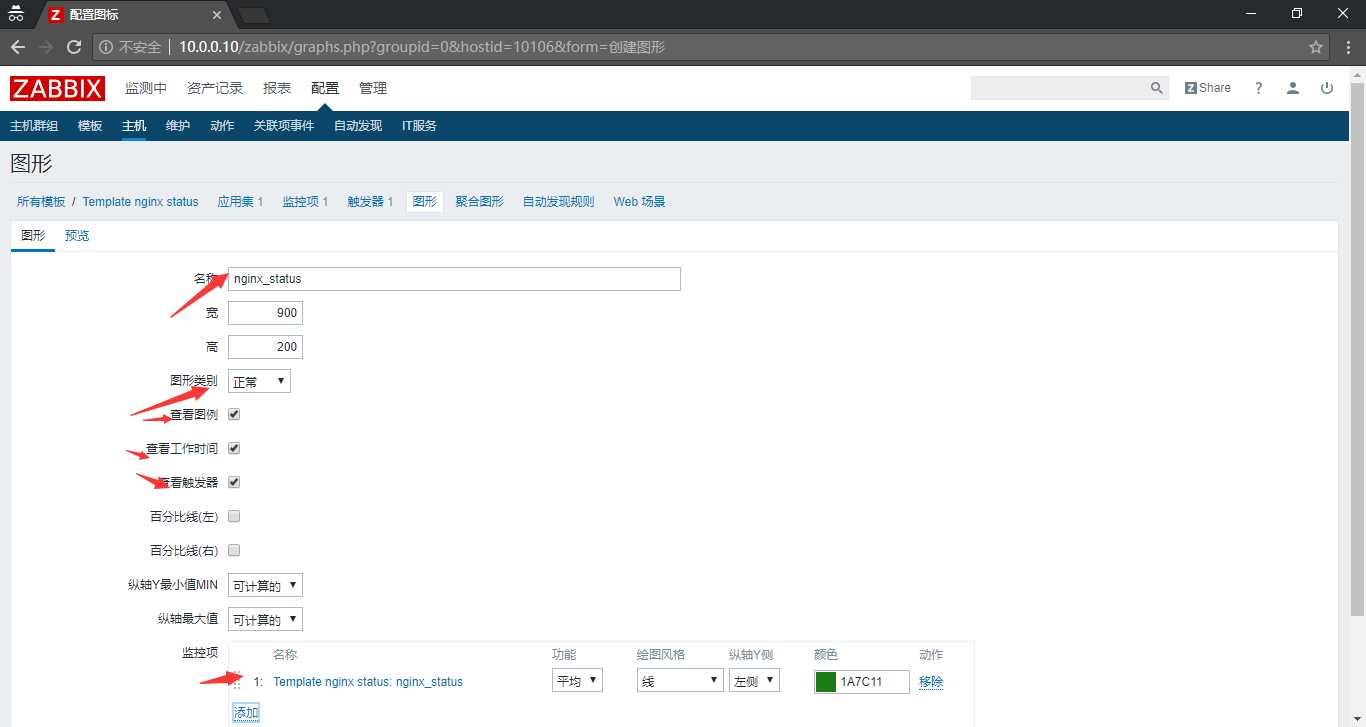
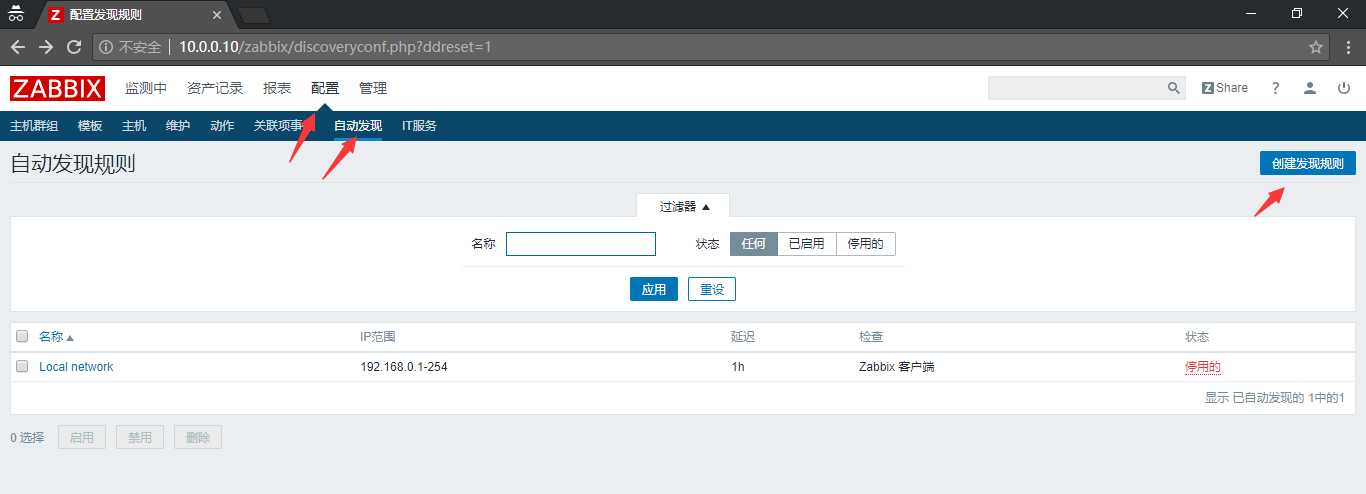
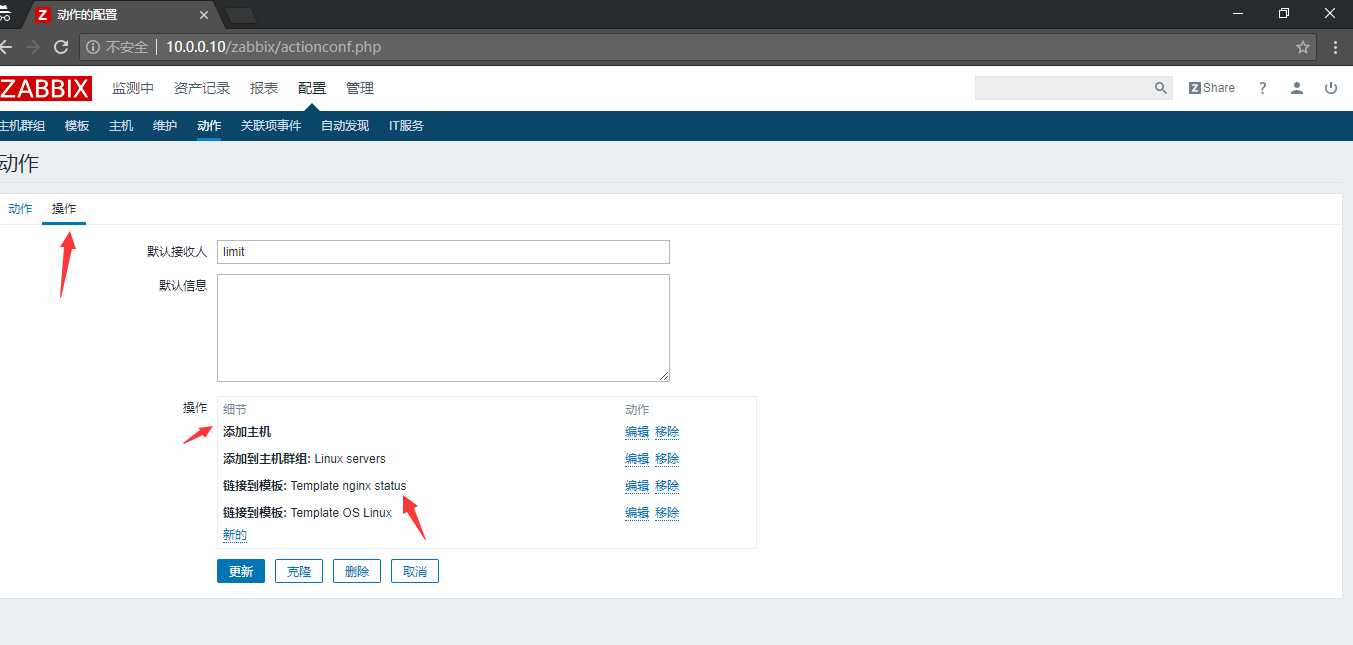
这里暂时选用一下zabbix3.4的配置界面。
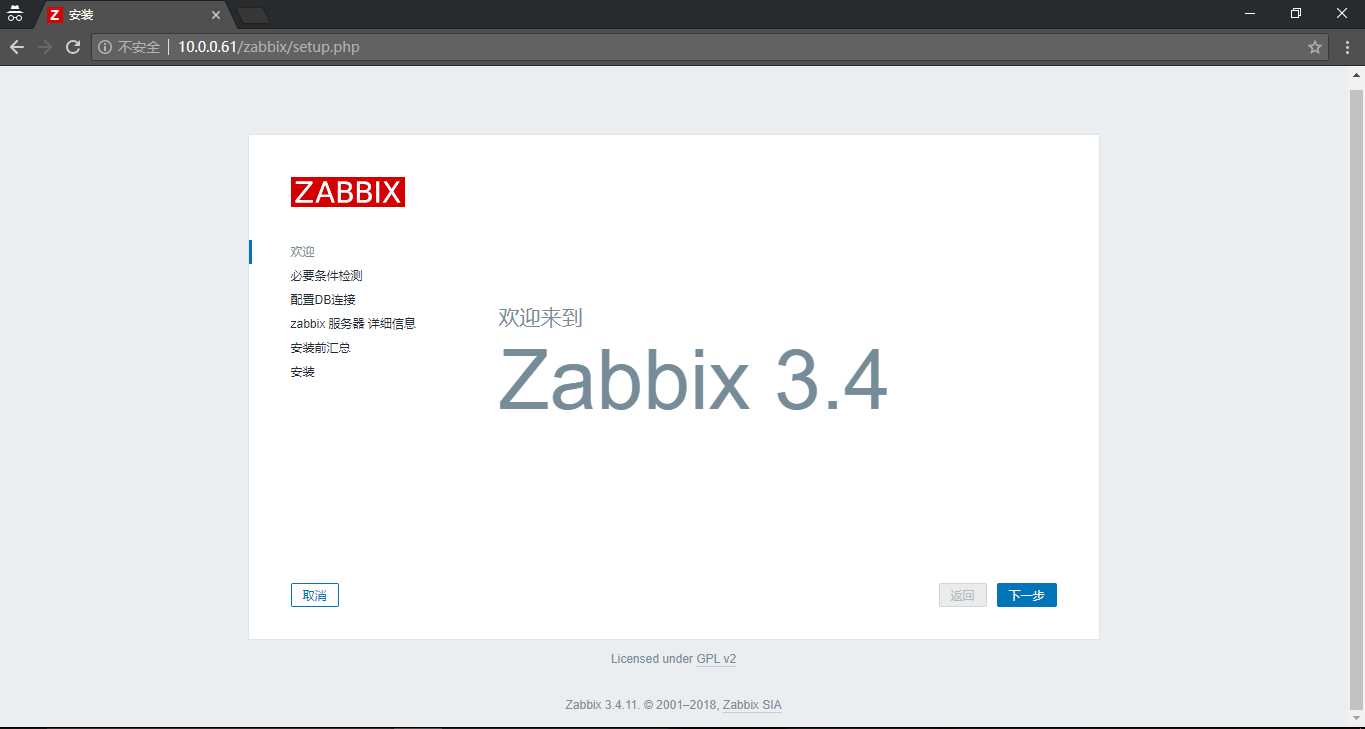
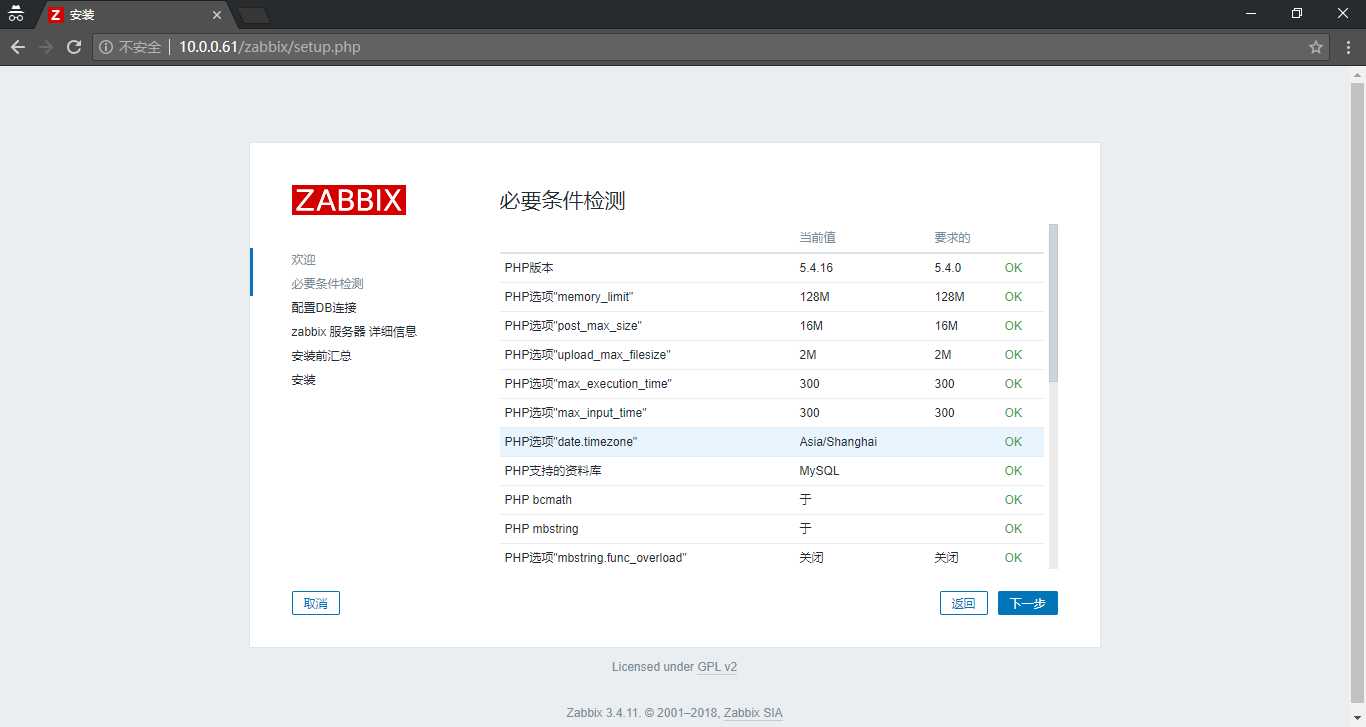
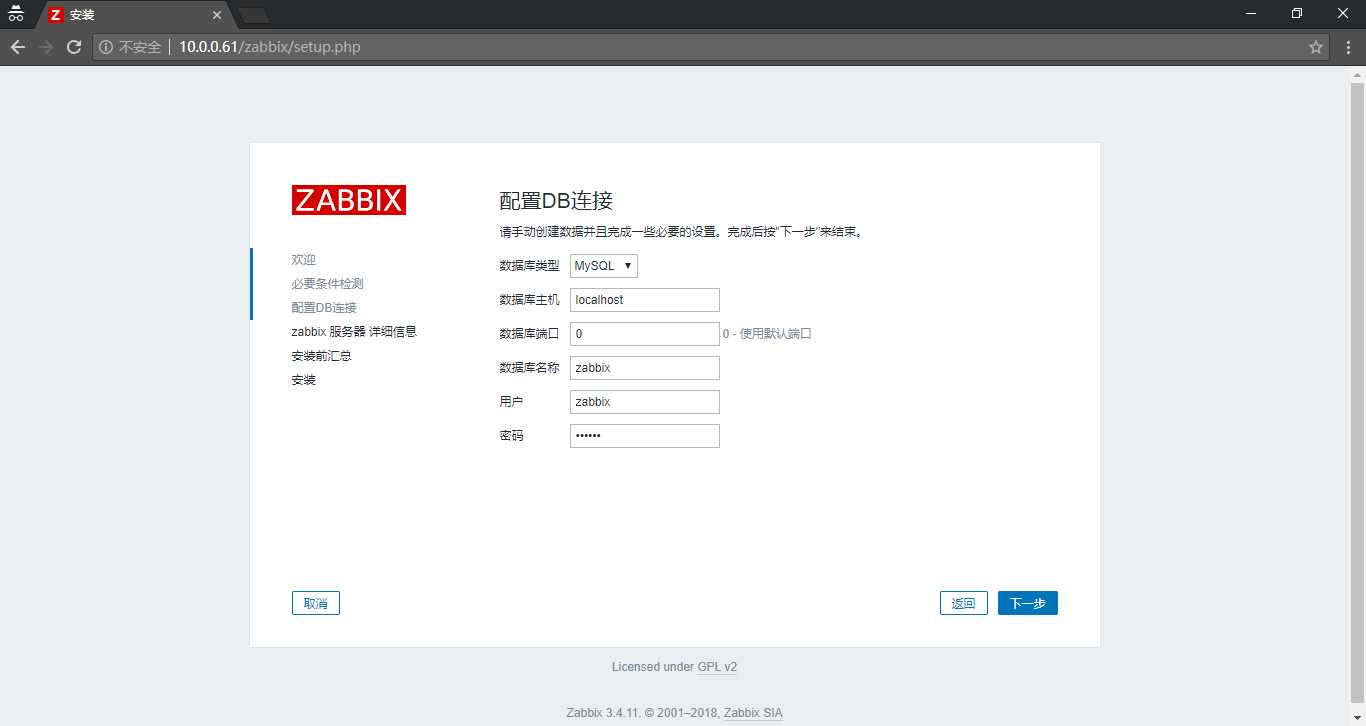
此处没用使用ip地址,是因为数据库中只是授权localhost。
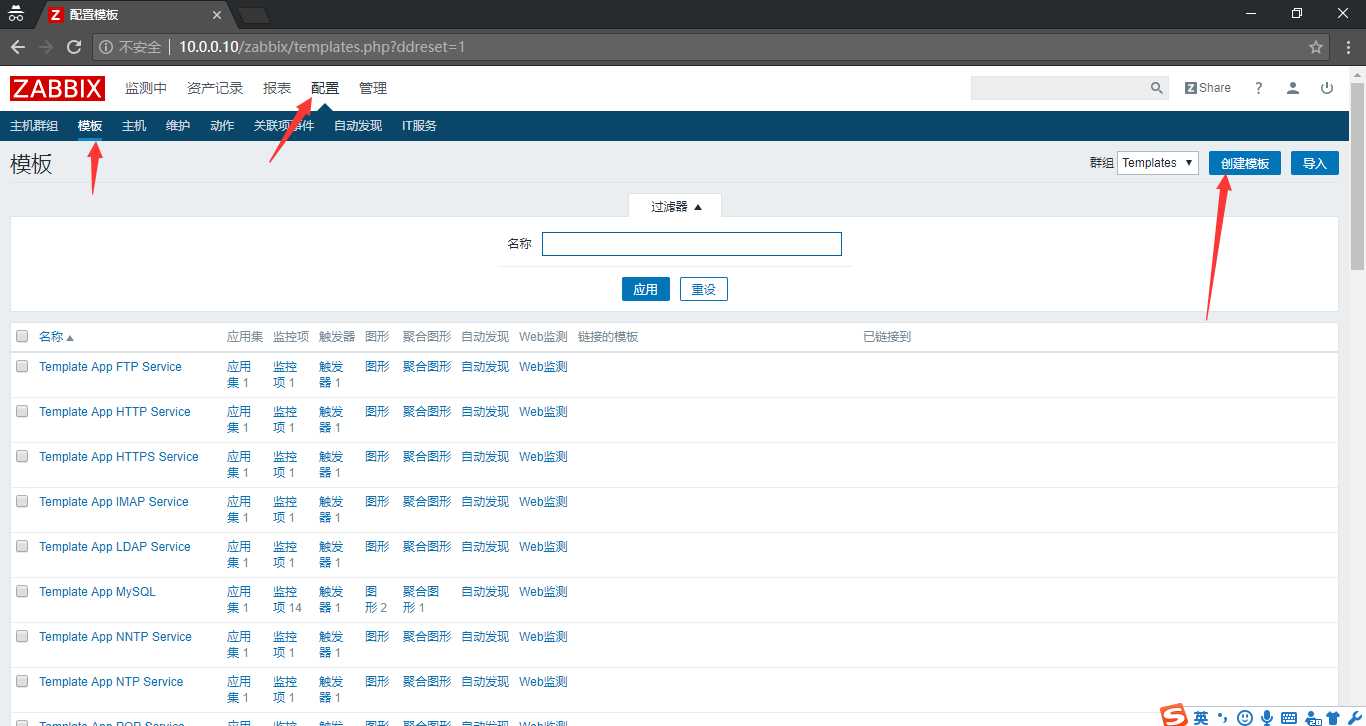



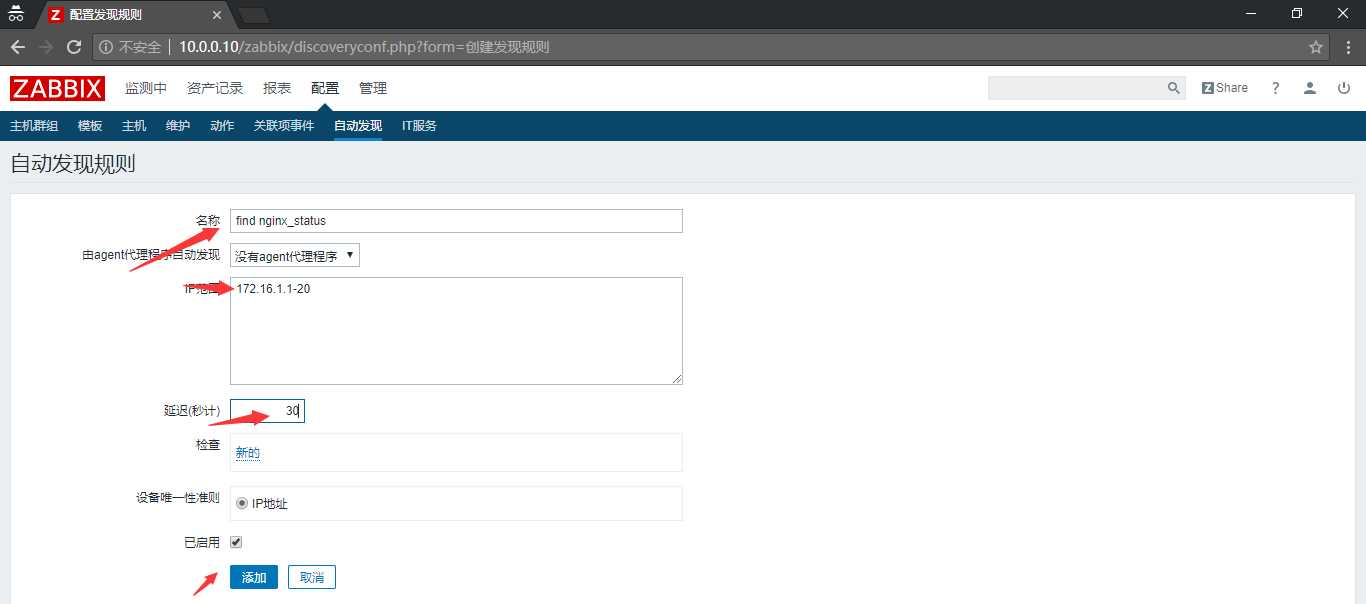
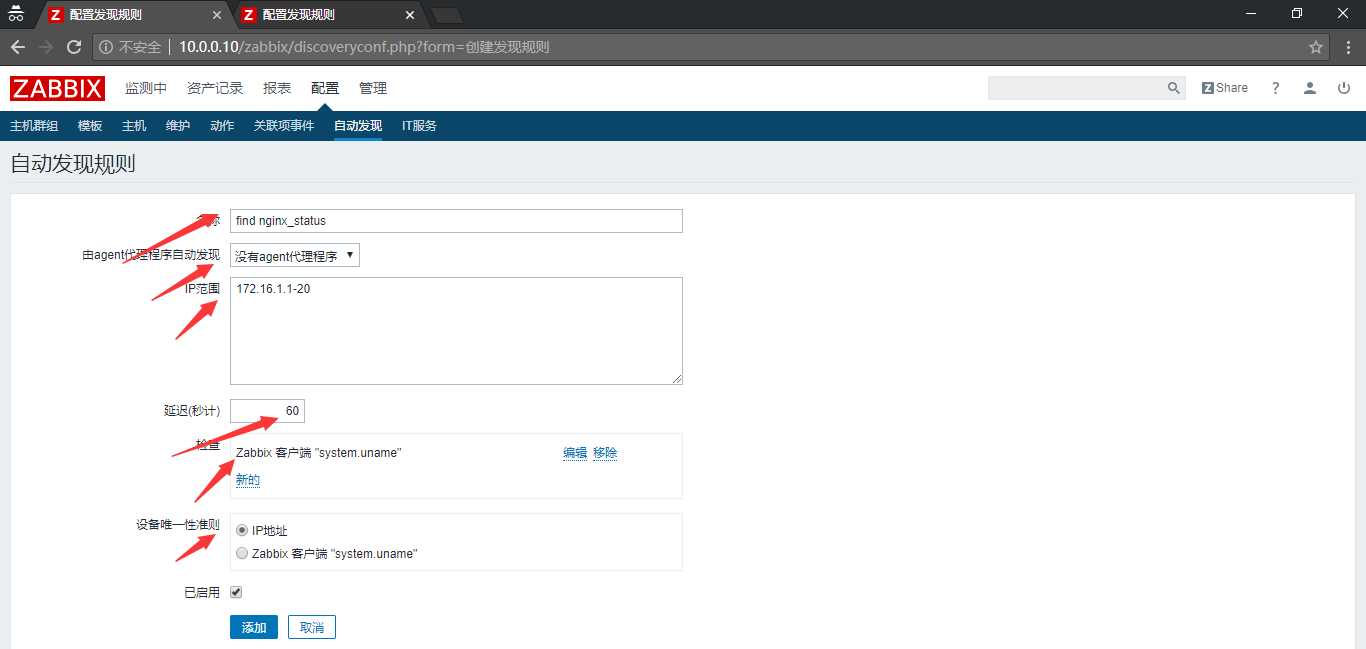
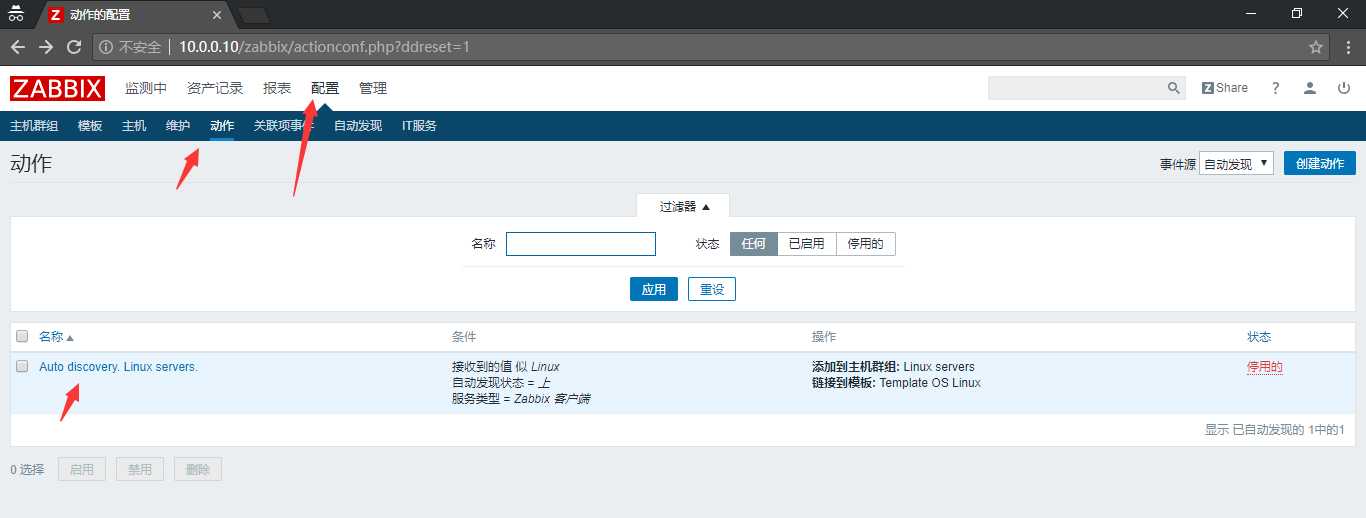
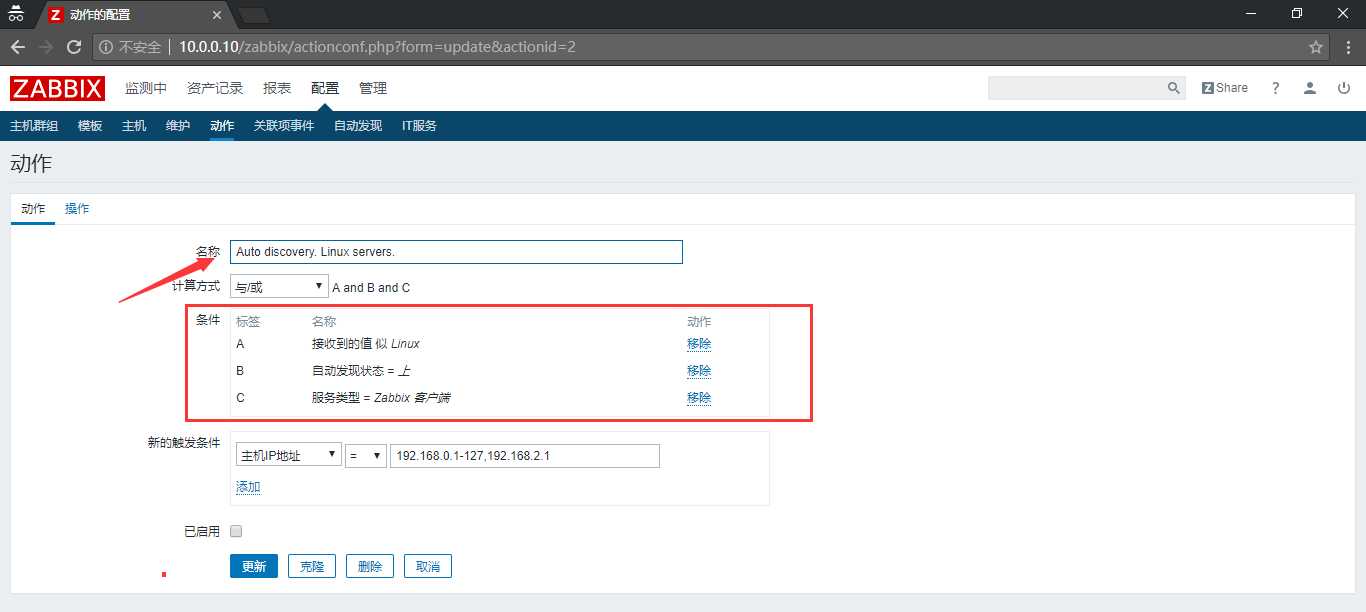
#JSON格式的脚本
[root@zabbix-agent2 ~]# cat /etc/zabbix/script/discovery.sh
#!/bin/bash
portarray=(`netstat -tnlp|egrep -i "$1"|awk {‘print $4‘}|awk -F‘:‘ ‘{if ($NF~/^[0-9]*$/) print $NF}‘|sort|uniq`)
#namearray=(`netstat -tnlp|egrep -i "$1"|awk {‘print $7‘}|awk -F‘/‘ ‘{if ($NF != "Address") print $NF}‘|uniq`)
length=${#portarray[@]}
printf "{\n"
printf ‘\t‘"\"data\":["
for ((i=0;i<$length;i++))
do
printf ‘\n\t\t{‘
printf "\"{#TCP_PORT}\":\"${portarray[$i]}\"}"
# printf "\"{#TCP_NAME}\":\"${namearray[$i]}\"}"
if [ $i -lt $[$length-1] ];then
printf ‘,‘
fi
done
printf "\n\t]\n"
printf "}\n"
#脚本给与 执行权限
[root@zabbix-agent2 ~]# chmod +x /etc/zabbix/script/discovery.sh
使用netstat命令输出端口号;-tnlp=Tcp协议+不显示别名+listen状态+显示程序名称;$1~$9表示输出的第几个参数;awk {‘print $4‘}表示输出第4个参数(如0.0.0.0:80);awk -F‘:‘ ‘{if ($NF~/^[0-9]*$/) print $NF}表示截取冒号后面的值,且只能是0~9的数字;|sort|uniq表示排序和去重。
脚本中注释掉的两行是用来监控服务的,只需替换掉其上的一行就是个扫描服务的脚本了。
[root@zabbix-agent2 ~]# sh /etc/zabbix/script/discovery.sh
{
"data":[
{"{#TCP_PORT}":"10050"},
{"{#TCP_PORT}":"111"},
{"{#TCP_PORT}":"20048"},
{"{#TCP_PORT}":"2049"},
{"{#TCP_PORT}":"22"},
{"{#TCP_PORT}":"41406"},
{"{#TCP_PORT}":"44522"},
{"{#TCP_PORT}":"58850"},
{"{#TCP_PORT}":"60859"}
]
}
[root@zabbix-agent2 ~]# cat /etc/zabbix/zabbix_agentd.d/userparameter_port.conf
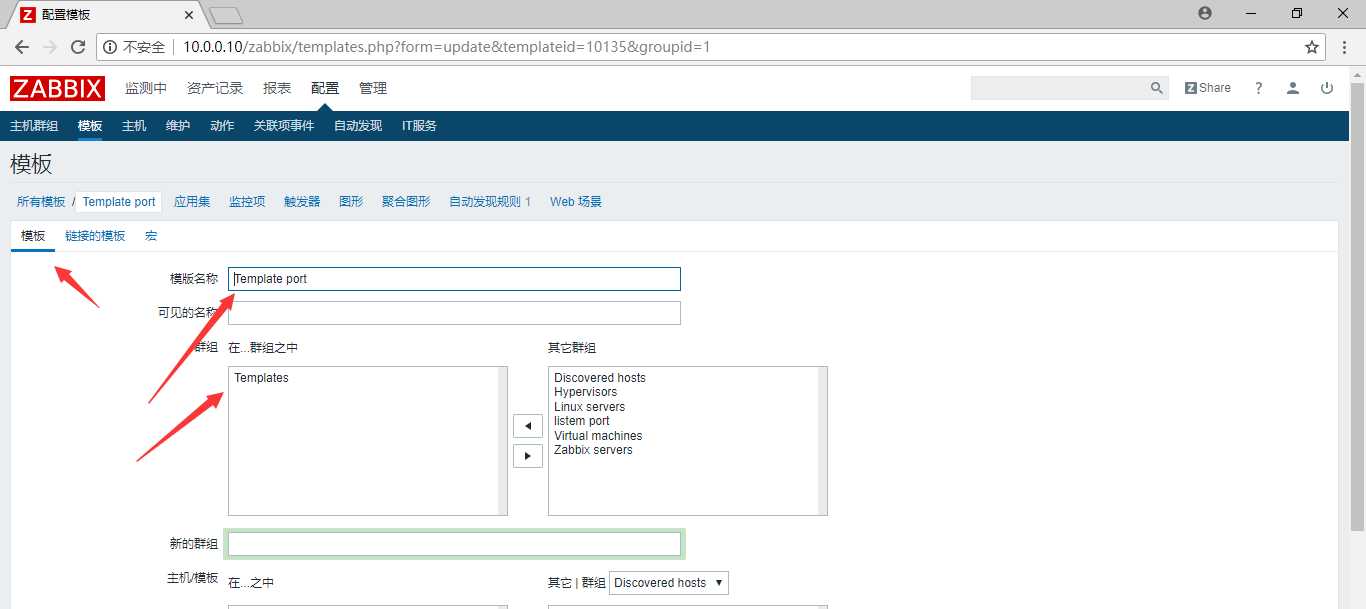
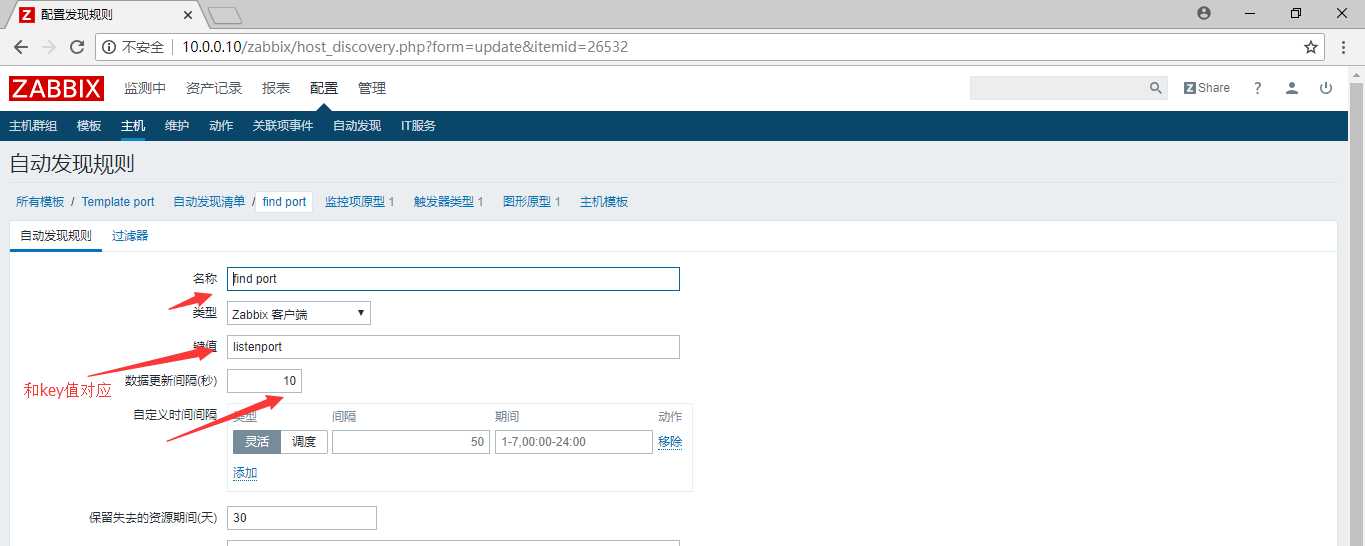
UserParameter=listenport,/etc/zabbix/script/discovery.sh "$1"
[root@zabbix-agent2 ~]# systemctl restart zabbix-agent.service
[root@zabbx-server ~]# zabbix_get -s 172.16.1.12 -p 10050 -k "listenport"
{
"data":[
{"{#TCP_PORT}":"10050"},
{"{#TCP_PORT}":"111"},
{"{#TCP_PORT}":"20048"},
{"{#TCP_PORT}":"2049"},
{"{#TCP_PORT}":"22"},
{"{#TCP_PORT}":"41406"},
{"{#TCP_PORT}":"44522"},
{"{#TCP_PORT}":"58850"},
{"{#TCP_PORT}":"60859"}
]
}



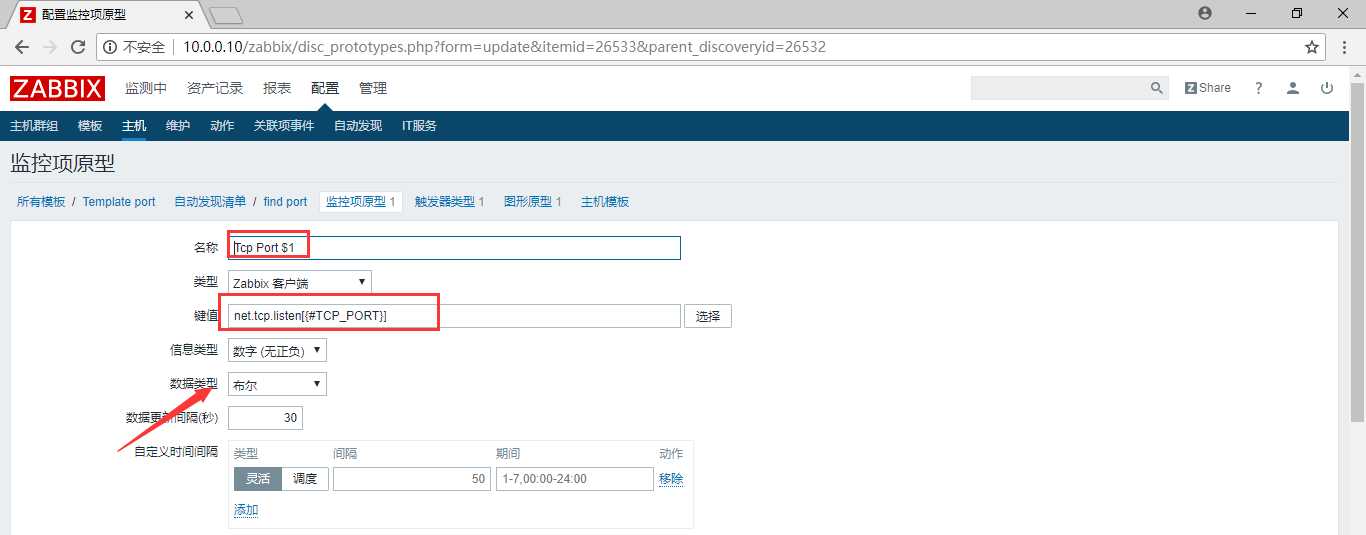


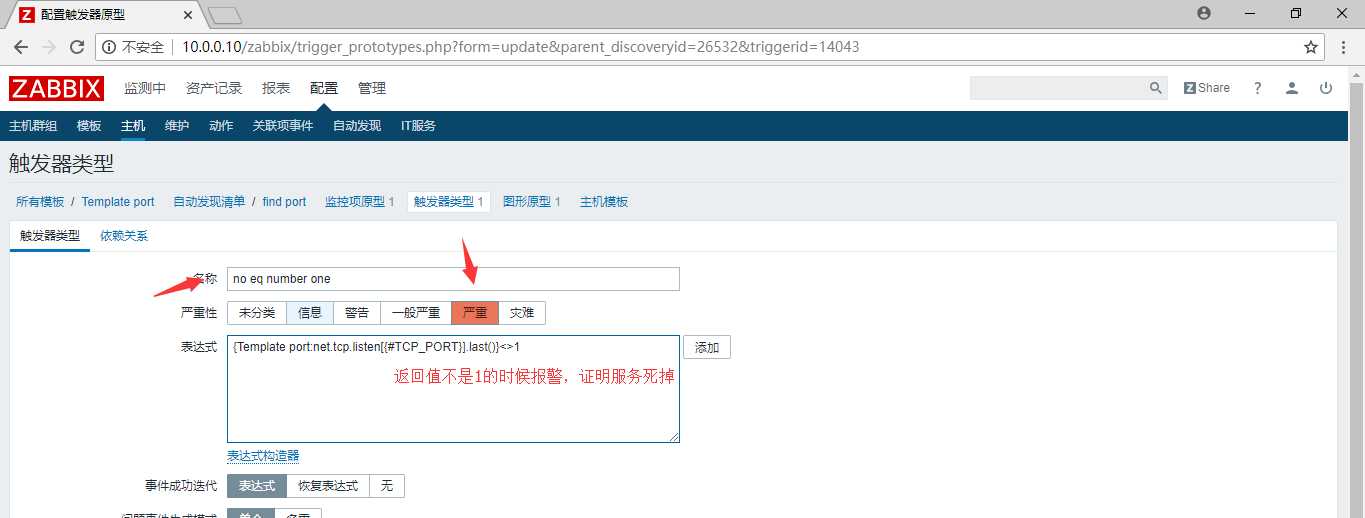

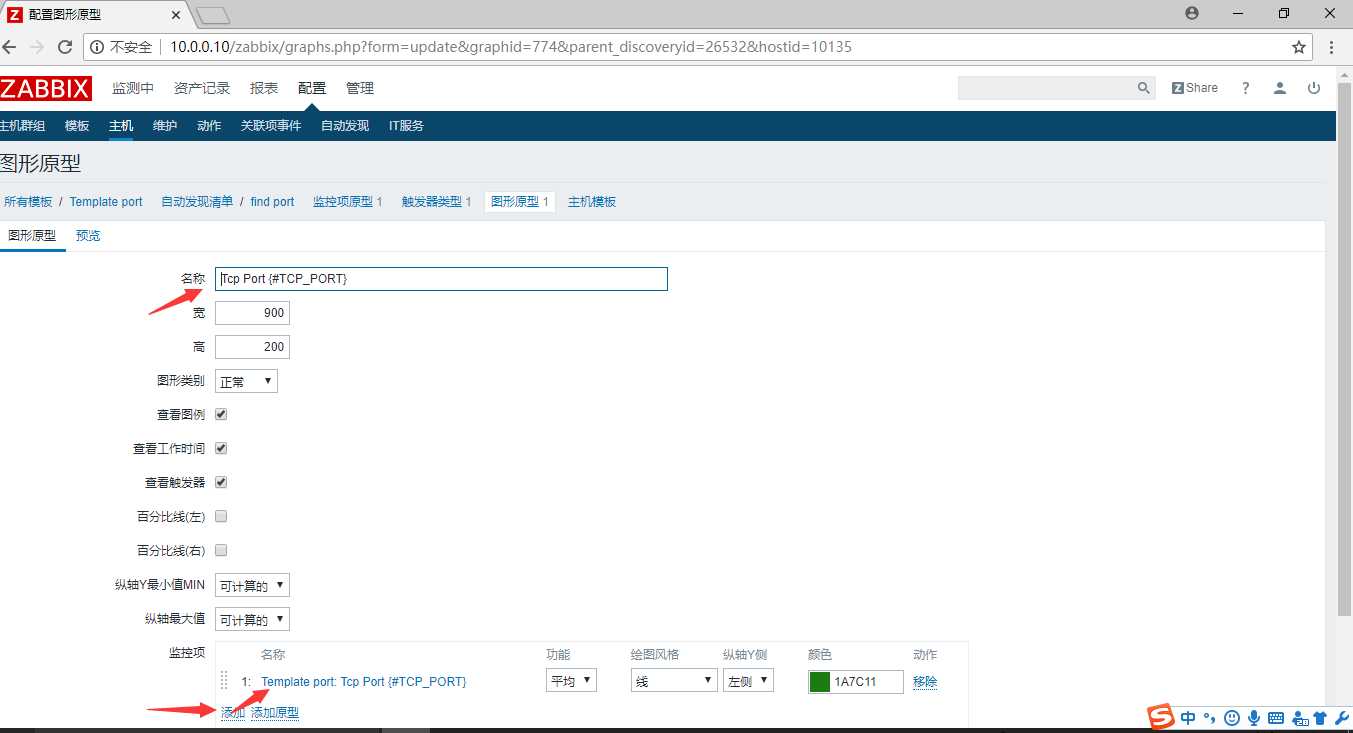
标签:length httpd 触发器 .gz 格式 enable hang ESS usr
原文地址:https://www.cnblogs.com/gmlkl/p/9425998.html