标签:样式 输出 userinfo att fun 转换 包含 value asc
文章评论包含两种评论,根评论:对文章的评论;子评论:对评论的评论。两者的区别在于是否存在父评论。
实现流程:1、构建样式;2、提交根评论;3、显示根评论(分为render显示和Ajax显示);4、提交子评论;5、显示子评论(分为render显示和Ajax显示);6、评论树显示(博客园是楼层显示)。
1、article_detail.html:
{# 文章点赞,清除浮动 #}
<div class="clearfix">
    <div id="div_digg">
    {# 推荐 #}
    <div class="diggit action">
        <span class="diggnum" id="digg_count">{{ article_obj.up_count }}</span>
    </div>
    {# 点灭 #}
    <div class="buryit action">
        <span class="diggnum" id="bury_count">{{ article_obj.down_count }}</span>
    </div>
    <div class="clear"></div>
    <div class="diggword" id="digg_tips" style="color: red;"></div>
</div>
</div>

<div class="comments">
    <p>发表评论</p>
    <p>昵称: <input type="text" id="tbCommentAuthor" class="author" disabled="disabled" size="50" value="{{ request.user.username }}"></p>
    <p>评论内容</p>
    <textarea name="" id="" cols="60" rows="10"></textarea> {# textarea是一个内联标签 #}
    <p><button class="btn btn-default comment_btn">提交评论</button></p>
</div>
由于id=div_digg中存在浮动,显示时会造成点赞区域和评论区域在同一行,在点赞区外包了一层div标签,添加bootstrap的clearfix清除浮动。
由于textarea是一个内联标签,下面直接接button标签,文本框和按钮会显示在同一行,同样给按钮包一层p标签,让按钮在文本框下方显示。
2、article_detail.css评论区样式调整
/* 评论 */
input.author {
    background-image: url("/static/font/icon_form.gif");
    background-repeat: no-repeat;
    border: 1px solid #ccc;
    padding: 4px 4px 4px 30px;
    width: 300px;
    font-size: 13px;
    background-position: 3px -3px;
}
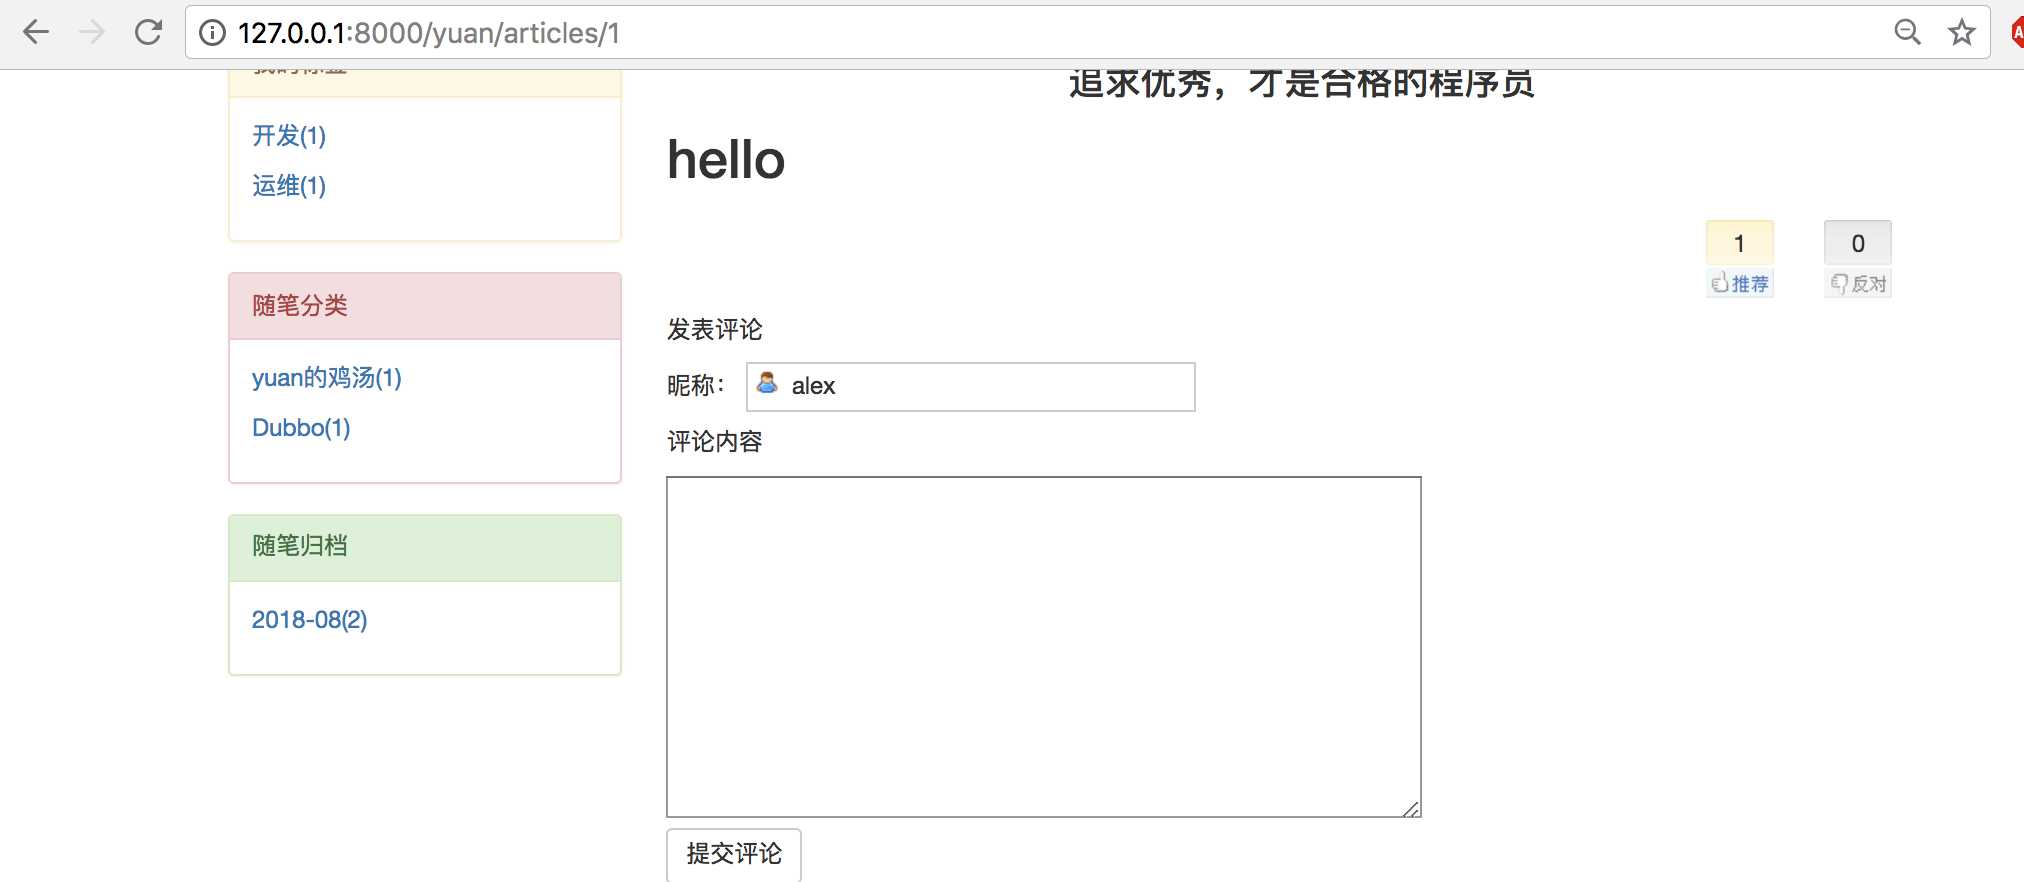
3、显示效果如下所示:

1、创建评论路由
urlpatterns = [
    ...
    path(‘digg/‘, views.digg),  # 点赞
    path(‘comment/‘, views.comment),  # 评论
    ...
]
2、创建评论视图函数comment
def comment(request):
    print(request.POST)

    article_id = request.POST.get("article_id")
    pid = request.POST.get("pid")
    content = request.POST.get("content")
    user_id = request.user.pk

    # 在数据库生成一条评论对象  父评论为空是根评论,不为空则是子评论
    comment_obj = models.Comment.objects.create(user_id=user_id, article_id=article_id, content=content, parent_comment_id=pid)

    return HttpResponse("comment")
3、在article_detail.html模板中创建评论事件
<script>
    // 点赞请求
    $(‘#div_digg .action‘).click(function () {
    ...

    // 评论请求
    $(".comment_btn").click(function () {
        var content = $(‘#comment_content‘).val();    // 拿到评论框的内容
        var pid = "";   // 父评论默认为空

        $.ajax({
            url: "/comment/",
            type: "post",
            data: {
                ‘csrfmiddlewaretoken‘: $("[name= ‘csrfmiddlewaretoken‘]").val(),
                ‘article_id‘: "{{ article_obj.pk }}",
                ‘content‘: content,
                ‘pid‘: pid,
            },
            success:function (data) {
                console.log(data);

                // 提交后清空评论框
                $("#comment_content").val("");
            }
        })
    })
</script>
4、提交评论后,在数据库blog_comment表中可以看到评论记录

def article_detail(request, username, article_id):

    user = UserInfo.objects.filter(username=username).first()
    blog = user.blog

    article_obj = models.Article.objects.filter(pk=article_id).first()

    comment_list = models.Comment.objects.filter(article_id=article_id)

    return render(request, "article_detail.html", locals())
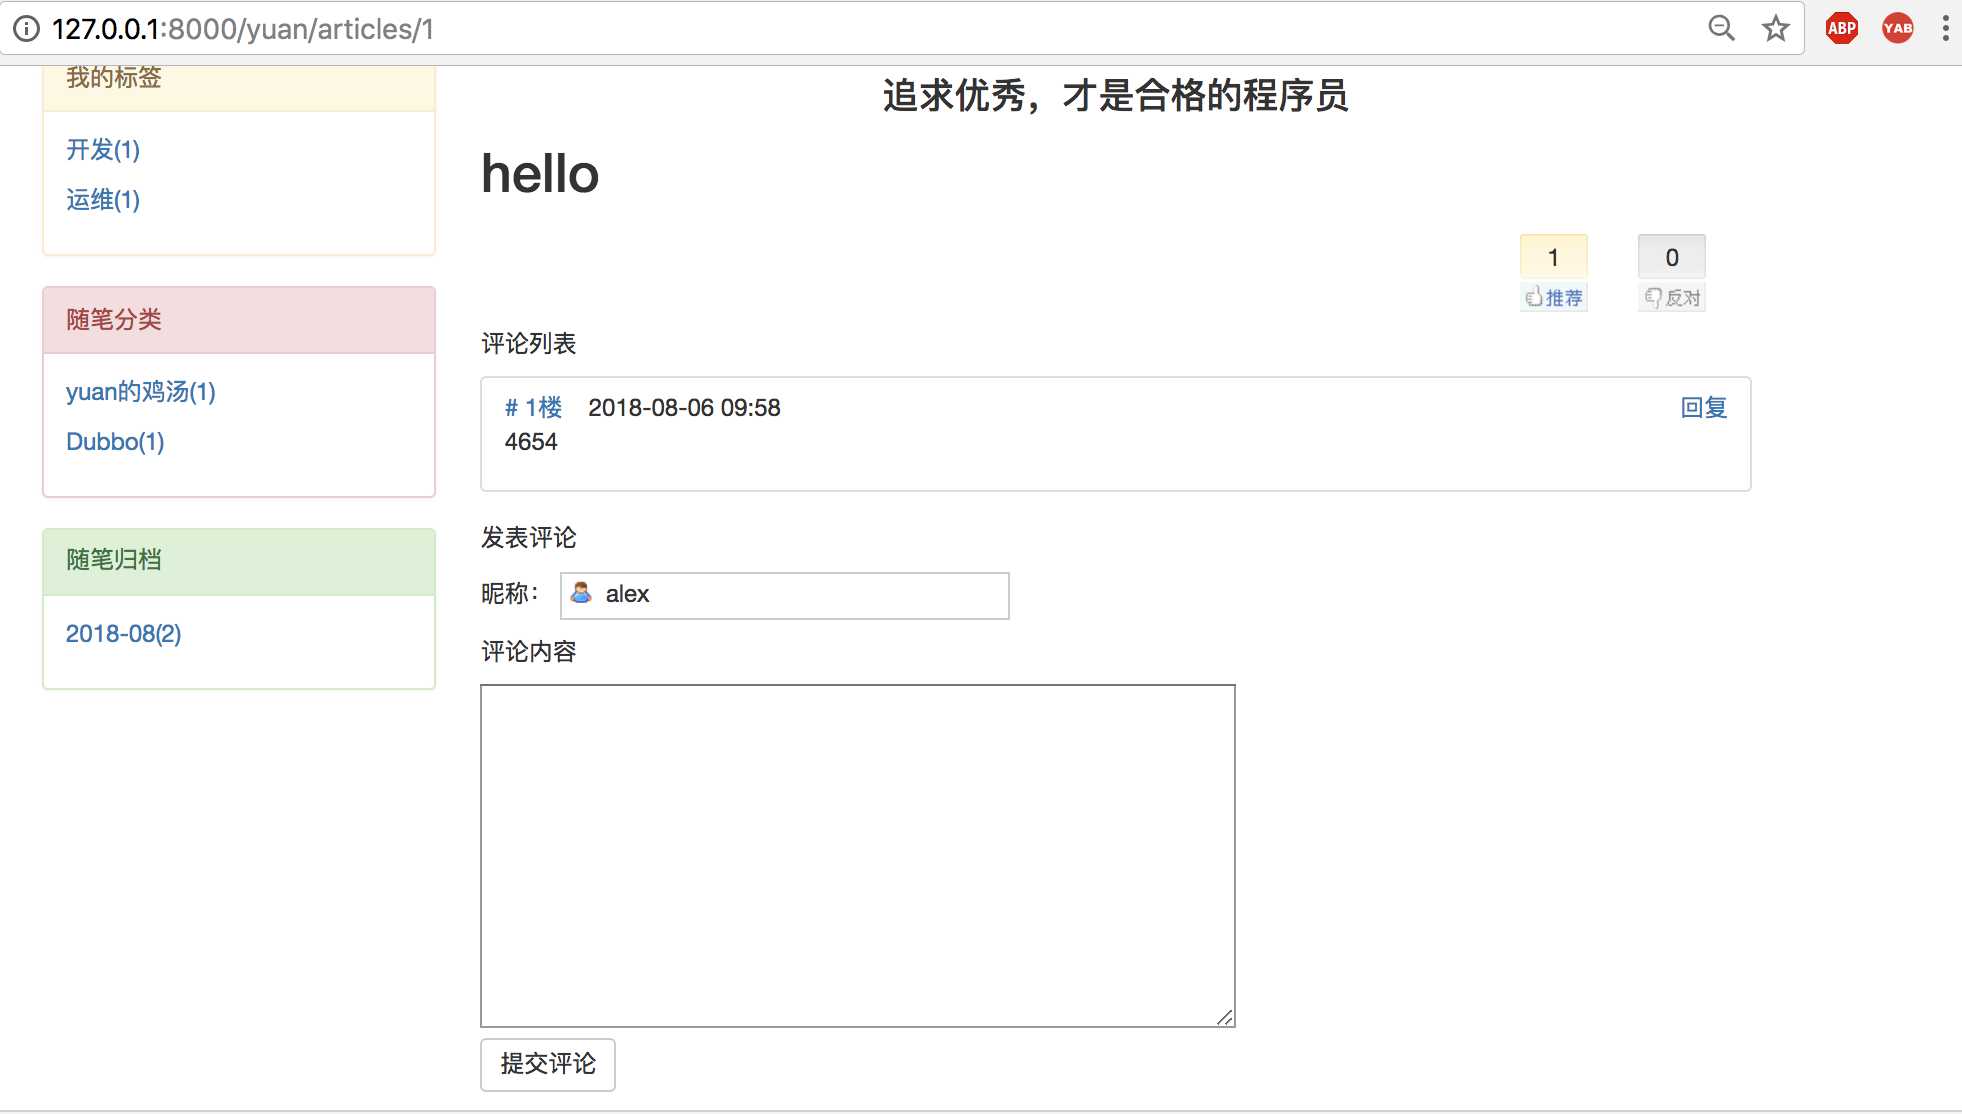
传递comment_list到模板中,根据过滤条件获取的是当前文章的评论。
{# 文章评论列表 #}
<div class="comments">
    <p>评论列表</p>
    <ul class="list-group comment_list">
        {% for comment in comment_list %}
            <li class="list-group-item">
                <div>
                    <a href=""># {{ forloop.counter }}楼</a>
                    <span>{{ comment.create_time|date:"Y-m-d H:i" }}</span>
                    <a href=""><span><{{ comment.user.username }}/span></a>
                    <a href="" class="pull-right">回复</a>
                </div>
                <div class="comment_con">
                    {# 评论内容 #}
                    <p>{{ comment.content }}</p>
                </div>
            </li>
        {% endfor %}
    </ul>

    <p>发表评论</p>
    <p>昵称: <input type="text" id="tbCommentAuthor" class="author" disabled="disabled" size="50" value="{{ request.user.username }}"></p>
    <p>评论内容</p>
    <textarea name="" id="comment_content" cols="60" rows="10"></textarea> {# textarea是一个内联标签 #}
    <p><button class="btn btn-default comment_btn">提交评论</button></p>
</div>
1)利用bootstrap的列表组组件来构建文章列表样式。
2)修饰评论内容样式article_detail.css:
.comment_con {
    margin-top: 10px;
}

def comment(request):
    print(request.POST)

    article_id = request.POST.get("article_id")
    pid = request.POST.get("pid")
    content = request.POST.get("content")
    user_id = request.user.pk

    # 在数据库生成一条评论对象  父评论为空是根评论,不为空则是子评论
    comment_obj = models.Comment.objects.create(user_id=user_id, article_id=article_id, content=content, parent_comment_id=pid)

    response = {}
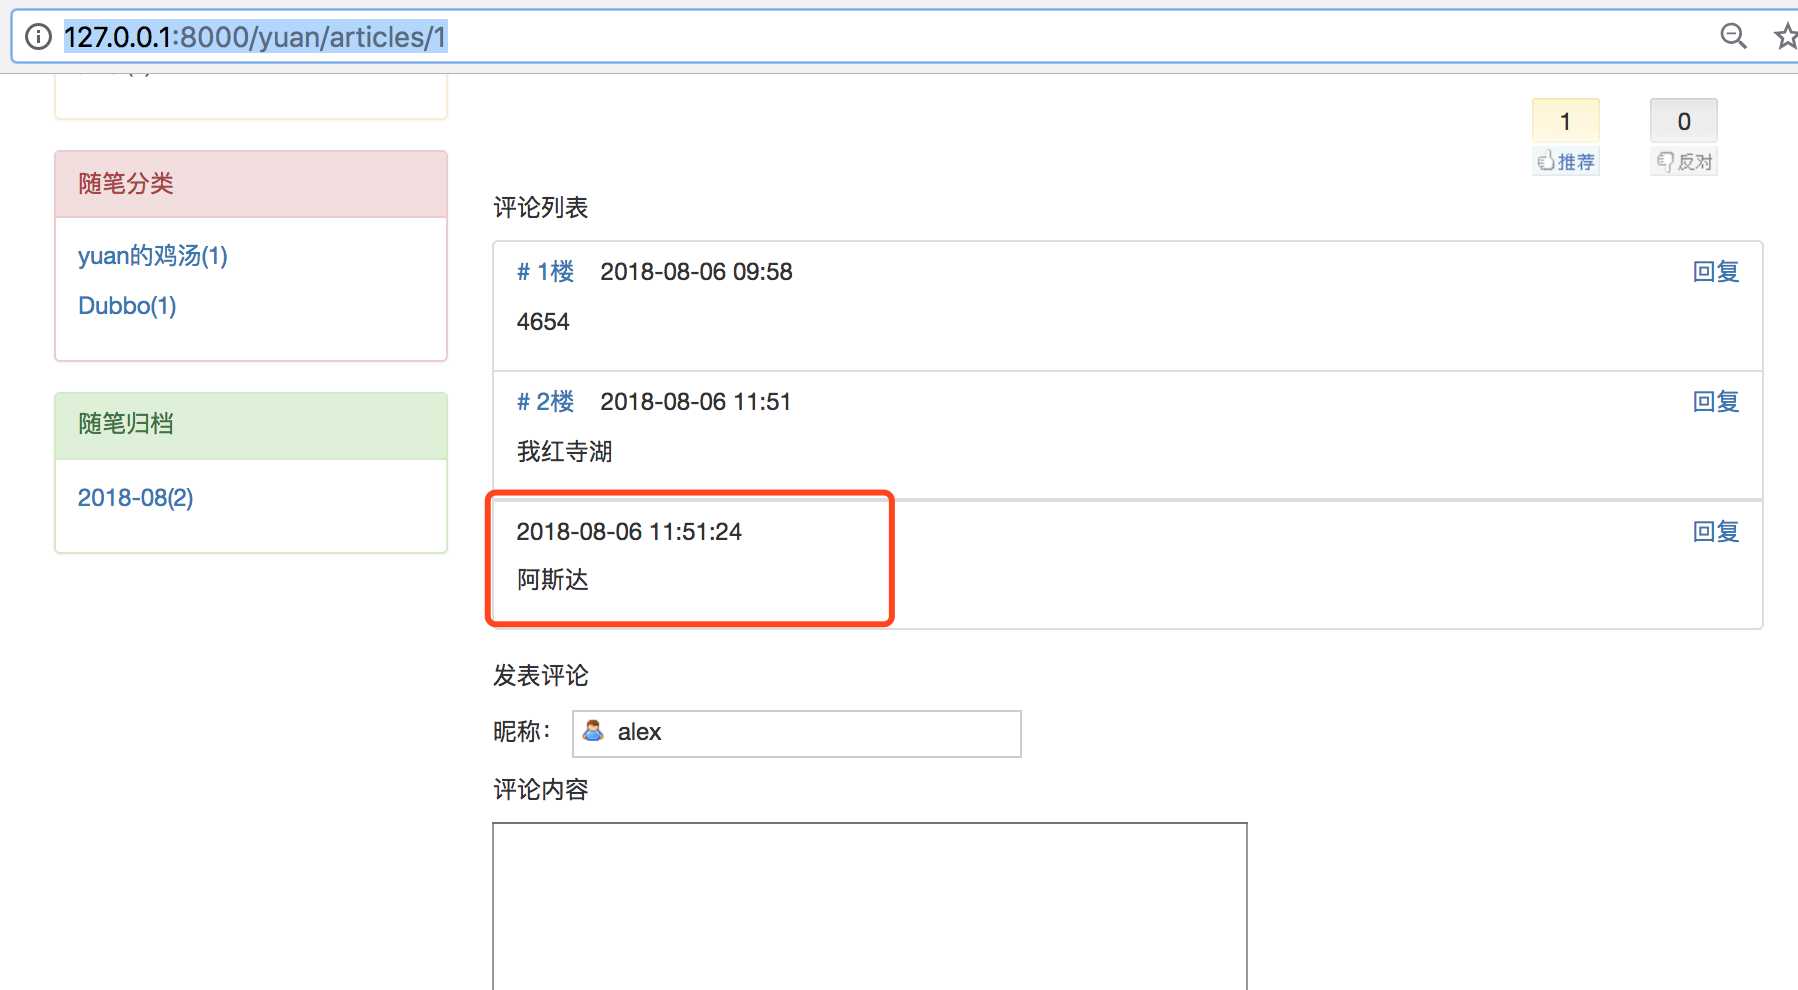
    # create_time是一个datetime.datetime对象,在json序列化时不能对对象进行json序列化,必须进行strftime的转换
    response["create_time"] = comment_obj.create_time.strftime("%Y-%m-%d %X")
    # 评论人
    response["username"] = request.user.username
    # 内容
    response["content"] = content

    return JsonResponse(response)
// 评论请求
$(".comment_btn").click(function () {
    var content = $(‘#comment_content‘).val();    // 拿到评论框的内容
    var pid = "";   // 父评论默认为空

    $.ajax({
        url: "/comment/",
        type: "post",
        data: {
            ‘csrfmiddlewaretoken‘: $("[name= ‘csrfmiddlewaretoken‘]").val(),
            ‘article_id‘: "{{ article_obj.pk }}",
            ‘content‘: content,
            ‘pid‘: pid,
        },
        success: function (data) {
            console.log(data);

            // 获取视图函数返回的数据
            var create_time = data.create_time;
            var username = data.username;
            var content = data.content;

            // ES6特性:字符串模板。
            // ES6中允许使用反引号 ` 来创建字符串,此种方法创建的字符串里面可以包含由美元符号加花括号包裹的变量${vraible}。
            var s = `
                <li class="list-group-item">
                    <div>
                        <span>${create_time}</span>
                        <a href=""><span><${username}/span></a>
                        <a href="" class="pull-right">回复</a>
                    </div>
                    <div class="comment_con">
                        {# 评论内容 #}
                        <p>${content}</p>
                    </div>
                </li>`;
            // DOM操作把标签字符串整个放入ul的标签中去
            $("ul.comment_list").append(s);

            // 提交后清空评论框
            $("#comment_content").val("");
        }
    })
})
注意:1)ES6中允许使用反引号 ` 来创建字符串,此种方法创建的字符串里面可以包含由美元符号加花括号包裹的变量${vraible}。
//产生一个随机数
var num=Math.random();
//将这个数字输出到console
console.log(`your num is ${num}`);
2)获取视图函数返回的数据:
// 获取视图函数返回的数据
var create_time = data.create_time;
var username = data.username;
var content = data.content;

标签:样式 输出 userinfo att fun 转换 包含 value asc
原文地址:https://www.cnblogs.com/xiugeng/p/9429510.html