标签:编译 The pat pen invalid ror class extend 打开
我们在使用jmeter的时候有时候会碰到jmeter现有插件或功能也无法支持的场景,比如前端加密,此时我们就需要自己手动编写函数并导入了,下面就是手动修改并导入的过程。
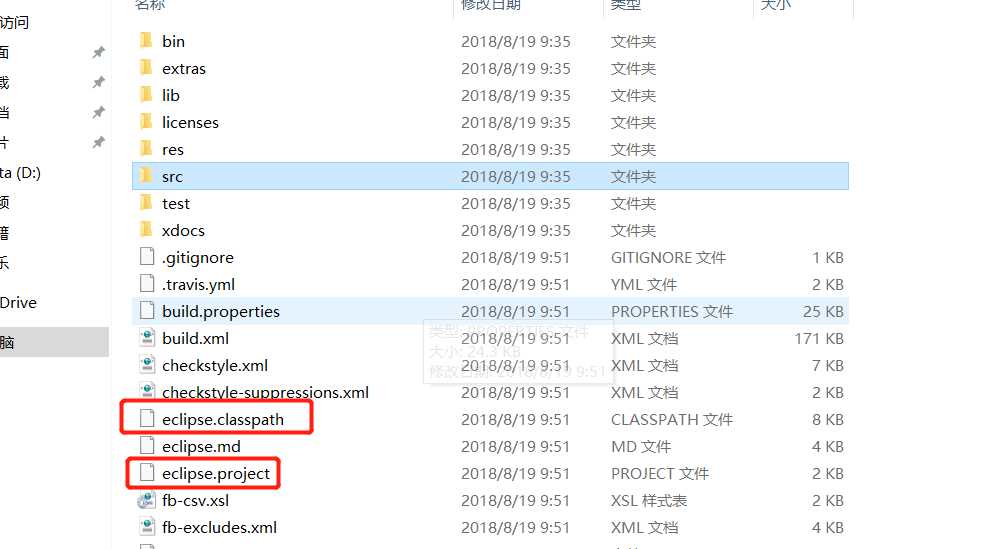
首先我们需要下载jmeter源码压缩包下来,我这里下载的是apache-jmeter-4.0_src.zip,下载解压后,此时直接导入jmeter源码是不行的,我们需要修改两个文件,如下图,将eclipse去掉即可,变成.classpath和.project。(注意下,去cmd命令下修改,ren 旧文件名 新文件名)
我们默认导入后,会发现lib下面没有任何jar包,所以我们需要下载下来,我们通过“Ant build”添加build.xml,然后就会读取配置文件所需的jar包,我们拉到下面双击选择“download_jars”将依赖的jar包全部下载下来。(这里需要一点时间,下载完后点击install即可,也是在download_jars”下方不远处)。install编译好后就会在ext下看到jmeter的核心jar。
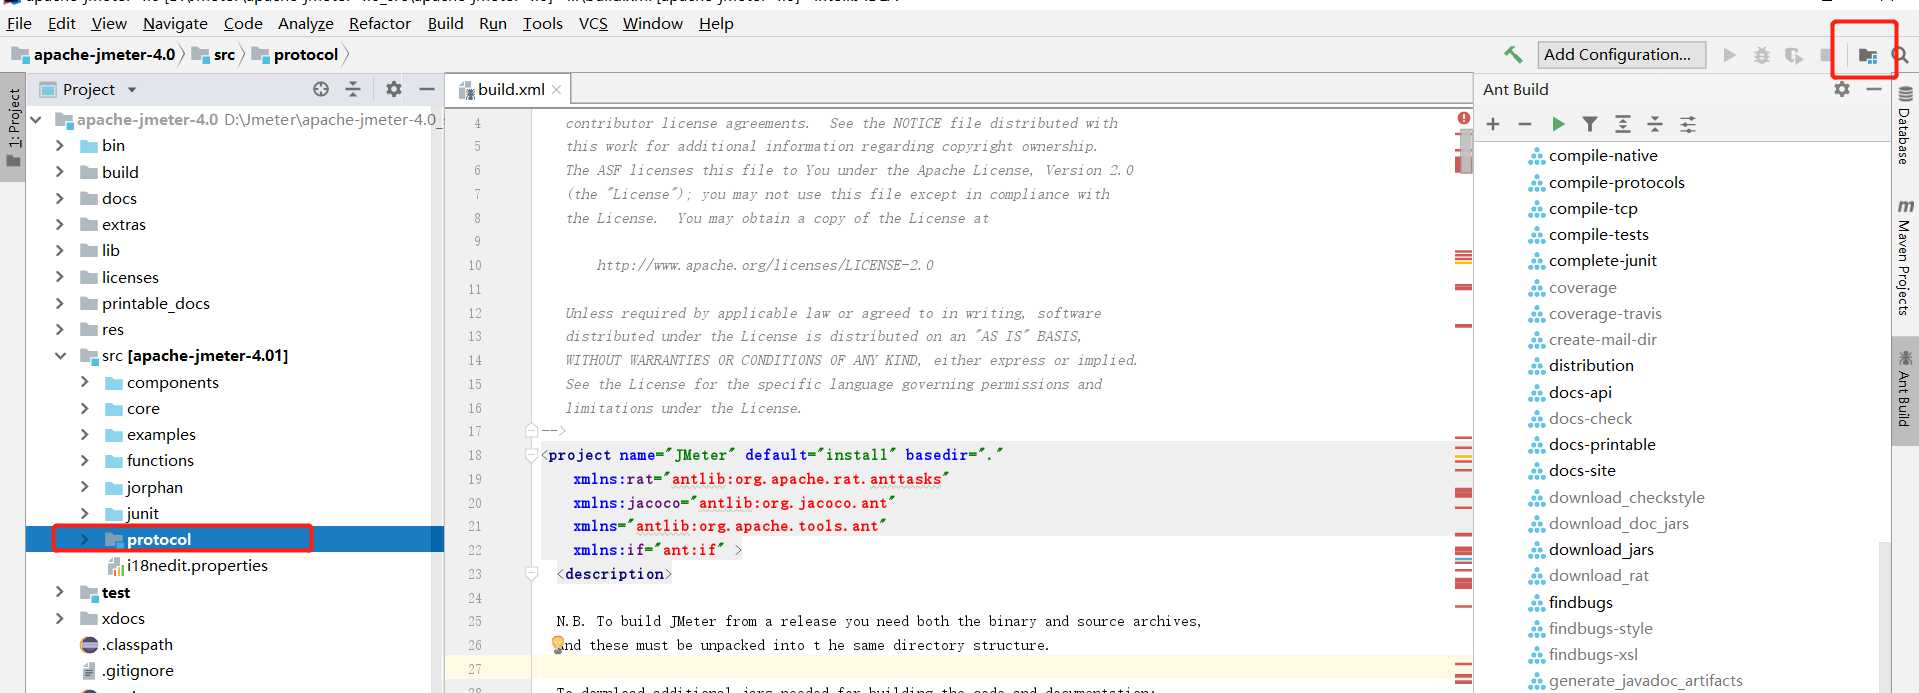
我们可以通过右上角或者F4将jar包导入到src下面,否则很多import都会失败。然后在对jmeter路径进行配置,否则启动的话会出现启动失败。
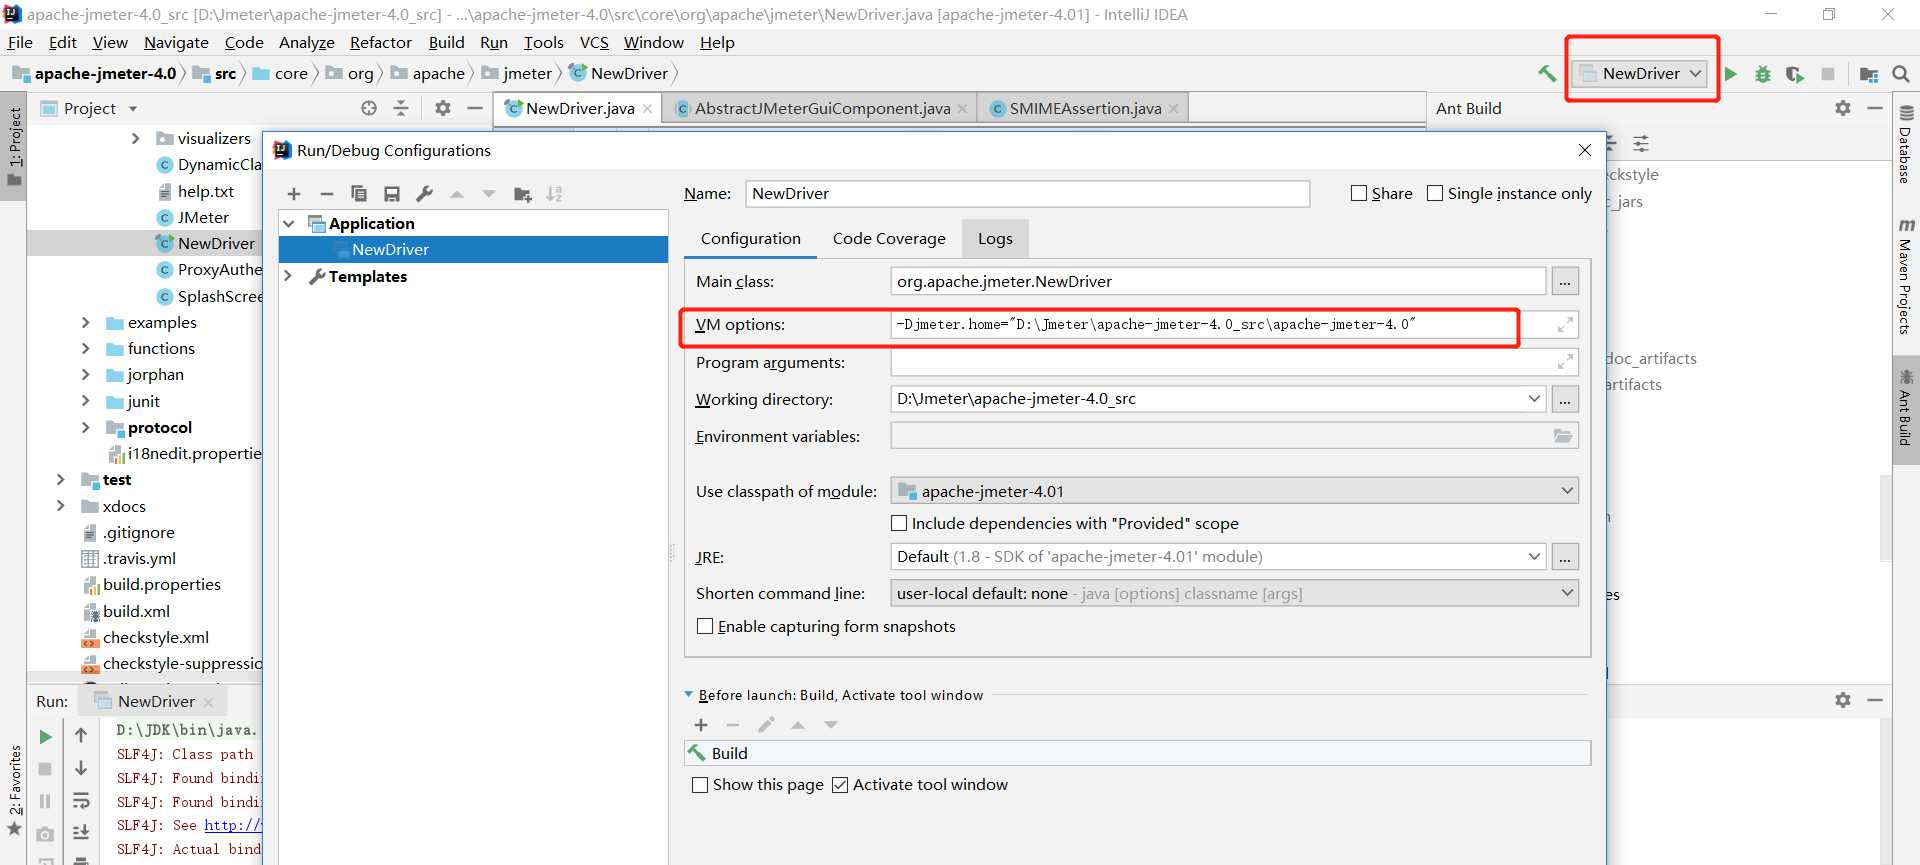
然后在src->core->NewDriver启动即可打开jmeter了。
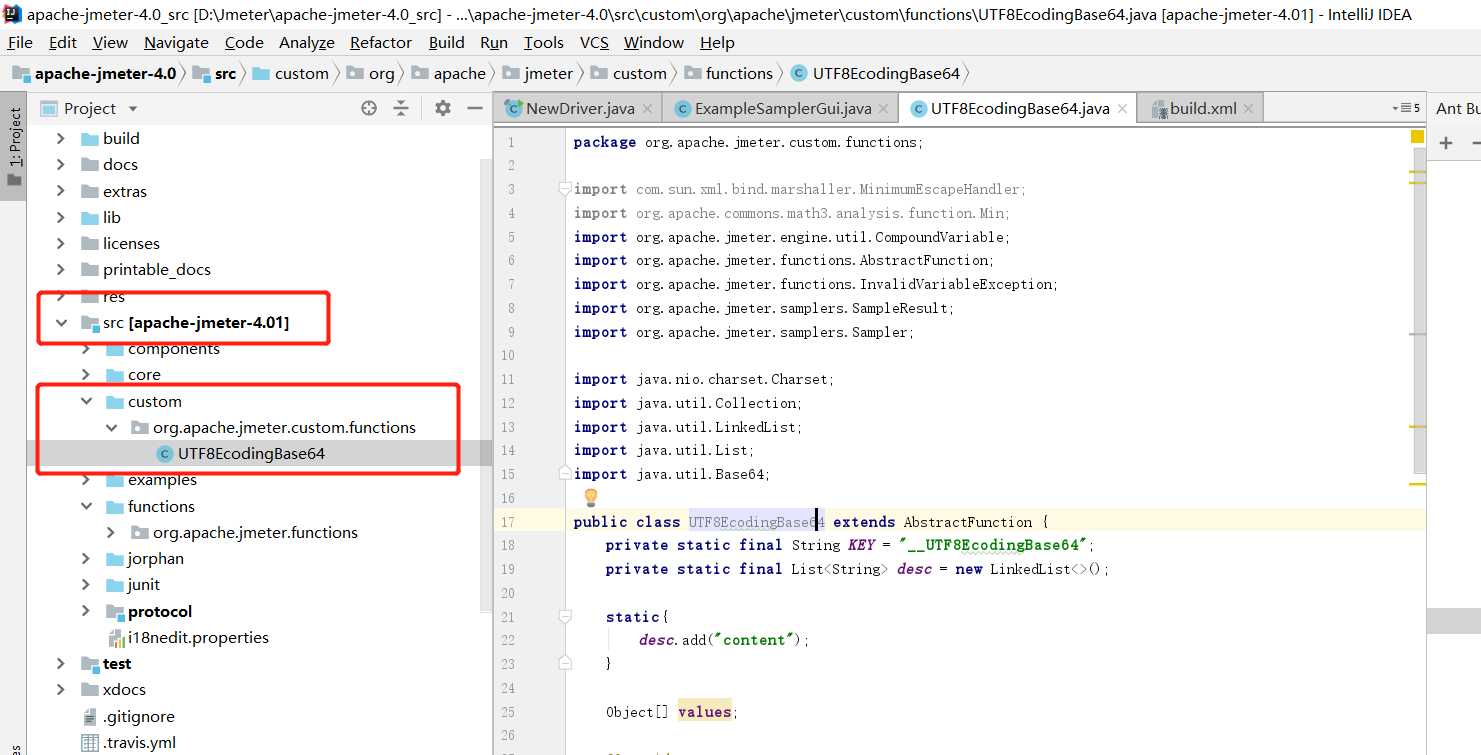
在这里我们写一个base64编码的函数,在src下新建目录->custom(这个名称随意),新建如下图所示:
代码如下:
package org.apache.jmeter.custom.functions;

import com.sun.xml.bind.marshaller.MinimumEscapeHandler;
import org.apache.commons.math3.analysis.function.Min;
import org.apache.jmeter.engine.util.CompoundVariable;
import org.apache.jmeter.functions.AbstractFunction;
import org.apache.jmeter.functions.InvalidVariableException;
import org.apache.jmeter.samplers.SampleResult;
import org.apache.jmeter.samplers.Sampler;

import java.nio.charset.Charset;
import java.util.Collection;
import java.util.LinkedList;
import java.util.List;
import java.util.Base64;

public class UTF8EcodingBase64 extends AbstractFunction {
    private static final String KEY = "__UTF8EcodingBase64";
    private static final List<String> desc = new LinkedList<>();

    static{
        desc.add("content");
    }

    Object[] values;

    @Override
    public String execute(SampleResult previousResult, Sampler currentSampler) throws InvalidVariableException {
        String content = ((CompoundVariable) values[0]).execute().trim();
        String encodeText = "";
        Base64.Encoder encoder = Base64.getEncoder();
        encodeText = encoder.encodeToString(content.getBytes(Charset.forName("UTF-8")));
        return encodeText;
    }

    @Override
    public void setParameters(Collection<CompoundVariable> parameters) throws InvalidVariableException {
        checkMinParameterCount(parameters, 1);
        values = parameters.toArray();
    }

    @Override
    public String getReferenceKey() {
        return KEY;
    }

    @Override
    public List<String> getArgumentDesc() {
        return desc;
    }
}
写完代码后我们还需要到build.xml下新增一些内容,新增内容如下:
<property name="src.custom" value="src/custom"/>
<property name="build.custom" value="build/custom"/>

<target name="compile-custom" depends="compile-jorphan,compile-core" description="Compile example components.">
    <mkdir dir="${build.custom}"/>
    <javac srcdir="${src.custom}" destdir="${build.custom}" source="${src.java.version}" optimize="${optimize}" debug="on" target="${target.java.version}"
           includeAntRuntime="${includeAntRuntime}" deprecation="${deprecation}" encoding="${encoding}">
      <include name="**/*.java"/>
      <classpath>
        <pathelement location="${build.jorphan}"/>
        <pathelement location="${build.core}"/>
        <path refid="classpath"/>
      </classpath>
    </javac>
  </target>

 <target name="install-custom" depends="compile-custom" description="Build and installs the example components.">
    <jar jarfile="${dest.jar}/ApacheJMeter_custom.jar" manifest="${build.dir}/MANIFEST_BIN.MF">
      <zipfileset file="${resources.meta-inf}/default.notice"
        fullpath="META-INF/NOTICE" />
      <zipfileset file="${resources.meta-inf}/default.license"
        fullpath="META-INF/LICENSE" />
      <fileset dir="${build.custom}" includes="**/*.class" />
      <fileset dir="${src.custom}" includes="**/*.properties" />
    </jar>
  </target>
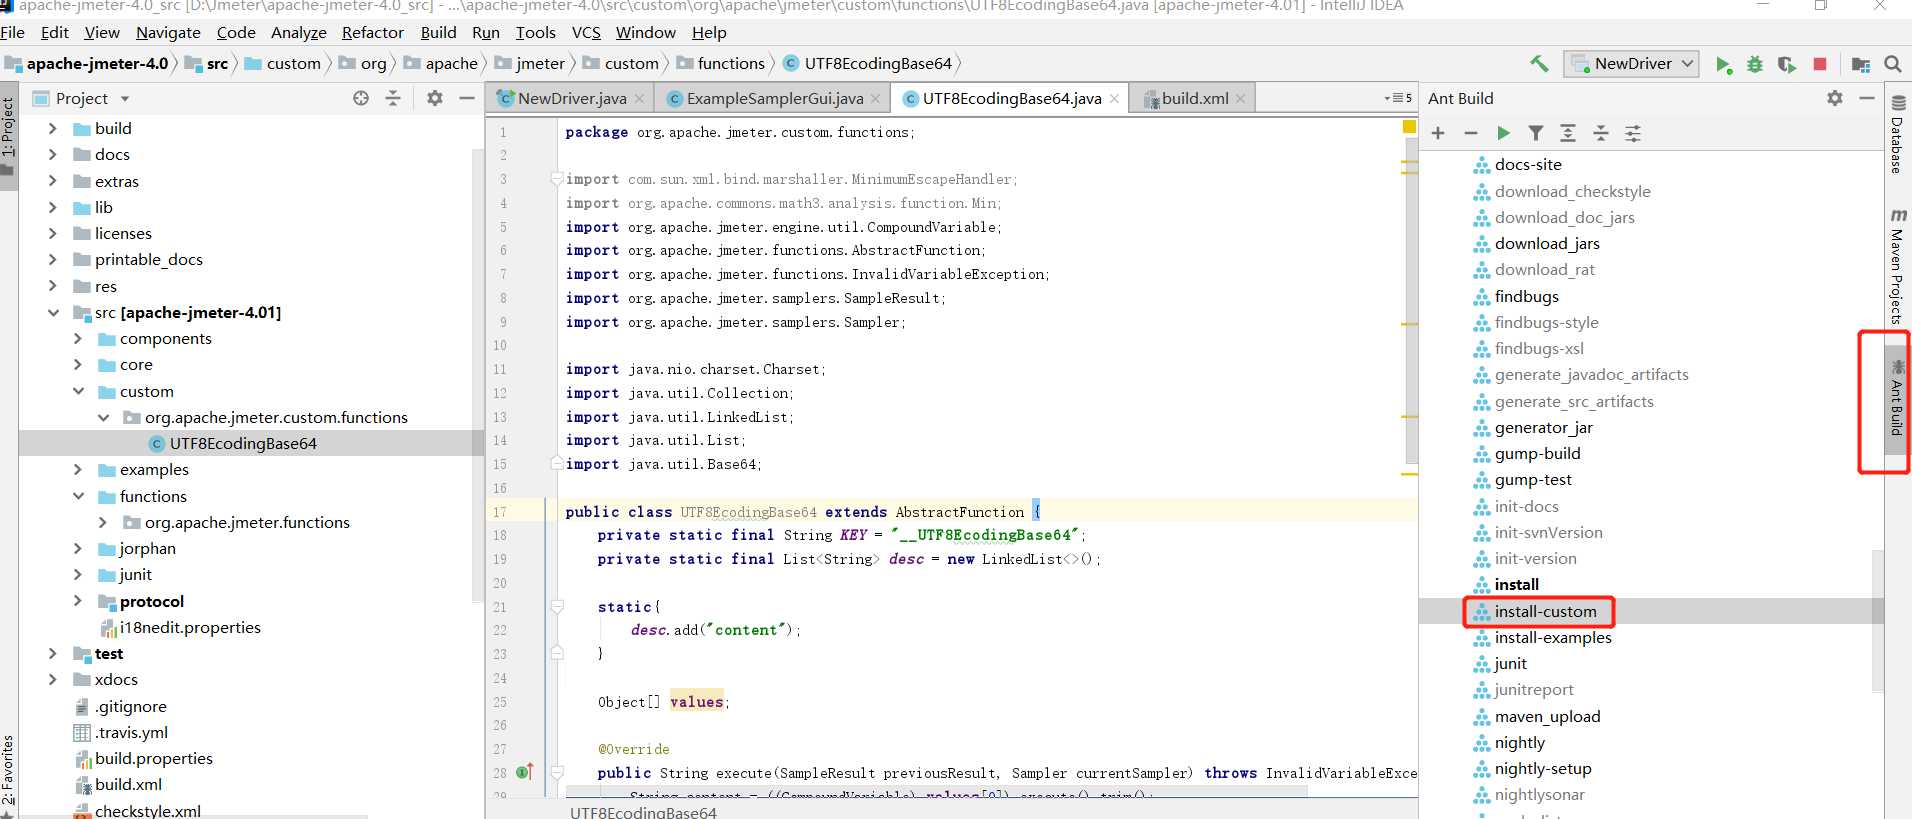
然后我们在Ant build下就可以看到我们新加的“install-custom”,我们双击就会生成class文件,然后再run就会编译产生jar包,最后拷贝jar包到jmeter的lib/ext目录下即可使用了。
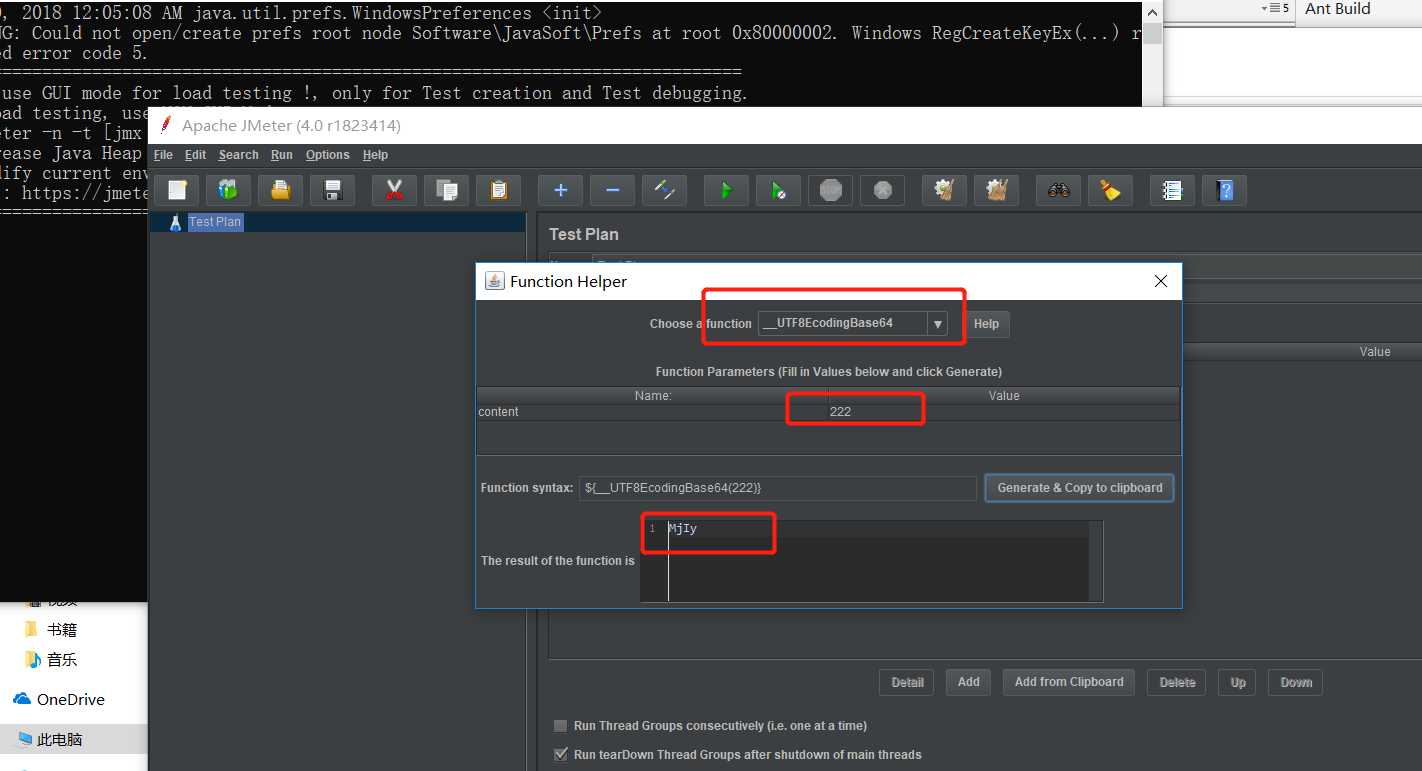
下图为拷贝之后打开jmeter使用效果图:
标签:编译 The pat pen invalid ror class extend 打开
原文地址:https://www.cnblogs.com/leixiaobai/p/9500681.html