标签:style blog http color io os 使用 ar for
1、安装好vbox,创建好虚拟机(红帽5.5),注意:VBOX全局设置VBOX磁盘的位置和备份位置
IP、hostname 规划:
| hostname |
lk1 |
lk2 |
| eth0:公网 |
192.168.1.171 |
192.168.1.173 |
| eth0:vip |
192.168.1.172 |
192.168.1.174 |
| eth1:private私有网络 |
172.168.1.191 |
172.168.1.192 |
| scan ip |
192.168.1.176 |
192.168.1.176 |
2、配置host文件
127.0.0.1 localhost.localdomain localhost #注意此行修改成这样
::1 localhost6.localdomain6 localhost6
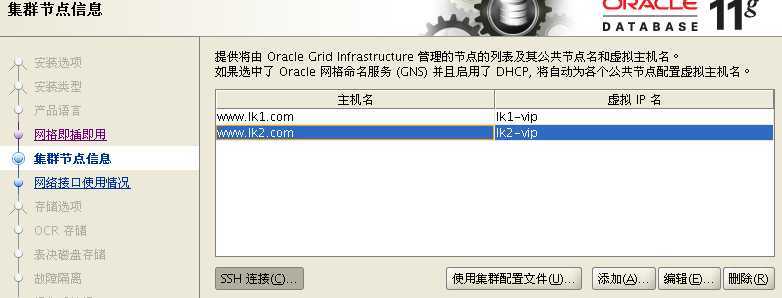
192.168.1.171 lk1 www.lk1.com
192.168.1.172 lk1-vip
192.168.1.173 lk2 www.lk2.com
192.168.1.174 lk2-vip
192.168.1.176 lk-cluster lk-cluster-scan
172.168.1.191 lk1-priv
172.168.1.192 lk2-priv
3、创建用户、组、目录
[root@www ~]# groupadd -g 5000 asmadmin
[root@www ~]# groupadd -g 5001 asmdba
[root@www ~]# groupadd -g 5002 asmoper
[root@www ~]# groupadd -g 6000 oinstall
[root@www ~]# groupadd -g 6001 dba
[root@www ~]# groupadd -g 6002 oper
[root@www ~]# useradd -g oinstall -G asmadmin,asmdba,asmoper grid
[root@www ~]# useradd -g oinstall -G dba,asmdba,oper oracle
[root@www ~]# passwd grid
[root@www ~]# passwd oracle
[root@www ~]# mkdir /s01
[root@www ~]# mkdir /g01
[root@www ~]# chown oracle:oinstall /s01
[root@www ~]# chown grid:oinstall /g01
确保时间同步关闭:
[root@www ~]# service ntpd status
[root@www ~]# chkconfig ntpd off
4、系统包安装:
[root@maclean1 ~]# mkdir /media/disk
[root@maclean1 ~]# mount /dev/cdrom /media/disk
mount: block device /dev/cdrom is write-protected, mounting read-only
[root@maclean1 ~]# touch /etc/yum.repos.d/public-yum-el5.repo
[root@maclean1 ~]# vi /etc/yum.repos.d/public-yum-el5.repo
[oel5]
name = Enterprise Linux 5.5 DVD
baseurl=file:///media/disk/Server/
gpgcheck=0
enabled=1
yum install oracle-validated #oracle linux 可直接使用此命令,redhat不行
#redhat执行以下:
[root@www ~]# yum install -y oracle-validated
[root@www ~]# yum install -y compat-db
[root@www ~]# yum install -y compat-gcc-34
[root@www ~]# yum install -y compat-gcc-34-c++
[root@www ~]# yum install -y elfutils-libelf-devel
[root@www ~]# yum install -y elfutils-libelf-devel-static
[root@www ~]# yum install -y gcc
[root@www ~]# yum install -y gcc-c++
[root@www ~]# yum install -y elfutils-libelf-devel
[root@www ~]# yum install -y elfutils-libelf-devel-static
[root@www ~]# yum install -y gdb
[root@www ~]# yum install -y glibc-devel
[root@www ~]# yum install -y glibc-headers
[root@www ~]# yum install -y kernel-headers
[root@www ~]# yum install -y libXp
[root@www ~]# yum install -y libaio-devel
[root@www ~]# yum install -y libaio
[root@www ~]# yum install -y libstdc++-devel
[root@www ~]# yum install -y sysstat
[root@www ~]# yum install -y unixODBC
[root@www ~]# yum install -y unixODBC-devel
[root@www ~]# yum install -y openmotif22
5、修改配置
[root@www ~]# vi /etc/sysctl.conf
net.ipv4.ip_forward = 0
net.ipv4.conf.default.rp_filter = 2
net.ipv4.conf.default.accept_source_route = 0
kernel.core_uses_pid = 1
net.ipv4.tcp_syncookies = 1
fs.file-max = 6815744
kernel.msgmni = 2878
kernel.msgmax = 8192
kernel.msgmnb = 65536
kernel.sem = 250 32000 100 142
kernel.shmmni = 4096
kernel.shmall = 1073741824
kernel.shmmax = 4398046511104
kernel.sysrq = 1
net.core.rmem_default = 262144
net.core.rmem_max = 4194394
net.core.wmem_default = 262144
net.core.wmem_max = 1048576
fs.aio-max-nr = 3145728
net.ipv4.ip_local_port_range = 9000 65500
vm.min_free_kbytes = 51200
[root@www disk]# sysctl -p
[root@www disk]# vi /etc/security/limits.conf
oracle soft nofile 131072
oracle hard nofile 131072
oracle soft nproc 131072
oracle hard nproc 131072
oracle soft core unlimited
oracle hard core unlimited
oracle soft memlock 50000000
oracle hard memlock 50000000
grid soft nofile 131072
grid hard nofile 131072
grid soft nproc 131072
grid hard nproc 131072
grid soft core unlimited
grid hard core unlimited
grid soft memlock 50000000
grid hard memlock 50000000
6、克隆一号机,并修改2号机IP和hostname
[root@www disk]# init 0 关闭一号机
在VBOX上clone一号机,注意

修改虚拟机配置,启动2号机,修改2号机IP和hostname
[root@www ~]# system-config-network
[root@www ~]# vi /etc/sysconfig/network
[root@www ~]# hostname
lk2
/etc/hosts不用动
注:【改vbox磁盘uuid:cmd中执行:VBoxManage internalcommands sethduuid E:\11g_rac\disk_node2\11g_rac_2.vdi】
7、关机,创建共享磁盘
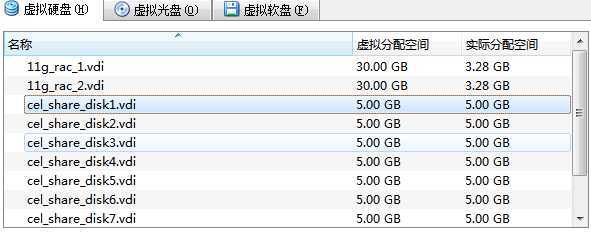
在一号机创建8个5G容量的共享磁盘,需要立即分配
打开 管理-》虚拟介质管理
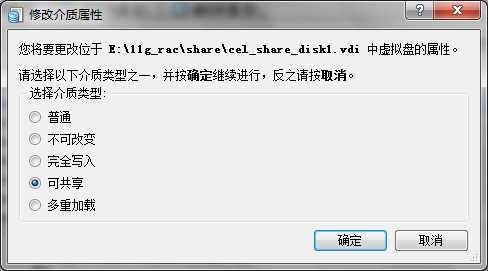
右键修改需要的每个磁盘位共享磁盘
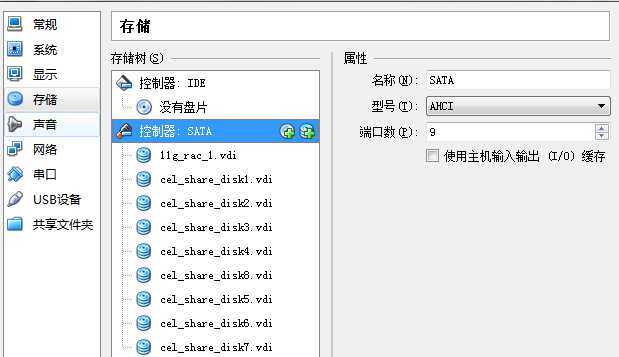
最终一号机设置如下:
在二号机上添加《现有的虚拟磁盘》,添加这8块磁盘,选中主机输入输出(提高性能)
启动2台主机。
8、创建UDEV,关联磁盘
[root@www dev]# ls sd*
sda sda1 sda2 sdb sdc sdd sde sdf sdg sdh sdi
在shell中执行:
for i in b c d e f g h i ;
do
echo "KERNEL==\"sd*\", BUS==\"scsi\", PROGRAM==\"/sbin/scsi_id -g -u -s %p\", RESULT==\"`scsi_id -g -u -s /block/sd$i`\", NAME=\"asm-disk$i\", OWNER=\"grid\", GROUP=\"asmadmin\", MODE=\"0660\""
done
得到:
KERNEL=="sd*", BUS=="scsi", PROGRAM=="/sbin/scsi_id -g -u -s %p", RESULT=="SATA_VBOX_HARDDISK_VB12762fea-b7caec51_", NAME="asm-diskb", OWNER="grid", GROUP="asmadmin", MODE="0660"
KERNEL=="sd*", BUS=="scsi", PROGRAM=="/sbin/scsi_id -g -u -s %p", RESULT=="SATA_VBOX_HARDDISK_VBb488642b-161d1783_", NAME="asm-diskc", OWNER="grid", GROUP="asmadmin", MODE="0660"
KERNEL=="sd*", BUS=="scsi", PROGRAM=="/sbin/scsi_id -g -u -s %p", RESULT=="SATA_VBOX_HARDDISK_VBaa2b39a4-97e266e1_", NAME="asm-diskd", OWNER="grid", GROUP="asmadmin", MODE="0660"
KERNEL=="sd*", BUS=="scsi", PROGRAM=="/sbin/scsi_id -g -u -s %p", RESULT=="SATA_VBOX_HARDDISK_VB8035d86d-2dc1002b_", NAME="asm-diske", OWNER="grid", GROUP="asmadmin", MODE="0660"
KERNEL=="sd*", BUS=="scsi", PROGRAM=="/sbin/scsi_id -g -u -s %p", RESULT=="SATA_VBOX_HARDDISK_VB7e17688a-d552054c_", NAME="asm-diskf", OWNER="grid", GROUP="asmadmin", MODE="0660"
KERNEL=="sd*", BUS=="scsi", PROGRAM=="/sbin/scsi_id -g -u -s %p", RESULT=="SATA_VBOX_HARDDISK_VB2cc9568a-3211781b_", NAME="asm-diskg", OWNER="grid", GROUP="asmadmin", MODE="0660"
KERNEL=="sd*", BUS=="scsi", PROGRAM=="/sbin/scsi_id -g -u -s %p", RESULT=="SATA_VBOX_HARDDISK_VB97fdf2ce-bfde99c2_", NAME="asm-diskh", OWNER="grid", GROUP="asmadmin", MODE="0660"
KERNEL=="sd*", BUS=="scsi", PROGRAM=="/sbin/scsi_id -g -u -s %p", RESULT=="SATA_VBOX_HARDDISK_VB151cf602-53902d7f_", NAME="asm-diski", OWNER="grid", GROUP="asmadmin", MODE="0660"
编辑配置文件:
[root@www dev]# cd /etc/udev/rules.d/
[root@www rules.d]# touch 99-oracle-asmdevices.rules
[root@www rules.d]# vi 99-oracle-asmdevices.rules
[root@www rules.d]# start_udev //启动UDEV
启动 udev:[确定]
[root@www rules.d]# ls -l /dev/asm* //这时出现asm磁盘,绑定成功
brw-rw---- 1 grid asmadmin 8, 16 11-12 00:29 /dev/asm-diskb
brw-rw---- 1 grid asmadmin 8, 32 11-12 00:29 /dev/asm-diskc
brw-rw---- 1 grid asmadmin 8, 48 11-12 00:29 /dev/asm-diskd
brw-rw---- 1 grid asmadmin 8, 64 11-12 00:29 /dev/asm-diske
brw-rw---- 1 grid asmadmin 8, 80 11-12 00:29 /dev/asm-diskf
brw-rw---- 1 grid asmadmin 8, 96 11-12 00:29 /dev/asm-diskg
brw-rw---- 1 grid asmadmin 8, 112 11-12 00:29 /dev/asm-diskh
brw-rw---- 1 grid asmadmin 8, 128 11-12 00:29 /dev/asm-diski
[root@www rules.d]# scp 99-oracle-asmdevices.rules lk2:/etc/udev/rules.d/ //拷贝到二号机
[root@www dev]# start_udev //二号机上同样启动UDEV
启动 udev:[确定]
[root@www dev]# ls -l /dev/asm*
brw-rw---- 1 grid asmadmin 8, 16 11-12 00:33 /dev/asm-diskb
brw-rw---- 1 grid asmadmin 8, 32 11-12 00:33 /dev/asm-diskc
brw-rw---- 1 grid asmadmin 8, 48 11-12 00:33 /dev/asm-diskd
brw-rw---- 1 grid asmadmin 8, 64 11-12 00:33 /dev/asm-diske
brw-rw---- 1 grid asmadmin 8, 128 11-12 00:33 /dev/asm-diskf
brw-rw---- 1 grid asmadmin 8, 80 11-12 00:33 /dev/asm-diskg
brw-rw---- 1 grid asmadmin 8, 96 11-12 00:33 /dev/asm-diskh
brw-rw---- 1 grid asmadmin 8, 112 11-12 00:33 /dev/asm-diski
9、上传介质,解压
[root@www g01]# su - grid
[grid@www ~]$ cd /g01/11201_install/
[grid@www 11201_install]$ ls -l
总计 3188276
-rw-r--r-- 1 root root 980831749 11-12 00:42 linux_11.2.0.1_grid.zip
-rw-r--r-- 1 root root 1285396902 11-12 00:39 linux_11gR2_database_1of2.zip
-rw-r--r-- 1 root root 995359177 11-12 00:40 linux_11gR2_database_2of2.zip
[grid@www 11201_install]$ unzip linux_11.2.0.1_grid.zip #注意解压完目录权限
[grid@www 11201_install]$ cd grid
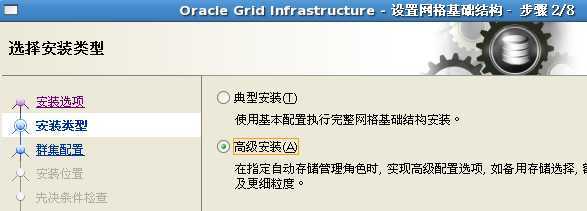
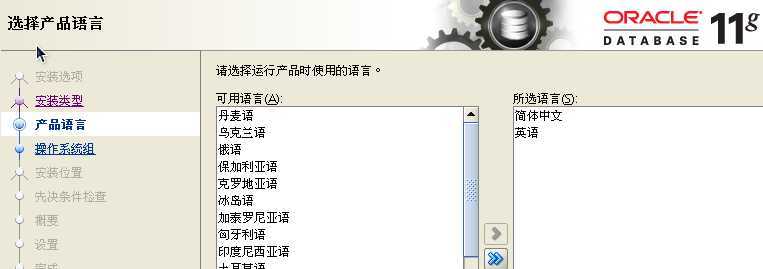
10、开始安装
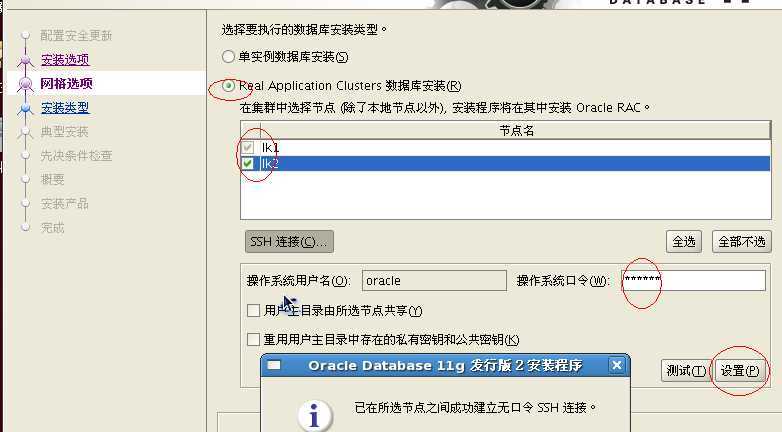
root:xhost +
[grid@www grid]$ ./runInstaller
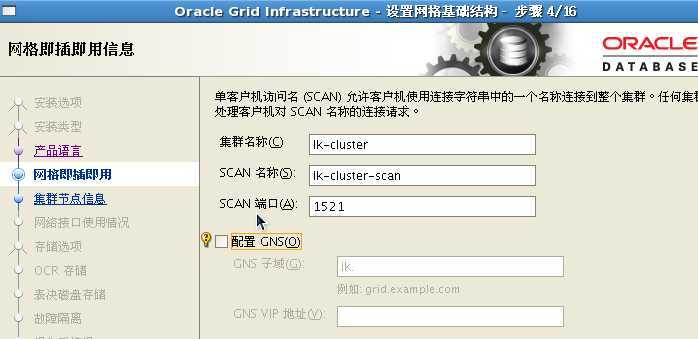
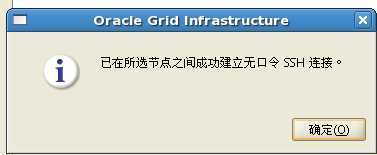
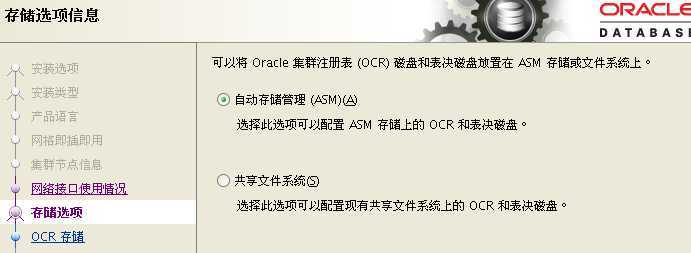
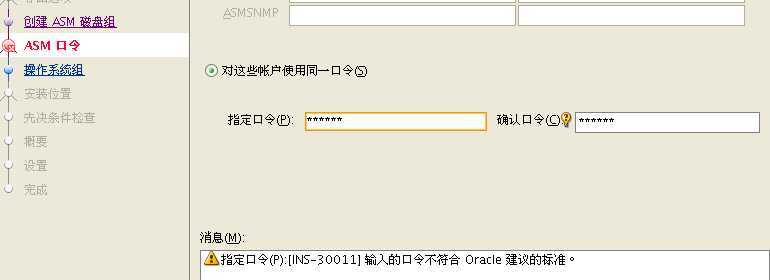
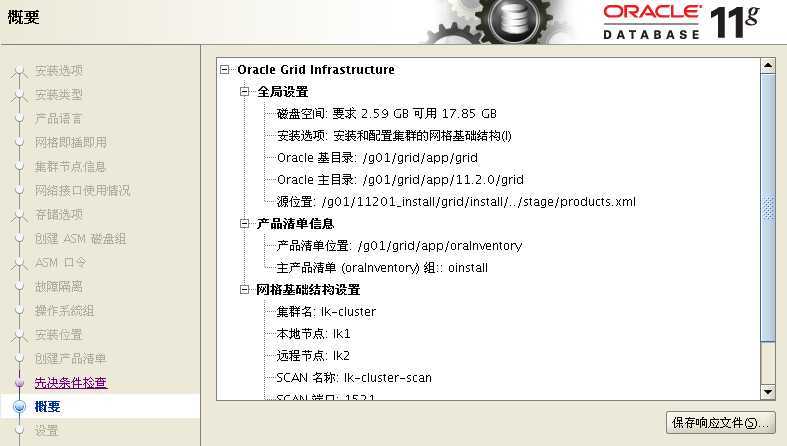
scan名称和/etc/hosts一致
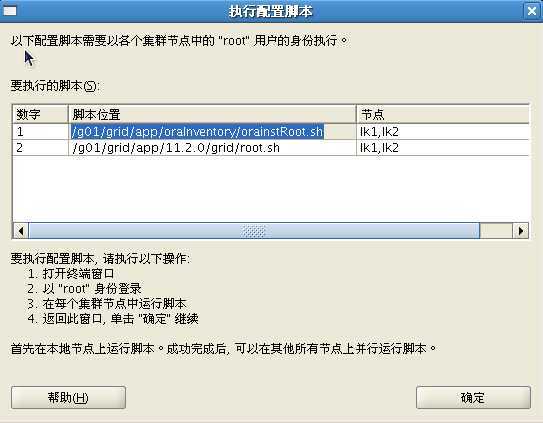
在两个节点上依次执行下2个脚本:
[root@lk1 ~]# /g01/grid/app/oraInventory/orainstRoot.sh
更改权限/g01/grid/app/oraInventory.
添加组的读取和写入权限。
删除全局的读取, 写入和执行权限。
更改组名/g01/grid/app/oraInventory 到 oinstall.
脚本的执行已完成。
[root@lk1 ~]# /g01/grid/app/11.2.0/grid/root.sh
Running Oracle 11g root.sh script...
The following environment variables are set as:
ORACLE_OWNER= grid
ORACLE_HOME= /g01/grid/app/11.2.0/grid
Enter the full pathname of the local bin directory: [/usr/local/bin]:
Copying dbhome to /usr/local/bin ...
Copying oraenv to /usr/local/bin ...
Copying coraenv to /usr/local/bin ...
Creating /etc/oratab file...
Entries will be added to the /etc/oratab file as needed by
Database Configuration Assistant when a database is created
Finished running generic part of root.sh script.
Now product-specific root actions will be performed.
2013-11-12 03:51:31: Parsing the host name
2013-11-12 03:51:31: Checking for super user privileges
2013-11-12 03:51:31: User has super user privileges
Using configuration parameter file: /g01/grid/app/11.2.0/grid/crs/install/crsconfig_params
Creating trace directory
LOCAL ADD MODE
Creating OCR keys for user ‘root‘, privgrp ‘root‘..
Operation successful.
root wallet
root wallet cert
root cert export
peer wallet
profile reader wallet
pa wallet
peer wallet keys
pa wallet keys
peer cert request
pa cert request
peer cert
pa cert
peer root cert TP
profile reader root cert TP
pa root cert TP
peer pa cert TP
pa peer cert TP
profile reader pa cert TP
profile reader peer cert TP
peer user cert
pa user cert
Adding daemon to inittab
CRS-4123: Oracle High Availability Services has been started.
ohasd is starting
CRS-2672: 尝试启动 ‘ora.gipcd‘ (在 ‘lk1‘ 上)
CRS-2672: 尝试启动 ‘ora.mdnsd‘ (在 ‘lk1‘ 上)
CRS-2676: 成功启动 ‘ora.gipcd‘ (在 ‘lk1‘ 上)
CRS-2676: 成功启动 ‘ora.mdnsd‘ (在 ‘lk1‘ 上)
CRS-2672: 尝试启动 ‘ora.gpnpd‘ (在 ‘lk1‘ 上)
CRS-2676: 成功启动 ‘ora.gpnpd‘ (在 ‘lk1‘ 上)
CRS-2672: 尝试启动 ‘ora.cssdmonitor‘ (在 ‘lk1‘ 上)
CRS-2676: 成功启动 ‘ora.cssdmonitor‘ (在 ‘lk1‘ 上)
CRS-2672: 尝试启动 ‘ora.cssd‘ (在 ‘lk1‘ 上)
CRS-2672: 尝试启动 ‘ora.diskmon‘ (在 ‘lk1‘ 上)
CRS-2676: 成功启动 ‘ora.diskmon‘ (在 ‘lk1‘ 上)
CRS-2676: 成功启动 ‘ora.cssd‘ (在 ‘lk1‘ 上)
CRS-2672: 尝试启动 ‘ora.ctssd‘ (在 ‘lk1‘ 上)
CRS-2676: 成功启动 ‘ora.ctssd‘ (在 ‘lk1‘ 上)
已成功创建并启动 ASM。
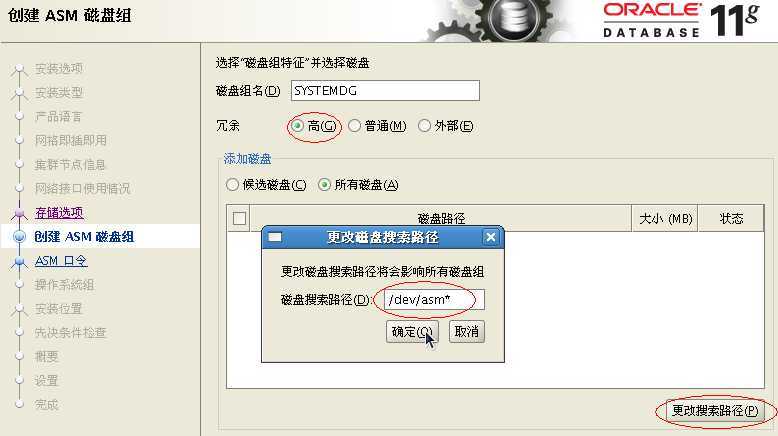
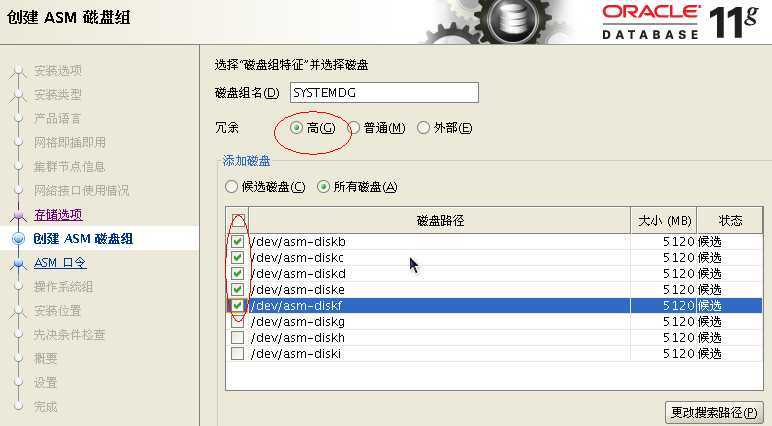
已成功创建磁盘组 SYSTEMDG。
clscfg: -install mode specified
Successfully accumulated necessary OCR keys.
Creating OCR keys for user ‘root‘, privgrp ‘root‘..
Operation successful.
CRS-2672: 尝试启动 ‘ora.crsd‘ (在 ‘lk1‘ 上)
CRS-2676: 成功启动 ‘ora.crsd‘ (在 ‘lk1‘ 上)
CRS-4256: Updating the profile
Successful addition of voting disk 24b7e49880b94f40bfcc2363b14201b9.
Successful addition of voting disk 05e6234683b74f54bf6cb05be26b6c18.
Successful addition of voting disk 936eeab744f64f46bf9ff1ca0d895d96.
Successful addition of voting disk 042aa5d1d4fc4fcabf9c2c525230b83e.
Successful addition of voting disk 8028d69206bc4f4cbffaf3a31ae6a01f.
Successfully replaced voting disk group with +SYSTEMDG.
CRS-4256: Updating the profile
CRS-4266: Voting file(s) successfully replaced
## STATE File Universal Id File Name Disk group
-- ----- ----------------- --------- ---------
1. ONLINE 24b7e49880b94f40bfcc2363b14201b9 (/dev/asm-diskb) [SYSTEMDG]
2. ONLINE 05e6234683b74f54bf6cb05be26b6c18 (/dev/asm-diskc) [SYSTEMDG]
3. ONLINE 936eeab744f64f46bf9ff1ca0d895d96 (/dev/asm-diskd) [SYSTEMDG]
4. ONLINE 042aa5d1d4fc4fcabf9c2c525230b83e (/dev/asm-diske) [SYSTEMDG]
5. ONLINE 8028d69206bc4f4cbffaf3a31ae6a01f (/dev/asm-diskf) [SYSTEMDG]
Located 5 voting disk(s).
CRS-2673: 尝试停止 ‘ora.crsd‘ (在 ‘lk1‘ 上)
CRS-2677: 成功停止 ‘ora.crsd‘ (在 ‘lk1‘ 上)
CRS-2673: 尝试停止 ‘ora.asm‘ (在 ‘lk1‘ 上)
CRS-2677: 成功停止 ‘ora.asm‘ (在 ‘lk1‘ 上)
CRS-2673: 尝试停止 ‘ora.ctssd‘ (在 ‘lk1‘ 上)
CRS-2677: 成功停止 ‘ora.ctssd‘ (在 ‘lk1‘ 上)
CRS-2673: 尝试停止 ‘ora.cssdmonitor‘ (在 ‘lk1‘ 上)
CRS-2677: 成功停止 ‘ora.cssdmonitor‘ (在 ‘lk1‘ 上)
CRS-2673: 尝试停止 ‘ora.cssd‘ (在 ‘lk1‘ 上)
CRS-2677: 成功停止 ‘ora.cssd‘ (在 ‘lk1‘ 上)
CRS-2673: 尝试停止 ‘ora.gpnpd‘ (在 ‘lk1‘ 上)
CRS-2677: 成功停止 ‘ora.gpnpd‘ (在 ‘lk1‘ 上)
CRS-2673: 尝试停止 ‘ora.gipcd‘ (在 ‘lk1‘ 上)
CRS-2677: 成功停止 ‘ora.gipcd‘ (在 ‘lk1‘ 上)
CRS-2673: 尝试停止 ‘ora.mdnsd‘ (在 ‘lk1‘ 上)
CRS-2677: 成功停止 ‘ora.mdnsd‘ (在 ‘lk1‘ 上)
CRS-2672: 尝试启动 ‘ora.mdnsd‘ (在 ‘lk1‘ 上)
CRS-2676: 成功启动 ‘ora.mdnsd‘ (在 ‘lk1‘ 上)
CRS-2672: 尝试启动 ‘ora.gipcd‘ (在 ‘lk1‘ 上)
CRS-2676: 成功启动 ‘ora.gipcd‘ (在 ‘lk1‘ 上)
CRS-2672: 尝试启动 ‘ora.gpnpd‘ (在 ‘lk1‘ 上)
CRS-2676: 成功启动 ‘ora.gpnpd‘ (在 ‘lk1‘ 上)
CRS-2672: 尝试启动 ‘ora.cssdmonitor‘ (在 ‘lk1‘ 上)
CRS-2676: 成功启动 ‘ora.cssdmonitor‘ (在 ‘lk1‘ 上)
CRS-2672: 尝试启动 ‘ora.cssd‘ (在 ‘lk1‘ 上)
CRS-2672: 尝试启动 ‘ora.diskmon‘ (在 ‘lk1‘ 上)
CRS-2676: 成功启动 ‘ora.diskmon‘ (在 ‘lk1‘ 上)
CRS-2676: 成功启动 ‘ora.cssd‘ (在 ‘lk1‘ 上)
CRS-2672: 尝试启动 ‘ora.ctssd‘ (在 ‘lk1‘ 上)
CRS-2676: 成功启动 ‘ora.ctssd‘ (在 ‘lk1‘ 上)
CRS-2672: 尝试启动 ‘ora.asm‘ (在 ‘lk1‘ 上)
CRS-2676: 成功启动 ‘ora.asm‘ (在 ‘lk1‘ 上)
CRS-2672: 尝试启动 ‘ora.crsd‘ (在 ‘lk1‘ 上)
CRS-2676: 成功启动 ‘ora.crsd‘ (在 ‘lk1‘ 上)
CRS-2672: 尝试启动 ‘ora.evmd‘ (在 ‘lk1‘ 上)
CRS-2676: 成功启动 ‘ora.evmd‘ (在 ‘lk1‘ 上)
CRS-2672: 尝试启动 ‘ora.asm‘ (在 ‘lk1‘ 上)
CRS-2676: 成功启动 ‘ora.asm‘ (在 ‘lk1‘ 上)
CRS-2672: 尝试启动 ‘ora.SYSTEMDG.dg‘ (在 ‘lk1‘ 上)
CRS-2676: 成功启动 ‘ora.SYSTEMDG.dg‘ (在 ‘lk1‘ 上)
CRS-2672: 尝试启动 ‘ora.registry.acfs‘ (在 ‘lk1‘ 上)
CRS-2676: 成功启动 ‘ora.registry.acfs‘ (在 ‘lk1‘ 上)
lk1 2013/11/12 04:18:11 /g01/grid/app/11.2.0/grid/cdata/lk1/backup_20131112_041811.olr
Preparing packages for installation...
cvuqdisk-1.0.7-1
Configure Oracle Grid Infrastructure for a Cluster ... succeeded
Updating inventory properties for clusterware
正在启动 Oracle Universal Installer...
检查交换空间: 必须大于 500 MB。 实际为 901 MB 通过
The inventory pointer is located at /etc/oraInst.loc
The inventory is located at /g01/grid/app/oraInventory
‘UpdateNodeList‘ 成功。
11、2个节点分别编辑配置文件
[root@lk1 ~]# su - grid
[grid@lk1 ~]$ vi .bash_profile
# .bash_profile
# Get the aliases and functions
if [ -f ~/.bashrc ]; then
. ~/.bashrc
fi
# User specific environment and startup programs
PATH=$PATH:$HOME/bin
export PATH
export CRS_HOME=/g01/grid/app/11.2.0/grid
export ORACLE_BASE=/g01
export ORACLE_HOME=/g01/grid/app/11.2.0/grid
export ORACLE_SID=+ASM1 #2节点修改此处
export PATH=$CRS_HOME/bin:$PATH
验证
[grid@lk1 ~]$ . .bash_profile
[grid@lk1 ~]$ asmcmd
ASMCMD
> lsdg
State Type Rebal Sector Block AU Total_MB Free_MB Req_mir_free_MB Usable_file_MB Offline_disks Voting_files
NameMOUNTED HIGH N
512 4096 1048576 25600 24470 455 8005 0 N SYSTEMDG
/ASMCMD
> exit
[root@lk1 ~]# crsctl status res -t
--------------------------------------------------------------------------------
NAME TARGET STATE SERVER STATE_DETAILS
--------------------------------------------------------------------------------
Local Resources
--------------------------------------------------------------------------------
ora.SYSTEMDG.dg
ONLINE ONLINE lk1
ONLINE ONLINE lk2
ora.asm
ONLINE ONLINE lk1 Started
ONLINE ONLINE lk2 Started
ora.eons
ONLINE ONLINE lk1
ONLINE ONLINE lk2
ora.gsd
OFFLINE OFFLINE lk1
OFFLINE OFFLINE lk2
ora.net1.network
ONLINE ONLINE lk1
ONLINE ONLINE lk2
ora.ons
ONLINE ONLINE lk1
ONLINE ONLINE lk2
ora.registry.acfs
ONLINE ONLINE lk1
ONLINE ONLINE lk2
--------------------------------------------------------------------------------
Cluster Resources
--------------------------------------------------------------------------------
ora.LISTENER_SCAN1.lsnr
1 ONLINE ONLINE lk1
ora.lk1.vip
1 ONLINE ONLINE lk1
ora.lk2.vip
1 ONLINE ONLINE lk2
ora.oc4j
1 OFFLINE OFFLINE
ora.scan1.vip
1 ONLINE ONLINE lk1 [grid@lk1 ~]$ crsctl query crs activeversion
Oracle Clusterware active
version on the
cluster is [
11.
2.
0.
1.
0]
[grid@lk1 ~]$ crsctl
check clusterCRS
-4537:
Cluster Ready Services
is online
CRS
-4529:
Cluster Synchronization Services
is online
CRS
-4533: Event Manager
is online
[grid@lk1 ~]$ crsctl
check crs
CRS
-4638: Oracle High Availability Services
is online
CRS
-4537:
Cluster Ready Services
is online
CRS
-4529:
Cluster Synchronization Services
is online
CRS
-4533: Event Manager
is online
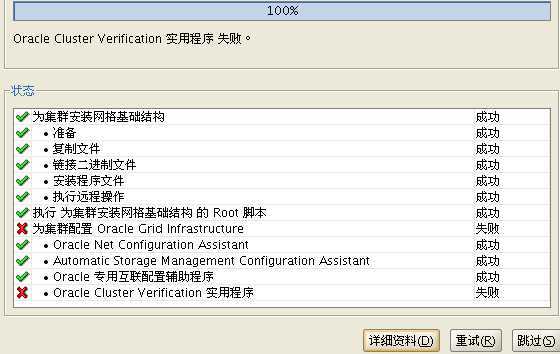
回到界面点击OK继续:
12、使用oracle用户在节点一安装数据库软件
先检查crs运行正常:
[grid@lk1 ~]$ crsctl check cluster
CRS-4537: Cluster Ready Services is online
CRS-4529: Cluster Synchronization Services is online
CRS-4533: Event Manager is online
[grid@lk1 ~]$ crsctl status res
解压安装包:
[oracle@lk1 ~]$ cd /s01
[oracle@lk1 s01]$ ls
linux_11gR2_database_1of2.zip linux_11gR2_database_2of2.zip
[oracle@lk1 s01]$ unzip linux_11gR2_database_1of2.zip
[oracle@lk1 s01]$ unzip linux_11gR2_database_2of2.zip
14、安装数据库软件:
[oracle@lk1 database]$ ./runInstaller
2个节点分别配置环境变量:
[oracle@lk1 dbhome_1]$ vi ~/.bash_profile
# .bash_profile
# Get the aliases and functions
if [ -f ~/.bashrc ]; then
. ~/.bashrc
fi
# User specific environment and startup programs
PATH=$PATH:$HOME/bin
export PATH
export ORACLE_BASE=/s01
export ORACLE_HOME=/s01/oracle/app/oracle/product/11.2.0/dbhome_1
export ORACLE_SID=orcl1 #二节点为 orcl2
export NLS_LANG=AMERICAN_AMERICA.AL32UTF8
export PATH=$ORACLE_HOME/OPatch:$ORACLE_HOME/bin:$PATH
跑root脚本:[root@lk1 s01]# /s01/oracle/app/oracle/product/11.2.0/dbhome_1/root.sh
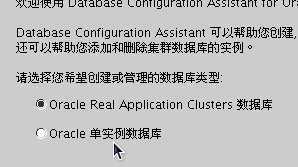
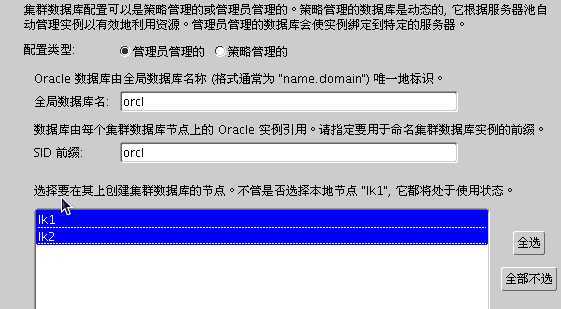
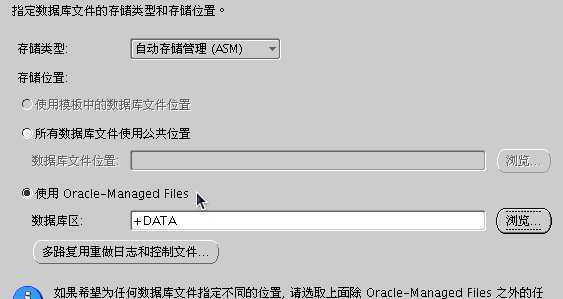
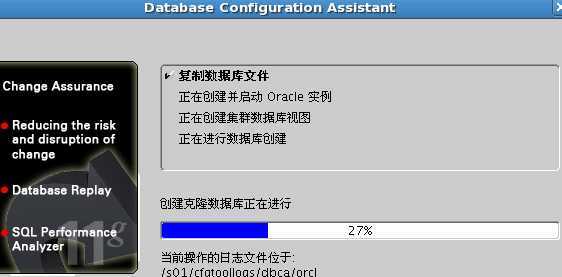
15、dbca建库:
11201_RHEL5.5_RAC_VBOX 详细搭建步骤
标签:style blog http color io os 使用 ar for
原文地址:http://www.cnblogs.com/kissdb/p/4009692.html

