标签:des style blog http color io os 使用 ar
apsart.cls
 1 % !Mode:: "TeX:UTF-8"
 2 %%
 3 %% This is file `APSart.cls‘,
 4 %%
 5 %% Copyright 2006-2012
 6 %%
 7 %% ----------------------------------------------------------------------
 8 %%
 9 %% It may be distributed and/or modified under the
10 %% conditions of the LaTeX Project Public License, either version 1.2
11 %% of this license or (at your option) any later version.
12 %% The latest version of this license is in
13 %%    http://www.latex-project.org/lppl.txt
14 %% and version 1.2 or later is part of all distributions of LaTeX
15 %% version 1999/12/01 or later.
16 %%
17 %% This the class file of the APSart class with LaTeX2e.
18 %%
19 \NeedsTeXFormat{LaTeX2e}[1995/12/01]
20 \ProvidesClass{APSart}[2012/02/08 v2.01 APSart document class]
21 \DeclareOption{Chinese}{%
22   \AtBeginDocument{\input{APSart_cn.cfg}}%
23   \PassOptionsToClass{\CurrentOption}%
24     {ctexart}}
25 \DeclareOption{English}{%
26   \AtBeginDocument{\input{APSart_en.cfg}}%
27   \PassOptionsToClass{\CurrentOption}%
28     {ctexart}}
29 \ProcessOptions
30 \LoadClass[cs4size,a4paper,fancyhdr,UTF8]{ctexart}[2004/08/14]
31 %% math packages
32 \RequirePackage{amsmath,amssymb,amsfonts,amsthm}
33 %% graphics packages
34 \RequirePackage{graphicx,epstopdf}
35 %% Other packages:
36 \RequirePackage{fancyhdr,fancyvrb}
37 %\RequirePackage[numbers,sort&compress]{natbib}
38 \RequirePackage{cite}
39 \RequirePackage[small,compact]{titlesec}
40 \headheight 11pt
41 \headsep 6 true mm
42 \footskip 0pt
43 \addtolength{\topmargin}{-4 true mm}
44 \oddsidemargin 0.4 true cm
45 \evensidemargin 0.4 true cm
46 \textwidth 15.0 true cm
47 \textheight 21.5 true cm
48 \parindent 2\ccwd
49 \renewcommand{\baselinestretch}{1.2}
50 \bibliographystyle{plain}
51 %% 修改论文标题的前置空行数
52 \makeatletter
53 \def\@maketitle{%
54  \newpage
55   \null
56   \vskip 0em%  % -- 原来为2em
57  \begin{center}%
58  \let \footnote \thanks
59    {\LARGE \@title \par}%
60    \vskip 1.5em%
61    {\large
62      \lineskip .5em%
63      \begin{tabular}[t]{c}%
64        \@author
65      \end{tabular}\par}%
66    \vskip 1em%
67    {\large \@date}%
68  \end{center}%
69  \par
70  \vskip 1.5em}
71 \makeatother
72 \endinput
73 %%
74 %% End of file `APSart.cls‘.
J_Aps.tex
% !Mode:: "TeX:UTF-8"
% UTF-8 编辑器
%%%%%%%%%%%%%%%%%%%%%%%%%%%%%%%%%%%%%%%%%%%%%%%%%%%%%%%%%%%%%%%%%%%%%%%%%%%
%%                                                                       %%
%%     LaTeX + CTeX 《应用概率统计》论文模板, 只针对 A4 纸英文稿.        %%
%%                                                                       %%
%%     Ver 2.05 By Tang Yincai aps@stat.ecnu.edu.cn                      %%
%%                             yctang@stat.ecnu.edu.cn(汤银才)         %%
%%                                                                       %%
%%                                                          2012.02.08   %%
%%     版本历史:                                                         %%
%%        Ver0.01   2005.09.10                                           %%
%%        Ver1.01   2006.03.01                                           %%
%%               1. 更改编号出现错位                                     %%
%%               2. 增加作者信息                                         %%
%%               3. 调整首页标题、作者和摘要之间的间距                   %%
%%        Ver1.02   2007.10.01                                           %%
%%               1. 将作者信集中处理                                     %%
%%               2. 将设置文件更改为APSart.cls,                         %%
%%                  中英文论文按采用选项Chniese/English                  %%
%%     You can mofify it and distribute it freely                        %%
%%                                                                       %%
%%%%%%%%%%%%%%%%%%%%%%%%%%%%%%%%%%%%%%%%%%%%%%%%%%%%%%%%%%%%%%%%%%%%%%%%%%%
%%=======================================================================%%
%%  编译方法: 1. LaTeX -> dvi2pdf                                       %%
%%             2. pdfLaTeX                                               %%
%%=======================================================================%%

%%%%%%%%%%%%%%%%%%%%%%%%%%%%%%%%%%%%%%%%%%%%%%%%%%%%%%%%%%%%%%%%
%            中文稿 文章模板:A4 纸, 五号字, 单列              %
%%%%%%%%%%%%%%%%%%%%%%%%%%%%%%%%%%%%%%%%%%%%%%%%%%%%%%%%%%%%%%%%
\documentclass[a4paper,11pt,onecolumn,twoside,cap,Chinese]{APSart}
%\usepackage{}  %添加自己论文需要的其他宏包
\usepackage{epsfig,picins,picinpar,subfigure}
\begin{document}
%%
%%%%%%%%%%%%%%%%%%%%%%%%%%%%%%%%%%%%%%%%%%%%%%%%%%%%%%%%%%%%%%%%
%%------------------ 编辑部提供的信息 ------------------------%%
%%%%%%%%%%%%%%%%%%%%%%%%%%%%%%%%%%%%%%%%%%%%%%%%%%%%%%%%%%%%%%%%
%%\apsnumber{2007/xxx}             % 论文编号 --- 编辑部受理后产生
\newcommand{\pubvol}{XX}         % 卷号
\newcommand{\pubno}{X}           % 期号
\newcommand{\pubyear}{XXXX}      % 出版年份
\newcommand{\pubmonth}{XX}       % 出版月份
\newcommand{\receivedate}{本文XXXX~年~XX~月~XX~日收到} % 论文收到日期
\newcommand{\modifydate}{XXXX~年~XX~月~XX~日收到修改稿}% 论文修改日期
%%
%%%%%%%%%%%%%%%%%%%%%%%%%%%%%%%%%%%%%%%%%%%%%%%%%%%%%%%%%%%%%%%%
%%-------------------- 作者提供的信息 ------------------------%%
%%%%%%%%%%%%%%%%%%%%%%%%%%%%%%%%%%%%%%%%%%%%%%%%%%%%%%%%%%%%%%%%
\newcommand{\cnfirstauthor}{APS编辑部}
\newcommand{\cnsecondauthor}{}
\newcommand{\cnfirstinst}{华东师范大学金融与统计学院,~~上海市\, 200241}
\newcommand{\cnsecondinst}{第二作者单位(到部门),~~省市\, 邮政编码}
\newcommand{\cntitle}{《应用概率统计》论文录入模板$^{\mathbf{Ver2.01}}$}
\newcommand{\cnkeywords}{科技论文, 排版, 页面, C\TeX.}
\newcommand{\cnclassno}{O212.xx}  % 中图分类号
%%
\newcommand{\enfirstauthor}{APS Editorial Board}
\newcommand{\ensecondauthor}{Second Name}
\newcommand{\enfirstinst}{Department of Statistics, East China Normal University, Shanghai, 200062}
\newcommand{\ensecondinst}{Second Author‘s Working Unit (Up to Department), Province\, Zip Code}
\newcommand{\entitle}{Template for Chinese Journal of APS$^{\mathbf{Ver1.02}}$}
\newcommand{\enkeywords}{Scientific paper, typesetting, page setting, C\TeX.}
\newcommand{\amsno}{62Nxx} % AMS Subject Claassification
%%
%% 中文摘要
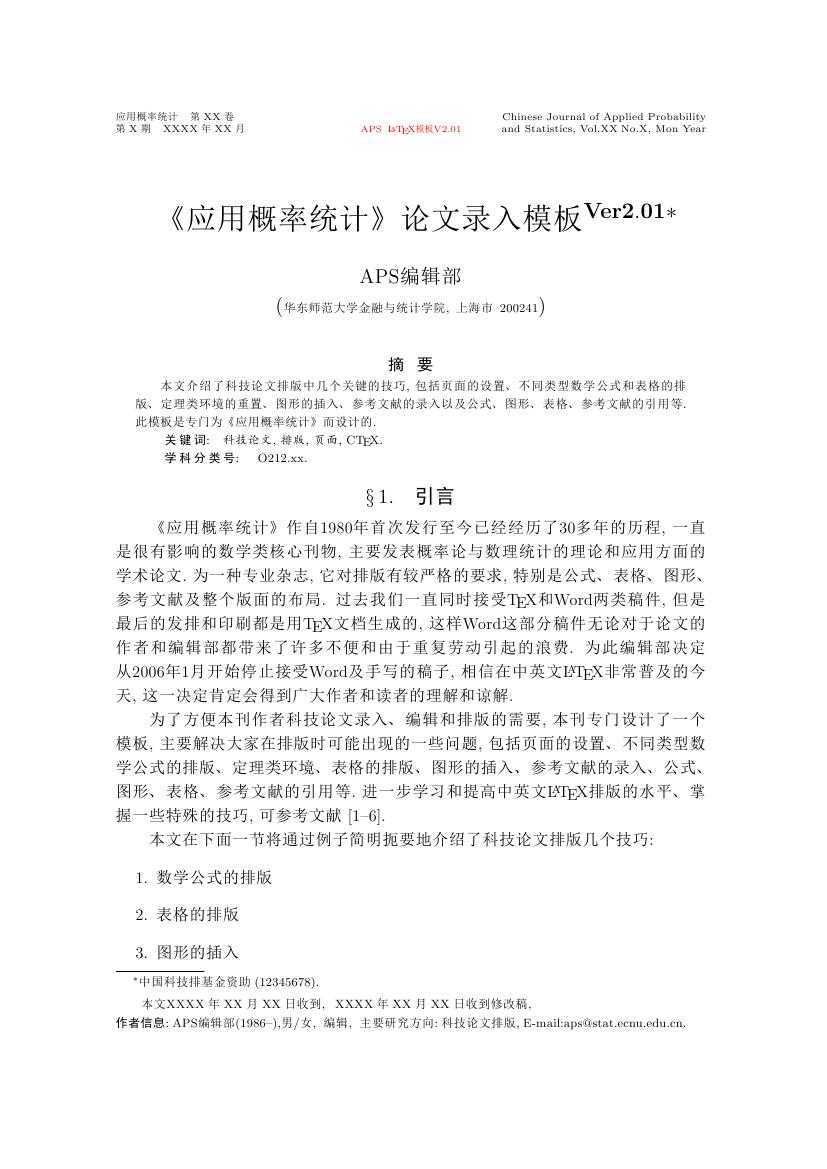
\newcommand{\cnabstract}{\hspace{2\ccwd}本文介绍了科技论文排版中几个关键的技巧, 包括页面的设置、不同类型数学公式和表格的排版、定理类环境的重置、
图形的插入、参考文献的录入以及公式、图形、表格、参考文献的引用等. 此模板是专门为《应用概率统计》而设计的.}
%% 英文摘要
\newcommand{\enabstract}{\hspace{2\ccwd}This paper introduces the techniques in the typesetting of scientific papers, including page setting-up,
typesetting of mathematical formulae and tables of different types, resetting of theorem environment, inserting of figures,
bibliography and referring of formulae, figures, tables and references. This template is specially designed for
Chinese Journal of Applied Probability and Statistics.} %%
\newcommand{\fundinfo}{中国科技排基金资助~(12345678).}
\newcommand{\authorsinfo}{\textbf{作者信息}:~
APS编辑部(1986--),男/女, ~编辑, ~主要研究方向:~科技论文排版,~E-mail:aps@stat.ecnu.edu.cn.}

%%%%%%%%%%%%%%%%%%%%%%%%%%%%%%%%%%%%%%%%%%%%%%%%%%%%%%%%%%%%%%%%
%        文章正文                                              %
%%%%%%%%%%%%%%%%%%%%%%%%%%%%%%%%%%%%%%%%%%%%%%%%%%%%%%%%%%%%%%%%

\title{\cntitle%
\thanks{\fundinfo}
}
\author{\cnfirstauthor\\[-1pt]
({\zihao{-5}\cnfirstinst}) \\[-2pt]}

\date{}  % 这一行用来去掉默认的日期显示
\maketitle
\vspace{-6mm}
%%%%%%%%%%%%%%%%%%%%%%%%%%%%%%%%%%%%%%%%%%%%%%%%%%%%%%%%%%%%%%%%
%       中文摘要                                               %
%%%%%%%%%%%%%%%%%%%%%%%%%%%%%%%%%%%%%%%%%%%%%%%%%%%%%%%%%%%%%%%%
\begin{center}
\begin{minipage}[c]{14cm}
\begin{center}\CJKfamily{hei}摘~~~要\end{center}
\vspace{-1em}
\zihao{-5}\cnabstract \\CJKfamily{hei}\mbox{}\hspace{2\ccwd} 关\,键\,词:\quad\CJKfamily{kai}\cnkeywords\\CJKfamily{hei}\mbox{}\hspace{2\ccwd} 学\,科\,分\,类\,号: \quad \cnclassno.
\end{minipage}
\end{center}
%\footnote[0]{\scriptsize{\receivedate,~~~\modifydate, \\ \authorsinfo}}
%\vspace{-1em}

%%%%%%%%%%%%%%%%%%%%%%%%%%%%%%%%%%%%%%%%%%%%%%%%%%%%%%%%%%%%%%%%
%        正文由此开始                                          %
%%%%%%%%%%%%%%%%%%%%%%%%%%%%%%%%%%%%%%%%%%%%%%%%%%%%%%%%%%%%%%%%

%%%%%%%%%%%%%%%%%%%%%%%%%%%%%%%%%%%%%%%%%%%%%%%%%%%%%%%%%%%%%%%%
\section{引言}
%%%%%%%%%%%%%%%%%%%%%%%%%%%%%%%%%%%%%%%%%%%%%%%%%%%%%%%%%%%%%%%%
《应用概率统计》作自1980年首次发行至今已经经历了30多年
的历程, 一直是很有影响的数学类核心刊物, 主要发表概率论与数理统计的理论和应用方面的学术论文.
为一种专业杂志, 它对排版有较严格的要求, 特别是公式、表格、图形、参考文献及整个版面的布局.
过去我们一直同时接受\TeX 和Word两类稿件, 但是最后的发排和印刷都是用\TeX 文档生成的, 这样Word这部分稿件
无论对于论文的作者和编辑部都带来了许多不便和由于重复劳动引起的浪费. 为此编辑部决定从2006年1月开始停止接受
Word及手写的稿子, 相信在中英文\LaTeX 非常普及的今天, 这一决定肯定会得到广大作者和读者的理解和谅解.

为了方便本刊作者科技论文录入、编辑和排版的需要, 本刊专门设计了一个模板, 主要解决大家在排版时可能出现的一些问题,
包括页面的设置、不同类型数学公式的排版、定理类环境、表格的排版、
图形的插入、参考文献的录入、公式、图形、表格、参考文献的引用等.
进一步学习和提高中英文\LaTeX 排版的水平、掌握一些特殊的技巧, 可参考文献
\cite{Xiedy,Dengjs,Sangdy,Chenzj,Wangl,CTug}.

本文在下面一节将通过例子简明扼要地介绍了科技论文排版几个技巧:
\begin{enumerate}
  \item 数学公式的排版
  \item 表格的排版
  \item 图形的插入
  \item 定理类环境
  \item 参考文献的录入
  \item 章节、公式、表格、图形和参考文献的引用
  \item 常用的插件或辅助工具
\end{enumerate}
%%%%%%%%%%%%%%%%%%%%%%%%%%%%%%%%%%%%%%%%%%%%%%%%%%%%%%%%%%%%%%%%
\section{科技论文排版技巧}
%%%%%%%%%%%%%%%%%%%%%%%%%%%%%%%%%%%%%%%%%%%%%%%%%%%%%%%%%%%%%%%%
\subsection{使用说明}
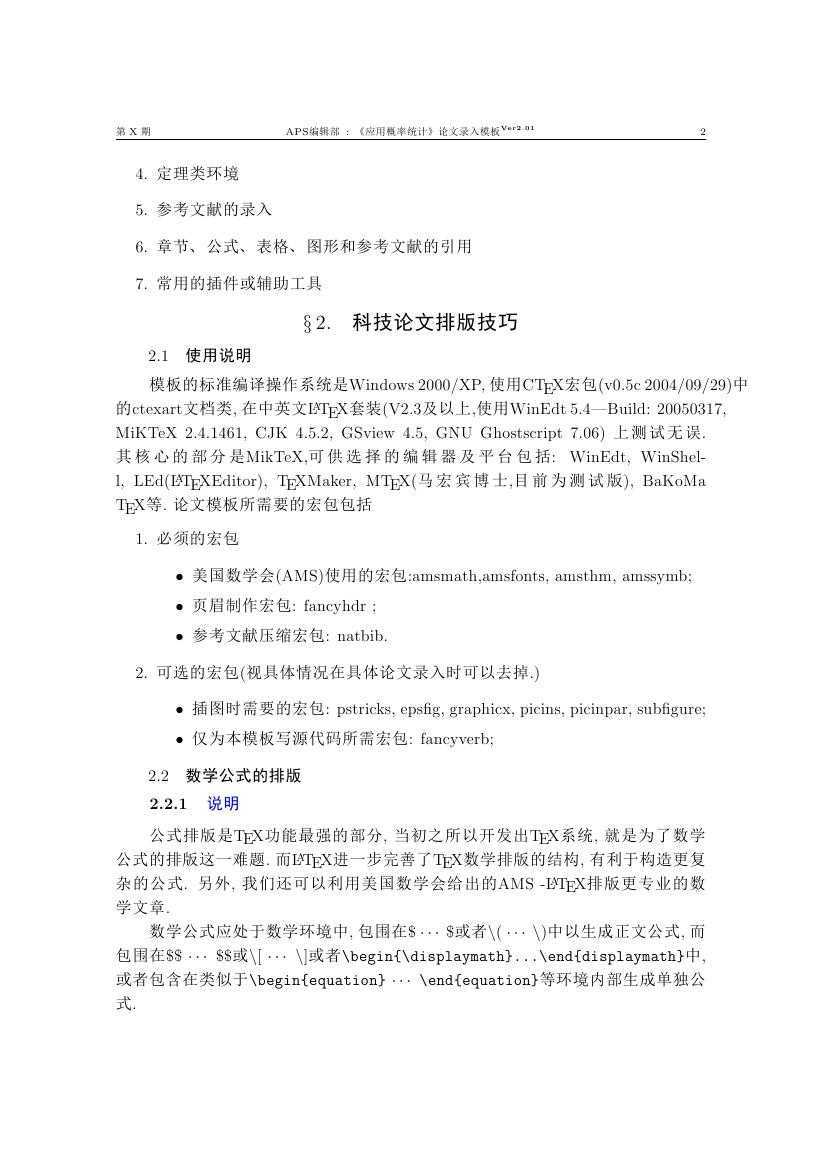
模板的标准编译操作系统是Windows 2000/XP, 使用C\TeX 宏包(v0.5c 2004/09/29)中的ctexart文档类,
在中英文\LaTeX 套装(V2.3及以上,使用WinEdt 5.4---Build: 20050317, MiKTeX 2.4.1461, CJK 4.5.2, GSview 4.5, GNU Ghostscript 7.06)
上测试无误. 其核心的部分是MikTeX,可供选择的编辑器及平台包括: WinEdt, WinShell, LEd(\LaTeX Editor), \TeX Maker,
M\TeX(马宏宾博士,目前为测试版), BaKoMa \TeX 等.
论文模板所需要的宏包包括~~
\begin{enumerate}
\item 必须的宏包
\begin{itemize}
\item 美国数学会(AMS)使用的宏包:amsmath,amsfonts, amsthm, amssymb;
\item 页眉制作宏包: fancyhdr ;
\item 参考文献压缩宏包: natbib.
\end{itemize}
\item 可选的宏包(视具体情况在具体论文录入时可以去掉.)
\begin{itemize}
\item 插图时需要的宏包: pstricks, epsfig, graphicx, picins, picinpar, subfigure;
\item 仅为本模板写源代码所需宏包: fancyverb;
%\item 字体点缀用的颜色宏包: xcolor (也可用普通的color宏包)
\end{itemize}
\end{enumerate}

\subsection{数学公式的排版}\label{formula}
\subsubsection{\color{blue}说明}
公式排版是\TeX 功能最强的部分, 当初之所以开发出\TeX 系统, 就是为了数学公式的排版这一难题.
而\LaTeX 进一步完善了\TeX 数学排版的结构, 有利于构造更复杂的公式. 另外, 我们还可以利用
美国数学会给出的AMS -\LaTeX 排版更专业的数学文章.

数学公式应处于数学环境中, 包围在
\$  $\cdots$  \$或者$\backslash$( $\cdots$ $\backslash$)中以生成正文公式,
而包围在\$\$ $\cdots$ \$\$或
$\backslash$[ $\cdots$ $\backslash$]或者
\verb=\begin{\displaymath}...\end{displaymath}=中, 或者包含在类似于
\verb=\begin{equation}= $\cdots$ \verb=\end{equation}=等环境内部生成单独公式.

\subsubsection{\color{blue}常用公式的排版}
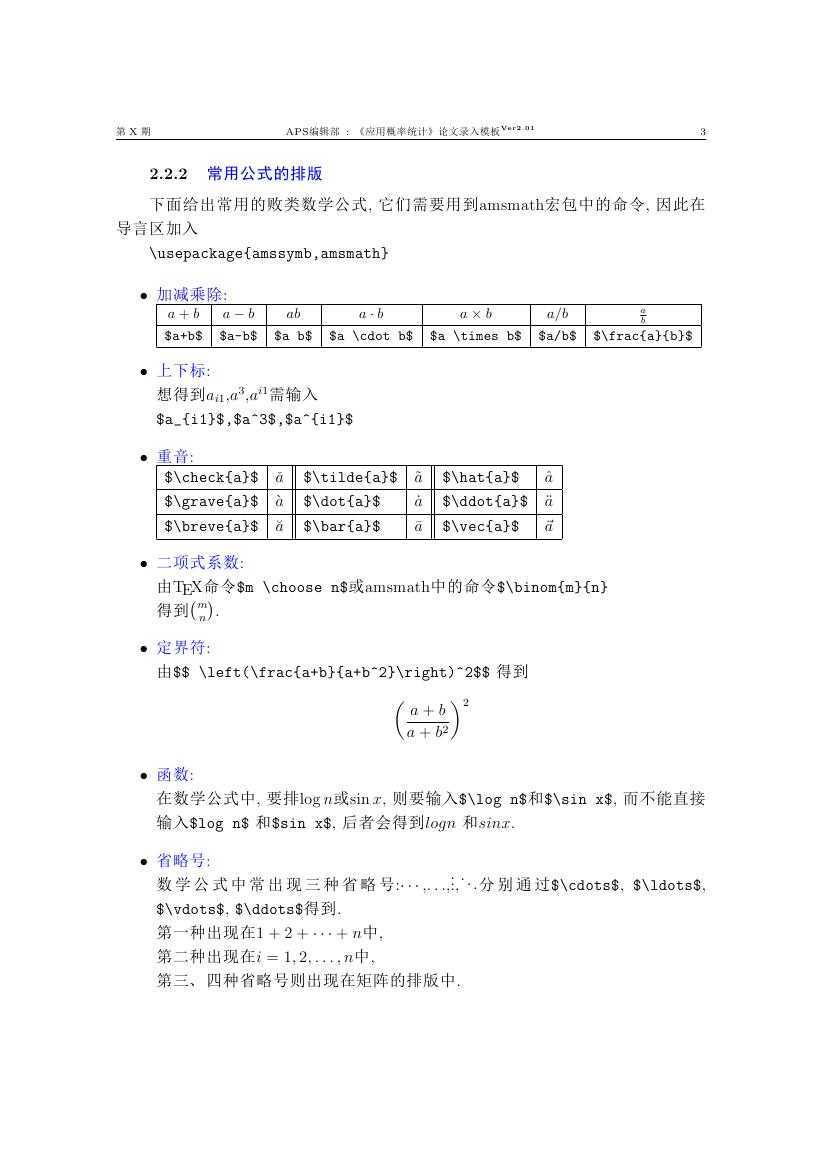
下面给出常用的败类数学公式, 它们需要用到amsmath宏包中的命令, 因此在导言区加入

\verb=\usepackage{amssymb,amsmath}=

\begin{itemize}
\item {\color{blue}{加减乘除:}}\{\small
\begin{tabular}{|c|c|c|c|c|c|c|c|}
\hline
\mbox{$a+b$}&\mbox{$a-b$}&\mbox{$a b$}&\mbox{$a \cdot b$}&\mbox{$a \times b$}
&\mbox{$a/b$}&\mbox{$\frac{a}{b}$}\\ \hline
\verb/$a+b$/&\verb/$a-b$/&\verb/$a b$/&\verb/$a \cdot b$/&\verb/$a \times b$/
&\verb=$a/b$=&\verb/$\frac{a}{b}$/
\\ \hline
\end{tabular}
}
\item {\color{blue}{上下标:}}\想得到$a_{i1}$,$a^3$,$a^{i1}$需输入\\verb=$a_{i1}$,$a^3$,$a^{i1}$=
\item {\color{blue}{重音:}}\\begin{tabular}{|l|l||l|l||l|l|}
\hline
\verb=$\check{a}$=&$\check{a}$&\verb=$\tilde{a}$=&$\tilde{a}$&\verb=$\hat{a}$=&$\hat{a}$\\ \hline
\verb=$\grave{a}$=&$\grave{a}$&\verb=$\dot{a}$=&$\dot{a}$&\verb=$\ddot{a}$=&$\ddot{a}$\\ \hline
\verb=$\breve{a}$=&$\breve{a}$&\verb=$\bar{a}$=&$\bar{a}$&\verb=$\vec{a}$=&$\vec{a}$\\ \hline
\end{tabular}

\item {\color{blue}{二项式系数:}}\由\TeX 命令\verb=$m \choose n$=或amsmath中的命令\verb=$\binom{m}{n}=\得到$m \choose n$.

\item {\color{blue}{定界符:}}\由
\verb=$$ \left(\frac{a+b}{a+b^2}\right)^2$$=
得到
$$
    \left(\frac{a+b}{a+b^2}\right)^2
$$

\item {\color{blue}{函数:}}\在数学公式中, 要排$\log n$或$\sin x$, 则要输入\verb=$\log n$=和\verb=$\sin x$=,
而不能直接输入\verb=$log n$= 和 \verb=$sin x$=, 后者会得到 $log n$ 和 $sin x$.
\item {\color{blue}{省略号:}}\数学公式中常出现三种省略号:$\cdots$,$\ldots$,$\vdots$,$\ddots$分别通过
\verb=$\cdots$=, \verb=$\ldots$=, \verb=$\vdots$=, \verb=$\ddots$=得到.\第一种出现在$1+2+\cdots+n$中,\第二种出现在$i=1,2,\ldots,n$中,\第三、四种省略号则出现在矩阵的排版中.

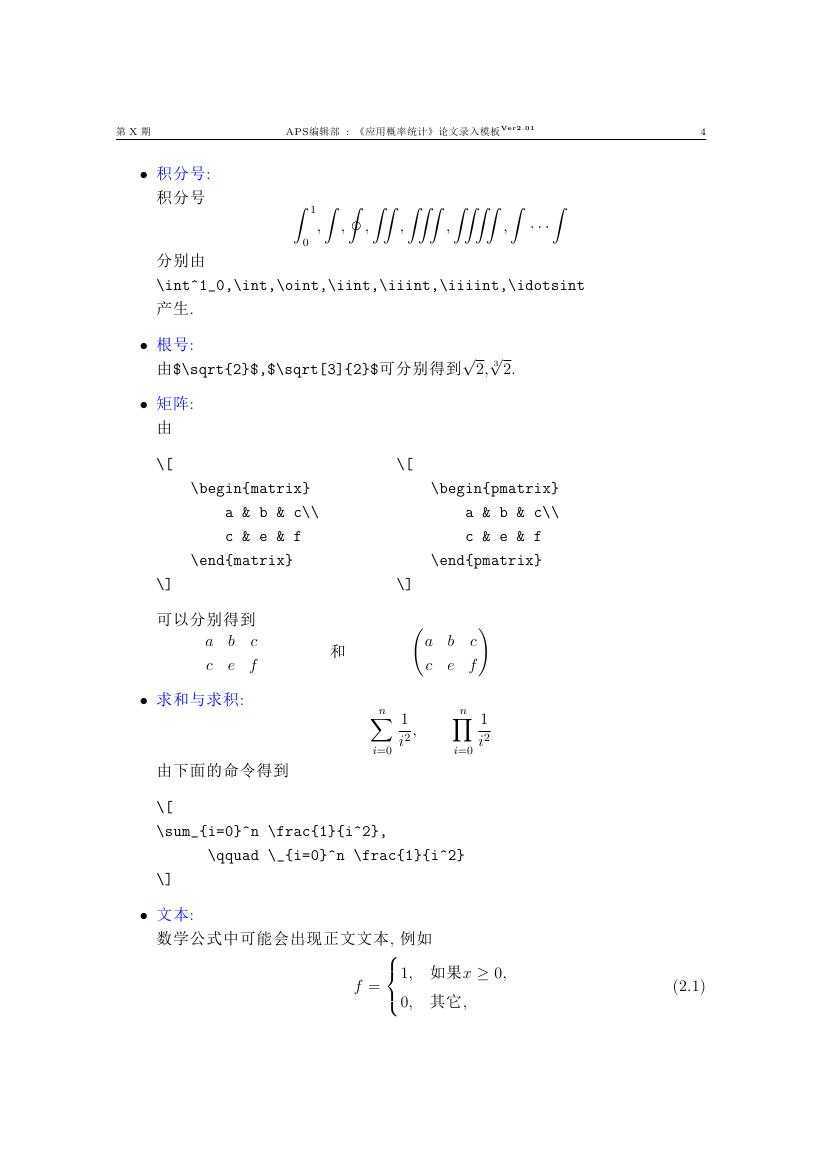
\item {\color{blue}{积分号:}}\积分号
$$
\int^1_0,\int,\oint,\iint,\iiint,\iiiint,\idotsint
$$
分别由\\verb=\int^1_0,\int,\oint,\iint,\iiint,\iiiint,\idotsint=\产生.
\item {\color{blue}{根号:}}\由\verb=$\sqrt{2}$,$\sqrt[3]{2}$=可分别得到$\sqrt{2}$,$\sqrt[3]{2}$.

\item {\color{blue}{矩阵:}}\由
\begin{verbatim}
\[                          \[
    \begin{matrix}              \begin{pmatrix}
        a & b & c\\                 a & b & c\        c & e & f                   c & e & f
    \end{matrix}                \end{pmatrix}
\]                          \]
\end{verbatim}
可以分别得到\\mbox{}\quad\qquad
\(
    \begin{matrix}
        a & b & c\        c & e & f
    \end{matrix}
\)
\qquad\qquad{}和\qquad\qquad
\(
    \begin{pmatrix}
        a & b & c\        c & e & f
    \end{pmatrix}
\)
\item {\color{blue}{求和与求积:}}
\[
\sum_{i=0}^n \frac{1}{i^2},
      \qquad \prod_{i=0}^n \frac{1}{i^2}
\]
由下面的命令得到
\begin{verbatim}
\[
\sum_{i=0}^n \frac{1}{i^2},
      \qquad \_{i=0}^n \frac{1}{i^2}
\]
\end{verbatim}

\item {\color{blue}{文本:}}\数学公式中可能会出现正文文本, 例如
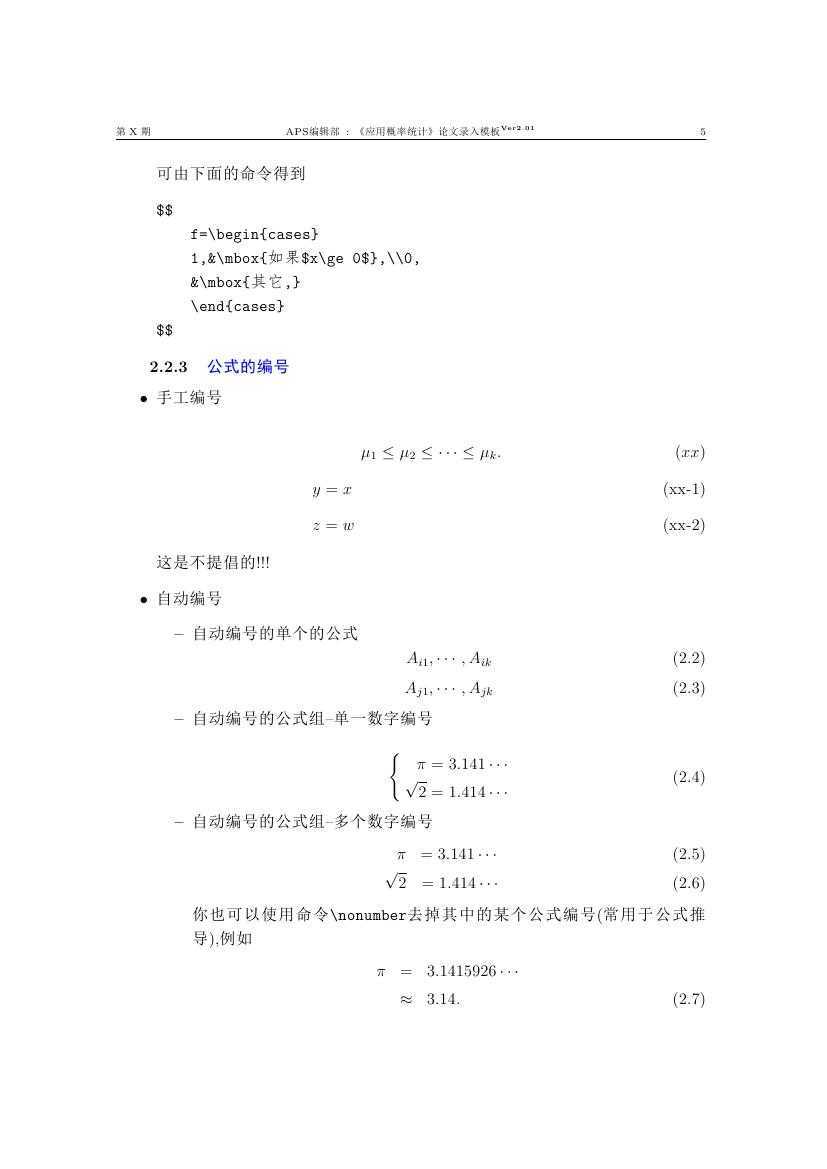
\begin{equation}
f=\begin{cases} 1, & \mbox{如果$x\ge 0$}, \\ 0,& \mbox{其它,}\end{cases}
\end{equation}
可由下面的命令得到
\begin{verbatim}
$$
    f=\begin{cases}
    1,&\mbox{如果$x\ge 0$},\\0,
    &\mbox{其它,}
    \end{cases}
$$
\end{verbatim}
\end{itemize}

\subsubsection{\color{blue}公式的编号}
\newcommand{\subvec}[3][x]{\ensuremath{#1_{#2},\cdots,#1_{#3}}}

\begin{itemize}
\item 手工编号

$$\mu_1\le\mu_2\le\cdots\le\mu_k.\eqno(xx)$$

\vskip\abovedisplayskip \hbox to\hsize{\hskip5cm
  $\displaystyle
y=x
  $\hss (xx-1)}
\vskip0.5\baselineskip \hbox to\hsize{\hskip5cm
  $\displaystyle
z=w
  $\hss (xx-2)}
\vskip\belowdisplayskip

这是不提倡的!!!

\item 自动编号
\begin{itemize}
\item 自动编号的单个的公式
\begin{equation}
   \subvec [A]{i1}{ik}
\end{equation}
\begin{equation}
   \subvec [A]{j1}{jk}
\end{equation}

\item 自动编号的公式组--单一数字编号

\begin{equation} \label{eq:3}
\left\{ \begin{aligned}
         \pi &= 3.141\cdots \     \sqrt{2}&=1.414\cdots
         \end{aligned} \right.
\end{equation}

\item 自动编号的公式组--多个数字编号
\begin{eqnarray}
         \pi &= 3.141\cdots \     \sqrt{2}&=1.414\cdots
\end{eqnarray}
你也可以使用命令\verb/\nonumber/去掉其中的某个公式编号(常用于公式推导),例如
\begin{eqnarray}
         \pi &=& 3.1415926\cdots \nonumber \             &\approx & 3.14.
\end{eqnarray}

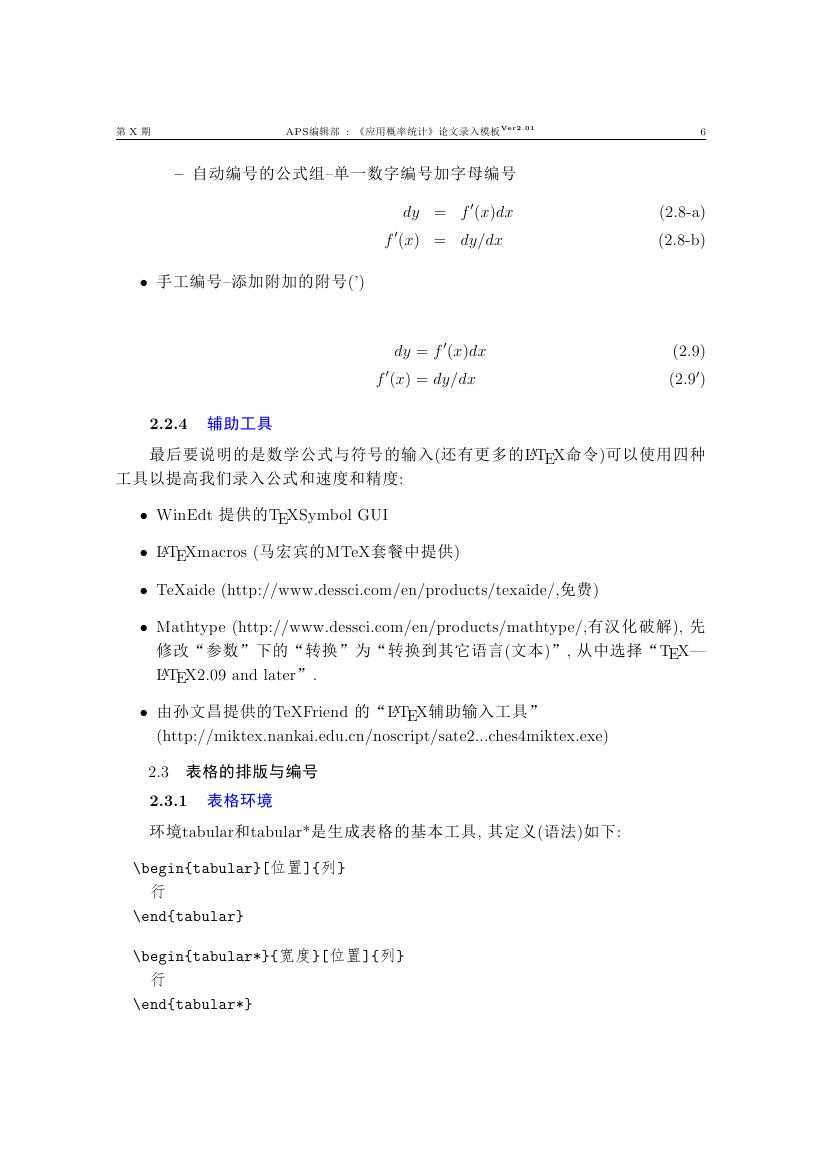
\item 自动编号的公式组--单一数字编号加字母编号
\alpheqn  %产生形如 4-a,4-b 的编号
\begin{eqnarray}
dy&=&f‘(x) dx  \label{eq_letter:a}\f‘(x)&=&dy/dx  \label{eq_letter:b}
\end{eqnarray}
\reseteqn  %恢复形如 4,5 的编号

\end{itemize}


\item 手工编号--添加附加的附号(‘)

\begin{align}
dy&=f‘(x) dx \label{eq:1} \f‘(x)&=dy/dx  \tag{\ref{eq:1}$‘$}
\end{align}
\end{itemize}
\subsubsection{\color{blue}辅助工具}
最后要说明的是数学公式与符号的输入(还有更多的\LaTeX 命令)可以使用四种工具以提高我们录入公式和速度和精度:
\begin{itemize}
  \item WinEdt 提供的 \TeX Symbol GUI
  \item \LaTeX macros (马宏宾的MTeX套餐中提供)
  \item TeXaide (http://www.dessci.com/en/products/texaide/,免费)
  \item Mathtype (http://www.dessci.com/en/products/mathtype/,有汉化破解),
  先修改“参数”下的“转换”为“转换到其它语言(文本)”, 从中选择 “\TeX --- \LaTeX 2.09 and later”.
  \item 由孙文昌提供的TeXFriend 的“\LaTeX 辅助输入工具”\     (http://miktex.nankai.edu.cn/noscript/sate2...ches4miktex.exe)
\end{itemize}

\subsection{表格的排版与编号}\label{table}
\subsubsection{\color{blue}表格环境}
环境tabular和tabular*是生成表格的基本工具, 其定义(语法)如下:
\begin{verbatim}
  \begin{tabular}[位置]{列}
    行
  \end{tabular}
\end{verbatim}

\begin{verbatim}
  \begin{tabular*}{宽度}[位置]{列}
    行
  \end{tabular*}
\end{verbatim}

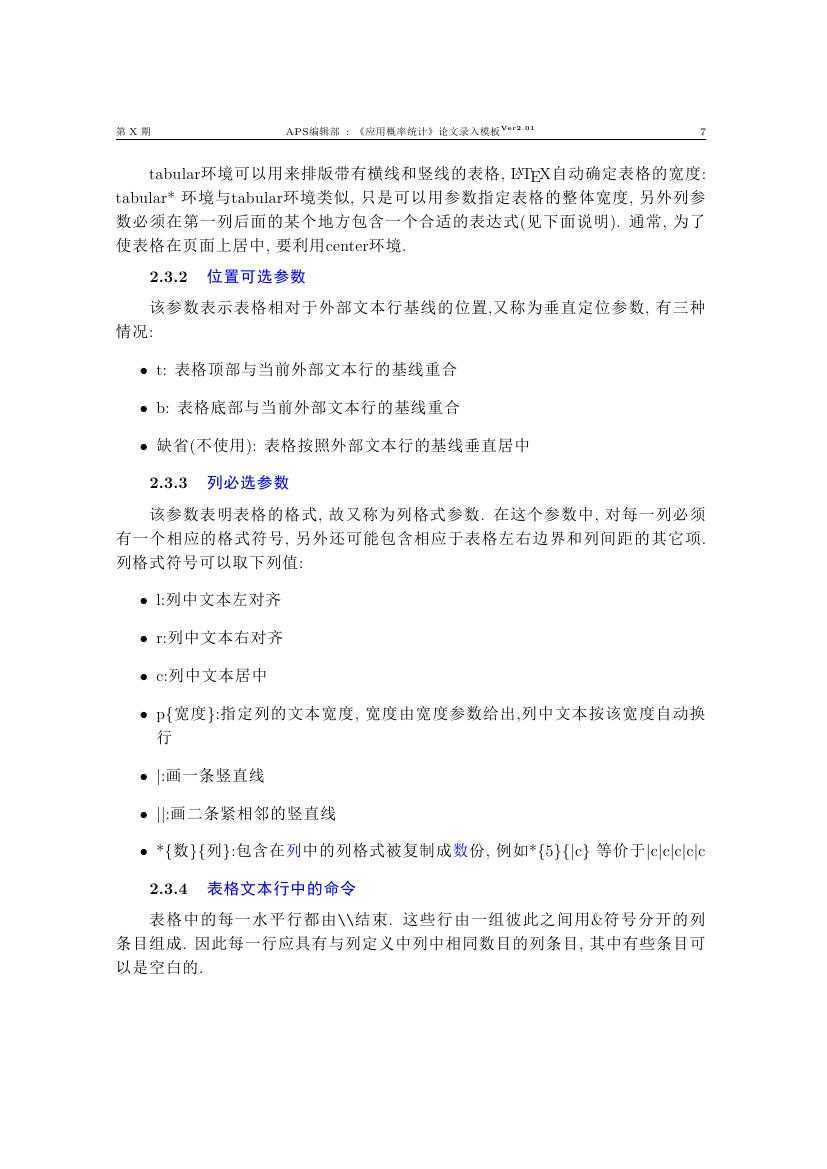
tabular环境可以用来排版带有横线和竖线的表格, \LaTeX 自动确定表格的宽度: tabular* 环境
与tabular环境类似, 只是可以用参数指定表格的整体宽度, 另外列参数必须在第一列后面的某个地方
包含一个合适的\@表达式(见下面说明). 通常, 为了使表格在页面上居中, 要利用center环境.

\subsubsection{\color{blue}位置可选参数}
该参数表示表格相对于外部文本行基线的位置,又称为垂直定位参数, 有三种情况:
\begin{itemize}
  \item t: 表格顶部与当前外部文本行的基线重合
  \item b: 表格底部与当前外部文本行的基线重合
  \item 缺省(不使用): 表格按照外部文本行的基线垂直居中
\end{itemize}

\subsubsection{\color{blue}列必选参数}
该参数表明表格的格式, 故又称为列格式参数. 在这个参数中, 对每一列必须有一个相应的格式符号, 另外
还可能包含相应于表格左右边界和列间距的其它项. 列格式符号可以取下列值:
\begin{itemize}
  \item l:列中文本左对齐
  \item r:列中文本右对齐
  \item c:列中文本居中
  \item p\{宽度\}:指定列的文本宽度, 宽度由宽度参数给出,列中文本按该宽度自动换行
  \item $|$:画一条竖直线
  \item $||$:画二条紧相邻的竖直线
  \item *\{数\}\{列\}:包含在{\color{blue}列}中的列格式被复制成{\color{blue}数}份, 例如*\{5\}\{$|$c\}
  等价于$|$c$|$c$|$c$|$c$|$c
\end{itemize}

\subsubsection{\color{blue}表格文本行中的命令}
表格中的每一水平行都由\verb=\\=结束. 这些行由一组彼此之间用\&符号分开的列条目组成. 因此每一行应
具有与列定义中列中相同数目的列条目, 其中有些条目可以是空白的.
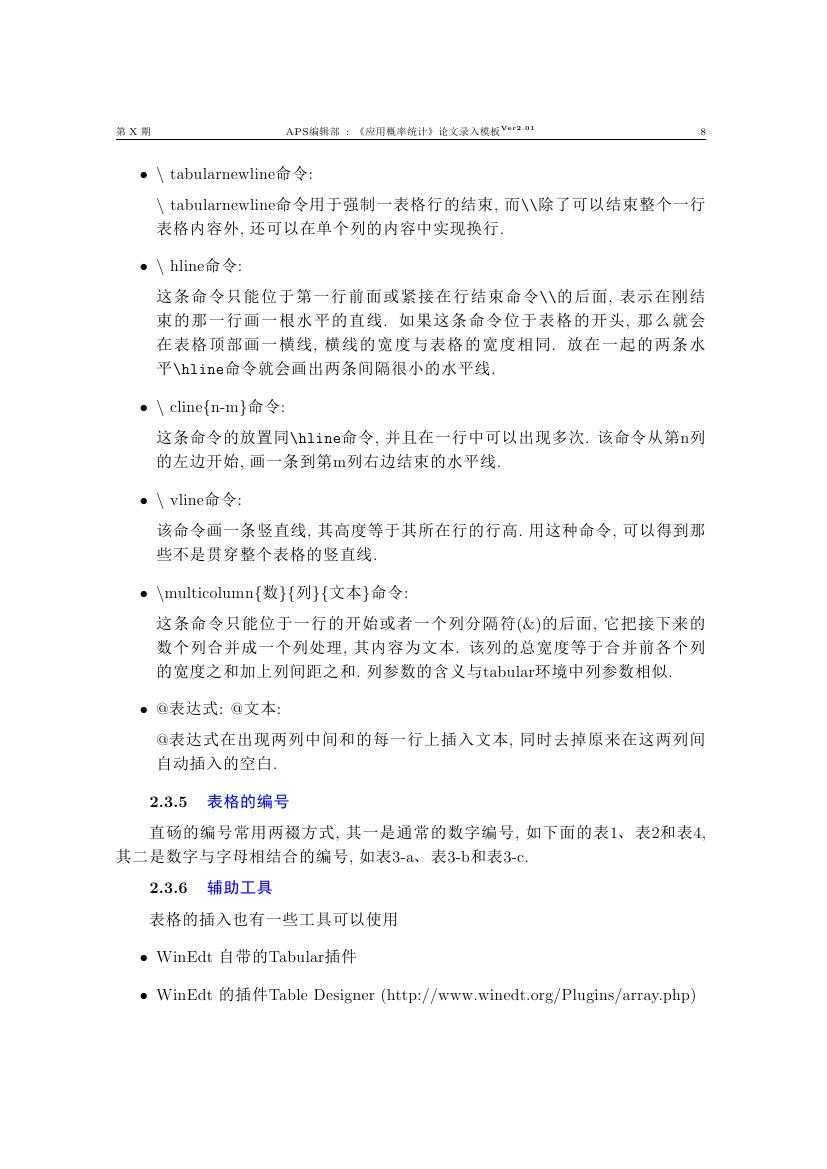
\begin{itemize}
\item
$\backslash$ tabularnewline命令:

$\backslash$ tabularnewline命令用于强制一表格行的结束, 而\verb=\\=除了可以结束整个一行表格内容
外, 还可以在单个列的内容中实现换行.

\item $\backslash$ hline命令:

这条命令只能位于第一行前面或紧接在行结束命令\verb=\\=的后面, 表示在刚结束的那一行画一根水平
的直线. 如果这条命令位于表格的开头, 那么就会在表格顶部画一横线, 横线的宽度与表格的宽度相同.
放在一起的两条水平\verb=\hline=命令就会画出两条间隔很小的水平线.
\item $\backslash$ cline\{n-m\}命令:

这条命令的放置同\verb=\hline=命令, 并且在一行中可以出现多次. 该命令从第n列的左边开始, 画一条
到第m列右边结束的水平线.

\item $\backslash$ vline命令:

该命令画一条竖直线, 其高度等于其所在行的行高. 用这种命令, 可以得到那些不是贯穿整个表格的竖直线.

\item $\backslash$multicolumn\{数\}\{列\}\{文本\}命令:

这条命令只能位于一行的开始或者一个列分隔符(\&)的后面, 它把接下来的数个列
合并成一个列处理, 其内容为文本. 该列的总宽度等于合并前各个列的宽度之和加
上列间距之和. 列参数的含义与tabular环境中列参数相似.

\item @表达式: @{文本}:

@表达式在出现两列中间和的每一行上插入文本, 同时去掉原来在这两列间自动插入
的空白.
\end{itemize}

\subsubsection{\color{blue}表格的编号}
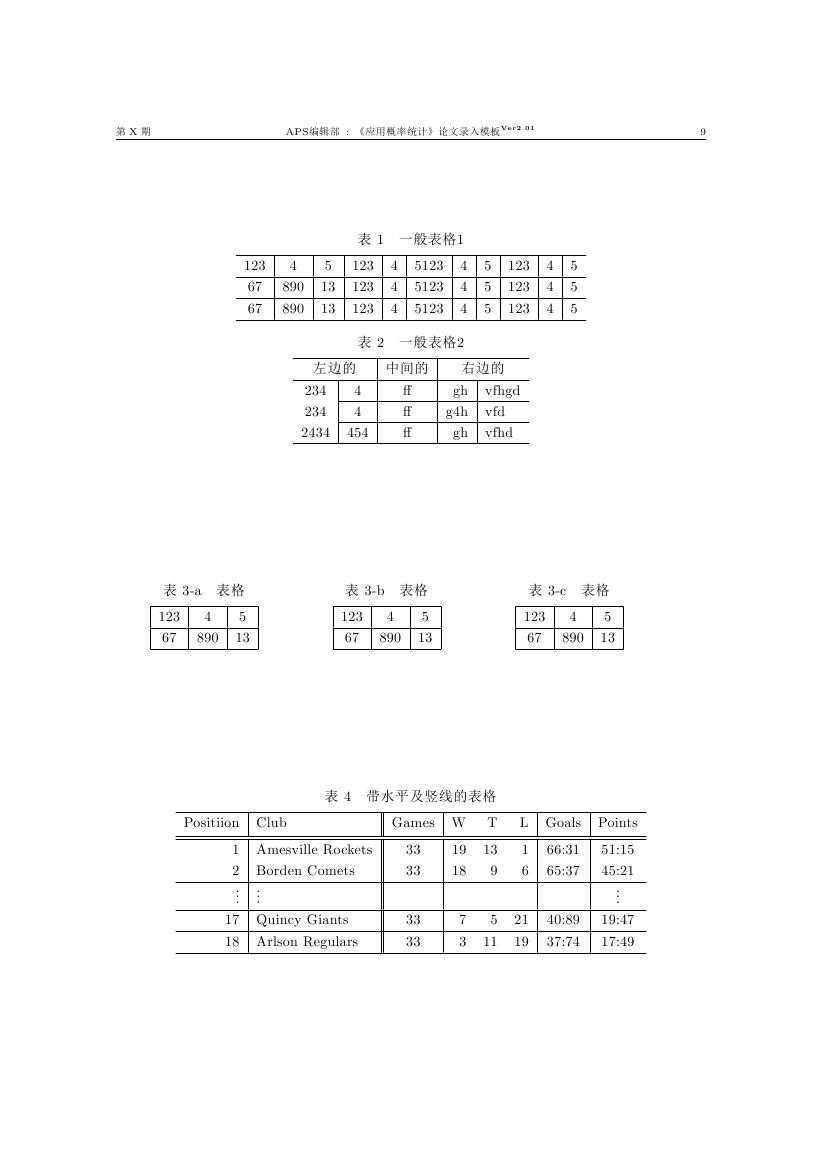
直砀的编号常用两裰方式, 其一是通常的数字编号, 如下面的表\ref{table:1}、表\ref{table:2}和表\ref{table:4},
其二是数字与字母相结合的编号, 如表\ref{table:3-a}、表\ref{table:3-b}和表\ref{table:3-c}.
\begin{table}[htbp]
\centering\zihao{5}
  \caption{一般表格1}\label{table:1}
  \vskip2mm
  \begin{tabular}{c|c|c|c|c|c|c|c|c|c|c}
    \hline
    % after \\: \hline or \cline{col1-col2} \cline{col3-col4} ...
    123 & 4  & 5  & 123 & 4 & 5123 & 4 & 5 & 123 & 4 & 5\    \hline
    67 & 890 & 13 & 123 & 4 & 5123 & 4 & 5 & 123 & 4 & 5\    \hline
    67 & 890 & 13 & 123 & 4 & 5123 & 4 & 5 & 123 & 4 & 5\    \hline
  \end{tabular}


  \caption{一般表格2}\label{table:2}
  \vskip2mm
  \begin{tabular}{c|c|c|r|l} \hline
  % after \\: \hline or \cline{col1-col2} \cline{col3-col4} ...
  \multicolumn{2}{c|}{左边的} & 中间的 & \multicolumn{2}{c}{右边的} \\ \hline
  234 & 4 & ff & gh & vfhgd \\ \cline{2-5}
  234 & 4 & ff & g4h & vfd \\  \cline{2-5}
  2434 & 454 & ff & gh & vfhd \  \hline
  \end{tabular}
\end{table}

\alphtab %产生形如 4-a,4-b 的编号
\begin{table}[htbp]
\begin{minipage}[htbp]{0.3\linewidth}
\centering\zihao{5}
  \caption{表格}\label{table:3-a}
  \vskip2mm
  \begin{tabular}{|c|c|c|}
    \hline
    % after \\: \hline or \cline{col1-col2} \cline{col3-col4} ...
    123 & 4 & 5 \    \hline
    67 & 890 & 13 \    \hline
  \end{tabular}
\end{minipage}
\begin{minipage}[htbp]{0.3\linewidth}
\centering\zihao{5}
  \caption{表格}\label{table:3-b}
    \vskip2mm
  \begin{tabular}{|c|c|c|}
    \hline
    % after \\: \hline or \cline{col1-col2} \cline{col3-col4} ...
    123 & 4 & 5 \    \hline
    67 & 890 & 13 \    \hline
  \end{tabular}
\end{minipage}
\begin{minipage}[htbp]{0.3\linewidth}
\centering\zihao{5}
  \caption{表格}\label{table:3-c}
    \vskip2mm
  \begin{tabular}{|c|c|c|}
    \hline
    % after \\: \hline or \cline{col1-col2} \cline{col3-col4} ...
    123 & 4 & 5 \    \hline
    67 & 890 & 13 \    \hline
  \end{tabular}
\end{minipage}
\end{table}

\resettab %恢复形如 4,5 的编号
\begin{table}[htbp]
\centering\zihao{5}
\caption{带水平及竖线的表格\label{table:4}}
\vskip2mm
\begin{tabular}{r|l||c|rrr|c|c}
\hline
Positiion & Club & Games & W & T & L & Goals & Points \\ [0.5ex]
\hline\hline
1 & Amesville Rockets & 33 & 19 & 13 & 1 & 66:31& 51:15\2 & Borden Comets & 33 & 18 & 9 & 6 &65:37 & 45:21\\ \hline
$\vdots$& $\vdots$ &&&&& &$\vdots$\\ \hline
17 & Quincy Giants & 33 & 7 & 5 & 21 & 40:89 &19:47\\ \hline
18 & Arlson Regulars & 33 & 3 & 11 &19 & 37:74 &17:49 \\ \hline
\end{tabular}
\end{table}
\subsubsection{\color{blue}辅助工具}
表格的插入也有一些工具可以使用
\begin{itemize}
  \item WinEdt 自带的Tabular插件
  \item WinEdt 的插件Table Designer (http://www.winedt.org/Plugins/array.php)
  \item WinEdt 的附加工具LaTable (http://www.g32.org/latable/)
  \item WinEdt 的附加工具\  Tablas Designer (http://www.informatica.us.es/~calvo/latex.html\#Tablas)
\end{itemize}

\subsection{图形的插入}\label{figure}
\LaTeX 文本中不同位置的插图根据需要可以选用下面的种图形包,包括
epsfig, graphics, graphix, picins, wrapfig, picinpar, subfig 等.
我们把它们分为三类:
\begin{enumerate}
\item 用于独立行插入图形: epsfig, graphics, graphix
\item 用于文本中插入图形: picins, picinpar, wrapfig
\item 用于图形并置: subfigure 加上小页环境(minipage)
\end{enumerate}
我们通过例子讲解最常用的几种方式,更为深入的使用方法参见文献\cite{Sangdy}.
\subsubsection{\color{blue}插入独立行图形}
\label{sec:fig}
使用epsfig宏包(现已包捆绑在graphics图形包中)、graphics宏包或graphix宏包可以实现图形的独立行插入,它们的格式非常类似,
前者的命令格式为\\mbox{}\hskip 2cm \verb/\epsfig{file=file_name.eps,key=value,...}/\后者两个的命令格式为\\mbox{}\hskip 2cm \verb/\includegrpahics[key=value,...]{file_name}/\其中可选的关键字参数key指明图像插入时对图像的加工, 主要是缩放和旋转等,它们可以通过
\verb|scale=ratio_value|, \verb|width=length_value|, \verb|height=length_value| 实现.
它们在epsfig中也可以使用,但放在文件名的后面.

还可以通过命令\verb/\scalebox/或\verb/\resizebox/调节. 这此命令或参数没有表示原来图形的大小.

\noindent
(下面命令中的text在此为上面的\verb|\epsfig| 或 \verb/\includegraphics/ 命令)\(1)\verb/\scalebox/命令\\mbox{}\hskip 2cm \verb/\scalebox{h_scale}{v_scale}{text}/\这条命令将矩形盒子水平和垂直缩放, 其中参数\verb/h_scale/代表水平方向的放大倍数,
\verb/v_scale/代表垂直方向的放大倍数.然而试验下来, 这个命令并不起作用!\(2)\verb/\resizebox/命令\\mbox{}\hskip 2cm \verb/resizebox{h_lenght}{v_length}{text}/\这条命令将图形调整到指定的水平和垂直尺寸, 其中\verb/h_length/代表水平宽度,
\verb/v_length/代表垂直高度, 两者都可以使用!作为参数值, 此时代表该方向按照比例1:1
确定图象的原始尺寸.

而图形的位置可以用\verb|\vskip v_length \hskip h_length|来调节, 使用\verb|\centering|实现图形的居中.

下面举例说明它们的使用.

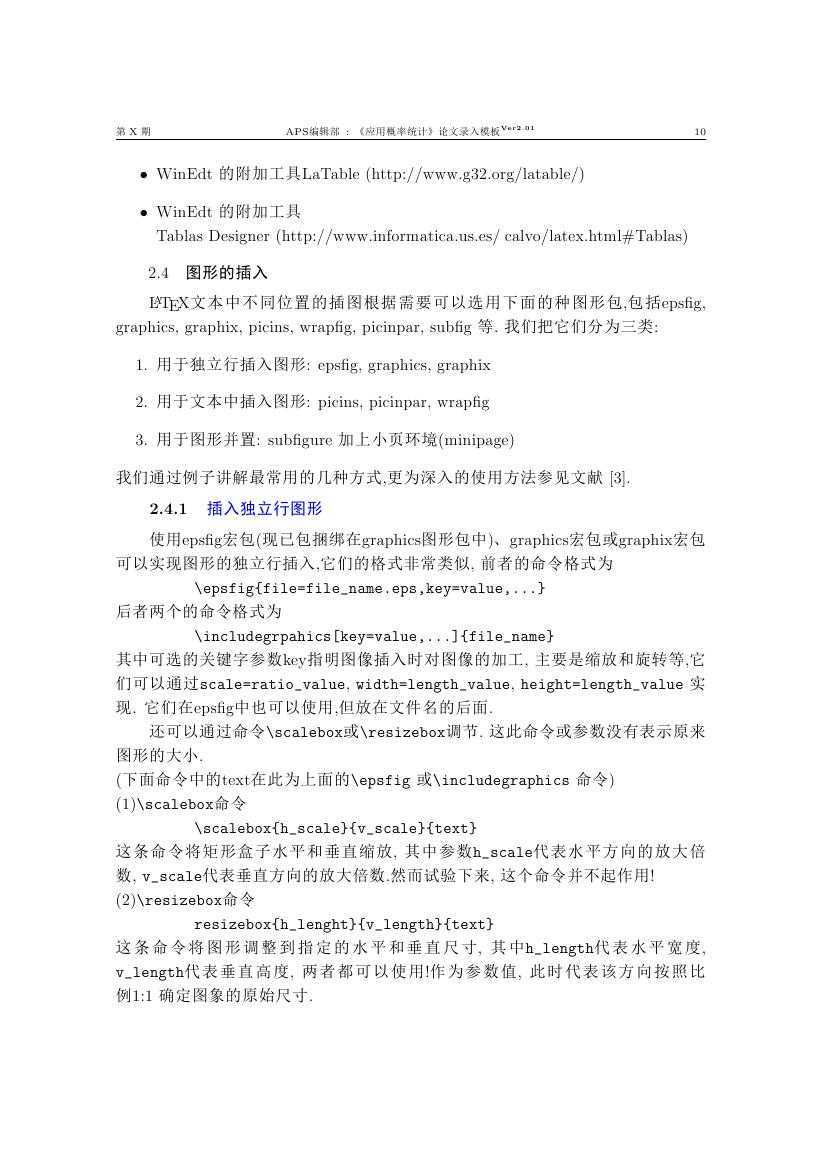
\noindent 1) epsfig+resizebox 命令
\begin{verbatim}
\vskip 10mm \hskip 50mm
\resizebox{7cm}{!}{\epsfig{file=sin}}
\caption{插入EPS浮动图的例子\label{fig:fig1}}
\end{verbatim}
产生图形
\vskip 5mm \hskip 50mm
\resizebox{7cm}{!}{\epsfig{file=figs/sin}}
\caption{插入EPS浮动图的例子\label{fig:fig1}}

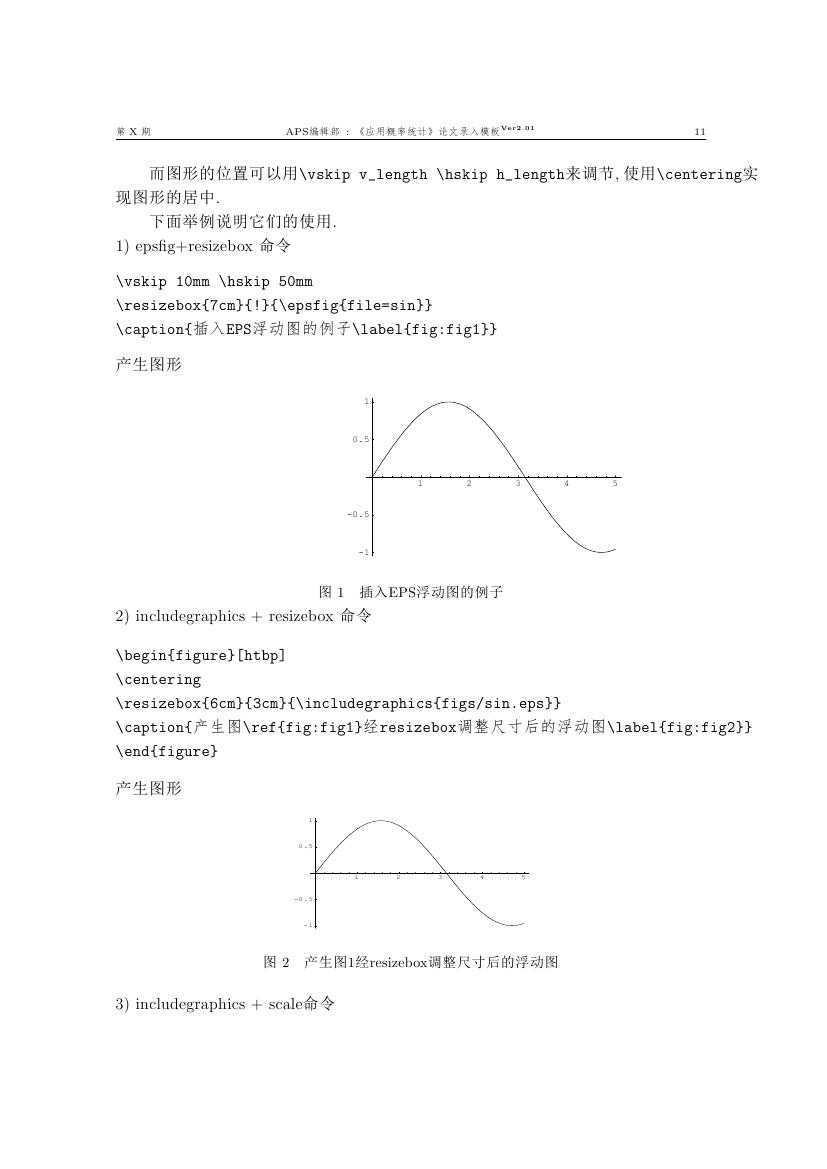
\noindent 2) includegraphics + resizebox 命令

\begin{verbatim}
\begin{figure}[htbp]
\centering
\resizebox{6cm}{3cm}{\includegraphics{figs/sin.eps}}
\caption{产生图\ref{fig:fig1}经resizebox调整尺寸后的浮动图\label{fig:fig2}}
\end{figure}
\end{verbatim}
产生图形
\begin{figure}[htbp]
\centering
\resizebox{6cm}{3cm}{\includegraphics{figs/sin.eps}}
\caption{产生图\ref{fig:fig1}经resizebox调整尺寸后的浮动图\label{fig:fig2}}
\end{figure}

\noindent 3) includegraphics + scale命令

\begin{verbatim}
\begin{figure}[htbp]
\centering
\includegraphics[scale=0.5]{figs/sin.eps}
\caption{产生图\ref{fig:fig1}经scale调整尺寸后的浮动图\label{fig:fig3}}
\end{figure}
\end{verbatim}
产生图\ref{fig:fig3}.\\begin{figure}[htbp]
\centering
\includegraphics[scale=0.5]{figs/sin.eps}
\caption{产生图\ref{fig:fig1}经scale调整尺寸后的浮动图\label{fig:fig3}}
\end{figure}

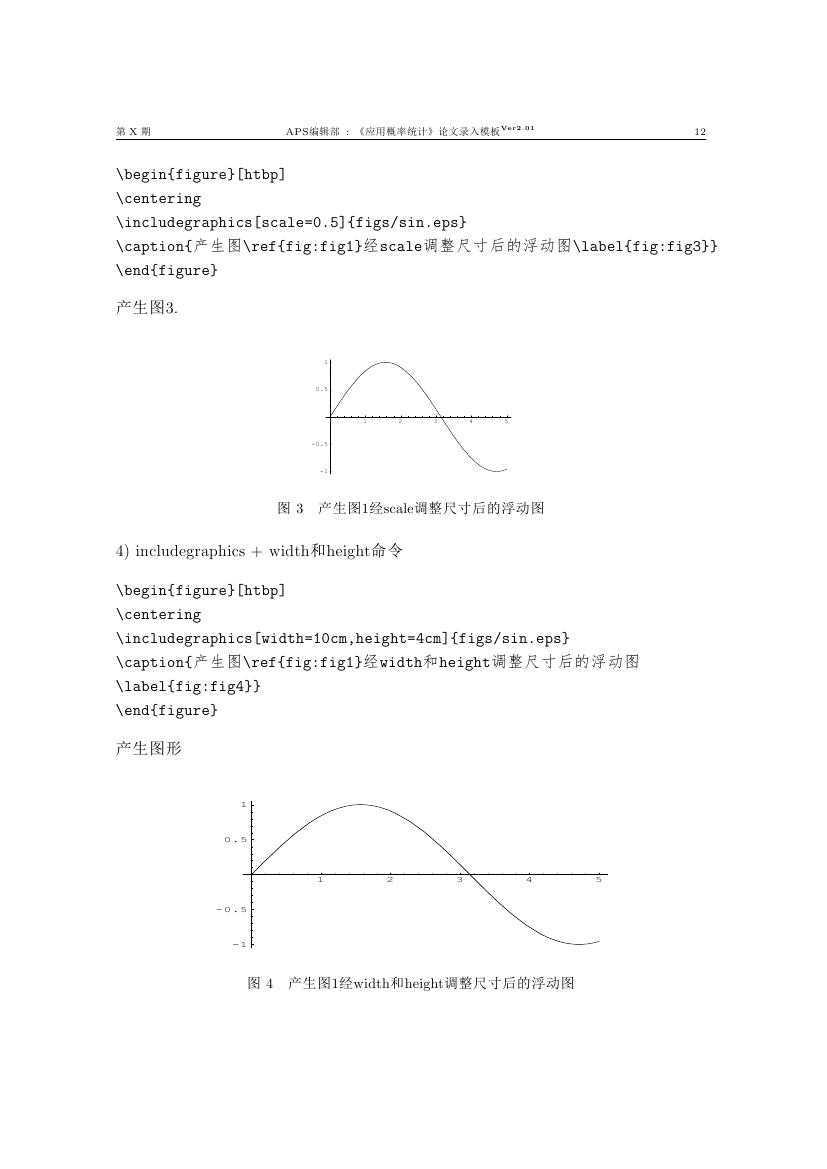
\noindent 4) includegraphics + width和height命令

\begin{verbatim}
\begin{figure}[htbp]
\centering
\includegraphics[width=10cm,height=4cm]{figs/sin.eps}
\caption{产生图\ref{fig:fig1}经width和height调整尺寸后的浮动图
\label{fig:fig4}}
\end{figure}
\end{verbatim}
产生图形\\begin{figure}[htbp]
\centering
\includegraphics[width=10cm,height=4cm]{figs/sin.eps}
\caption{产生图\ref{fig:fig1}经width和height调整尺寸后的浮动图\label{fig:fig4}}
\end{figure}


\subsubsection{\color{blue}文本中插入图形}
文本中插入图形可以采用picins,wrapfig和picinpar宏包,picins和wrapfig只能使图形放在左右两侧, 而picinpar可以使
图形放在所选段落的任何位置,因此我们在此仅说明picinpar的使用方法.

picinpar 宏包定义了一个基本的环境 window, 还有两个变体 figwindow 和 tabwindow.
允许在文本段落中打开一个"窗口", 在其中放入图形、文字和表格等. 这里我们主要讨论将图形放入文本段落
的用法, 其它的用法可参考 picinpar 的说明.

\begin{verbatim}
\begin{window}[行数, 对齐方式, 内容, 内容说明]\end{window}
\end{verbatim}
\begin{verbatim}
\begin{figwindow}[行数, 对齐方式, 图形, 标题]\end{figwindow}
\end{verbatim}

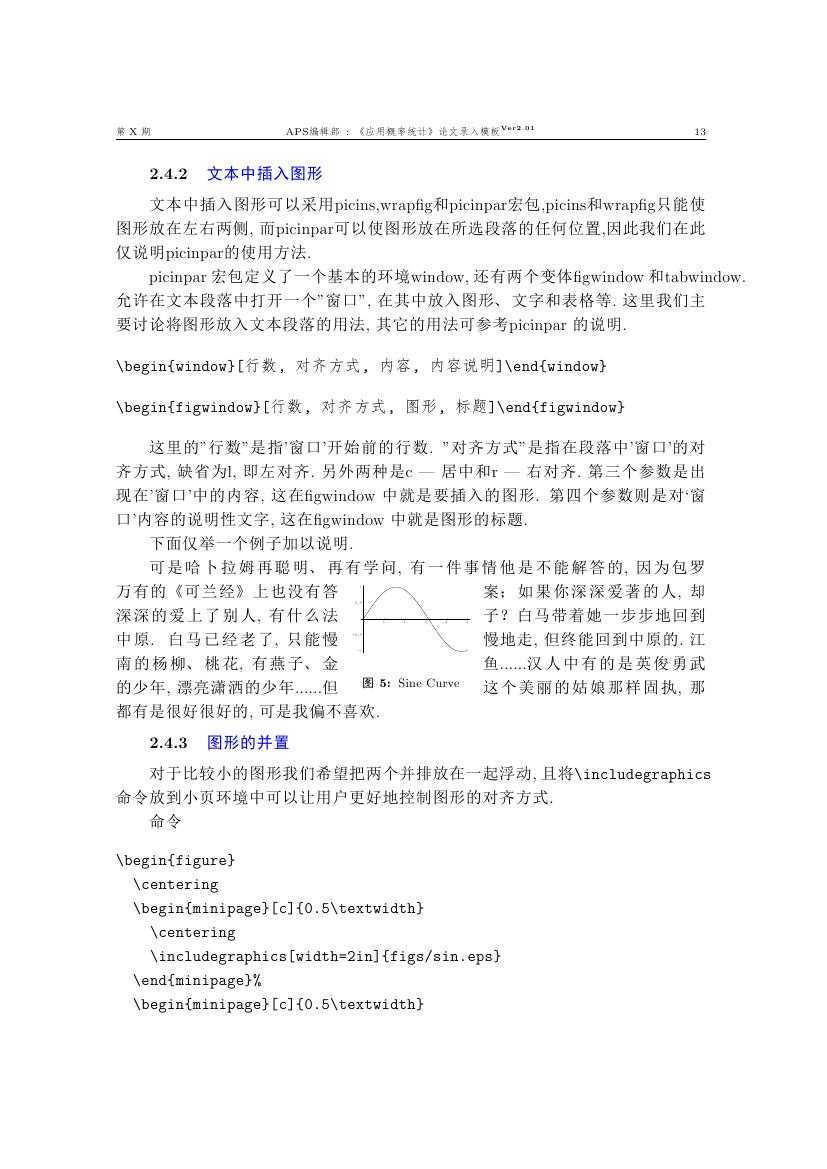
这里的"行数"是指‘窗口‘开始前的行数. "对齐方式"是指在段落中‘窗口‘的对齐方式, 缺省为l, 即左对齐.
另外两种是 c --- 居中和 r --- 右对齐.  第三个参数是出现在‘窗口‘中的内容, 这在 figwindow 中就是
要插入的图形. 第四个参数则是对`窗口‘内容的说明性文字, 这在 figwindow 中就是图形的标题.

下面仅举一个例子加以说明.

\begin{figwindow}[1,c,{\mbox{%
    \includegraphics[width=3cm]{figs/sin.eps}}},{Sine Curve}]
可是哈卜拉姆再聪明、再有学问, 有一件事情他是不能解答的, 因为包罗万有的《可兰经》上也没有答案;如果你深深爱著的人, 却
深深的爱上了别人, 有什么法子?白马带着她一步步地回到中原. 白马已经老了, 只能慢慢地走, 但终能回到中原的. 江南的杨柳、桃花,
有燕子、金鱼......汉人中有的是英俊勇武的少年, 漂亮潇洒的少年......但这个美丽的姑娘那样固执, 那都有是很好很好的, 可是我
偏不喜欢.
\end{figwindow}

\subsubsection{\color{blue}图形的并置}
对于比较小的图形我们希望把两个并排放在一起浮动, 且将 \verb/\includegraphics/
命令放到小页环境中可以让用户更好地控制图形的对齐方式.

命令
\begin{verbatim}
\begin{figure}
  \centering
  \begin{minipage}[c]{0.5\textwidth}
    \centering
    \includegraphics[width=2in]{figs/sin.eps}
  \end{minipage}%
  \begin{minipage}[c]{0.5\textwidth}
    \centering
    \includegraphics[width=2in]{figs/fig.eps}
  \end{minipage}
  \caption{Centers Aligned Vertically}
\end{figure}
\end{verbatim}
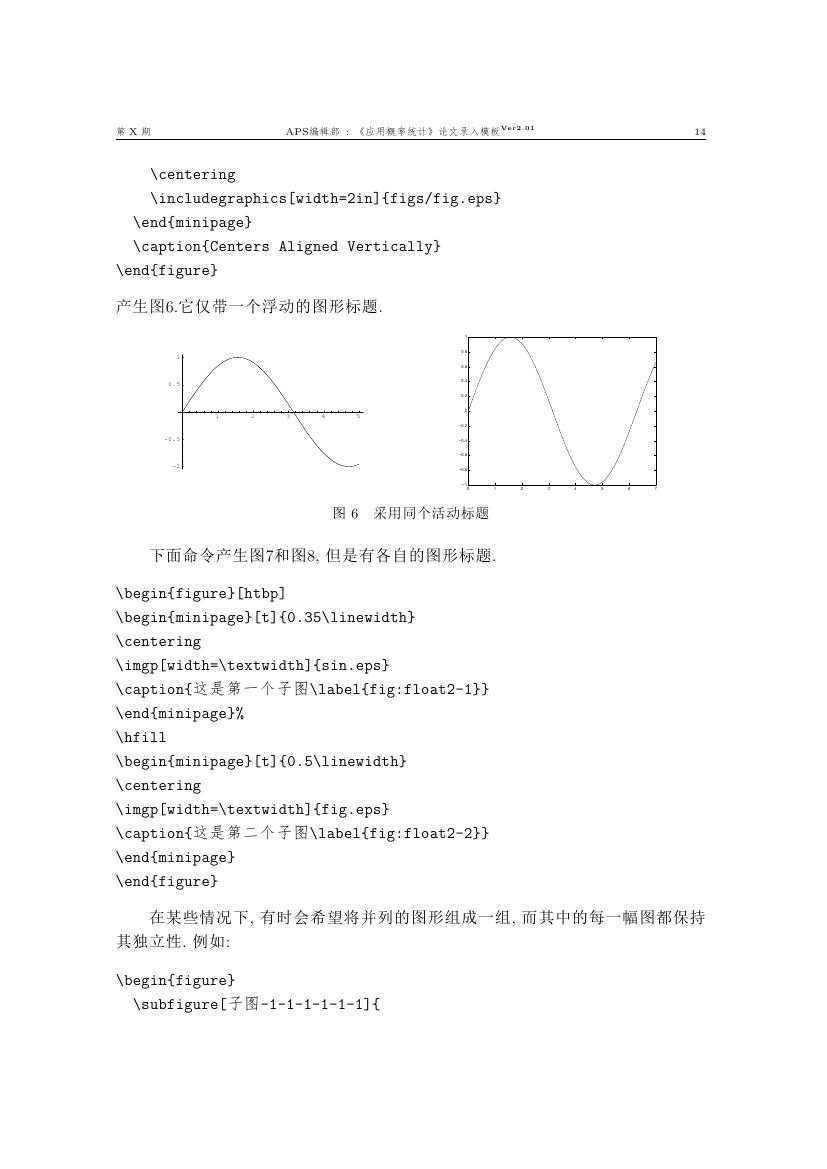
产生图\ref{fig:float1}.它仅带一个浮动的图形标题.
\begin{figure}[htbp]
  \centering
  \begin{minipage}[c]{0.5\textwidth}
    \centering
    \includegraphics[width=2in]{figs/sin.eps}
  \end{minipage}%
  \begin{minipage}[c]{0.5\textwidth}
    \centering
    \includegraphics[width=2in]{figs/fig.eps}
  \end{minipage}
  \caption{采用同个活动标题\label{fig:float1}}
\end{figure}

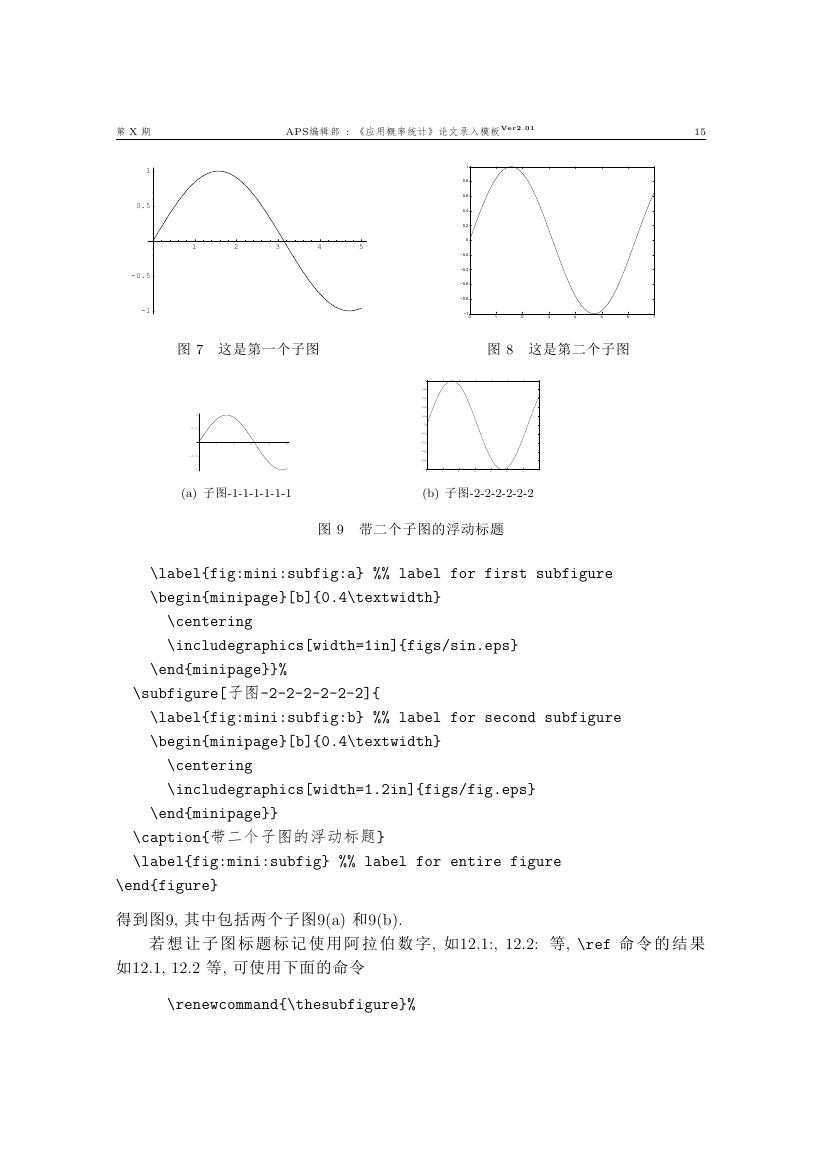
下面命令产生图\ref{fig:float2-1}和图\ref{fig:float2-2}, 但是有各自的图形标题.
\begin{Verbatim}
\begin{figure}[htbp]
\begin{minipage}[t]{0.35\linewidth}
\centering
\imgp[width=\textwidth]{sin.eps}
\caption{这是第一个子图\label{fig:float2-1}}
\end{minipage}%
\hfill
\begin{minipage}[t]{0.5\linewidth}
\centering
\imgp[width=\textwidth]{fig.eps}
\caption{这是第二个子图\label{fig:float2-2}}
\end{minipage}
\end{figure}
\end{Verbatim}

\begin{figure}[htbp]
\begin{minipage}[t]{0.45\linewidth}
\centering
\includegraphics[width=6cm,height=4cm]{figs/sin.eps}
\caption{这是第一个子图\label{fig:float2-1}}
\end{minipage}%
\hfill
\begin{minipage}[t]{0.5\linewidth}
\centering
\includegraphics[width=5cm,height=4cm]{figs/fig.eps}
\caption{这是第二个子图\label{fig:float2-2}}
\end{minipage}
\end{figure}


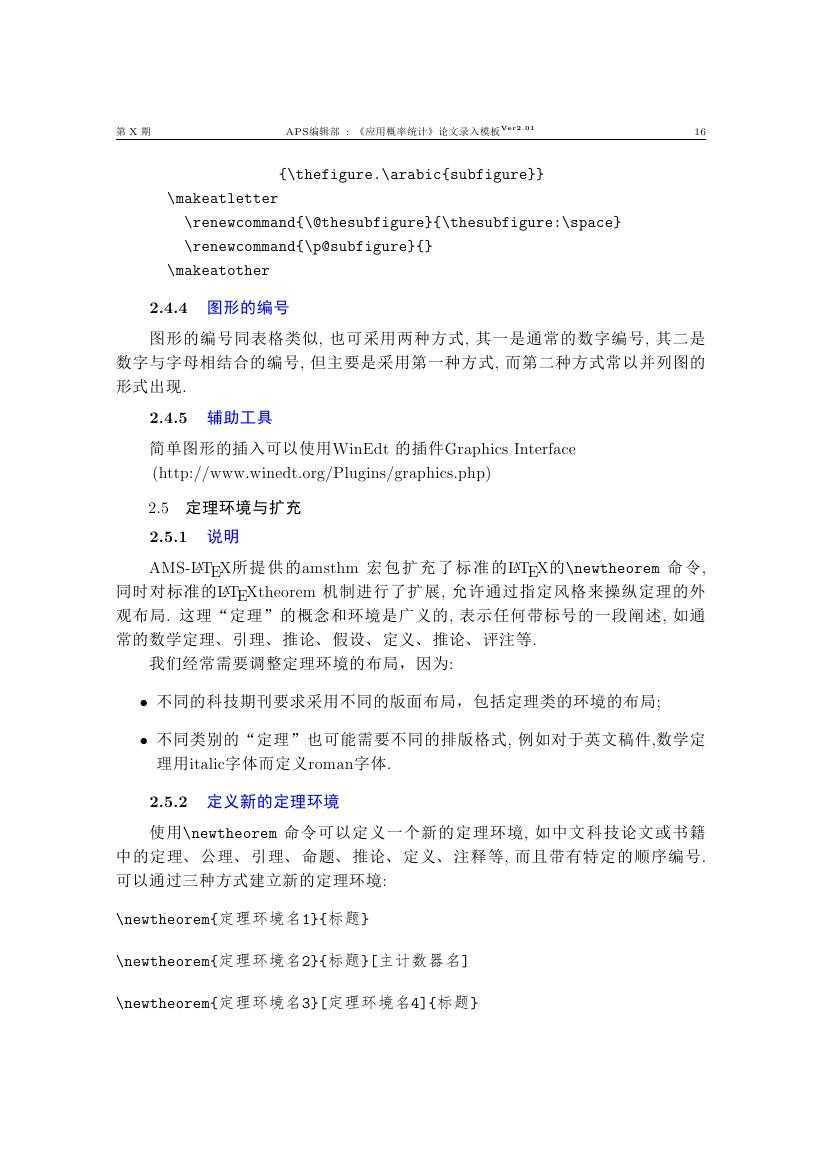
在某些情况下, 有时会希望将并列的图形组成一组, 而其中的每一幅图 都保持其独立性. 例如:
\begin{Verbatim}
\begin{figure}
  \subfigure[子图-1-1-1-1-1-1]{
    \label{fig:mini:subfig:a} %% label for first subfigure
    \begin{minipage}[b]{0.4\textwidth}
      \centering
      \includegraphics[width=1in]{figs/sin.eps}
    \end{minipage}}%
  \subfigure[子图-2-2-2-2-2-2]{
    \label{fig:mini:subfig:b} %% label for second subfigure
    \begin{minipage}[b]{0.4\textwidth}
      \centering
      \includegraphics[width=1.2in]{figs/fig.eps}
    \end{minipage}}
  \caption{带二个子图的浮动标题}
  \label{fig:mini:subfig} %% label for entire figure
\end{figure}
\end{Verbatim}
得到图\ref{fig:mini:subfig}, 其中包括两个子图\ref{fig:mini:subfig:a} 和\ref{fig:mini:subfig:b}.

\begin{figure}
  \subfigure[子图-1-1-1-1-1-1]{
    \label{fig:mini:subfig:a} %% label for first subfigure
    \begin{minipage}[b]{0.4\textwidth}
      \centering
      \includegraphics[width=1in]{figs/sin.eps}
    \end{minipage}}%
  \subfigure[子图-2-2-2-2-2-2]{
    \label{fig:mini:subfig:b} %% label for second subfigure
    \begin{minipage}[b]{0.4\textwidth}
      \centering
      \includegraphics[width=1.2in]{figs/fig.eps}
    \end{minipage}}
  \caption{带二个子图的浮动标题}
  \label{fig:mini:subfig} %% label for entire figure
\end{figure}


若想让子图标题标记使用阿拉伯数字, 如 12.1:, 12.2: 等,  \verb/\ref/ 命令的结果如 12.1, 12.2
等, 可使用下面的命令
\begin{verbatim}
      \renewcommand{\thesubfigure}%
                   {\thefigure.\arabic{subfigure}}
      \makeatletter
        \renewcommand{\@thesubfigure}{\thesubfigure:\space}
        \renewcommand{\p@subfigure}{}
      \makeatother
\end{verbatim}
\subsubsection{\color{blue}图形的编号}
图形的编号同表格类似, 也可采用两种方式, 其一是通常的数字编号, 其二是数字与字母相结合的编号, 但主要是采用第一种方式,
而第二种方式常以并列图的形式出现.

\subsubsection{\color{blue}辅助工具}
简单图形的插入可以使用 WinEdt 的插件Graphics Interface \\mbox{}~~~~~~~~~(http://www.winedt.org/Plugins/graphics.php)

\subsection{定理环境与扩充}\label{theorem}
\subsubsection{\color{blue}说明}
AMS-\LaTeX 所提供的amsthm 宏包扩充了标准的\LaTeX 的\verb/\newtheorem/ 命令, 同时对标准的\LaTeX
theorem 机制进行了扩展, 允许通过指定风格来操纵定理的外观布局. 这理“定理”的概念和环境是广义的,
表示任何带标号的一段阐述, 如通常的数学定理、引理、推论、假设、定义、推论、评注等.

我们经常需要调整定理环境的布局,因为:
\begin{itemize}
\item 不同的科技期刊要求采用不同的版面布局,包括定理类的环境的布局;
\item 不同类别的“定理”也可能需要不同的排版格式, 例如对于英文稿件,数学定理用italic字体而定义roman字体.
\end{itemize}
\subsubsection{\color{blue}定义新的定理环境}
使用\verb/\newtheorem/ 命令可以定义一个新的定理环境, 如中文科技论文或书籍中的定理、公理、引理、命题、
推论、定义、注释等, 而且带有特定的顺序编号. 可以通过三种方式建立新的定理环境:
\begin{verbatim}
\newtheorem{定理环境名1}{标题}
\end{verbatim}
\begin{verbatim}
\newtheorem{定理环境名2}{标题}[主计数器名]
\end{verbatim}
\begin{verbatim}
\newtheorem{定理环境名3}[定理环境名4]{标题}
\end{verbatim}
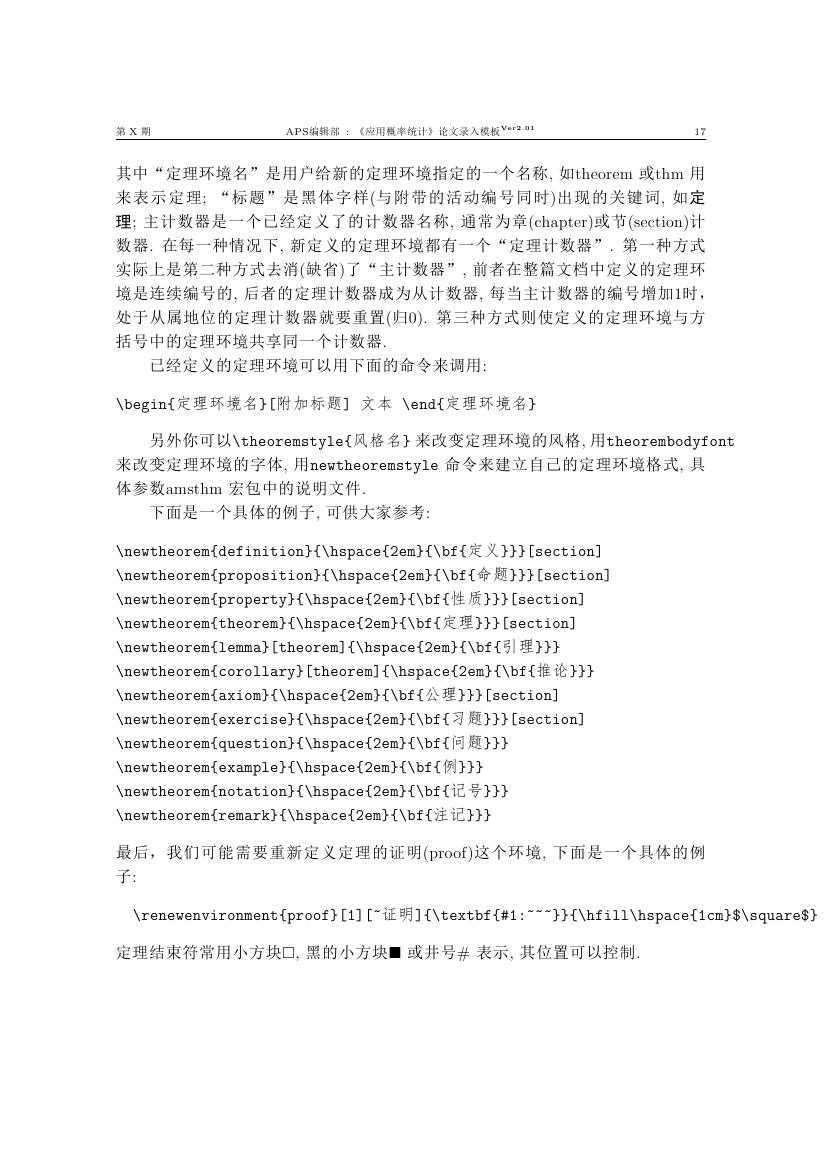
其中“定理环境名”是用户给新的定理环境指定的一个名称, 如theorem 或 thm 用来表示定理; “标题”是
黑体字样(与附带的活动编号同时)出现的关键词, 如 {\bf 定理}; 主计数器是一个已经定义了的计数器名称,
通常为章(chapter)或节(section)计数器. 在每一种情况下, 新定义的定理环境都有一个“定理计数器”.
第一种方式实际上是第二种方式去消(缺省)了“主计数器”, 前者在整篇文档中定义的定理环境是连续编号的,
后者的定理计数器成为从计数器, 每当主计数器的编号增加1时,处于从属地位的定理计数器就要重置(归0).
 第三种方式则使定义的定理环境与方括号中的定理环境共享同一个计数器.

已经定义的定理环境可以用下面的命令来调用:
\begin{verbatim}
\begin{定理环境名}[附加标题] 文本 \end{定理环境名}
\end{verbatim}

另外你可以\verb/\theoremstyle{风格名}/ 来改变定理环境的风格,
用\verb/theorembodyfont/ 来改变定理环境的字体,
用\verb/newtheoremstyle/ 命令来建立
自己的定理环境格式, 具体参数amsthm 宏包中的说明文件.

下面是一个具体的例子, 可供大家参考:
\begin{verbatim}
\newtheorem{definition}{\hspace{2em}{\bf{定义}}}[section]
\newtheorem{proposition}{\hspace{2em}{\bf{命题}}}[section]
\newtheorem{property}{\hspace{2em}{\bf{性质}}}[section]
\newtheorem{theorem}{\hspace{2em}{\bf{定理}}}[section]
\newtheorem{lemma}[theorem]{\hspace{2em}{\bf{引理}}}
\newtheorem{corollary}[theorem]{\hspace{2em}{\bf{推论}}}
\newtheorem{axiom}{\hspace{2em}{\bf{公理}}}[section]
\newtheorem{exercise}{\hspace{2em}{\bf{习题}}}[section]
\newtheorem{question}{\hspace{2em}{\bf{问题}}}
\newtheorem{example}{\hspace{2em}{\bf{例}}}
\newtheorem{notation}{\hspace{2em}{\bf{记号}}}
\newtheorem{remark}{\hspace{2em}{\bf{注记}}}
\end{verbatim}
最后,我们可能需要重新定义定理的证明(proof)这个环境, 下面是一个具体的例子:
\begin{verbatim}
  \renewenvironment{proof}[1][~证明]{\textbf{#1:~~~}}{\hfill\hspace{1cm}$\square$}
\end{verbatim}
定理结束符常用小方块$\square$, 黑的小方块$\blacksquare$ 或井号 \# 表示, 其位置可以控制.

\newcommand{\aaa}{这是科技文稿排版测试这是科技文稿排版测试}
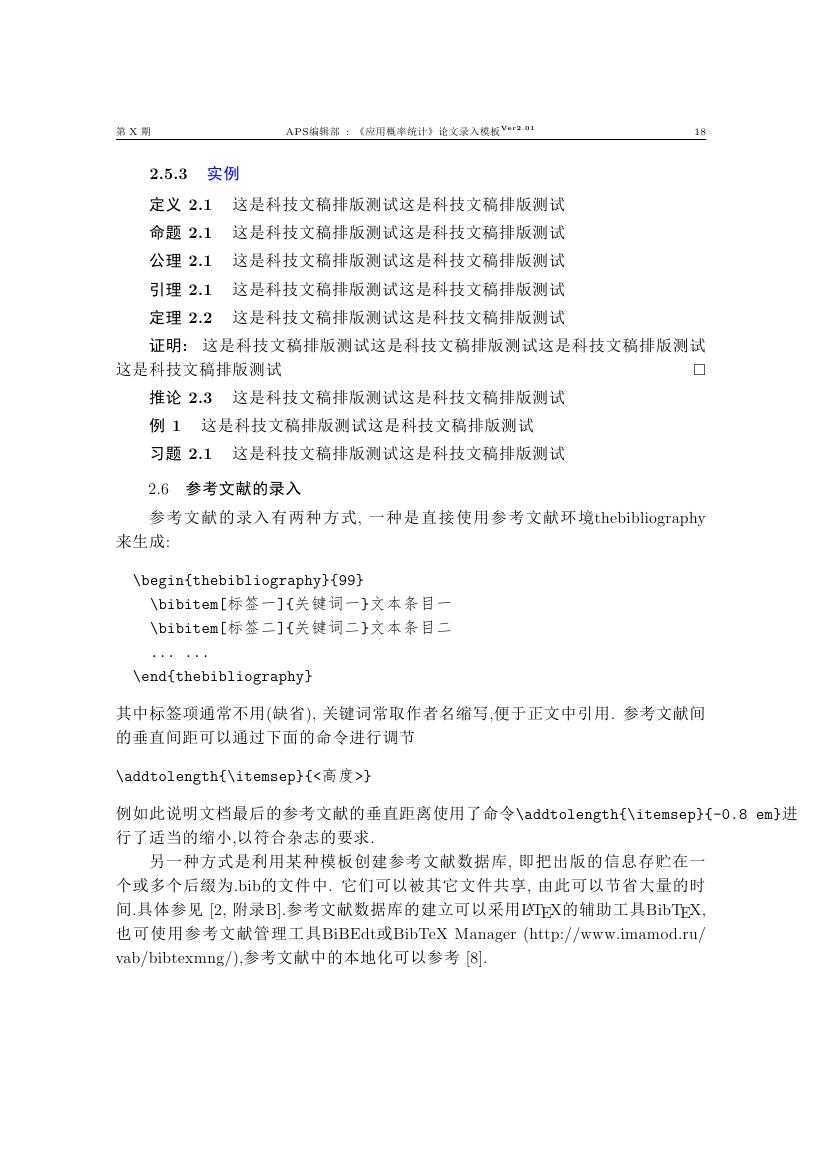
\subsubsection{\color{blue}实例}
\begin{definition} %
\aaa
\end{definition}%
\begin{proposition} %
\aaa
\end{proposition}%
\begin{axiom}%
\aaa
\end{axiom}
\begin{lemma}%
\aaa
\end{lemma}
\begin{theorem}\label{thm-1}%
 \aaa
\end{theorem}%
\begin{proof}%
\aaa \aaa
\end{proof}
\begin{corollary}%
\aaa
\end{corollary}
\begin{example}%
\aaa
\end{example}

\begin{exercise}%
\aaa
\end{exercise}

\subsection{参考文献的录入}\label{reference}
参考文献的录入有两种方式, 一种是直接使用参考文献环境thebibliography 来生成:
\begin{Verbatim}
  \begin{thebibliography}{99}
    \bibitem[标签一]{关键词一}文本条目一
    \bibitem[标签二]{关键词二}文本条目二
    ... ...
  \end{thebibliography}
\end{Verbatim}
其中标签项通常不用(缺省), 关键词常取作者名缩写,便于正文中引用. 参考文献间的垂直间距可以通过下面的命令进行调节
\begin{verbatim}
\addtolength{\itemsep}{<高度>}
\end{verbatim}
例如此说明文档最后的参考文献的垂直距离使用了命令
\verb/\addtolength{\itemsep}{-0.8 em}/进行了适当的缩小,以符合杂志的要求.


另一种方式是利用某种模板创建参考文献数据库, 即把出版的信息存贮在一个或多个后缀为.bib的文件中.
它们可以被其它文件共享, 由此可以节省大量的时间.具体参见\cite[附录B]{Dengjs}.参考文献数据库的建立可以采用
\LaTeX 的辅助工具Bib\TeX, 也可使用参考文献管理工具BiBEdt或BibTeX Manager (http://www.imamod.ru/~vab/bibtexmng/),参考文献中的本地化可以
参考\cite{Lisj}.
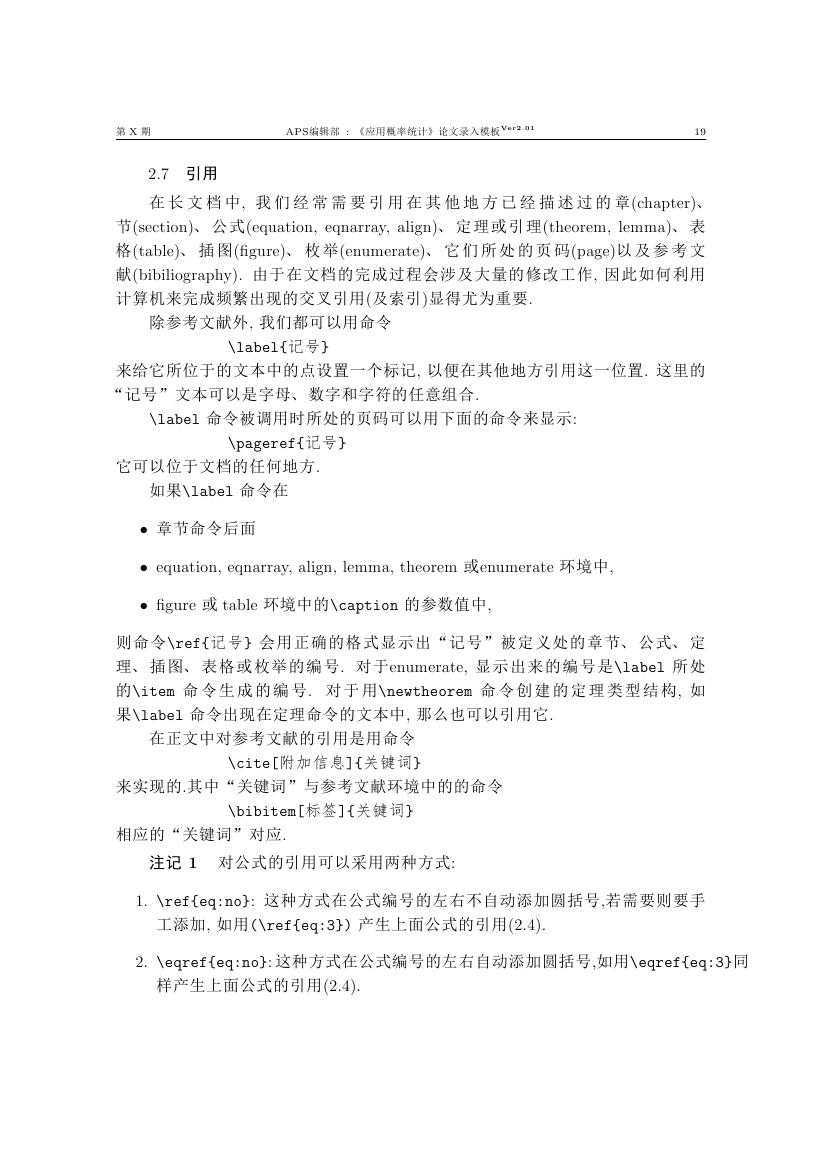
\subsection{引用}\label{citation}
在长文档中, 我们经常需要引用在其他地方已经描述过的章(chapter)、节(section)、公式(equation, eqnarray, align)、
定理或引理(theorem, lemma)、表格(table)、插图(figure)、枚举(enumerate)、它们
所处的页码(page)以及参考文献(bibiliography). 由于在文档的完成过程会涉及大量的修改工作, 因此如何利用计算机来完成
频繁出现的交叉引用(及索引)显得尤为重要.

除参考文献外, 我们都可以用命令

\mbox{}\hskip 2cm {\verb=\label{记号}=}

\noindent
来给它所位于的文本中的点设置一个标记, 以便在其他地方引用这一位置. 这里的“记号”文本
可以是字母、数字和字符的任意组合.

 \verb=\label= 命令被调用时所处的页码可以用下面的命令来显示:

 \mbox{}\hskip 2cm {\verb=\pageref{记号}=}

\noindent 它可以位于文档的任何地方.

如果 \verb=\label= 命令在
\begin{itemize}
\item 章节命令后面
\item equation, eqnarray, align, lemma, theorem 或 enumerate 环境中,
\item figure 或~ table 环境中的 \verb=\caption= 的参数值中,
\end{itemize}
 则命令{\verb=\ref{记号}=}
会用正确的格式显示出“记号”被定义处的章节、公式、定理、插图、表格或枚举的编号.
对于enumerate, 显示出来的编号是\verb=\label= 所处的 \verb=\item= 命令生成的编号. 对于用
 \verb=\newtheorem= 命令创建的定理类型结构, 如果 \verb=\label= 命令出现在定理命令的文本中,
那么也可以引用它.

在正文中对参考文献的引用是用命令

\mbox{}\hskip 2cm {\verb=\cite[附加信息]{关键词}=}

\noindent
来实现的.其中“关键词”与参考文献环境中的的命令

\mbox{}\hskip 2cm {\verb=\bibitem[标签]{关键词}=}

\noindent
相应的“关键词”对应.

\begin{remark}
对公式的引用可以采用两种方式:
\begin{enumerate}
\item \verb+\ref{eq:no}+:~~这种方式在公式编号的左右不自动添加圆括号,若需要则要手工添加, 如用 \verb+(\ref{eq:3})+ 产
生上面公式的引用(\ref{eq:3}).
\item \verb+\eqref{eq:no}+:~这种方式在公式编号的左右自动添加圆括号,如用\verb+\eqref{eq:3}+同样产
生上面公式的引用\eqref{eq:3}.
\end{enumerate}
\end{remark}

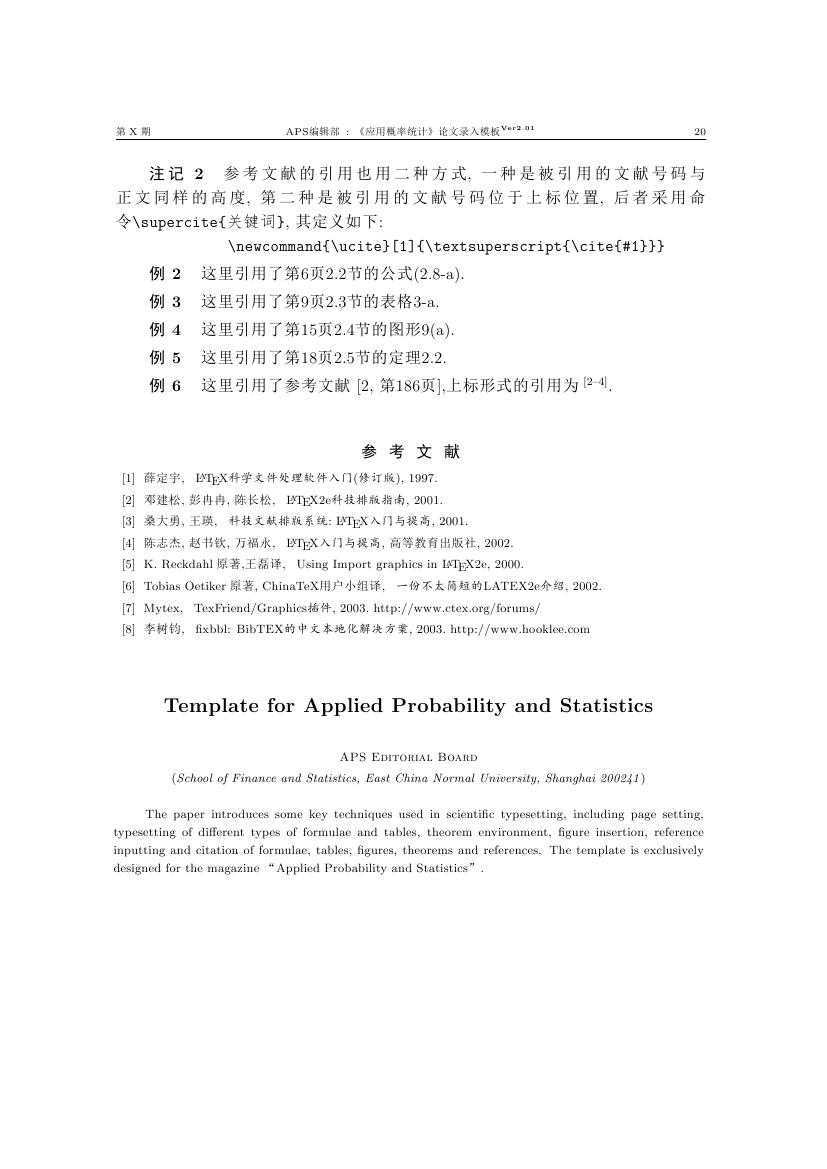
\begin{remark}
参考文献的引用也用二种方式, 一种是被引用的文献号码与正文同样的高度, 第二种是被引用的文献号码位于上标位置, 后者采用命令
\verb|\supercite{关键词}|, 其定义如下:

\mbox{}\hskip 2cm {\verb=\newcommand{\ucite}[1]{\textsuperscript{\cite{#1}}}=}

\end{remark}

\begin{example}
这里引用了第\pageref{eq_letter:a}页\ref{formula}节的公式\eqref{eq_letter:a}.
\end{example}
\begin{example}
这里引用了第\pageref{table:3-a}页\ref{table}节的表格\ref{table:3-a}.
\end{example}
\begin{example}
这里引用了第\pageref{fig:mini:subfig:a}页\ref{figure}节的图形\ref{fig:mini:subfig:a}.
\end{example}
\begin{example}
这里引用了第\pageref{thm-1}页\ref{theorem}节的定理\ref{thm-1}.
\end{example}
\begin{example}
这里引用了参考文献\cite[第186页]{Dengjs},上标形式的引用为\ucite{Dengjs,Sangdy,Chenzj}.
\end{example}


\vspace{6mm}
%%%%%%%%%%%%%%%%%%%%%%%%%%%%%%%%%%%%%%%%%%%%%%%%%%%%%%%%%%%%%%%%
%  参考文献
%%%%%%%%%%%%%%%%%%%%%%%%%%%%%%%%%%%%%%%%%%%%%%%%%%%%%%%%%%%%%%%%
\zihao{-5}
\begin{thebibliography}{99}
%\setlength{\parskip}{0pt}  %段落之间的竖直距离
\addtolength{\itemsep}{-0.8 em} % 缩小参考文献间的垂直间距
  \bibitem{Xiedy}  薛定宇, ~~{\kaishu \LaTeX 科学文件处理软件入门(修订版)}, 1997.
  \bibitem{Dengjs} 邓建松, 彭冉冉, 陈长松, ~~{\kaishu\LaTeX2e科技排版指南}, 2001.
  \bibitem{Sangdy} 桑大勇, 王瑛, ~~{\kaishu 科技文献排版系统: \LaTeX 入门与提高}, 2001.
  \bibitem{Chenzj} 陈志杰, 赵书钦, 万福永, ~~{\kaishu \LaTeX 入门与提高},
  高等教育出版社, 2002.
  \bibitem{Wangl} K. Reckdahl~原著,王磊 译, ~~{\kaishu Using Import graphics in \LaTeX2e}, 2000.
  \bibitem{CTug} Tobias Oetiker~原著, ChinaTeX用户小组译, ~~{\kaishu 一份不太简短的LATEX2e介绍}, 2002.
  \bibitem{TexFriend03}Mytex, ~~{\kaishu TexFriend/Graphics插件}, 2003. http://www.ctex.org/forums/
  \bibitem{Lisj}李树钧, ~~{\kaishu fixbbl: BibTEX的中文本地化解决方案}, 2003. http://www.hooklee.com
\end{thebibliography}

%%其中chinesebst是我自己生成的参考文献风格,比较符合中国人的习惯
%%      参考文献
%% plain,unsrt,alpha,abbrev,chinesebst
%\bibliographystyle{chinesebst}
%\addtolength{\itemsep}{-0.5 em} % 缩小参考文献间的垂直间距
%%\bibliography{reference/reference,reference/chinese,reference/english}
%\bibliography{refs/aps_ref}


%%%%%%%%%%%%%%%%%%%%%%%%%%%%%%%%%%%%%%%%%%%%%%%%%%%%%%%%%%%%%%%%
%       英文摘要
%%%%%%%%%%%%%%%%%%%%%%%%%%%%%%%%%%%%%%%%%%%%%%%%%%%%%%%%%%%%%%%%
\vspace{6mm}\hspace{-8mm}
\parbox{\textwidth}{
\begin{center}
{\large{\textbf{Template for Applied Probability and Statistics }}}\\vspace{8mm}
\textsc{APS Editorial Board}\\[2pt]
(\textit{\zihao{-5}School of Finance and Statistics, East China Normal University, Shanghai 200241})\\[2pt]
\end{center}
\hspace{2em}
The paper introduces some key techniques used in scientific typesetting, including page setting,
typesetting of different types of formulae and tables, theorem environment, figure insertion, reference inputting
and citation of formulae, tables, figures, theorems and references. The template is exclusively designed for
the magazine “Applied Probability and Statistics”.
}


\begin{appendix}
\CTEXsetup[name={附录~,}]{section}
%====================================================================%
%--------- 定义附录中的图形、表格、公式的编号格式 -------------------%
%====================================================================%
\renewcommand{\thetable}{\Alph{section}-\arabic{table}}
\renewcommand{\theequation}{\Alph{section}-\arabic{equation}}
\renewcommand{\thefigure}{\Alph{section}-\arabic{figure}}
%\renewcommand{\chaptername}{附录\Alph{section}}
%\renewcommand{\thesection}{\Alph{section}.\arabic{section}}

\newpage
\mbox{}\vskip 5mm
%%%%%%%%%%%%%%%%%%%%%%%%%%%%%%%%%%%%%%%%%%%%%%%%%%%%%%%%%%%%%%%%
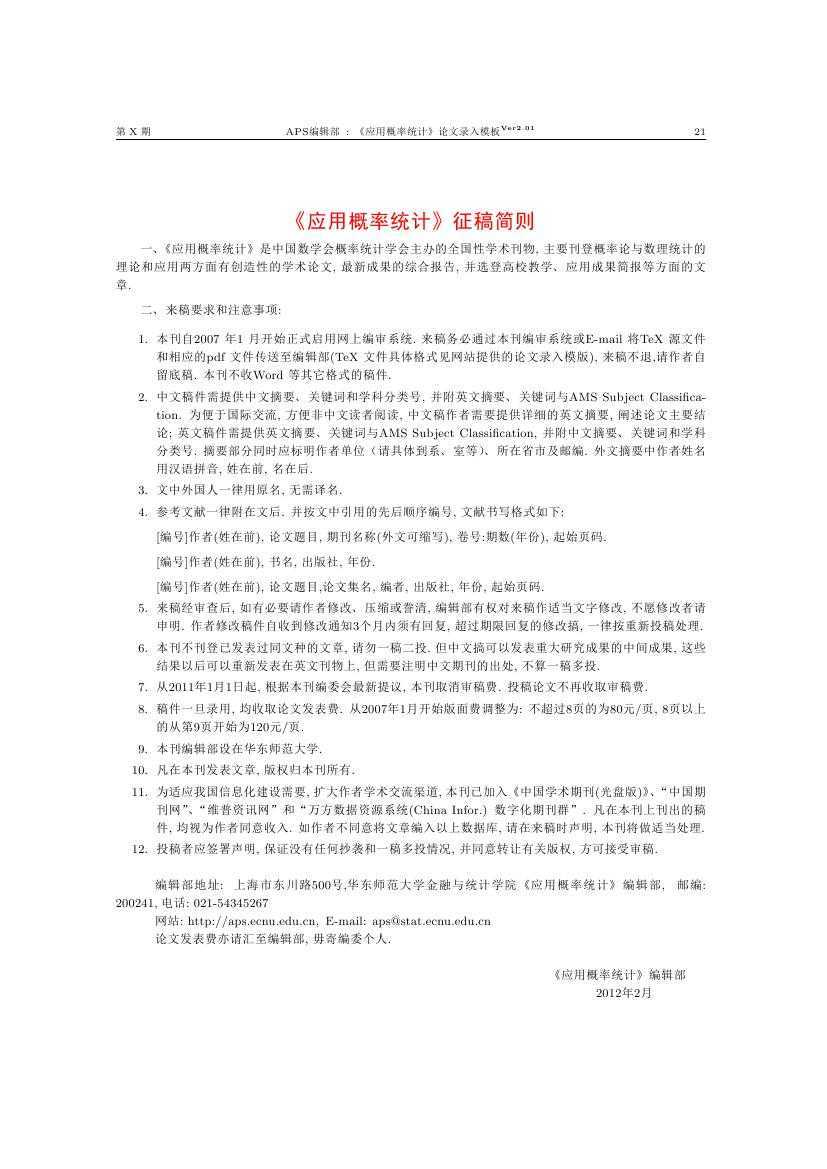
 \section*{\color{red}《应用概率统计》征稿简则}
%%%%%%%%%%%%%%%%%%%%%%%%%%%%%%%%%%%%%%%%%%%%%%%%%%%%%%%%%%%%%%%%

    一、《应用概率统计》是中国数学会概率统计学会主办的全国性学术刊物,
    主要刊登概率论与数理统计的理论和应用两方面有创造性的学术论文, 最新成果的综合报告,
    并选登高校教学、应用成果简报等方面的文章.

\vskip 5pt
    二、来稿要求和注意事项:
\vspace{-5pt}
\renewcommand\baselinestretch{0.5}

 \begin{enumerate}
 \addtolength{\itemsep}{-0.8 em} % 缩小参考文献间的垂直间距
   \item 本刊自 2007 年 1 月开始正式启用网上编审系统. 来稿务必通过本刊编审系统或 E-mail 将 TeX 源文件和相应的 pdf 文件传送至编辑部
    (TeX 文件具体格式见网站提供的论文录入模版), 来稿不退,请作者自留底稿.
    本刊不收 Word 等其它格式的稿件.
    \item 中文稿件需提供中文摘要、关键词和学科分类号, 并附英文摘要、关键词与 AMS Subject Classification. 为便于国际交流, 方便非中文读者阅读, 中文稿作者需要提供详细的英文摘要, 阐述论文主要结论; 英文稿件需提供英文摘要、关键词与 AMS Subject Classification, 并附中文摘要、关键词和学科分类号. 摘要部分同时应标明作者单位(请具体到系、室等)、所在省市及邮编. 外文摘要中作者姓名用汉语拼音, 姓在前, 名在后.
    \item 文中外国人一律用原名, 无需译名.
    \item  参考文献一律附在文后. 并按文中引用的先后顺序编号, 文献书写格式如下:

    [编号]作者(姓在前), 论文题目, 期刊名称(外文可缩写), 卷号:期数(年份), 起始页码.

    [编号]作者(姓在前), 书名, 出版社, 年份.

    [编号]作者(姓在前), 论文题目,论文集名, 编者, 出版社, 年份, 起始页码.
    \item  来稿经审查后, 如有必要请作者修改、压缩或誊清, 编辑部有权对来稿作适当文字修改, 不愿修改者请申明. 作者修改稿件自收到修改通知3个月内须有回复, 超过期限回复的修改搞, 一律按重新投稿处理.
    \item  本刊不刊登已发表过同文种的文章, 请勿一稿二投. 但中文搞可以发表重大研究成果的中间成果, 这些结果以后可以重新发表在英文刊物上, 但需要注明中文期刊的出处, 不算一稿多投.
    \item  从2011年1月1日起, 根据本刊编委会最新提议, 本刊取消审稿费. 投稿论文不再收取审稿费.
    \item  稿件一旦录用, 均收取论文发表费. 从2007年1月开始版面费调整为: 不超过8页的为80元/页, 8页以上的从第9页开始为120元/页.
    \item  本刊编辑部设在华东师范大学.
    \item 凡在本刊发表文章, 版权归本刊所有.
    \item 为适应我国信息化建设需要, 扩大作者学术交流渠道, 本刊已加入《中国学术期刊(光盘版)》、“中国期刊网”、“维普资讯网”和“万方数据资源系统 (China Infor.) 数字化期刊群”. 凡在本刊上刊出的稿件, 均视为作者同意收入. 如作者不同意将文章编入以上数据库, 请在来稿时声明, 本刊将做适当处理.
    \item 投稿者应签署声明, 保证没有任何抄袭和一稿多投情况, 并同意转让有关版权, 方可接受审稿.
 \end{enumerate}
\mbox{}\hspace{1cm}编辑部地址: 上海市东川路500号,华东师范大学金融与统计学院《应用概率统计》编辑部, ~邮编: 200241,~电话: 021-54345267\\mbox{}\hspace{1cm}网站: http://aps.ecnu.edu.cn,~~ E-mail: aps@stat.ecnu.edu.cn\\mbox{}\hspace{1cm}论文发表费亦请汇至编辑部, 毋寄编委个人. \\ \\mbox{}\hspace{11cm}《应用概率统计》编辑部\\mbox{}\hspace{12.2cm}2012年2月

\end{appendix}

%%%%%%%%%%%%%%%%%%%%%%%%%%%%%%%%%%%%%%%%%%%%%%%%%%%%%%%%%%%%%%%%
%  英文摘要
%%%%%%%%%%%%%%%%%%%%%%%%%%%%%%%%%%%%%%%%%%%%%%%%%%%%%%%%%%%%%%%%
\vspace{6mm}\hspace{-8mm}
\parbox{\textwidth}{
\begin{center}
\large{\textbf{\entitle}}\\vspace{8mm}
\textsc{\enfirstauthor}\\[2pt]
({\zihao{-5}\enfirstinst})\\[2pt]
%\textsc{\cnsecondauthor}\\[2pt]
%({\zihao{-5}\cnsecondinst})\\[2pt]
\end{center}
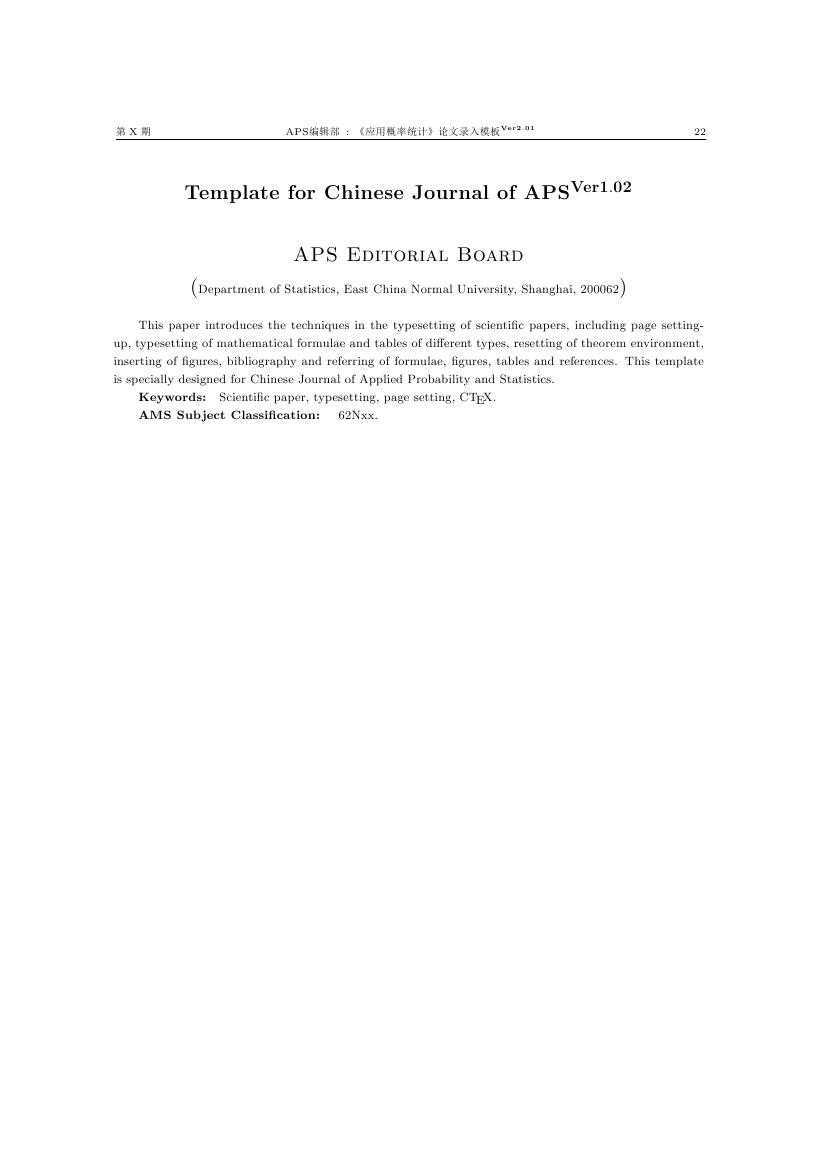
\enabstract\\mbox{}\hspace{2\ccwd}\textbf{Keywords:}\quad \enkeywords\\mbox{}\hspace{2\ccwd}\textbf{AMS Subject Classification:} \quad \amsno. }

%%%%%%%%%%%%%%%%%%%%%%%%%%%%%%%%%%%%%%%%%%%%%%%%%%%%%%%%%%%%%%%%
%  文章结束
%%%%%%%%%%%%%%%%%%%%%%%%%%%%%%%%%%%%%%%%%%%%%%%%%%%%%%%%%%%%%%%%
\clearpage
\end{document}

%%%%%%%%%%%%%%%%%%%%%%%%%%%%%%%%%%%%%%%%%%%%%%%%%%%%%%%%%%%%%%%%
%  文章结束
%%%%%%%%%%%%%%%%%%%%%%%%%%%%%%%%%%%%%%%%%%%%%%%%%%%%%%%%%%%%%%%%
\clearpage
\end{document}
J_Aps_CN.tex
% !Mode:: "TeX:UTF-8"
% UTF-8 编辑器
%%%%%%%%%%%%%%%%%%%%%%%%%%%%%%%%%%%%%%%%%%%%%%%%%%%%%%%%%%%%%%%%%%%%%%%%%%%
%%                                                                       %%
%%     LaTeX + CTeX 《应用概率统计》论文模板, 只针对 A4 纸英文稿.        %%
%%                                                                       %%
%%     Ver 2.05 By Tang Yincai aps@stat.ecnu.edu.cn                      %%
%%                             yctang@stat.ecnu.edu.cn(汤银才)         %%
%%                                                                       %%
%%                                                          2012.02.08   %%
%%     版本历史:                                                         %%
%%        Ver0.01   2005.09.10                                           %%
%%        Ver1.01   2006.03.01                                           %%
%%               1. 更改编号出现错位                                     %%
%%               2. 增加作者信息                                         %%
%%               3. 调整首页标题、作者和摘要之间的间距                   %%
%%        Ver1.02   2007.10.01                                           %%
%%               1. 将作者信集中处理                                     %%
%%               2. 将设置文件更改为APSart.cls,                         %%
%%                  中英文论文按采用选项Chniese/English                  %%
%%     You can mofify it and distribute it freely                        %%
%%                                                                       %%
%%%%%%%%%%%%%%%%%%%%%%%%%%%%%%%%%%%%%%%%%%%%%%%%%%%%%%%%%%%%%%%%%%%%%%%%%%%
%%=======================================================================%%
%%  编译方法: 1. LaTeX -> dvi2pdf                                       %%
%%             2. pdfLaTeX                                               %%
%%             3. XeLaTeX                                                %%
%%=======================================================================%%

%%%%%%%%%%%%%%%%%%%%%%%%%%%%%%%%%%%%%%%%%%%%%%%%%%%%%%%%%%%%%%%%
%            中文稿 文章模板:A4 纸, 五号字, 单列              %
%%%%%%%%%%%%%%%%%%%%%%%%%%%%%%%%%%%%%%%%%%%%%%%%%%%%%%%%%%%%%%%%
\documentclass[a4paper,c5size,onecolumn,twoside,cap,Chinese]{APSart}
%\usepackage{}  %添加自己论文需要的其他宏包
\begin{document}
%%
%%%%%%%%%%%%%%%%%%%%%%%%%%%%%%%%%%%%%%%%%%%%%%%%%%%%%%%%%%%%%%%%
%%------------------ 编辑部提供的信息 ------------------------%%
%%%%%%%%%%%%%%%%%%%%%%%%%%%%%%%%%%%%%%%%%%%%%%%%%%%%%%%%%%%%%%%%
%%\apsnumber{20xx/xxx}             % 论文编号 --- 编辑部受理后产生
\newcommand{\pubvol}{XX}         % 卷号
\newcommand{\pubno}{X}           % 期号
\newcommand{\pubyear}{XXXX}      % 出版年份
\newcommand{\pubmonth}{XX}       % 出版月份
\newcommand{\receivedate}{本文XXXX~年~XX~月~XX~日收到} % 论文收到日期
\newcommand{\modifydate}{XXXX~年~XX~月~XX~日收到修改稿}% 论文修改日期
%%
%%%%%%%%%%%%%%%%%%%%%%%%%%%%%%%%%%%%%%%%%%%%%%%%%%%%%%%%%%%%%%%%
%%-------------------- 作者提供的信息 ------------------------%%
%%%%%%%%%%%%%%%%%%%%%%%%%%%%%%%%%%%%%%%%%%%%%%%%%%%%%%%%%%%%%%%%
\newcommand{\cnfirstauthor}{第一作者姓名}
\newcommand{\cnsecondauthor}{第二作者姓名}
\newcommand{\cnfirstinst}{第一作者单位(到部门),~~省市\, 邮政编码}
\newcommand{\cnsecondinst}{第二作者单位(到部门),~~省市\, 邮政编码}
\newcommand{\cntitle}{论文题目}
\newcommand{\cnkeywords}{关键词1, 关键词2, 关键词3, 关键词4.}
\newcommand{\cnclassno}{O212.xx}  % 中图分类号
%%
\newcommand{\enfirstauthor}{First Name}
\newcommand{\ensecondauthor}{Second Name}
\newcommand{\enfirstinst}{First Author‘s Working Unit (Up to Department), Province\, Zip Code}
\newcommand{\ensecondinst}{Second Author‘s Working Unit (Up to Department), Province\, Zip Code}
\newcommand{\entitle}{English Title}
\newcommand{\enkeywords}{Keyword 1, Keyword 2, Keyword 3, Keyword 4.}
\newcommand{\amsno}{62Nxx} % AMS Subject Claassification
%%
%% 中文摘要
\newcommand{\cnabstract}{\hspace{2\ccwd}摘要内容摘要内容摘要内容摘要内容摘要内容摘要内容摘要内容摘要内容摘要内容摘要内容摘要内容摘要内容摘要内容摘要内容摘要内容摘要内容摘要内容摘要内容摘要内容摘要内容摘要内容摘要内容摘要内容摘要内容.}
%% 英文摘要
\newcommand{\enabstract}{\hspace{2\ccwd}The abstract comes here! The abstract comes here! The abstract comes here! The abstract comes here!
The abstract comes here! The abstract comes here! The abstract comes here! The abstract comes here! The abstract comes here!} %%
\newcommand{\fundinfo}{XXXX基金资助~(12345678).}
\newcommand{\authorsinfo}{\textbf{作者信息}:~
第一作者(出生时间--),~性别,~职称,~主要研究方向:~xxxxxx,~E-mail:xxxxx@xxxx.xxx.xx~;
第二作者(出生时间--):~性别, 职称,主要研究方向:~xxxxxx,~E-mail:xxxxx@xxxx.xxx.xx~.}

%%%%%%%%%%%%%%%%%%%%%%%%%%%%%%%%%%%%%%%%%%%%%%%%%%%%%%%%%%%%%%%%
%        文章正文                                              %
%%%%%%%%%%%%%%%%%%%%%%%%%%%%%%%%%%%%%%%%%%%%%%%%%%%%%%%%%%%%%%%%

\title{\cntitle %
\thanks{\zihao{-5}{~\fundinfo}}
}
%%%%%%%%%%%%%%%%%%%%%%%%%%%%%%%%%%%%%%%%%%%%%%%%%%%%%%%%%%%%%%%%
% 作者姓名与单位 : 三种形式中选一种
% 后面英文摘要中的名字和单位同样处理
% ---------------------
% 第一种形式: 单一作者
% ---------------------
%\author{\cnfirstauthor\footnote{\authorsinfo}\\[-1pt]
%({\zihao{-5}\cnfirstinst}) \\[-2pt]}

% ---------------------
% 第二种形式: 同一单位 多个作者 -- 名字左右并列,
% ---------------------
%\author{\cnfirstauthor\hspace{15mm}\cnsecondauthor\footnote{\authorsinfo}\\[-1pt]
%({\zihao{-5}\cnfirstinst}) \\[-2pt]}

% ---------------------
% 第三种形式: 不同单位 多个作者 -- 名字与单位上下并列
% ---------------------
\author{\cnfirstauthor\\[-1pt]
({\zihao{-5}\cnfirstinst}) \\[-2pt]
\cnsecondauthor%
\\[-1pt]
({\zihao{-5}\cnsecondinst}) \\[-2pt]}
%%%%%%%%%%%%%%%%%%%%%%%%%%%%%%%%%%%%%%%%%%%%%%%%%%%%%%%%%%%%%%%

\date{}  % 这一行用来去掉默认的日期显示
\maketitle \vspace{-6mm}
%%%%%%%%%%%%%%%%%%%%%%%%%%%%%%%%%%%%%%%%%%%%%%%%%%%%%%%%%%%%%%%%
%  中文摘要
%%%%%%%%%%%%%%%%%%%%%%%%%%%%%%%%%%%%%%%%%%%%%%%%%%%%%%%%%%%%%%%%
\begin{center}
\begin{minipage}[c]{14cm}
\begin{center}\textbf{摘~~~要}\end{center}
\vspace{-1em}
\zihao{-5}\cnabstract \\mbox{}\hspace{2\ccwd}\textbf{关\,键\,词:}\quad \cnkeywords\\mbox{}\hspace{2\ccwd}\textbf{学\,科\,分\,类\,号:} \quad \cnclassno.
\end{minipage}
\end{center}
%
\zihao{5}
%%%%%%%%%%%%%%%%%%%%%%%%%%%%%%%%%%%%%%%%%%%%%%%%%%%%%%%%%%%%%%%%
%  正文由此开始
%%%%%%%%%%%%%%%%%%%%%%%%%%%%%%%%%%%%%%%%%%%%%%%%%%%%%%%%%%%%%%%%
%
%%%%%%%%%%%%%%%%%%%%%%%%%%%%%%%%%%%%%%%%%%%%%%%%%%%%%%%%%%%%%%%%
\section{引言}
%%%%%%%%%%%%%%%%%%%%%%%%%%%%%%%%%%%%%%%%%%%%%%%%%%%%%%%%%%%%%%%%

%%%%%%%%%%%%%%%%%%%%%%%%%%%%%%%%%%%%%%%%%%%%%%%%%%%%%%%%%%%%%%%%
\section{新的一节}
%%%%%%%%%%%%%%%%%%%%%%%%%%%%%%%%%%%%%%%%%%%%%%%%%%%%%%%%%%%%%%%%
\subsection{第一小节}
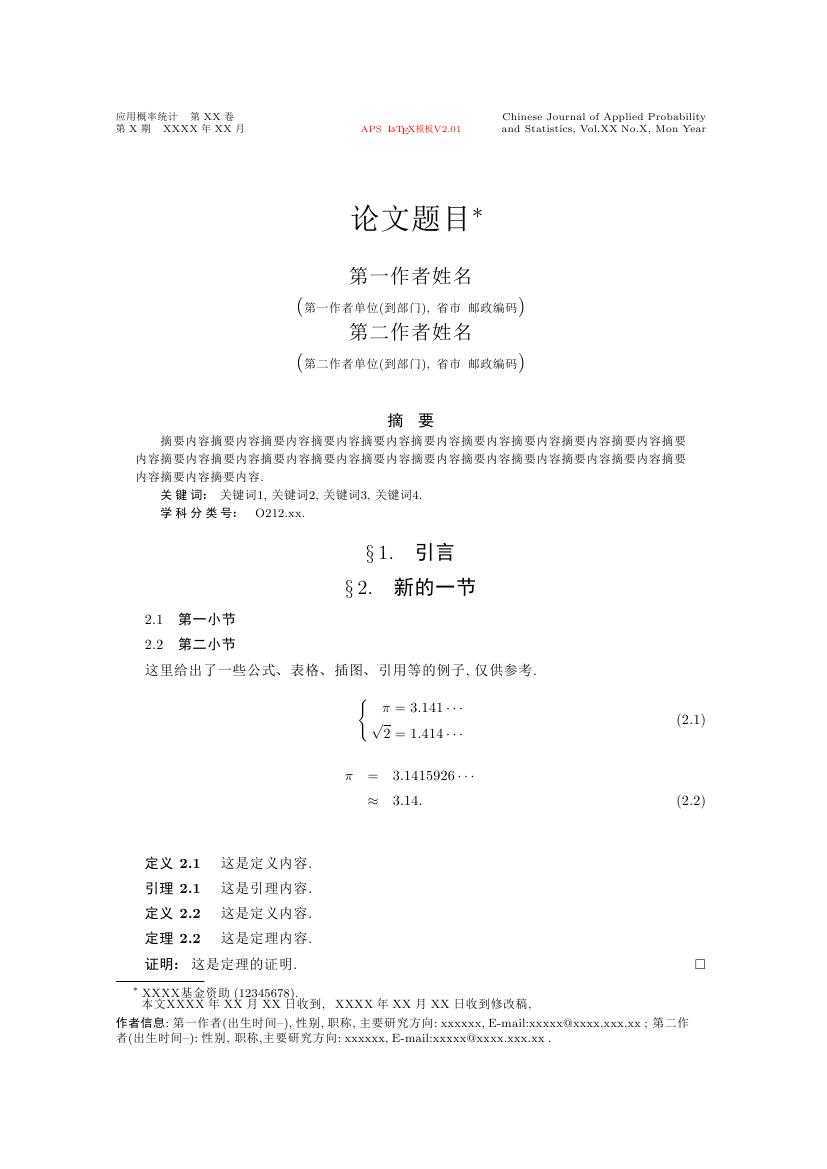
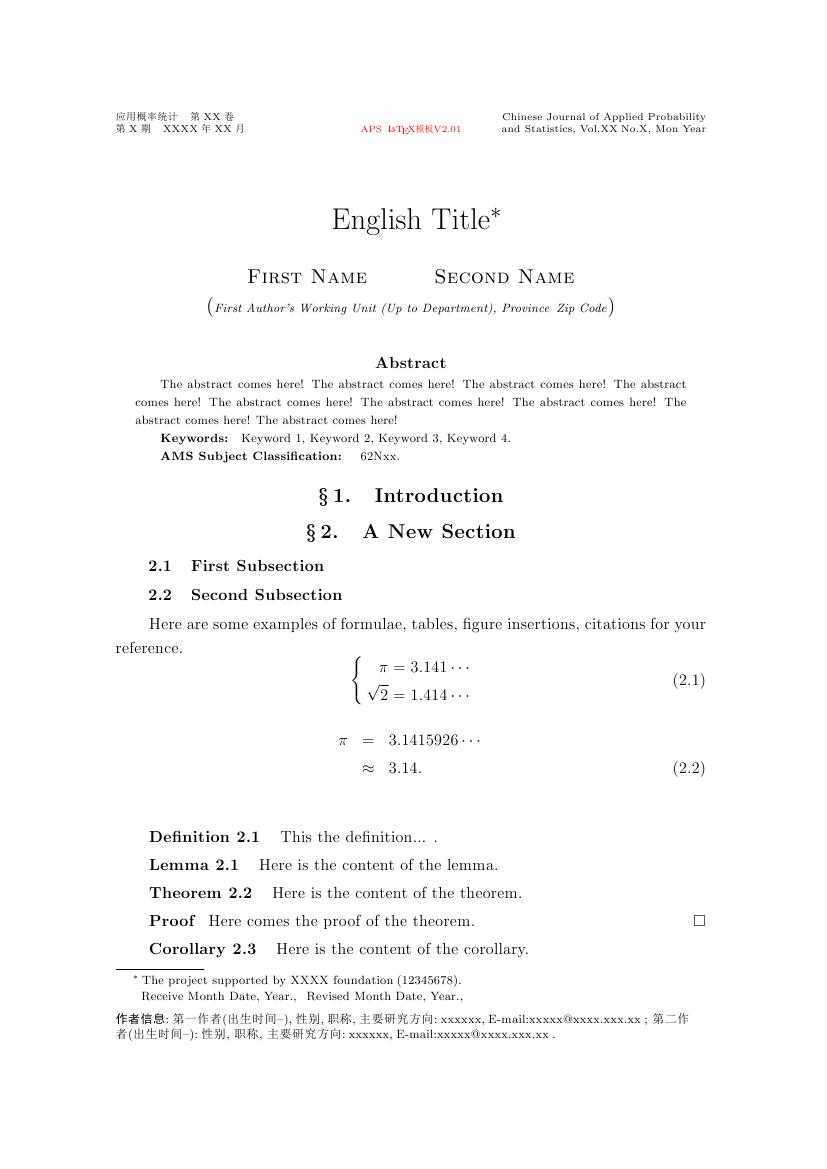
\subsection{第二小节} 这里给出了一些公式、表格、插图、引用等的例子, 仅供参考.

\begin{equation} \label{eq:1}
\left\{ \begin{aligned}
         \pi &= 3.141\cdots \     \sqrt{2}&=1.414\cdots
         \end{aligned} \right.
\end{equation}
\begin{eqnarray}
         \pi &=& 3.1415926\cdots \nonumber \             &\approx & 3.14.
\end{eqnarray}
\begin{table}[htbp]
\centering\zihao{5}
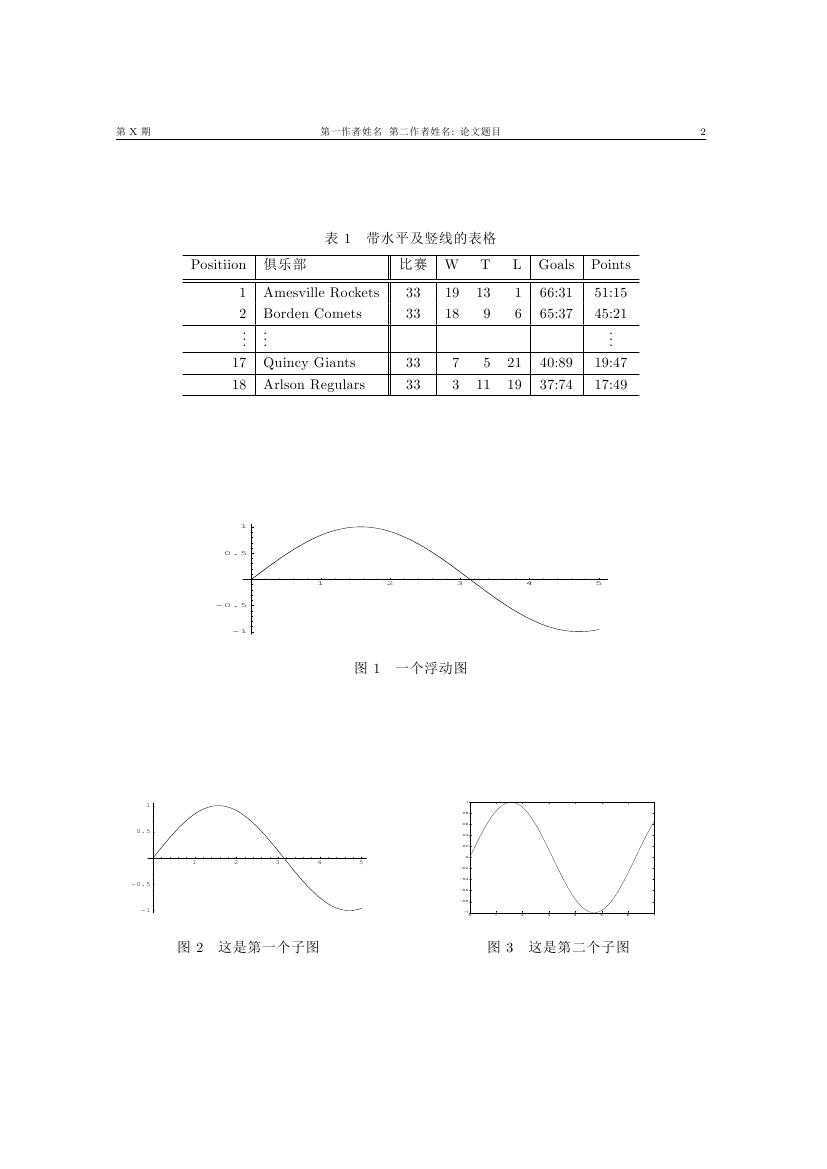
{\caption{带水平及竖线的表格\label{table:1}}}
\vskip2mm
\begin{tabular}{r|l||c|rrr|c|c}
\hline
Positiion & 俱乐部 & 比赛 & W & T & L & Goals & Points \\ [0.5ex]
\hline\hline
1 & Amesville Rockets & 33 & 19 & 13 & 1 & 66:31& 51:15\2 & Borden Comets     & 33 & 18 & 9 & 6 &65:37 & 45:21\\ \hline
$\vdots$& $\vdots$    &&&&& &$\vdots$\\ \hline
17 & Quincy Giants    & 33 & 7 & 5 & 21 & 40:89 &19:47\\ \hline
18 & Arlson Regulars  & 33 & 3 & 11 &19 & 37:74 &17:49 \\ \hline
\end{tabular}
\end{table}
\begin{figure}[htbp]
\centering


\includegraphics[width=10cm,height=3cm]{figs/sin.eps}
\caption{一个浮动图\label{fig:fig4}}
\end{figure}
\begin{figure}[htbp]
\begin{minipage}[t]{0.45\linewidth}
\centering
\includegraphics[width=6cm,height=3cm]{figs/sin.eps}
\caption{这是第一个子图\label{fig:float2-1}}
\end{minipage}%
\hfill
\begin{minipage}[t]{0.5\linewidth}
\centering
\includegraphics[width=5cm,height=3cm]{figs/fig.eps}
\caption{这是第二个子图\label{fig:float2-2}}
\end{minipage}
\end{figure}

\begin{definition} %
这是定义内容.
\end{definition}%
\begin{lemma}%
这是引理内容.
\end{lemma}
\begin{definition} %
这是定义内容.
\end{definition}%

\begin{theorem}\label{thm-1}%
这是定理内容.
\end{theorem}%
\begin{proof}%
这是定理的证明.
\end{proof}
\begin{corollary}%
这是推论.
\end{corollary}

下面是一些引用的例子:
\begin{example}
这里引用了第\pageref{eq:1}页的公式\eqref{eq:1}.
\end{example}
\begin{example}
这里引用了第\pageref{table:1}页的表格\ref{table:1}.
\end{example}
\begin{example}
这里引用了第\pageref{fig:float2-1}页的图形\ref{fig:float2-1}.
\end{example}
\begin{example}
这里引用了第\pageref{thm-1}页的定理\ref{thm-1}.
\end{example}
\begin{example}
这里引用了参考文献\cite[第186页]{Dengjs},上标形式的引用为\ucite{Dengjs,Sangdy,Chenzj}.
\end{example}
\begin{example}
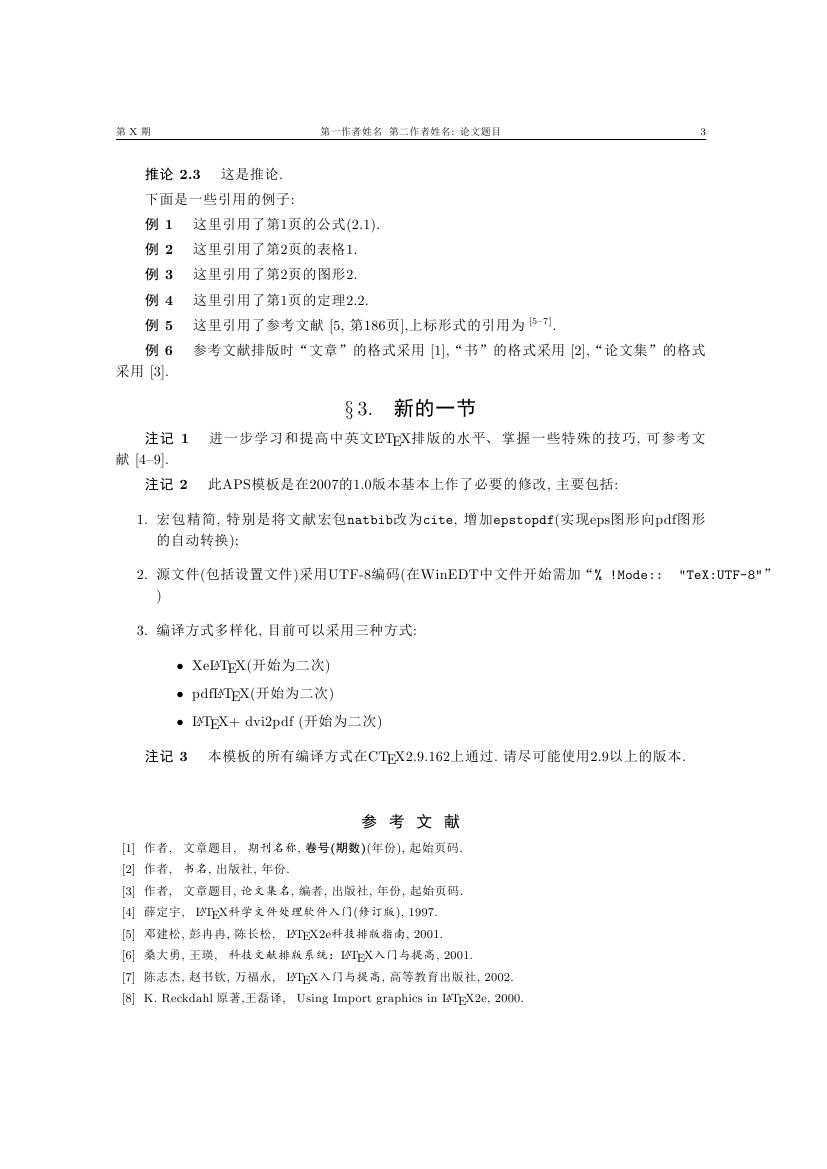
参考文献排版时“文章”的格式采用\cite{Art},“书”的格式采用\cite{Book},“论文集”的格式采用\cite{Conference}.
\end{example}

%%%%%%%%%%%%%%%%%%%%%%%%%%%%%%%%%%%%%%%%%%%%%%%%%%%%%%%%%%%%%%%%
\section{新的一节}
%%%%%%%%%%%%%%%%%%%%%%%%%%%%%%%%%%%%%%%%%%%%%%%%%%%%%%%%%%%%%%%%

\begin{remark}
 进一步学习和提高中英文\LaTeX 排版的水平、掌握一些特殊的技巧, 可参考文献
\cite{Xiedy,Dengjs,Sangdy,Chenzj,Wangl,CTug}.
\end{remark}
\begin{remark}
此APS模板是在2007的1.0版本基本上作了必要的修改, 主要包括:
\begin{enumerate}
  \item 宏包精简, 特别是将文献宏包\texttt{natbib}改为\texttt{cite}, 增加\texttt{epstopdf}(实现eps图形向pdf图形的自动转换);
  \item 源文件(包括设置文件)采用UTF-8编码(在WinEDT中文件开始需加“\texttt{\% !Mode:: "TeX:UTF-8"}”)
  \item 编译方式多样化, 目前可以采用三种方式:
  \begin{itemize}
    \item Xe\LaTeX (开始为二次)
    \item pdf\LaTeX (开始为二次)
    \item \LaTeX + dvi2pdf (开始为二次)
  \end{itemize}
\end{enumerate}
\end{remark}
\begin{remark}
  本模板的所有编译方式在C\TeX2.9.162上通过. 请尽可能使用2.9以上的版本.
\end{remark}
\vspace{6mm}
%%%%%%%%%%%%%%%%%%%%%%%%%%%%%%%%%%%%%%%%%%%%%%%%%%%%%%%%%%%%%%%%
%  参考文献
%%%%%%%%%%%%%%%%%%%%%%%%%%%%%%%%%%%%%%%%%%%%%%%%%%%%%%%%%%%%%%%%
\zihao{-5}
\begin{thebibliography}{99}
%\setlength{\parskip}{0pt}  %段落之间的竖直距离
\addtolength{\itemsep}{-0.8 em} % 缩小参考文献间的垂直间距
  \bibitem{Art}  作者, ~~文章题目, ~~{\kaishu 期刊名称}, {\bf 卷号(期数)}(年份), 起始页码.
  \bibitem{Book}  作者, ~~{\kaishu 书名}, 出版社, 年份.
  \bibitem{Conference}  作者, ~~文章题目, {\kaishu 论文集名}, 编者, 出版社, 年份, 起始页码.
  \bibitem{Xiedy}  薛定宇, ~~{\kaishu \LaTeX 科学文件处理软件入门(修订版)}, 1997.
  \bibitem{Dengjs} 邓建松, 彭冉冉, 陈长松, ~~{\kaishu\LaTeX2e科技排版指南}, 2001.
  \bibitem{Sangdy} 桑大勇, 王瑛, ~~{\kaishu 科技文献排版系统:\LaTeX 入门与提高}, 2001.
  \bibitem{Chenzj} 陈志杰, 赵书钦, 万福永, ~~{\kaishu \LaTeX 入门与提高},
  高等教育出版社, 2002.
  \bibitem{Wangl} K. Reckdahl~原著,王磊 译, ~~{\kaishu Using Import graphics in \LaTeX2e}, 2000.
  \bibitem{CTug} Tobias Oetiker~原著, ChinaTeX用户小组译, ~~{\kaishu 一份不太简短的LATEX2e介绍}, 2002.
  \bibitem{TexFriend03}Mytex, ~~{\kaishu TexFriend/Graphics插件}, 2003. http://www.ctex.org/forums/
  \bibitem{Lisj}李树钧, ~~{\kaishu fixbbl:BibTEX的中文本地化解决方案}, 2003. http://www.hooklee.com
\end{thebibliography}

%%%%%%%%%%%%%%%%%%%%%%%%%%%%%%%%%%%%%%%%%%%%%%%%%%%%%%%%%%%%%%%%
%  英文摘要
%%%%%%%%%%%%%%%%%%%%%%%%%%%%%%%%%%%%%%%%%%%%%%%%%%%%%%%%%%%%%%%%
\vspace{6mm}\hspace{-8mm}
\parbox{\textwidth}{
\begin{center}
\large{\textbf{\entitle}}\\vspace{8mm}
\textsc{\enfirstauthor}\\[2pt]
(\textit{\zihao{-5} \enfirstinst}) \\[2pt]
\textsc{\ensecondauthor}\\[2pt]
(\textit{\zihao{-5} \ensecondinst}) \\[2pt]
\end{center}
\enabstract\\mbox{}\hspace{2\ccwd}\textbf{Keywords:}\quad \enkeywords\\mbox{}\hspace{2\ccwd}\textbf{AMS Subject Classification:} \quad \amsno. }
%%%%%%%%%%%%%%%%%%%%%%%%%%%%%%%%%%%%%%%%%%%%%%%%%%%%%%%%%%%%%%%%
%  文章结束
%%%%%%%%%%%%%%%%%%%%%%%%%%%%%%%%%%%%%%%%%%%%%%%%%%%%%%%%%%%%%%%%
\clearpage
\end{document}
J_Aps_EN.tex
% !Mode:: "TeX:UTF-8"
%%%%%%%%%%%%%%%%%%%%%%%%%%%%%%%%%%%%%%%%%%%%%%%%%%%%%%%%%%%%%%%%%%%%%%%%%%%
%%                                                                       %%
%%     LaTeX + CTeX 《应用概率统计》论文模板, 只针对 A4 纸英文稿.        %%
%%                                                                       %%
%%     Ver 2.05 By Tang Yincai aps@stat.ecnu.edu.cn                      %%
%%                             yctang@stat.ecnu.edu.cn(汤银才)         %%
%%                                                                       %%
%%                                                          2012.02.08   %%
%%     版本历史:                                                         %%
%%        Ver0.01   2005.09.10                                           %%
%%        Ver1.01   2006.03.01                                           %%
%%               1. 更改编号出现错位                                     %%
%%               2. 增加作者信息                                         %%
%%               3. 调整首页标题、作者和摘要之间的间距                   %%
%%        Ver1.02   2007.10.01                                           %%
%%               1. 将作者信集中处理                                     %%
%%               2. 将设置文件更改为APSart.cls,                         %%
%%                  中英文论文按采用选项Chniese/English                  %%
%%     You can mofify it and distribute it freely                        %%
%%                                                                       %%
%%%%%%%%%%%%%%%%%%%%%%%%%%%%%%%%%%%%%%%%%%%%%%%%%%%%%%%%%%%%%%%%%%%%%%%%%%%
%%=======================================================================%%
%%  编译方法: 1. LaTeX -> dvi2pdf                                       %%
%%             2. pdfLaTeX                                               %%
%%=======================================================================%%

%%%%%%%%%%%%%%%%%%%%%%%%%%%%%%%%%%%%%%%%%%%%%%%%%%%%%%%%%%%%%%%%
%            英文稿 文章模板:A4 纸, 五号字, 单列              %
%%%%%%%%%%%%%%%%%%%%%%%%%%%%%%%%%%%%%%%%%%%%%%%%%%%%%%%%%%%%%%%%
\documentclass[a4paper,c5size,onecolumn,twoside,nocap,English]{APSart}
%\usepackage{}  %添加自己论文需要的其他宏包
\begin{document}
%%
%%%%%%%%%%%%%%%%%%%%%%%%%%%%%%%%%%%%%%%%%%%%%%%%%%%%%%%%%%%%%%%%
%%------------------ 编辑部提供的信息 ------------------------%%
%%%%%%%%%%%%%%%%%%%%%%%%%%%%%%%%%%%%%%%%%%%%%%%%%%%%%%%%%%%%%%%%
%%\apsnumber{20xx/xxx}             % 论文编号 --- 编辑部受理后产生
\newcommand{\pubvol}{XX}         % 卷号
\newcommand{\pubno}{X}           % 期号
\newcommand{\pubyear}{XXXX}      % 出版年份
\newcommand{\pubmonth}{XX}       % 出版月份
\newcommand{\receivedate}{Receive Month Date, Year.} % 论文收到日期
\newcommand{\modifydate}{Revised Month Date, Year.}% 论文修改日期
%%
%%%%%%%%%%%%%%%%%%%%%%%%%%%%%%%%%%%%%%%%%%%%%%%%%%%%%%%%%%%%%%%%
%%-------------------- 作者提供的信息 ------------------------%%
%%%%%%%%%%%%%%%%%%%%%%%%%%%%%%%%%%%%%%%%%%%%%%%%%%%%%%%%%%%%%%%%
\newcommand{\cnfirstauthor}{第一作者姓名}
\newcommand{\cnsecondauthor}{第二作者姓名}
\newcommand{\cnfirstinst}{第一作者单位(到部门),~~省市\, 邮政编码}
\newcommand{\cnsecondinst}{第二作者单位(到部门),~~省市\, 邮政编码}
\newcommand{\cntitle}{论文题目}
\newcommand{\cnkeywords}{关键词1, 关键词2, 关键词3, 关键词4.}
\newcommand{\cnclassno}{O212.xx}  % 中图分类号
%%
\newcommand{\enfirstauthor}{First Name}
\newcommand{\ensecondauthor}{Second Name}
\newcommand{\enfirstinst}{First Author‘s Working Unit (Up to Department), Province\, Zip Code}
\newcommand{\ensecondinst}{Second Author‘s Working Unit (Up to Department), Province\, Zip Code}
\newcommand{\entitle}{English Title}
\newcommand{\enkeywords}{Keyword 1, Keyword 2, Keyword 3, Keyword 4.}
\newcommand{\amsno}{62Nxx} % AMS Subject Claassification
%%
%% 中文摘要
\newcommand{\cnabstract}{\hspace{2\ccwd}摘要内容摘要内容摘要内容摘要内容摘要内容摘要内容摘要内容摘要内容摘要内容摘要内容摘要内容摘要内容摘要内容摘要内容摘要内容摘要内容摘要内容摘要内容摘要内容摘要内容摘要内容摘要内容摘要内容摘要内容.}
%% 英文摘要
\newcommand{\enabstract}{\hspace{2\ccwd}The abstract comes here! The abstract comes here! The abstract comes here! The abstract comes here!
The abstract comes here! The abstract comes here! The abstract comes here! The abstract comes here! The abstract comes here!} %%
\newcommand{\fundinfo}{The project supported by XXXX foundation~(12345678).}
\newcommand{\authorsinfo}{\textbf{作者信息}:~ %% 使用中文
第一作者(出生时间--),~性别,~职称,~主要研究方向:~xxxxxx,~E-mail:xxxxx@xxxx.xxx.xx~;
第二作者(出生时间--):~性别, 职称, 主要研究方向:~xxxxxx,~E-mail:xxxxx@xxxx.xxx.xx~.}

%%%%%%%%%%%%%%%%%%%%%%%%%%%%%%%%%%%%%%%%%%%%%%%%%%%%%%%%%%%%%%%%
%        文章正文                                              %
%%%%%%%%%%%%%%%%%%%%%%%%%%%%%%%%%%%%%%%%%%%%%%%%%%%%%%%%%%%%%%%%

\title{\entitle %
\thanks{\zihao{-5}{~\fundinfo}}
}
%%%%%%%%%%%%%%%%%%%%%%%%%%%%%%%%%%%%%%%%%%%%%%%%%%%%%%%%%%%%%%%%
% 作者姓名与单位 : 三种形式中选一种
% 后面中文摘要中的名字和单位同样处理
% ---------------------
% 第一种形式: 单一作者
% ---------------------
%\author{\textsc{\enfirstauthor}\\[-1pt]
%(\textit{\zihao{-5} \enfirstinst}) \\[-2pt]}

% ---------------------
% 第二种形式: 同一单位 多个作者 -- 名字左右并列,
% ---------------------
\author{\textsc{\enfirstauthor \hspace{15mm} \ensecondauthor}\\[-1pt]
(\textit{\zihao{-5} \enfirstinst}) \\[-2pt]}

% ---------------------
% 第三种形式: 不同单位 多个作者 -- 名字与单位上下并列
% ---------------------
%\author{\textsc{\enfirstauthor}\\[-1pt]
%(\textit{\zihao{-5} \enfirstinst}) \\[-2pt]
%\textsc{\ensecondauthor}\\[-1pt]
%(\textit{\zihao{-5} \ensecondauthor}) \\[-2pt]}
%%%%%%%%%%%%%%%%%%%%%%%%%%%%%%%%%%%%%%%%%%%%%%%%%%%%%%%%%%%%%%%%

\date{}  % 这一行用来去掉默认的日期显示
\maketitle
\vspace{-6mm}
%%%%%%%%%%%%%%%%%%%%%%%%%%%%%%%%%%%%%%%%%%%%%%%%%%%%%%%%%%%%%%%%
%  英文文摘要
%%%%%%%%%%%%%%%%%%%%%%%%%%%%%%%%%%%%%%%%%%%%%%%%%%%%%%%%%%%%%%%%
\begin{center}
\begin{minipage}[c]{14cm}
\begin{center}\textbf{Abstract}\quad \end{center}
\vspace{-1em}
\zihao{-5}\enabstract\\mbox{}\hspace{2\ccwd}\textbf{Keywords:}\quad \enkeywords\\mbox{}\hspace{2\ccwd}\textbf{AMS Subject Classification:} \quad \amsno.
\end{minipage}
\end{center}
%\footnote[0]{\scriptsize{\receivedate~~~\modifydate \\ \authorsinfo}}
%\vspace{-1em}

%%%%%%%%%%%%%%%%%%%%%%%%%%%%%%%%%%%%%%%%%%%%%%%%%%%%%%%%%%%%%%%%
%  正文由此开始
%%%%%%%%%%%%%%%%%%%%%%%%%%%%%%%%%%%%%%%%%%%%%%%%%%%%%%%%%%%%%%%%

%%%%%%%%%%%%%%%%%%%%%%%%%%%%%%%%%%%%%%%%%%%%%%%%%%%%%%%%%%%%%%%%
\section{Introduction}
%%%%%%%%%%%%%%%%%%%%%%%%%%%%%%%%%%%%%%%%%%%%%%%%%%%%%%%%%%%%%%%%

%%%%%%%%%%%%%%%%%%%%%%%%%%%%%%%%%%%%%%%%%%%%%%%%%%%%%%%%%%%%%%%%
\section{A New Section}
%%%%%%%%%%%%%%%%%%%%%%%%%%%%%%%%%%%%%%%%%%%%%%%%%%%%%%%%%%%%%%%%
\subsection{First Subsection}
\subsection{Second Subsection}
Here are some examples of formulae, tables, figure insertions, citations for your reference.
\begin{equation} \label{eq:1}
\left\{ \begin{aligned}
         \pi &= 3.141\cdots \     \sqrt{2}&=1.414\cdots
         \end{aligned} \right.
\end{equation}
\begin{eqnarray}
         \pi &=& 3.1415926\cdots \nonumber \             &\approx & 3.14.
\end{eqnarray}
\begin{table}[htbp]
\centering\zihao{5}
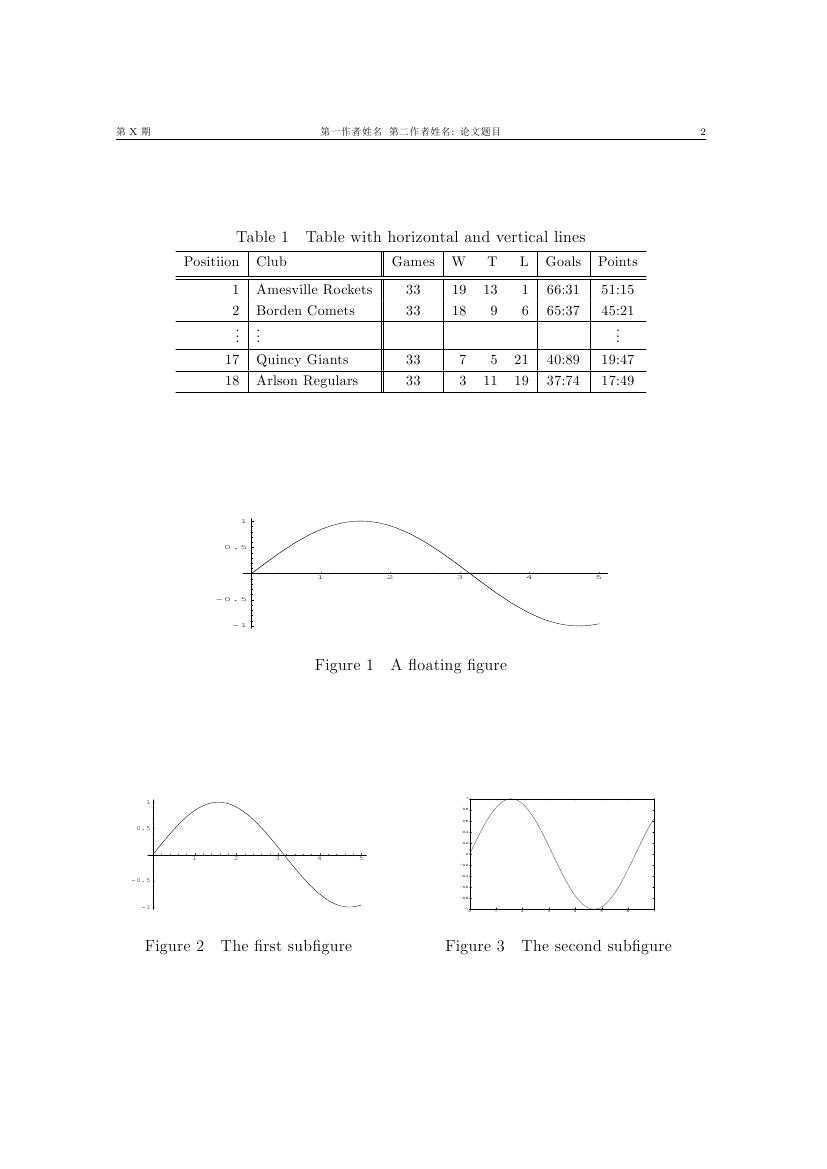
\caption{Table with horizontal and vertical lines\label{table:1}}
\vskip2mm
\begin{tabular}{r|l||c|rrr|c|c}
\hline
Positiion & Club & Games & W & T & L & Goals & Points \\ [0.5ex]
\hline\hline
1 & Amesville Rockets & 33 & 19 & 13 & 1 & 66:31& 51:15\2 & Borden Comets & 33 & 18 & 9 & 6 &65:37 & 45:21\\ \hline
$\vdots$& $\vdots$ &&&&& &$\vdots$\\ \hline
17 & Quincy Giants & 33 & 7 & 5 & 21 & 40:89 &19:47\\ \hline
18 & Arlson Regulars & 33 & 3 & 11 &19 & 37:74 &17:49 \\ \hline
\end{tabular}
\end{table}
\begin{figure}[htbp]
\centering
\includegraphics[width=10cm,height=3cm]{figs/sin.eps}
\caption{A floating figure\label{fig:fig4}}
\end{figure}
\begin{figure}[htbp]
\begin{minipage}[t]{0.45\linewidth}
\centering
\includegraphics[width=6cm,height=3cm]{figs/sin.eps}
\caption{The first subfigure\label{fig:float2-1}}
\end{minipage}%
\hfill
\begin{minipage}[t]{0.5\linewidth}
\centering
\includegraphics[width=5cm,height=3cm]{figs/fig.eps}
\caption{The second subfigure\label{fig:float2-2}}
\end{minipage}
\end{figure}

\begin{definition} %
This the definition... .
\end{definition}%
\begin{lemma}%
Here is the content of the lemma.
\end{lemma}
\begin{theorem}\label{thm-1}%
Here is the content of the theorem.
\end{theorem}%
\begin{proof}%
Here comes the proof of the theorem.
\end{proof}
\begin{corollary}%
Here is the content of the corollary.
\end{corollary}

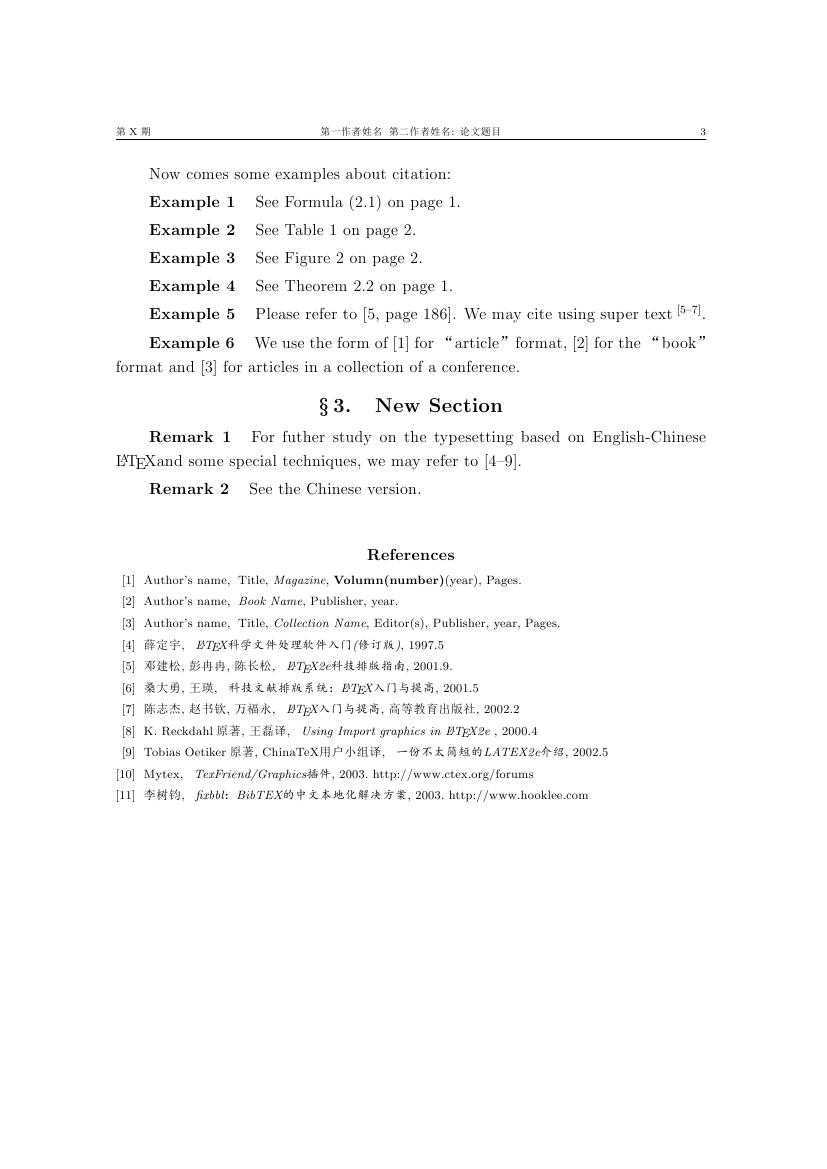
Now comes some examples about citation:
\begin{example}
See Formula \eqref{eq:1} on page \pageref{eq:1}.
\end{example}
\begin{example}
See Table \ref{table:1}  on page \pageref{table:1}.
\end{example}
\begin{example}
See Figure \ref{fig:float2-1} on page \pageref{fig:float2-1}.
\end{example}
\begin{example}
See Theorem \ref{thm-1} on page \pageref{thm-1}.
\end{example}
\begin{example}
Please refer to \cite[page 186]{Dengjs}. We may cite using super
text\ucite{Dengjs,Sangdy,Chenzj}.
\end{example}
\begin{example}
We use the form of \cite{Art} for “article” format, \cite{Book}
for the “book” format and \cite{Conference} for articles in a
collection of a conference.
\end{example}

%%%%%%%%%%%%%%%%%%%%%%%%%%%%%%%%%%%%%%%%%%%%%%%%%%%%%%%%%%%%%%%%
\section{New Section}
%%%%%%%%%%%%%%%%%%%%%%%%%%%%%%%%%%%%%%%%%%%%%%%%%%%%%%%%%%%%%%%%
\begin{remark}
For futher study on the typesetting based on English-Chinese \LaTeX and some special techniques,
we may refer to \cite{Xiedy,Dengjs,Sangdy,Chenzj,Wangl,CTug}.
\end{remark}
\begin{remark}
See the Chinese version.
\end{remark}

\vspace{6mm}
%%%%%%%%%%%%%%%%%%%%%%%%%%%%%%%%%%%%%%%%%%%%%%%%%%%%%%%%%%%%%%%%
%  参考文献
%%%%%%%%%%%%%%%%%%%%%%%%%%%%%%%%%%%%%%%%%%%%%%%%%%%%%%%%%%%%%%%%
\zihao{-5}
\begin{thebibliography}{99}
%\setlength{\parskip}{0pt}  %段落之间的竖直距离
\addtolength{\itemsep}{-0.8 em} % 缩小参考文献间的垂直间距
  \bibitem{Art}  Author‘s name, ~Title, {\it Magazine}, {\bf Volumn(number)}(year), Pages.
  \bibitem{Book}  Author‘s name, ~{\it Book Name}, Publisher, year.
  \bibitem{Conference}  Author‘s name, ~Title, {\it Collection Name}, Editor(s), Publisher, year, Pages.
  \bibitem{Xiedy}  薛定宇, ~~{\it\LaTeX 科学文件处理软件入门(修订版)}, 1997.5
  \bibitem{Dengjs} 邓建松, 彭冉冉, 陈长松, ~~{\it \LaTeX2e科技排版指南}, 2001.9.
  \bibitem{Sangdy} 桑大勇, 王瑛, ~~{\it 科技文献排版系统:\LaTeX 入门与提高}, 2001.5
  \bibitem{Chenzj} 陈志杰, 赵书钦, 万福永, ~~{\it\LaTeX 入门与提高}, 高等教育出版社, 2002.2
  \bibitem{Wangl} K. Reckdahl~原著, 王磊 译, ~~{\it Using Import graphics in \LaTeX2e} , 2000.4
  \bibitem{CTug} Tobias Oetiker~原著, ChinaTeX用户小组译, ~~{\it 一份不太简短的LATEX2e介绍}, 2002.5
  \bibitem{TexFriend03}Mytex, ~~{\it TexFriend/Graphics插件}, 2003. http://www.ctex.org/forums
  \bibitem{Lisj}李树钧, ~~{\it fixbbl:BibTEX的中文本地化解决方案}, 2003. http://www.hooklee.com
\end{thebibliography}

%%其中chinesebst是我自己生成的参考文献风格,比较符合中国人的习惯
%%参考文献
%% plain,unsrt,alpha,abbrev,chinesebst
%\bibliographystyle{chinesebst}
%\addtolength{\itemsep}{-0.5 em} % 缩小参考文献间的垂直间距
%%\bibliography{reference/reference,reference/chinese,reference/english}
%\bibliography{refs/aps_ref}


%%%%%%%%%%%%%%%%%%%%%%%%%%%%%%%%%%%%%%%%%%%%%%%%%%%%%%%%%%%%%%%%
%  英文摘要
%%%%%%%%%%%%%%%%%%%%%%%%%%%%%%%%%%%%%%%%%%%%%%%%%%%%%%%%%%%%%%%%
\vspace{6mm}\hspace{-8mm}
\parbox{\textwidth}{
\begin{center}
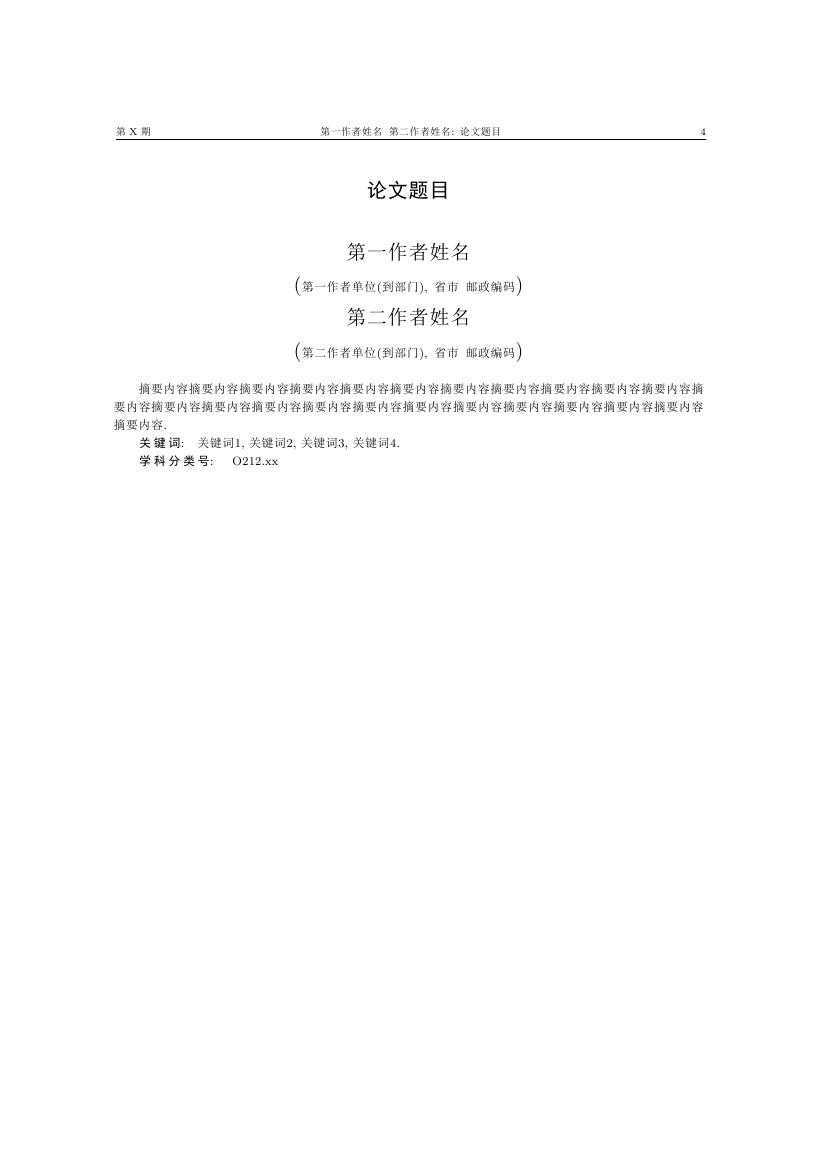
\large{\textbf{\cntitle }}\\vspace{8mm}
\textsc{\cnfirstauthor}\\[2pt]
({\zihao{-5}\cnfirstinst})\\[2pt]
\textsc{\cnsecondauthor}\\[2pt]
({\zihao{-5}\cnsecondinst})\\[2pt]
\end{center}
\cnabstract\\mbox{}\hspace{2em}{\CJKfamily{hei}关\,键\,词:}\quad \cnkeywords\\mbox{}\hspace{2em}{\CJKfamily{hei}学\,科\,分\,类\,号:} \quad \cnclassno}

%%%%%%%%%%%%%%%%%%%%%%%%%%%%%%%%%%%%%%%%%%%%%%%%%%%%%%%%%%%%%%%%
%  文章结束
%%%%%%%%%%%%%%%%%%%%%%%%%%%%%%%%%%%%%%%%%%%%%%%%%%%%%%%%%%%%%%%%
\clearpage
\end{document}
标签:des style blog http color io os 使用 ar
原文地址:http://www.cnblogs.com/jinliangjiuzhuang/p/4010490.html