标签:设定 lse segment 查找 dimen ntp lis osi 程序
词向量作为文本的基本结构——词的模型,以其优越的性能,受到自然语言处理领域研究人员的青睐。良好的词向量可以达到语义相近的词在词向量空间里聚集在一起,这对后续的文本分类,文本聚类等等操作提供了便利,本文将详细介绍如何使用word2vec构建中文词向量。
一、中文语料库
本文采用的是搜狗实验室的搜狗新闻语料库,数据链接 http://www.sogou.com/labs/resource/cs.php
下载下来的文件名为: news_sohusite_xml.full.tar.gz
二、数据预处理
2.1 解压并查看原始数据
cd 到原始文件目录下,执行解压命令:
tar -zvxf news_sohusite_xml.full.tar.gz
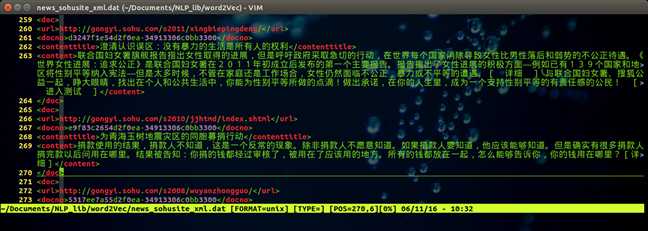
得到文件 news_sohusite_xml.dat, 用vim打开该文件,
vim news_sohusite_xml.dat
得到如下结果:
2.2 取出内容
取出<content> </content> 中的内容,执行如下命令:
cat news_tensite_xml.dat | iconv -f gbk -t utf-8 -c | grep "<content>" > corpus.txt
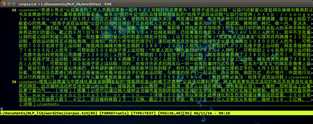
得到文件名为corpus.txt的文件,可以通过vim 打开
vim corpus.txt
得到如下效果:
2.3 分词
注意,送给word2vec的文件是需要分词的,分词可以采用jieba分词实现,安装jieba 分词
pip install jieba
对原始文本内容进行分词,python 程序如下:
 1 ##!/usr/bin/env python
 2 ## coding=utf-8
 3 import jieba
 4
 5 filePath=‘corpus.txt‘
 6 fileSegWordDonePath =‘corpusSegDone.txt‘
 7 # read the file by line
 8 fileTrainRead = []
 9 #fileTestRead = []
10 with open(filePath) as fileTrainRaw:
11     for line in fileTrainRaw:
12         fileTrainRead.append(line)
13
14
15 # define this function to print a list with Chinese
16 def PrintListChinese(list):
17     for i in range(len(list)):
18         print list[i],
19 # segment word with jieba
20 fileTrainSeg=[]
21 for i in range(len(fileTrainRead)):
22     fileTrainSeg.append([‘ ‘.join(list(jieba.cut(fileTrainRead[i][9:-11],cut_all=False)))])
23     if i % 100 == 0 :
24         print i
25
26 # to test the segment result
27 #PrintListChinese(fileTrainSeg[10])
28
29 # save the result
30 with open(fileSegWordDonePath,‘wb‘) as fW:
31     for i in range(len(fileTrainSeg)):
32         fW.write(fileTrainSeg[i][0].encode(‘utf-8‘))
33         fW.write(‘\n‘)
可以得到文件名为 corpusSegDone.txt 的文件,需要注意的是,对于读入文件的每一行,使用结巴分词的时候并不是从0到结尾的全部都进行分词,而是对[9:-11]分词 (如行22中所示: fileTrainRead[i][9:-11] ),这样可以去掉每行(一篇新闻稿)起始的<content> 和结尾的</content>。
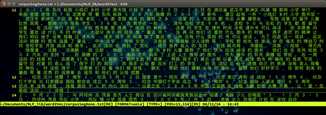
同样的,可以通过vim 打开分词之后的文件,执行命令:
vim corpusSegDone.txt
得到如下图所示的结果:
三、构建词向量
3.1 安装word2vec
pip install word2vec
3.2 构建词向量
执行以下程序:
import word2vec
word2vec.word2vec(‘corpusSegDone.txt‘, ‘corpusWord2Vec.bin‘, size=300,verbose=True)
即可构建词向量,得到结果放在文件名为 corpusWord2Vec.bin的文件中。可以通过设定size 的大小来指定词向量的维数。用vim打开生成的二进制文件会出现乱码,目前不知道解决方法。
3.3 显示并使用词向量
3.3.1 查看词向量
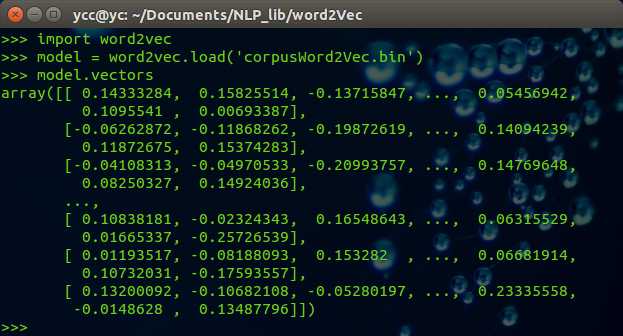
import word2vec
model = word2vec.load(‘corpusWord2Vec.bin‘)
print (model.vectors)
可以得到如下结果:
3.3.2 查看词表中的词
import word2vec
model = word2vec.load(‘corpusWord2Vec.bin‘)
index = 1000
print (model.vocab[index]
得到结果如下:

可以得到词表中第1000个词为 确保。
3.3.3 显示空间距离相近的词
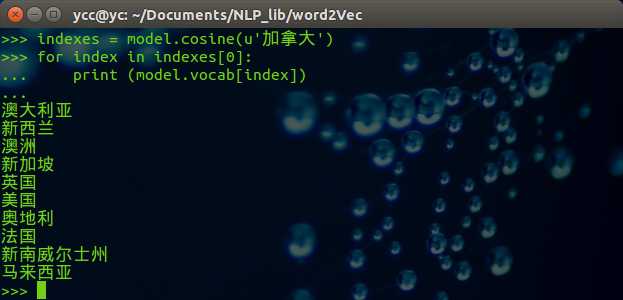
一个好的词向量可以实现词义相近的一组词在词向量空间中也是接近的,可以通过显示词向量空间中相近的一组词并判断它们语义是否相近来评价词向量构建的好坏。代码如下:
import word2vec
model = word2vec.load(‘corpusWord2Vec.bin‘)
indexes = model.cosine(u‘加拿大‘)
for index in indexes[0]:
    print (model.vocab[index])
得到的结果如下:
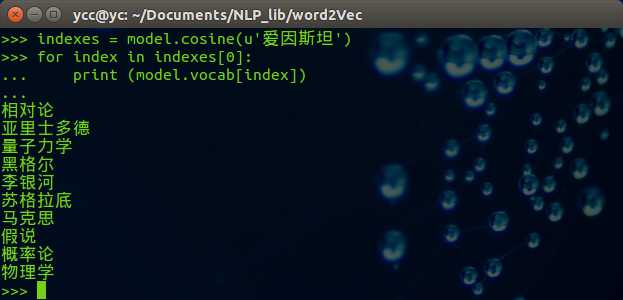
可以修改希望查找的中文词,例子如下:

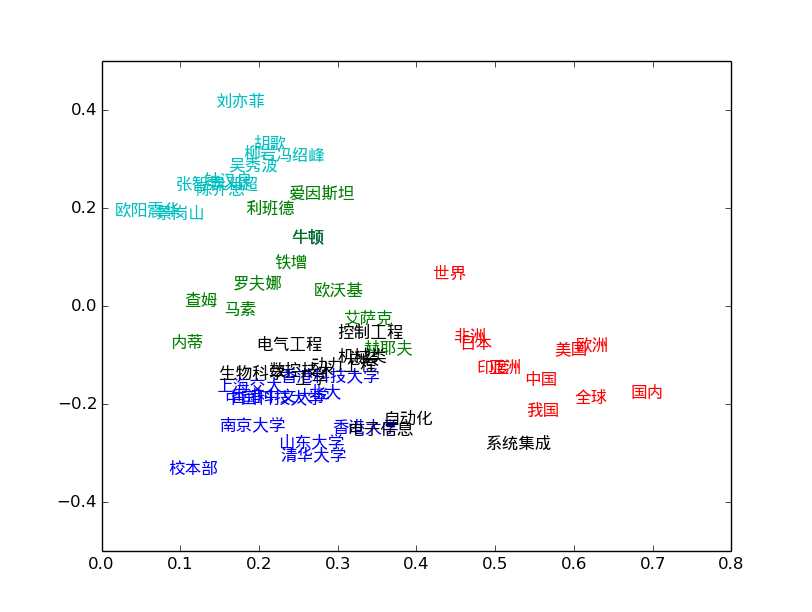
四、二维空间中显示词向量
将词向量采用PCA进行降维,得到二维的词向量,并打印出来,代码如下:
#!/usr/bin/env python
# coding=utf-8
import numpy as np
import matplotlib
import matplotlib.pyplot as plt

from sklearn.decomposition import PCA
import word2vec
# load the word2vec model
model = word2vec.load(‘corpusWord2Vec.bin‘)
rawWordVec=model.vectors

# reduce the dimension of word vector
X_reduced = PCA(n_components=2).fit_transform(rawWordVec)

# show some word(center word) and it‘s similar words
index1,metrics1 = model.cosine(u‘中国‘)
index2,metrics2 = model.cosine(u‘清华‘)
index3,metrics3 = model.cosine(u‘牛顿‘)
index4,metrics4 = model.cosine(u‘自动化‘)
index5,metrics5 = model.cosine(u‘刘亦菲‘)

# add the index of center word
index01=np.where(model.vocab==u‘中国‘)
index02=np.where(model.vocab==u‘清华‘)
index03=np.where(model.vocab==u‘牛顿‘)
index04=np.where(model.vocab==u‘自动化‘)
index05=np.where(model.vocab==u‘刘亦菲‘)

index1=np.append(index1,index01)
index2=np.append(index2,index03)
index3=np.append(index3,index03)
index4=np.append(index4,index04)
index5=np.append(index5,index05)

# plot the result
zhfont = matplotlib.font_manager.FontProperties(fname=‘/usr/share/fonts/truetype/wqy/wqy-microhei.ttc‘)
fig = plt.figure()
ax = fig.add_subplot(111)

for i in index1:
    ax.text(X_reduced[i][0],X_reduced[i][1], model.vocab[i], fontproperties=zhfont,color=‘r‘)

for i in index2:
    ax.text(X_reduced[i][0],X_reduced[i][1], model.vocab[i], fontproperties=zhfont,color=‘b‘)

for i in index3:
    ax.text(X_reduced[i][0],X_reduced[i][1], model.vocab[i], fontproperties=zhfont,color=‘g‘)

for i in index4:
    ax.text(X_reduced[i][0],X_reduced[i][1], model.vocab[i], fontproperties=zhfont,color=‘k‘)

for i in index5:
    ax.text(X_reduced[i][0],X_reduced[i][1], model.vocab[i], fontproperties=zhfont,color=‘c‘)

ax.axis([0,0.8,-0.5,0.5])
plt.show()
中文的显示需要做特殊处理,详见代码 line: 37
下图是执行结果:
源自: https://www.cnblogs.com/Newsteinwell/p/6034747.html
标签:设定 lse segment 查找 dimen ntp lis osi 程序
原文地址:https://www.cnblogs.com/chenlove/p/9692622.html