标签:官网 zip 1.2 http 4.0 默认端口 服务器 stat activemq
目前使用的版本是activemq-5.14.0,可以官网下载对应的版本
步骤1:服务器需要事先安装好jdk(这里不介绍安装jdk的方法)
步骤2:将安装包进行解压apache-activemq-5.14.0.zip
unzip apache-activemq-5.14.0.zip
步骤3:进入bin目录执行命令启动
cd apache-activemq-5.14.0/bin
./activemq start
步骤4:启动成功后,会默认启动两个端口的进程,可以通过命令进行查看
netstat -apn|grep 8161(此默认端口可以修改,见后面)

netstat -apn|grep 61616(此默认端口可以修改,见后面)

进入bin目录执行命令
cd apache-activemq-5.14.0/bin
./activemq stop
进入bin目录执行命令
cd apache-activemq-5.14.0/bin
./activemq start
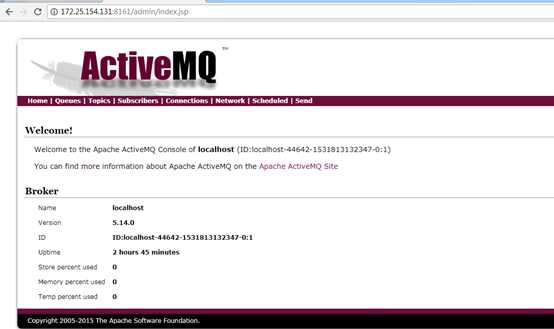
服务启动成功后,访问服务,能正常打开
登录用户 admin 密码:admin

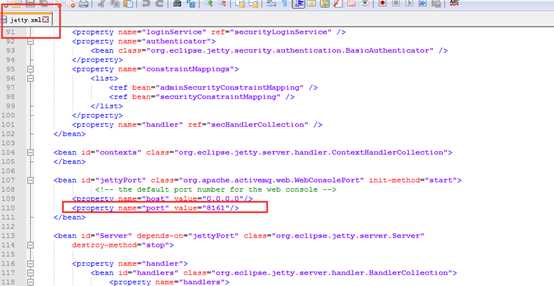
8161的端口号,配置在apache-activemq-5.14.0/conf/ jetty.xml里面

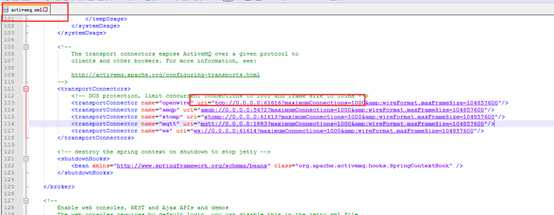
61616的端口号,配置在apache-activemq-5.14.0/conf/activemq.xml里面

修改端口号后,需要重启服务生效
标签:官网 zip 1.2 http 4.0 默认端口 服务器 stat activemq
原文地址:https://www.cnblogs.com/tonnyzhou/p/9728754.html