标签:char vertica 基本 绝对定位 cti round 设置 定位元素 line
该方法适用于单行文字垂直居中
<!DOCTYPE html>
<html lang="en">
<head>
    <meta charset="UTF-8">
    <title>垂直居中</title>
    <style>
        .test{
            width:300px;
            height:200px;
            background-color:#ccc;
            line-height:200px;
            margin:auto;
            text-align: center;
        }
    </style>
</head>
<body>
   <div class="test">垂直居中</div>
</body>
</html>
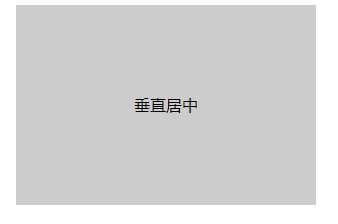
将多个元素或多行元素当成一个行元素来看待,需要将这些数据多包一层,并将其设定为inline-block,并在该inline-block对象的外层对象使用inline-block来代替height的设置。适用于多对象的垂直居中
<!DOCTYPE html>
<html lang="en">
<head>
    <meta charset="UTF-8">
    <title>垂直居中</title>
    <style>

    .box{
    width: 500px;
    border: 1px solid #f00;
    margin: auto;
    line-height: 200px;
    text-align: center;
    }
    .content{
    display: inline-block;
    height: auto;
    line-height:1;
    width: 400px;
    background: #ccc;
    }
    </style>
</head>
<body>
   <div class="box">
  <div class="content">
    多元素
    <a>垂直居中</a><a>垂直居中</a>
    多元素
 </div>
</div>
</body>
</html>
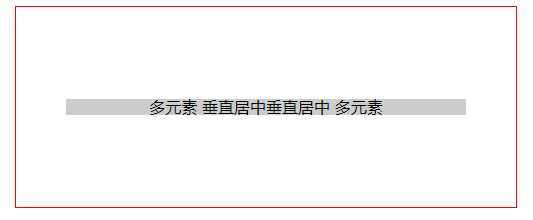
此方法利用:before伪类元素设定为100%高的inline-block,再搭配上将需要居中的子元素同样设置成inline-block性质后,使用vertical-align:middle来达到垂直居中。适用于多对象的CSS垂直居中。
<!DOCTYPE html>
<html lang="en">
<head>
    <meta charset="UTF-8">
    <title>垂直居中</title>
    <style>

    .box{
        width: 500px;
        height: 250px;
        border: 1px solid #f00;
        margin: auto;
        text-align: center;
    }
    .box::before{
        content:‘‘;
        display: inline-block;
        height: 100%;
        width: 0;
        vertical-align: middle;
    }
    .box .content{
        width: 400px;
        background: #ccc;
        display: inline-block;
        vertical-align: middle;
    }
    </style>
</head>
<body>
    <div class="box">
        <div class="content">
            <p>11</p>
            <a>22</a>
            <p>11</p>
        </div>
</body>
</html>
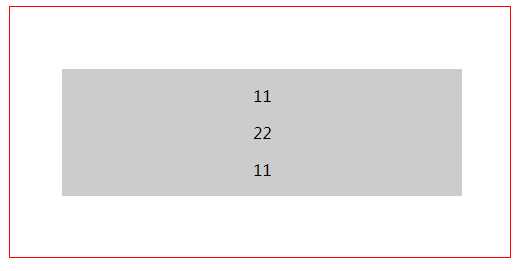
适用于已知高度元素的居中
<!DOCTYPE html>
<html lang="en">
<head>
    <meta charset="UTF-8">
    <title>垂直居中</title>
    <style>

    .box{
       width: 300px;
        height: 260px;
        border: 1px solid #f00;
        margin: auto;
        position: relative;
    }

    .box .content{
        width: 200px;
        background: #ccc;
        height: 120px;
        position: absolute;
        top:50%;
        left: 50%;
        margin-left: -100px;
        margin-top: -60px;
        text-align: center;
    }
    </style>
</head>
<body>
    <div class="box">
        <div class="content">
            <p>11</p>
            <a>22</a>
            <p>11</p>
        </div>
</body>
</html>
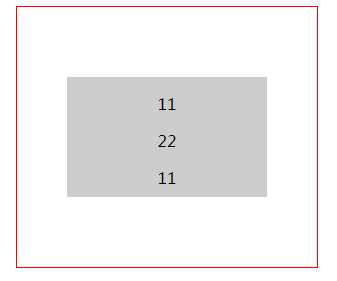
这个方式比较特别一点,当元素设置为绝对定位后,假设它是抓不到整体可运用的空间范围。所以margin:auto会失效,但当设置了top:0;bottom:0;时,绝对定位元素就抓到了可运用的空间了,这时margin:auto就生效了。该方法适用于已知高度元素的居中。
<!DOCTYPE html>
<html lang="en">
<head>
    <meta charset="UTF-8">
    <title>垂直居中</title>
    <style>

    .box{
       width: 300px;
        height: 260px;
        border: 1px solid #f00;
        margin: auto;
        position: relative;
    }

    .box .content{
        width: 200px;
        background: #ccc;
        height: 120px;
        position: absolute;
        top: 0;
        right: 0;
        bottom: 0;
        left: 0;
        margin: auto;
        text-align: center;
    }
    </style>
</head>
<body>
    <div class="box">
        <div class="content">
            <p>11</p>
            <a>22</a>
            <p>11</p>
        </div>
</body>
</html>
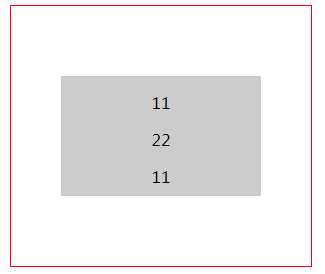
此居中的定位元素不需要固定的宽高,我们利用绝对定位时的top 与right设置元素的上方跟左方各为50% 。再利用translate(-50%,-50%)位移居中元素自身宽与高的50%就能达成居中的目的了。该方法适用于未知高度元素的居中。
<!DOCTYPE html>
<html lang="en">
<head>
    <meta charset="UTF-8">
    <title>垂直居中</title>
    <style>

    .box{
       width: 300px;
        height: 260px;
        border: 1px solid #f00;
        margin: auto;
        position: relative;
    }

    .box .content{
        width: 200px;
        background: #ccc;
       position: absolute;
        top:50%;
        left: 50%;
        transform: translate(-50%, -50%);
        text-align: center;
    }
    </style>
</head>
<body>
    <div class="box">
        <div class="content">
            <p>11</p>
            <a>22</a>
            <p>11</p>
        </div>
</body>
</html>
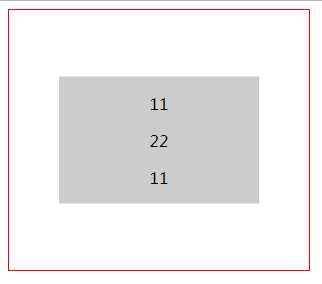
该方法只要设定父层display:flex以及设定次轴(cross axis)属性align-items:center 就可以实现居中了,适用于未知高度元素的居中。
<!DOCTYPE html>
<html lang="en">
<head>
    <meta charset="UTF-8">
    <title>垂直居中</title>
    <style>

    .box{
       width: 300px;
        height: 260px;
        border: 1px solid #f00;
        margin: auto;
        display: flex;
        justify-content: center;
        align-items: center;
    }

    .box .content{
        width: 200px;
        background: #ccc;
        text-align: center;
    }
    </style>
</head>
<body>
    <div class="box">
        <div class="content">
            <p>11</p>
            <a>22</a>
            <p>11</p>
        </div>
</body>
</html>
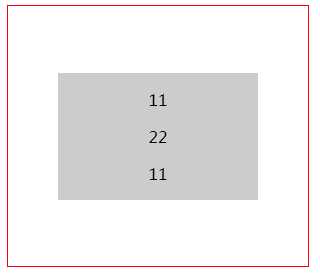
该方法使用了flex-direction:column直式排法,搭配:before伪元素适用flex-grow伸展值能够取得剩下所有空间的特性。把它设定成一半的剩余空间就能做到把内容数据准确的推到垂直中间位置。适用于未知高度元素的居中。
<!DOCTYPE html>
<html lang="en">
<head>
    <meta charset="UTF-8">
    <title>垂直居中</title>
    <style>

    .box{
       width: 300px;
        height: 260px;
        border: 1px solid #f00;
        margin: auto;
        display: flex;
        flex-direction: column;
        align-items: center;
    }
    .box:before{
        content: ‘‘;
        flex-grow: .5;
    }
    .box .content{
        width: 200px;
        background: #ccc;
        text-align: center;
    }
    </style>
</head>
<body>
    <div class="box">
        <div class="content">
            <p>11</p>
            <a>22</a>
            <p>11</p>
        </div>
</body>
</html>
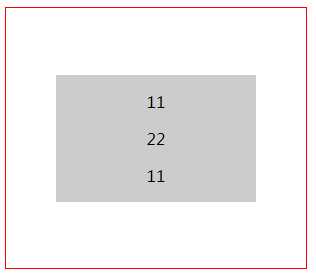
由于Flex元素对空间解读的特殊性,我们只要在父层元素设定display:flex,接着在需要垂直居中的元素上设定margin:auto,即可自动居中。适用于未知高度元素的居中。
<!DOCTYPE html>
<html lang="en">
<head>
    <meta charset="UTF-8">
    <title>垂直居中</title>
    <style>

    .box{
       width: 300px;
        height: 260px;
        border: 1px solid #f00;
        margin: auto;
        display: flex;
    }
    .box .content{
        width: 200px;
        background: #ccc;
        text-align: center;
        margin: auto;
    }
    </style>
</head>
<body>
    <div class="box">
        <div class="content">
            <p>11</p>
            <a>22</a>
            <p>11</p>
        </div>
</body>
</html>
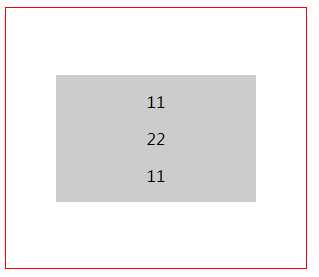
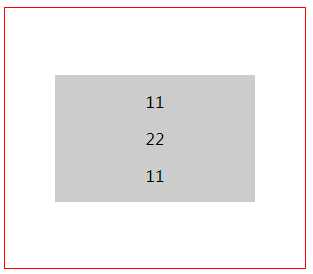
基本上就是对flex次轴cross axis 的个别对齐方式只要对单一子层元素设定align-self:center就能达成垂直居中的目的了。适用于唯一子元素的居中
<!DOCTYPE html>
<html lang="en">
<head>
    <meta charset="UTF-8">
    <title>垂直居中</title>
    <style>

    .box{
       width: 300px;
        height: 260px;
        border: 1px solid #f00;
        margin: auto;
        display: flex;
        justify-content: center;
    }
    .box .content{
        width: 200px;
        background: #ccc;
        text-align: center;
        align-self: center;
    }
    </style>
</head>
<body>
    <div class="box">
        <div class="content">
            <p>11</p>
            <a>22</a>
            <p>11</p>
        </div>
</body>
</html>
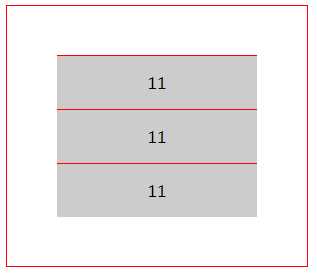
在正常的状况下,align-content 仅能对次轴多行flex item做居中,但是当子层元素不确定有多少个,且有时可能会有单个的情况出现时,此技巧就能用到了,这样就能使用flex的align-content属性来居中。适用于子元素个数不确定的居中。
<!DOCTYPE html>
<html lang="en">
<head>
    <meta charset="UTF-8">
    <title>垂直居中</title>
    <style>
    .box{
       width: 300px;
        height: 260px;
        border: 1px solid #f00;
        margin: auto;
        display: flex;
        flex-wrap: wrap;
        justify-content: center;
        align-content: center;
    }
    .box .content{
        width: 200px;
        background: #ccc;
        text-align: center;
        border-top: 1px solid red;
    }
    </style>
</head>
<body>
    <div class="box">
        <div class="content"><p>11</p></div>
        <div class="content"><p>11</p></div>
        <div class="content"><p>11</p></div>
</body>
</html>
标签:char vertica 基本 绝对定位 cti round 设置 定位元素 line
原文地址:https://www.cnblogs.com/yuyujuan/p/9769300.html